Mykonos Mini Album for SCT


Thursday, July 13, 2017

The start of my mini album making obsession actually began back in March when I was assigned to create a mini album for the Summer 2017 issue of Scrapbook & Cards Today Magazine! Up until that point I didn't particularly enjoy making mini albums... I don't have a reason why. But then, seeing amazing mini album after amazing mini album by my design team members inspired me to try and enjoy the process, and, as fate would have it, now I'm obsessed!

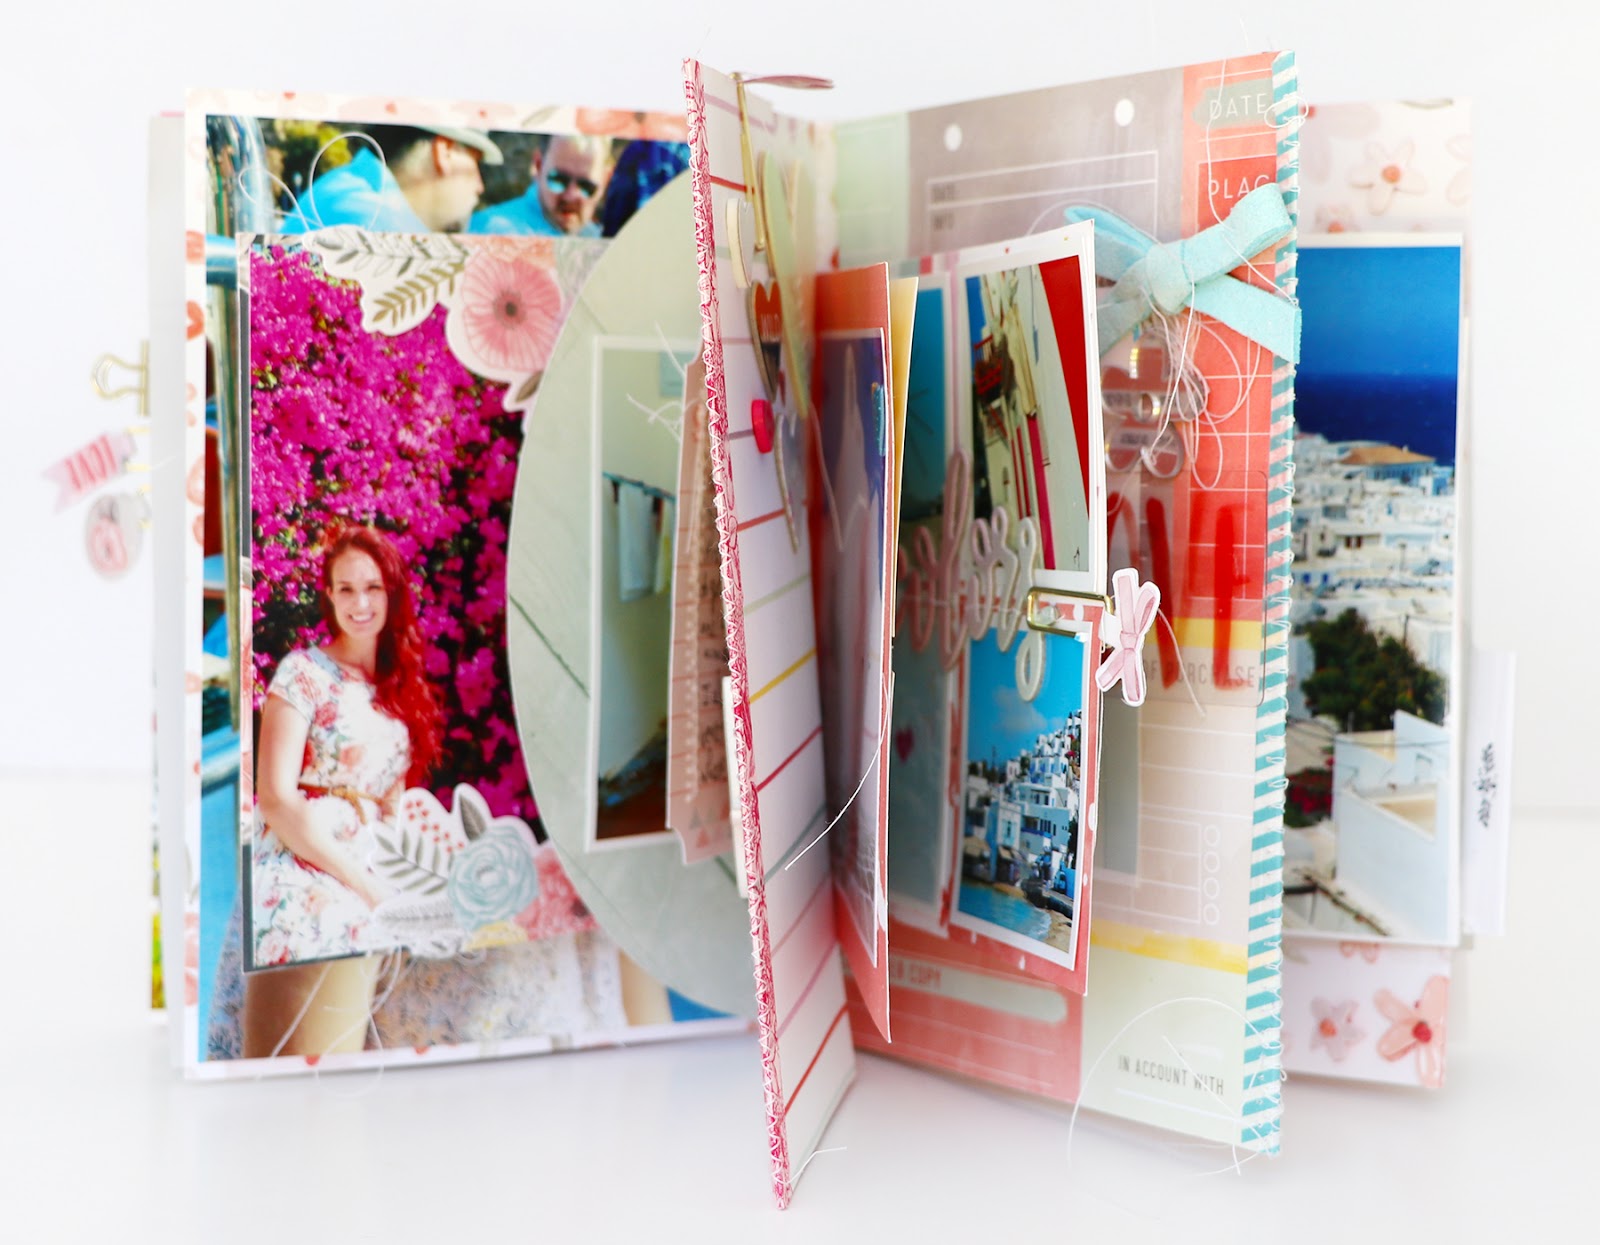
Last summer we went on a cruise to the Greece islands and one day we stopped at Mykonos. It was everything I dreamed Greece would be and more! The buildings were stark white with the doors, shutters, and accents painted mostly bright blue and I also saw pops of pink, yellow, lime green, purple, and red. It made my color-loving heart so happy! I took so many pictures and a mini album fit the bill for sharing them.

I made the album base from scratch – the finished or closed size is 5x7” so I trimmed my papers including the cover floral transparency paper to 10x7”. For more interest and to make turning the pages fun and whimsical I trimmed other pages to 10x5”, added a piece of vellum, and even die cut a 7” circle from patterned paper and an envelope from regular copy paper to hold more photos inside! Then I stacked all the papers and die cuts on top of each other and ran the pile through my sewing machine down the center. When folded in half, the pages became a book ready for photos and embellishing!
This is the first time I ever made an album like this and it got pretty bulky pretty quickly, so to fix this I attached brads on the covers and wrapped baker's twine around them so the album stays shut. It’s a very chunky album which is something I am trying to embrace more and more these days! I usually try to make my pages flat to fit more pages into an album, but I also don’t want to put silly restrictions on myself whether in scrapbooking or mini album making so bring on the dimensional embellishments!
Some more tips and tricks: I added a LOT of machine stitching to my pages for several reasons: as a replacement for adhesive, to add texture, to create pockets, and to attach more papers to create interactive flaps and additional pages. My sewing machine is my best friend! Well, one of them. I also really love my Silhouette Cameo (hence the reason I lugged them in my suitcase across the ocean!) :)
More photos I couldn't fit anywhere in the album are stored in a couple pockets. They might not be featured but they'll never be forgotten since they're printed!
I love having the threads sticking out everywhere, the paper clips with epoxy charms hanging off the edges that help make turning the pages easy breezy, and I even added a tab leftover from my December Daily®. I’m all about making it interactive and messy. In fact, some of the pages are pretty crooked from when I was sewing the album together in the beginning. And that’s okay! I’m only human and I embrace the madness!
My favorite photos are full size - 5x7". I love the dramatic impact.
Get more use out of your die cuts by cutting them in half and "framing" the photo.
Sequins from my stash (that I swear never gets smaller!) make perfect little details and pops of color.
My Take Me Away collection was perfect for so many reasons for this album - the colors, the theme, the sentiments - they all go so well with Mykonos!
Here I found all the photos with pink/red flowers and bunched them together.
In the centerfold of the album I added a bunch more colorful photos.
Fox & Jane loved going on this adventure so I wanted to include them in this project. Inside one of the flaps I stitched a paper pocket and then asked them to color me something about the trip.
Fox colored a dragon from a trip we took to Ljubljana, Slovenia a few years ago (silly Fox) and Jane colored something abstract. So they didn’t necessarily follow the assignment haha, but I still cherish their contribution and their artwork is now tucked inside the custom pocket.
Think outsize the square-shaped box! When assembling your pages before stitching them together, cut circles, hearts, and more - they become such fun interactive pages!
I wanted the photos to be the star of the show so I tried to keep embellishing to a minimum, but goodness knows on some pages I just couldn’t reign it in!
In particular, this page that is made from a small scale floral paper. From another sheet of the same paper, I stitched a French knot through the center of every flower, fussy cut them all out, then adhered them on the matching flower on the mini album page. Labor of love, yes, but so worth the fun texture and design element! Other pages are very simple though with only a single photo or a single embellishment as the focal design element.
Another photo pocket. There are even more photos I didn't edit and print... I take a lotta pics! I can't help it in places like this!
Hand written journaling is important – I love seeing my parent’s and grandparent’s handwriting in letters and cards, so I did incorporate some of my own handwriting to describe what the album is about. I also typed and printed out journaling and then trimmed it into strips – I love the clean look of typed journaling and how where it’s placed becomes part of the overall design. 
Closing paragraph from my article: "I’d say about 99 out of 100 things I make are layouts so this was a really fun challenge for me to delve into the world of making mini albums! It’s quite addicting! Now I want to make a mini from everywhere we’ve visited! I might never finish, but hey, it’s a good goal to have and makes me feel inspired." I am happy to say that I have continued making mini albums because of this assignment so I am thankful to Megan and Susan for issuing this challenge!
Be sure to download the free Summer 2017 issue of Scrapbook & Cards Today Magazine to see this album and so many other amazing creations!
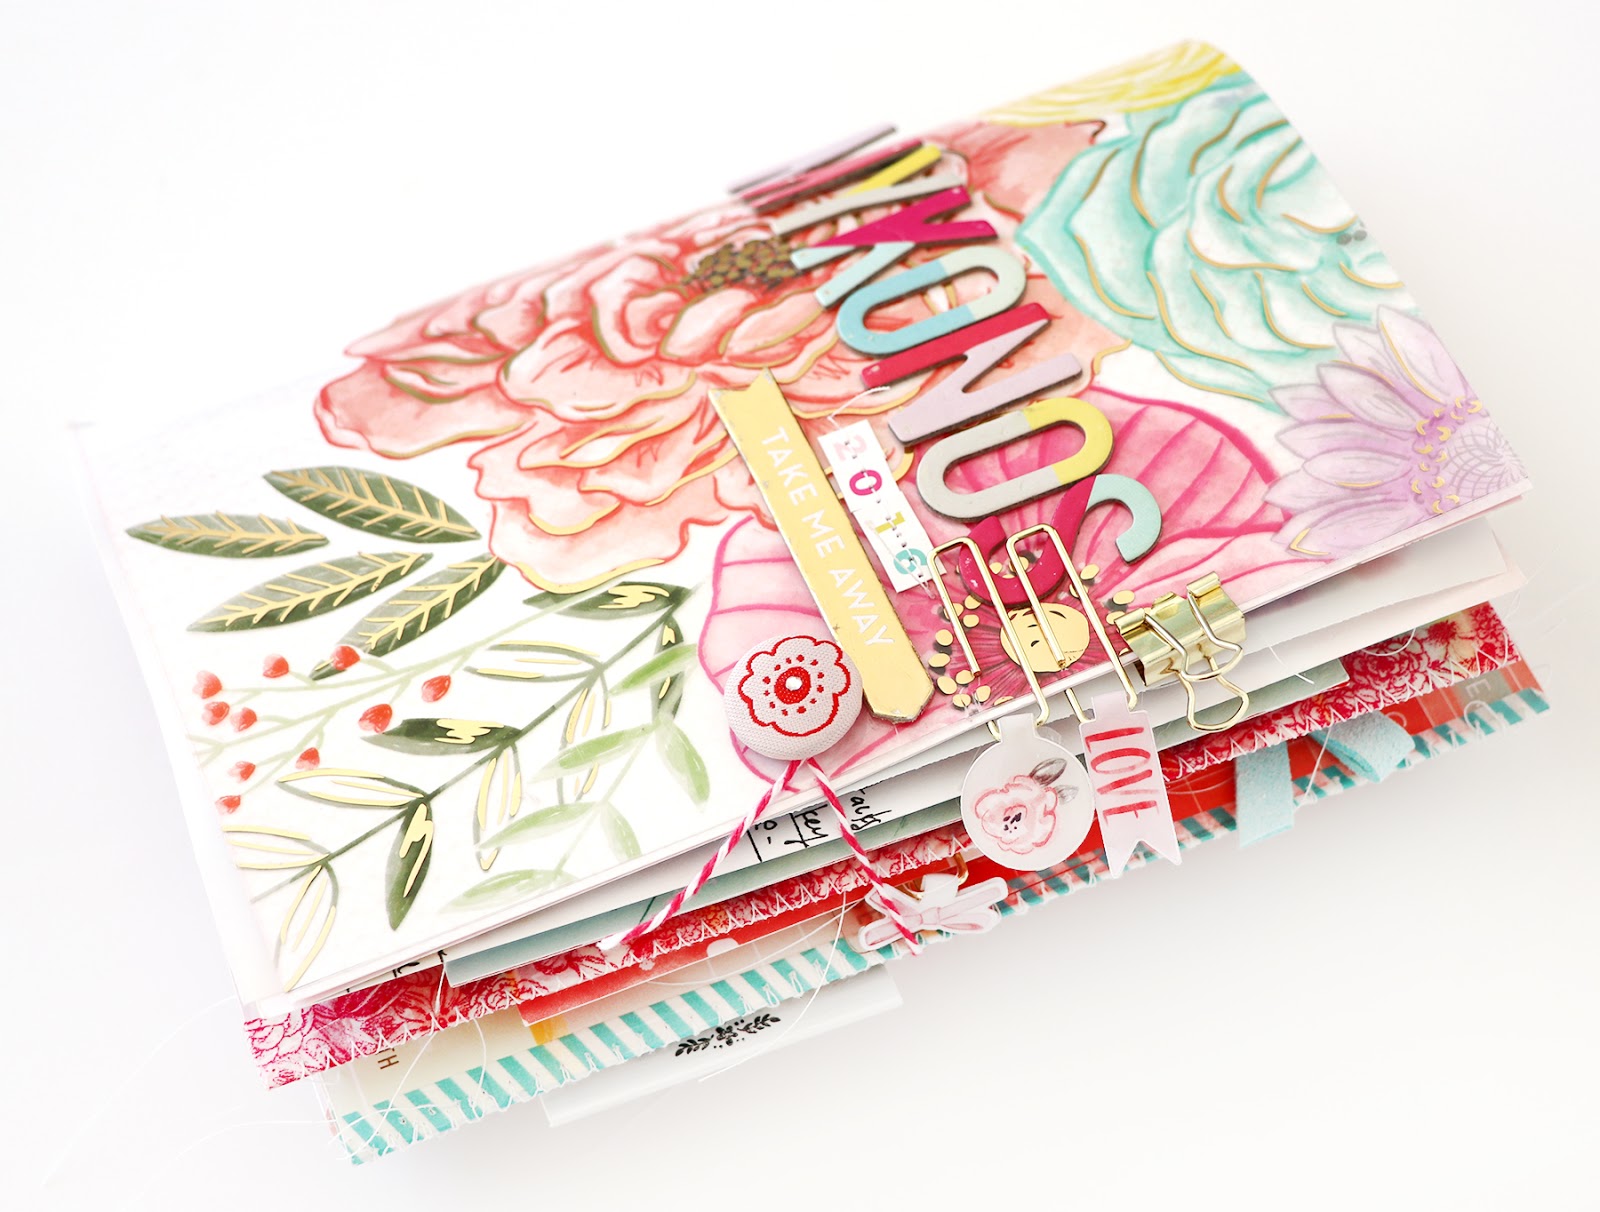
Supplies: Patterned paper, Thickers, paper clips, die cuts, mini alphabet stickers, chipboard stickers, wood veneer, puffy stickers, suede bow, mirror stickers, buttons, stamps: Take Me Away by Paige Evans / Pink Paislee; Sewing machine: Brother; Thread: Coats & Clark; Floss; DMC; Baker’s twine: Divine Twine; Brads: Crate Paper; Cardstock, vellum, adhesive, pen: American Crafts; Ink: StazOn, Studio Calico; Font: Remington Noiseless; Sequins: Studio Calico; Die cut machine: Silhouette Cameo 3; Washi tape: Craft supply

3 comments

  1. Wow! It's amazing! Lot of colours and loads of joy! Looks like perfect holidays!

    ReplyDelete
  2. This is gorgeous and has inspired me to create my own album from scratch - now to find the time ...

    ReplyDelete
  3. Love love love love this! That cover just draws you in and LOVING that photo of Jane in the sunglasses!! ADORABLE!!!!!!!!!!!!!!!

    ReplyDelete

Paige Taylor Evans © // Quinn Creatives DESIGN