
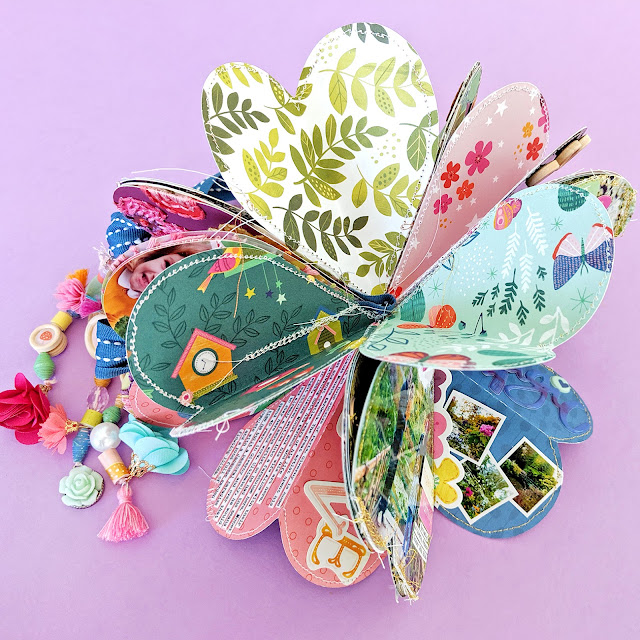
I've finished a new mini album using my brand new Folding Hearts Mini Album cut file and Truly Grateful collection, documenting our day in Giverny, France - the house and gardens where Claude Monet lived and painted his beautiful waterlilies.

Once the embroidery was finished, this album came together so quickly - in just a day!

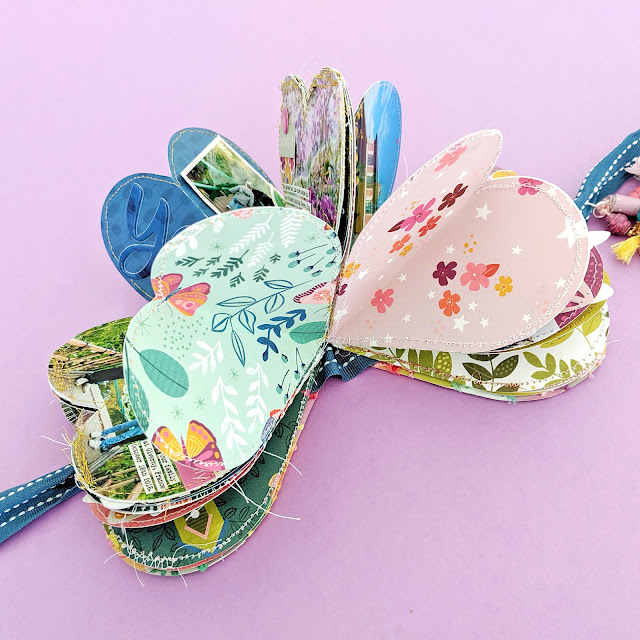
I love how the album can be opened to create a multidimensional project, or squashed up into a heart-shaped book. The ribbon ties it all together into a pretty bow.
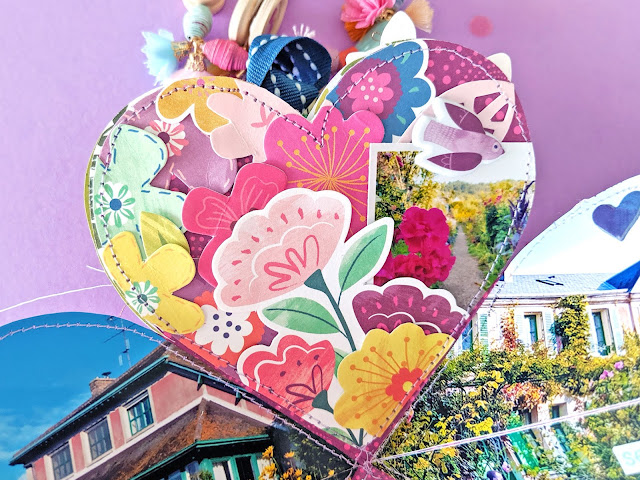
I started by cutting the two covers (at about 4") from the purple floral Paper 02. I then spent 4-6 hours embroidering over the designs using matching colored thread. I use all 6 strands of DMC embroidery floss. I used two different kinds of stitches: mostly a backstitch and little French knots here and there. You may notice in the photo below I spelled Giverny with an E, Giverney. It wasn't until after I finished taking photos and doing flip throughs and filming that I realized I had spelled it wrong... I was going to keep it, but after sleeping on it I decided to fix the mistake. Except in this photo ;)
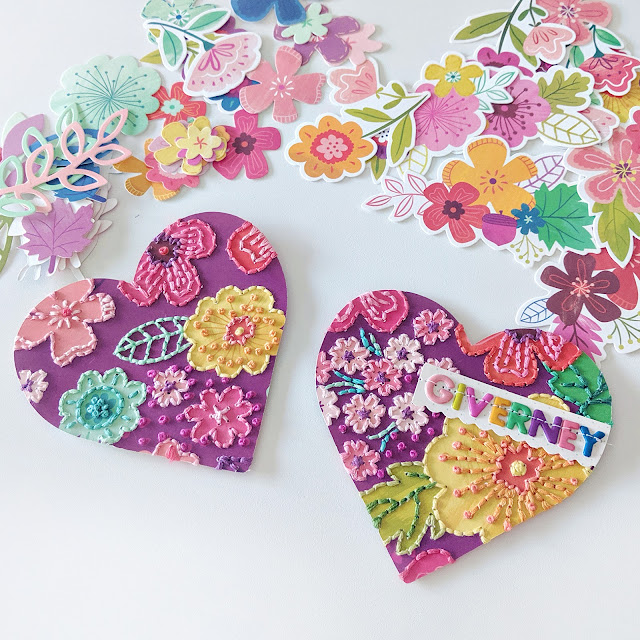
For the title I chose colorful letters from the Puffy Phrase Stickers - so I'll use this sheet like a regular pack of Thickers since I took away some of the letters from the words they come in. For "FRANCE" I did the same thing with the 6x12 Stickers - I cut letters ransom-style and will use this sheet of stickers for this purpose of making a colorful mini alphabet moving forward. I machine stitched the title over a piece of a Journaling Spot and trimmed the bottom edge with scalloped scissors before adhering it to the cover.
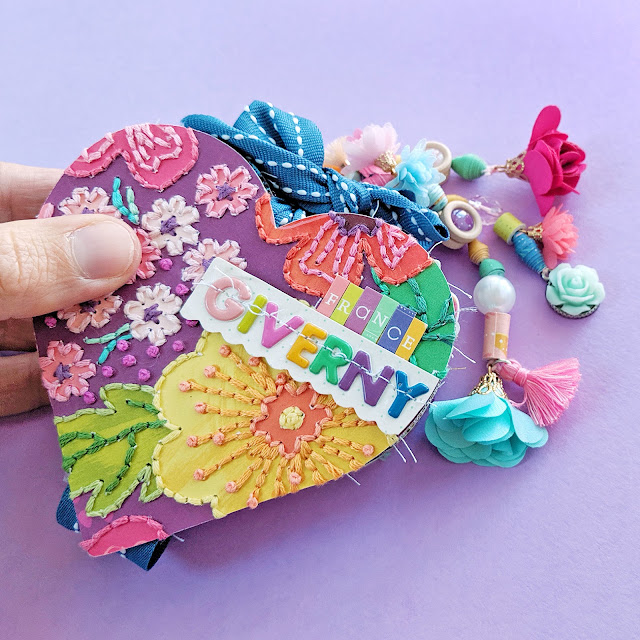 To make the paper beads for the tassel charm I watched this video by Pink Paislee Design Team Member Lisa Fonseca. I made so many! They're addicting to create! I have a handful of them left to use on a different project. Once I finished making paper beads from Truly Grateful patterned papers, I went through my craft stash and found a few charms, beads, and pearls to add to the mix. Then I strung them onto three strands of pink string and added Wooden Buttons back-to-back on each one. I looped the strands onto a jump ring and added it to the blue grosgrain ribbon that ties the album together. Love the finishing touch this handmade paper beads dangling charm adds.
 I cut four papers for the inner pages shown in this order: Paper 11, Paper 05, Paper 04, and Paper 03. I used Picasa to create tiny photo collages and placed square photos into a new 4x6" Adobe Photoshop document to keep them 4" square, and then uploaded all of my pics to Costco. I get lots of requests to show how I print my pictures so small. I need to do this still!

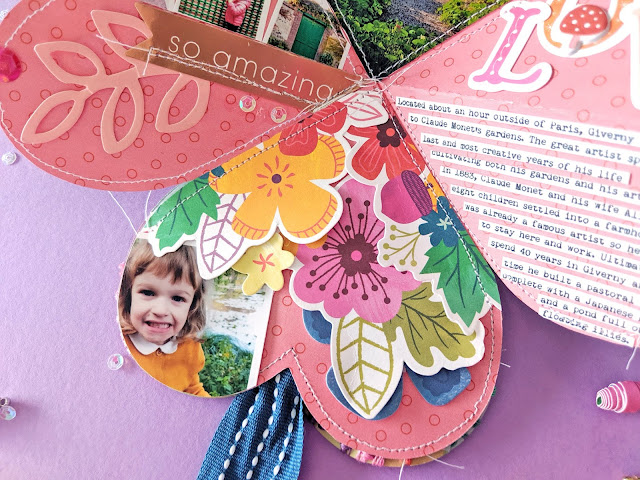
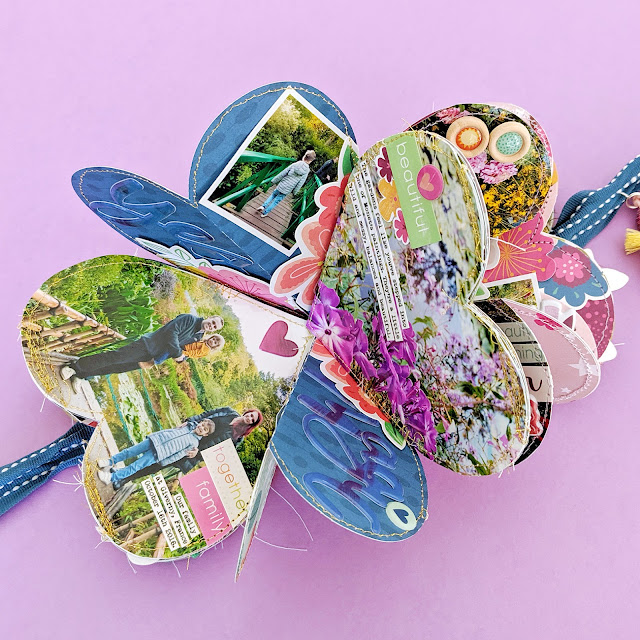
On this left side I added a plethora of 1" photos and placed a Floral Die Cut on top, leaf from the Floral Die Cuts below, and a "so amazing" Sticker. I also added sequins from the Mixed Embellishments but I see that one fell off and that pink one is a stray lol. On every page I machine stitched around the edges to add texture and help secure elements in place.
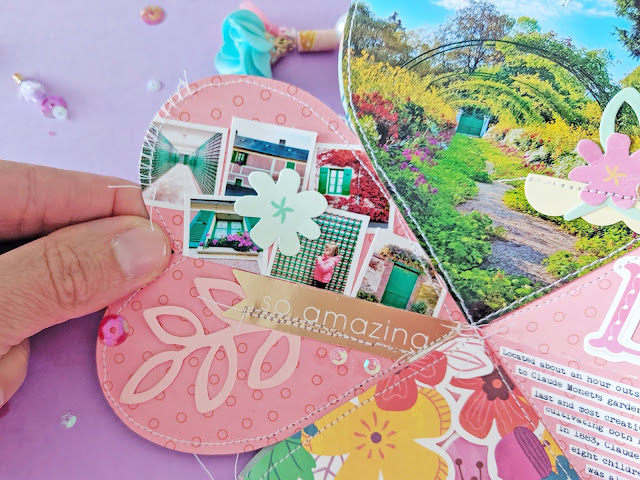
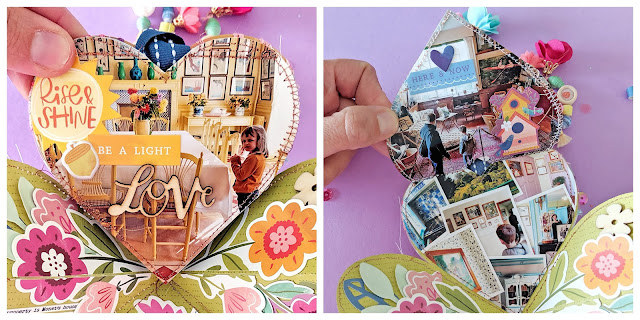
I traced the heart onto this 4" square photo and trimmed it out to create a full-page photo. I added a few embellishments for a fun detail.
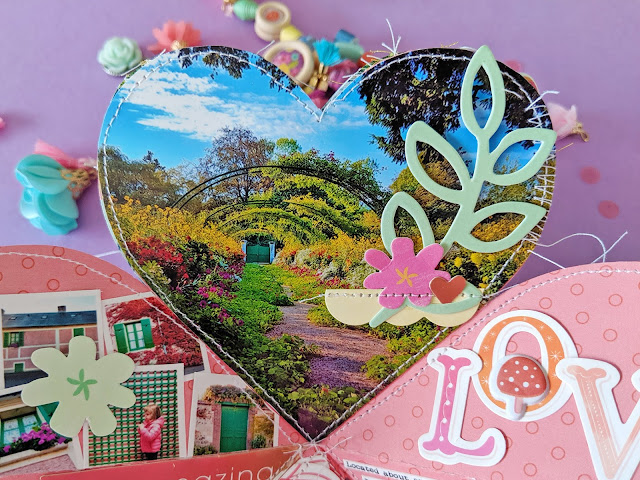
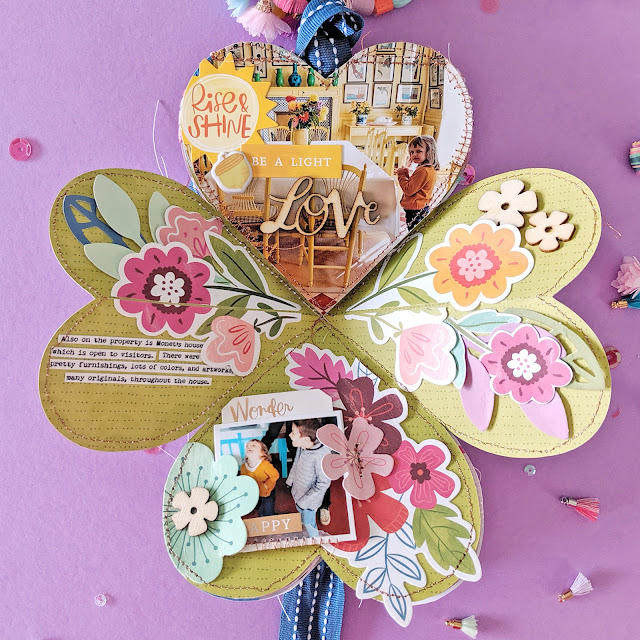
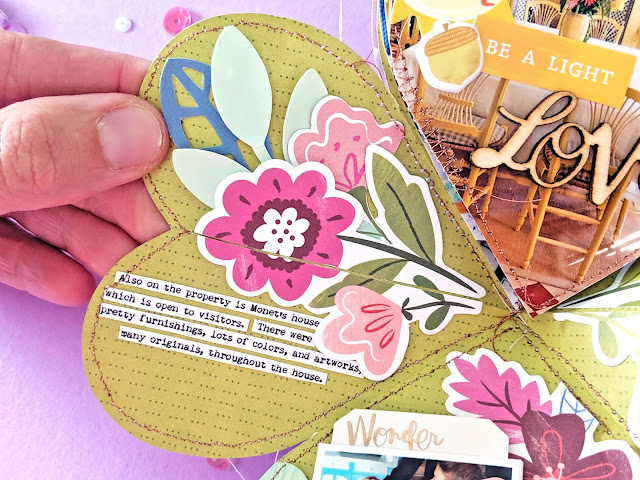
On this right side I placed "LOVE" letters from the Stickers with a little mushroom Puffy Sticker inside the "O". I used journaling directly from my blog post recap about the trip and printed it at point 8 in my favorite font, Remington Noiseless, trimmed into strips, and glued in place with liquid adhesive.

On this bottom heart I layered a bunch of Floral Die Cuts and tucked in a cute photo of Jane. Anywhere I could add a photo I tried to do so because I had so.many.photos I wanted to include.
Here is the 2nd of 4 pages.

On the left side I added a photo, two flower halves from the Floral Die Cuts, and a "yes" Epoxy Sticker.

For the top and bottom sections, I needed a way to add more photos (always!) so here is my solution: I traced hearts onto my printed 4" square photos, rotating the heart top and bottom side up, and cut them out. I glued photos back-to-back and then machine stitched across the tops or bottoms to create lift-up (or down) flaps. I used gold thread to machine stitch around all the edges of these hearts.
Three 1" square photos, more Floral Die Cuts, and another Epoxy Sticker dotted with a heart Puffy Sticker complete this section.

Here is the 3rd page!

I wanted to place the photos on the sides instead of the top/bottom so after tracing and cutting two photos into sideways hearts, I trimmed them in half so they will still fold along the seam. I added three Wooden Buttons along the bottom curve of this section.

On this photo section I added a heart Puffy Sticker to the white space at the top, two flower Puffy Stickers at the bottom, and trimmed out sentiments from an Ephemera Die Cut and Journaling Spot.
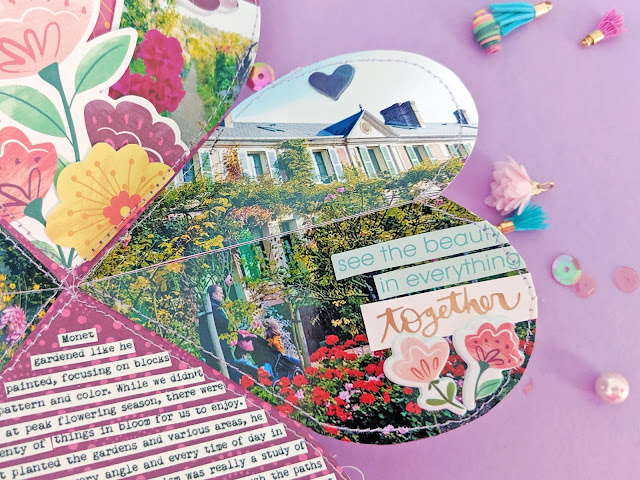
In the top section I added a whole lot of Floral Die Cuts - I mean, if you can't use all.the.flowers in a place filled with flowers, when else?! :) I tucked in a photo of flowers into the flowers.
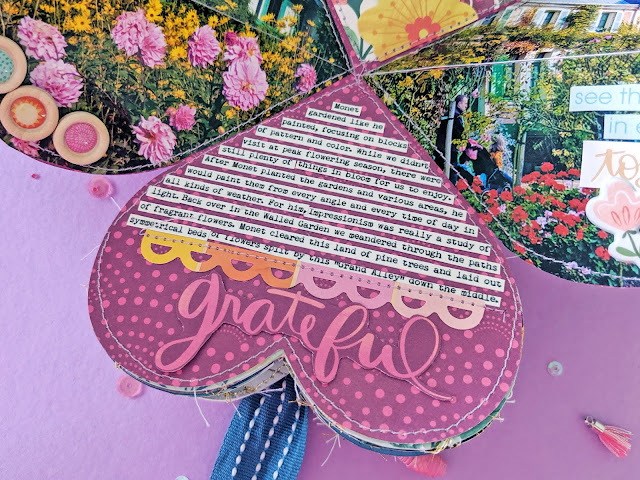
In the bottom section I added a lot of journaling strips and punched a scalloped border from a colorblocked Journaling Spot. The "grateful" is fussy cut from Paper 17. I used light purple thread to machine stitch around all the hearts in this page.
The 4th and final page!
For the left and right sections I used Floral Die Cuts trimmed in half so they will fold up along the seam. I added journaling strips below.
On the right side I also added a couple wood veneer flowers from the Mixed Embellishments.

For the top I repeated the back-to-back photo flap technique and used copper thread to machine stitch around all these edges.
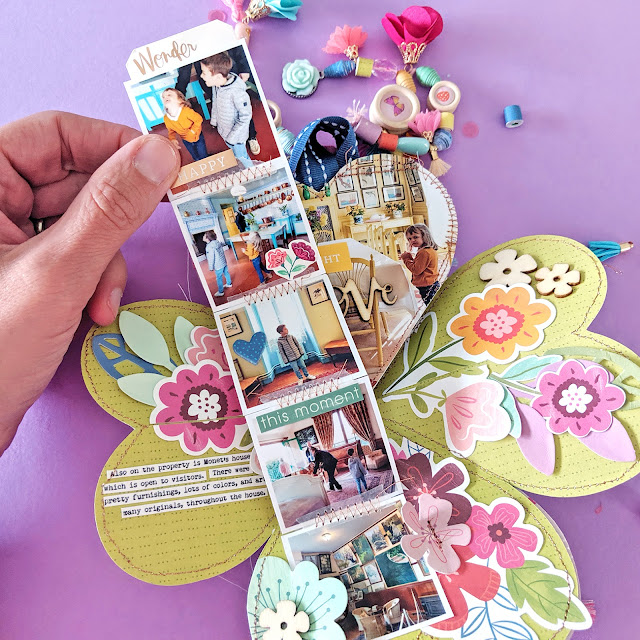
In the bottom section I still had a bunch of photos I wanted to include to I created an accordion flip up which is held closed by flowers machine stitched in place and tucking the photos under the petals.
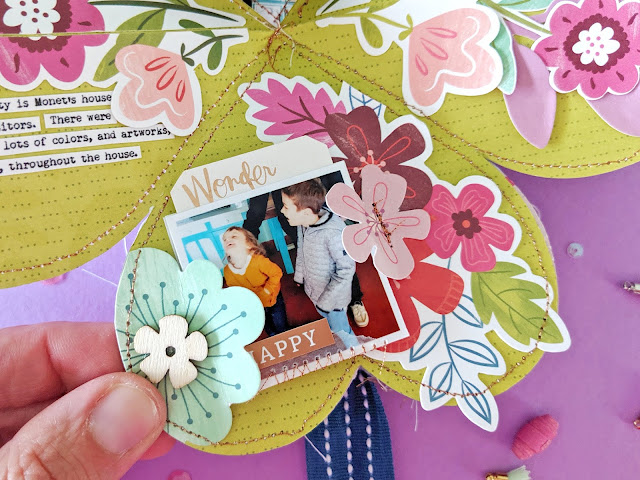
I adhered a piece of a Journaling Spot with a gold "Wonder" printed on it to the top to create a little flap to pull it. To create this photo strip I placed clear washi tape across the photos and then zig zag stitched through them, folding it up accordion style. I added stickers here there to the photos to embellish.
And the back cover finishes it up!

I love how this book stays open when placed flat. And I love how quickly it all came together.
I hope you are inspired to make one of these albums too!
Grab my Folding Hearts Mini Album cut file and Truly Grateful collection and get to gettin'!

SUPPLIES: Patterned paper, stickers, embellishments, die cuts, sequins, wood veneer: TRULY GRATEFUL; Ribbon: American Crafts; Font: Remington Noiseless; Embroidery floss: DMC; Sewing machine: Brother; Thread: Coats & Clark; Cut file: Folding Hearts Mini Album by Paige Evans; Die cut machine: Silhouette Cameo 3

Here is a video flip through so you can see how this album looks when turning the pages and hear a little bit about how it was created:
Once the embroidery was finished, this album came together so quickly - in just a day!

I love how the album can be opened to create a multidimensional project, or squashed up into a heart-shaped book. The ribbon ties it all together into a pretty bow.

I started by cutting the two covers (at about 4") from the purple floral Paper 02. I then spent 4-6 hours embroidering over the designs using matching colored thread. I use all 6 strands of DMC embroidery floss. I used two different kinds of stitches: mostly a backstitch and little French knots here and there. You may notice in the photo below I spelled Giverny with an E, Giverney. It wasn't until after I finished taking photos and doing flip throughs and filming that I realized I had spelled it wrong... I was going to keep it, but after sleeping on it I decided to fix the mistake. Except in this photo ;)

For the title I chose colorful letters from the Puffy Phrase Stickers - so I'll use this sheet like a regular pack of Thickers since I took away some of the letters from the words they come in. For "FRANCE" I did the same thing with the 6x12 Stickers - I cut letters ransom-style and will use this sheet of stickers for this purpose of making a colorful mini alphabet moving forward. I machine stitched the title over a piece of a Journaling Spot and trimmed the bottom edge with scalloped scissors before adhering it to the cover.


On this left side I added a plethora of 1" photos and placed a Floral Die Cut on top, leaf from the Floral Die Cuts below, and a "so amazing" Sticker. I also added sequins from the Mixed Embellishments but I see that one fell off and that pink one is a stray lol. On every page I machine stitched around the edges to add texture and help secure elements in place.

I traced the heart onto this 4" square photo and trimmed it out to create a full-page photo. I added a few embellishments for a fun detail.

On this right side I placed "LOVE" letters from the Stickers with a little mushroom Puffy Sticker inside the "O". I used journaling directly from my blog post recap about the trip and printed it at point 8 in my favorite font, Remington Noiseless, trimmed into strips, and glued in place with liquid adhesive.

On this bottom heart I layered a bunch of Floral Die Cuts and tucked in a cute photo of Jane. Anywhere I could add a photo I tried to do so because I had so.many.photos I wanted to include.

Here is the 2nd of 4 pages.

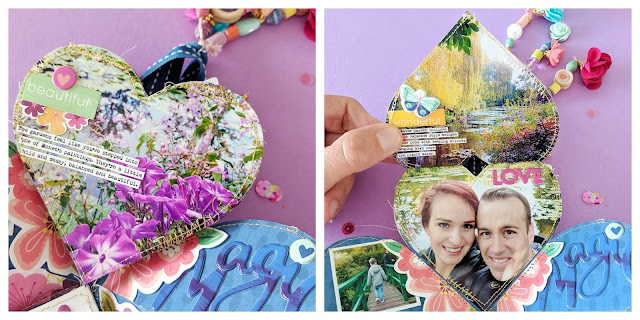
On the left side I added a photo, two flower halves from the Floral Die Cuts, and a "yes" Epoxy Sticker.

For the top and bottom sections, I needed a way to add more photos (always!) so here is my solution: I traced hearts onto my printed 4" square photos, rotating the heart top and bottom side up, and cut them out. I glued photos back-to-back and then machine stitched across the tops or bottoms to create lift-up (or down) flaps. I used gold thread to machine stitch around all the edges of these hearts.


Three 1" square photos, more Floral Die Cuts, and another Epoxy Sticker dotted with a heart Puffy Sticker complete this section.

Here is the 3rd page!

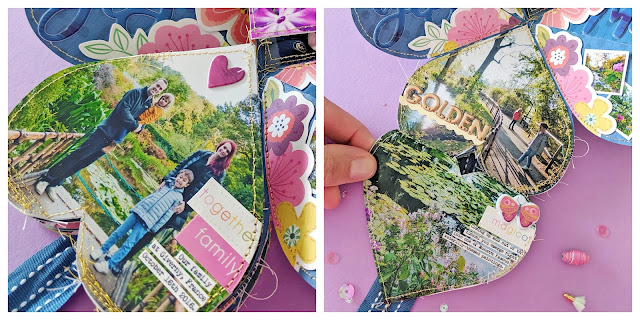
I wanted to place the photos on the sides instead of the top/bottom so after tracing and cutting two photos into sideways hearts, I trimmed them in half so they will still fold along the seam. I added three Wooden Buttons along the bottom curve of this section.

On this photo section I added a heart Puffy Sticker to the white space at the top, two flower Puffy Stickers at the bottom, and trimmed out sentiments from an Ephemera Die Cut and Journaling Spot.

In the top section I added a whole lot of Floral Die Cuts - I mean, if you can't use all.the.flowers in a place filled with flowers, when else?! :) I tucked in a photo of flowers into the flowers.

In the bottom section I added a lot of journaling strips and punched a scalloped border from a colorblocked Journaling Spot. The "grateful" is fussy cut from Paper 17. I used light purple thread to machine stitch around all the hearts in this page.

The 4th and final page!

For the left and right sections I used Floral Die Cuts trimmed in half so they will fold up along the seam. I added journaling strips below.

On the right side I also added a couple wood veneer flowers from the Mixed Embellishments.

For the top I repeated the back-to-back photo flap technique and used copper thread to machine stitch around all these edges.

In the bottom section I still had a bunch of photos I wanted to include to I created an accordion flip up which is held closed by flowers machine stitched in place and tucking the photos under the petals.

I adhered a piece of a Journaling Spot with a gold "Wonder" printed on it to the top to create a little flap to pull it. To create this photo strip I placed clear washi tape across the photos and then zig zag stitched through them, folding it up accordion style. I added stickers here there to the photos to embellish.

And the back cover finishes it up!

I love how this book stays open when placed flat. And I love how quickly it all came together.

I hope you are inspired to make one of these albums too!

Grab my Folding Hearts Mini Album cut file and Truly Grateful collection and get to gettin'!

SUPPLIES: Patterned paper, stickers, embellishments, die cuts, sequins, wood veneer: TRULY GRATEFUL; Ribbon: American Crafts; Font: Remington Noiseless; Embroidery floss: DMC; Sewing machine: Brother; Thread: Coats & Clark; Cut file: Folding Hearts Mini Album by Paige Evans; Die cut machine: Silhouette Cameo 3


Wow wow wowwwwwww!! This is STUNNING! LOVING the colors, the shapes, the photos, the stitching and the tassels!!! Just AMAZING!!!!!!!!!
ReplyDeleteOh my goodness Paige. You have outdone even yourself this time. Ah-mazing!! Headed to the silhouette store now to purchase the file. And thank you for the tutorial. This will be my first mini album project. Very excited to start
ReplyDelete