
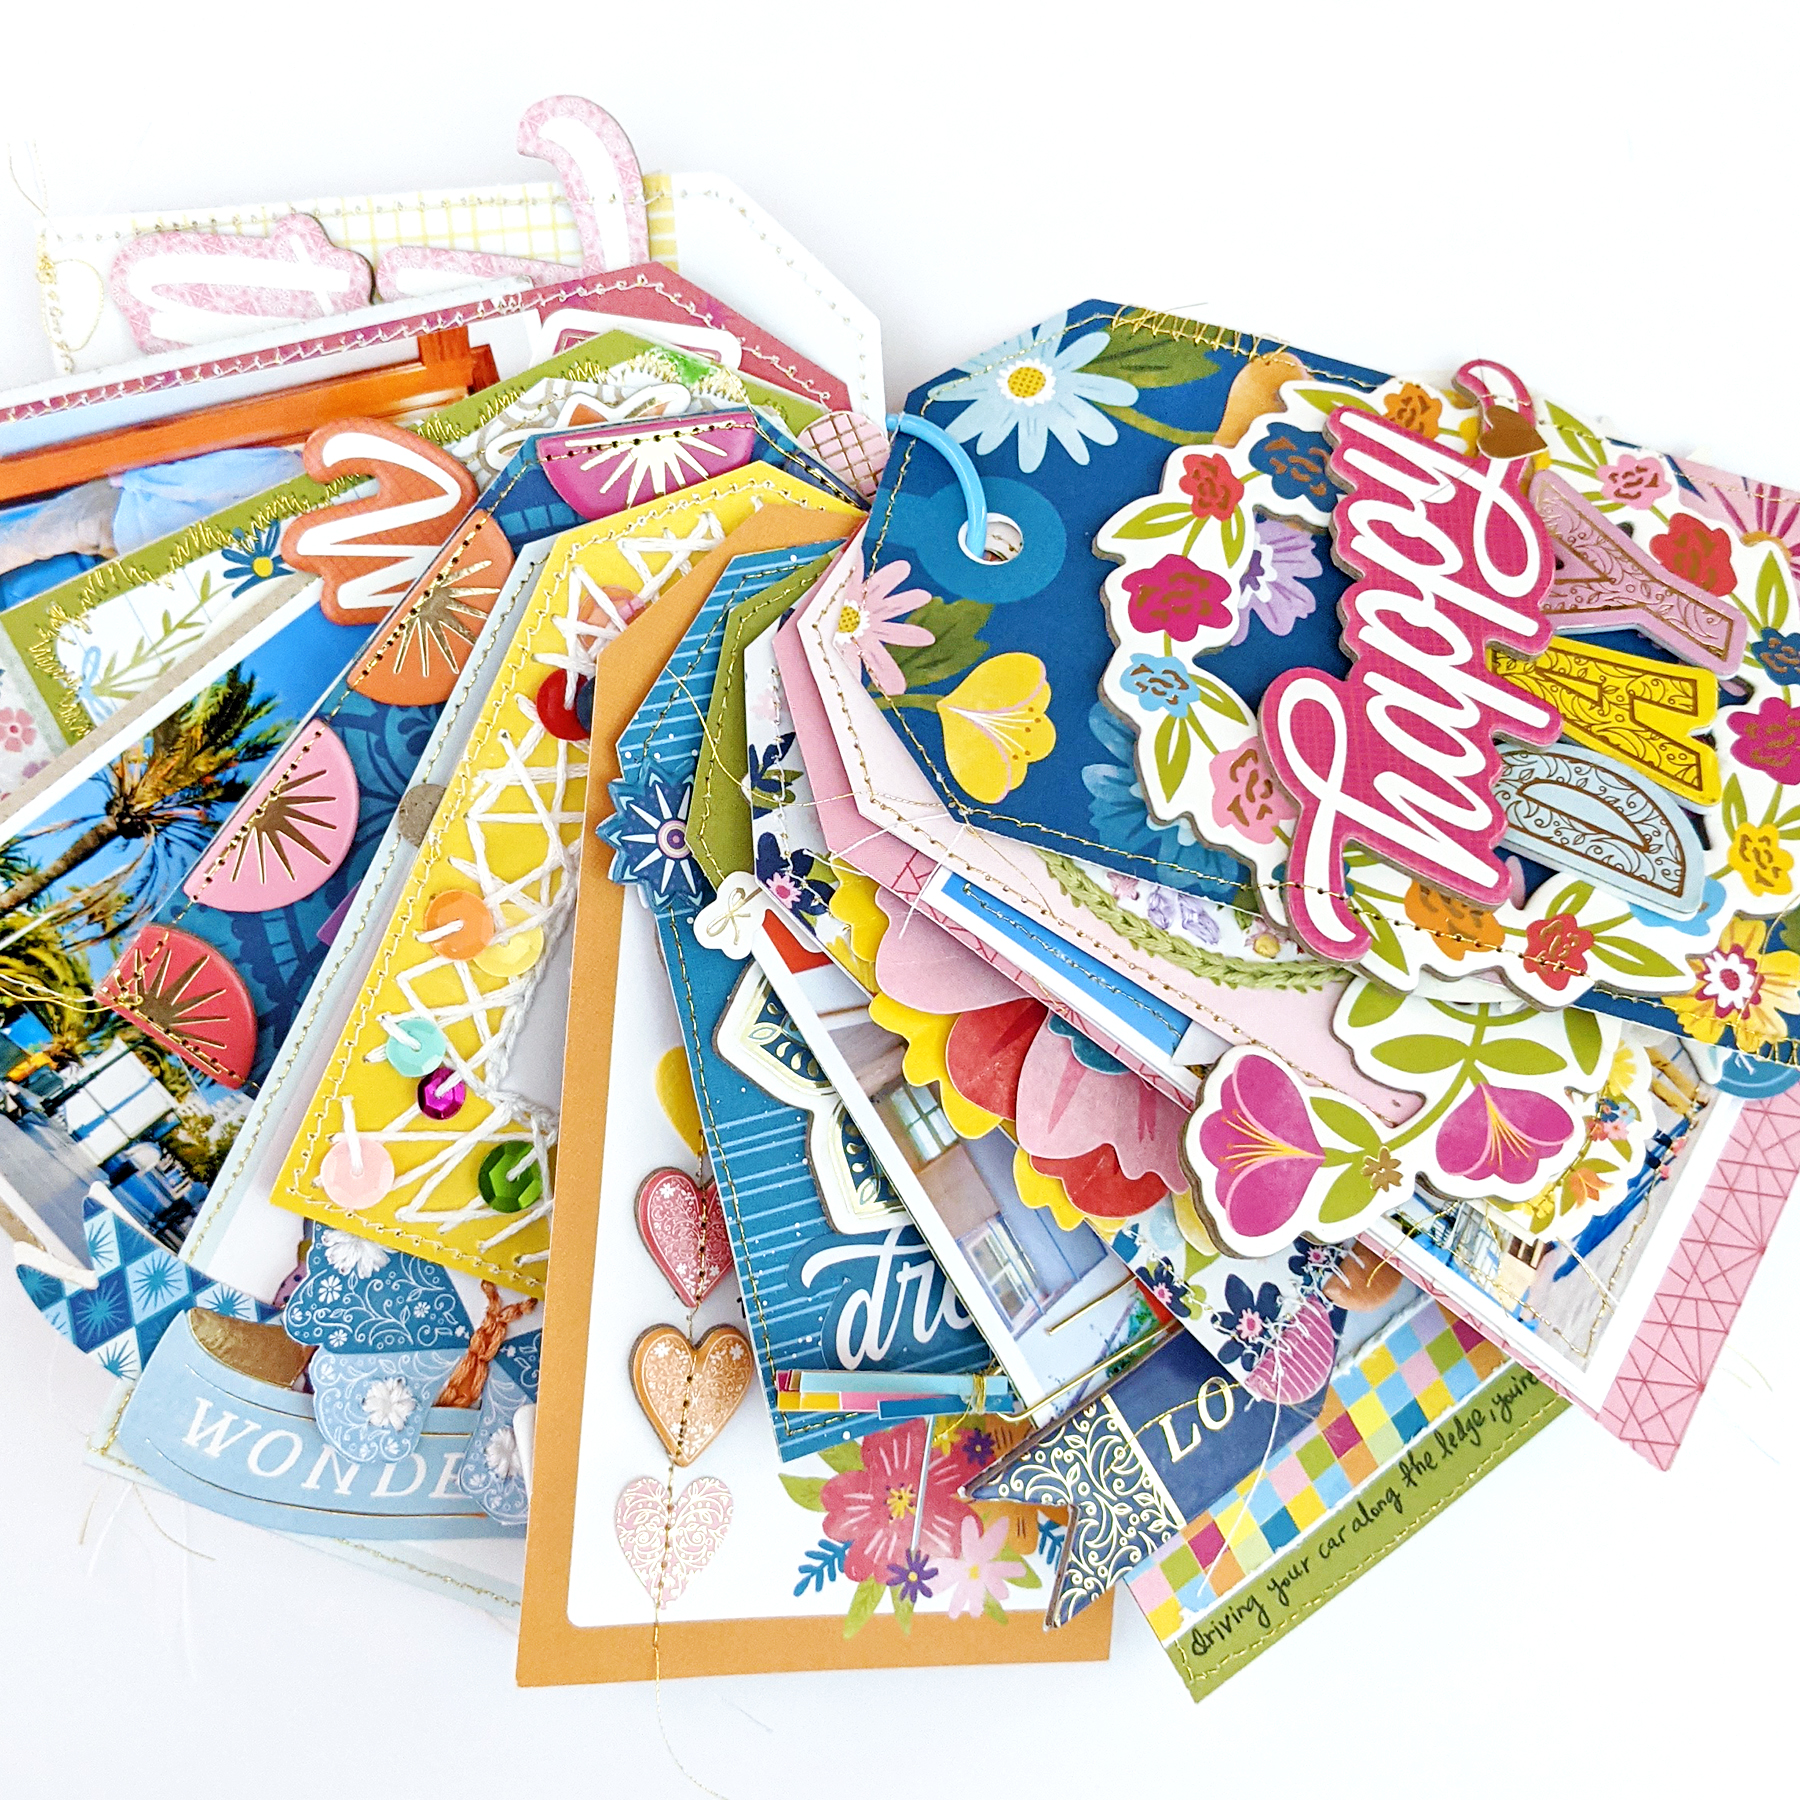
Hi friends! Today I have a new mini album to share with you created with my Wonders collection! I'm wrapping up projects with this line before I start using Bungalow Lane!
Join me as I walk and talk through the album in this YouTube video:
The base of this mini album is created from just two patterned papers: Paper 12 with the 8 tags, and Paper 24 with the (12) 3x4 cut-aparts.

Here are the fronts of all the tags:

And here are the backs of all the tags:

The first thing I did was cut out all 8 tags from Paper 12, angled the corners along the pattern lines, and punched a hole through the tops with a standard hole punch. I then cut up all 12 sections from Paper 24 and used one of the tags as a template to angle the top corners and punch a hole in the tops to also turn them into tags.

I used the floral tag as the cover and added a floral Chipboard Sticker, "happy" Chipboard Sticker, and "DAY" Thickers layered in the middle. I also added a gold heart Cardstock Sticker. For more texture, shine, and interest, I machine stitched around the edges of almost every tag using gold thread and white thread in the bobbin.

On the back I wrote an introduction to this mini album and then added a 2" square photo framed with a heart Cardstock Sticker, "explore" Cardstock Sticker, heart Chipboard Sticker, gold heart Puffy Sticker, and transparent floral sticker from the 8-Page Sticker Book.

The second tag is probably my favorite :) I embroidered the entire bird image using a chain stitch, back stitch, and French knots. It took about two hours to complete the stitching and I just love the homespun touch it adds. Across the bottom I added a floral border Cardstock Sticker topped with a floral border Chipboard Sticker.
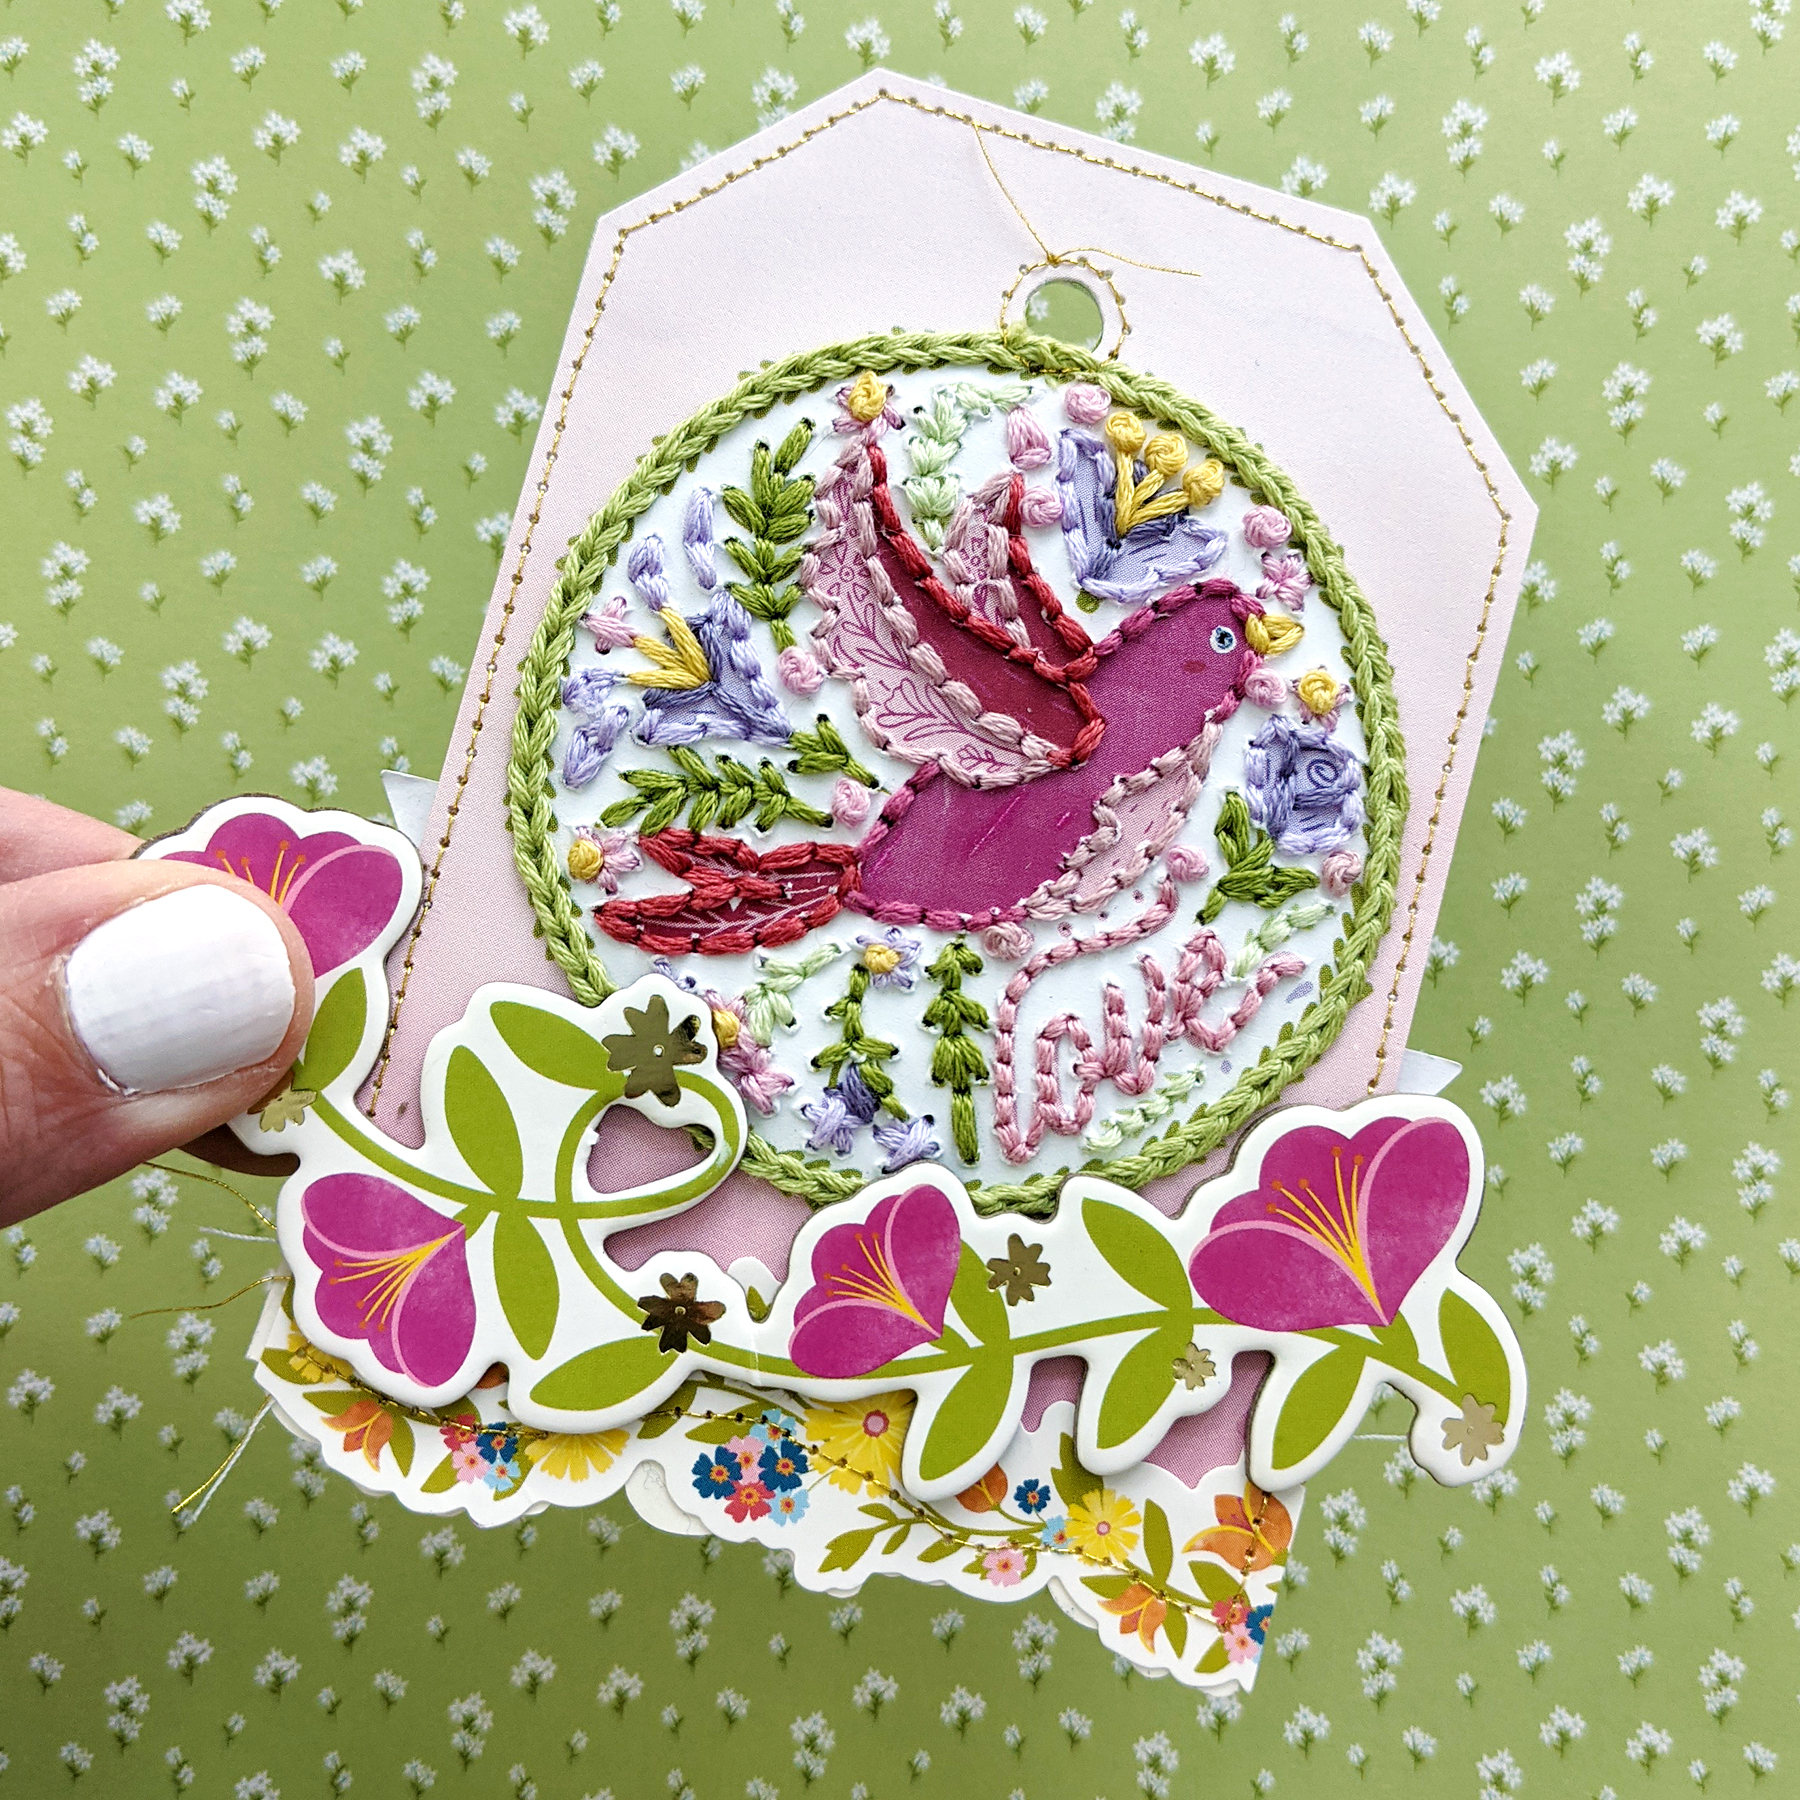
These are the DMC threads that I used throughout this mini album and I use all 6 strands for ultimate texture.

On the back of the bird tag I adhered this dark pink floral tag then machine stitched around the edges. I mirrored the front by adding a floral border Cardstock Sticker topped with a floral border Chipboard Sticker. On a label sticker from the 8-Page Sticker Book I added colorful letter stickers also from the 8-Page Sticker Book to spell the location of our day trip (Marbella, Spain). On a tiny, yellow label sticker from the 8-Page Sticker Book I stamped the date of our visit.

On the next tag I added two photos connected at the top with a "hello there" Cardstock Sticker. I accented the tag hole with a Puffy Sticker and created a tab with a "today" sticker from the 8-Page Sticker Book topped with a floral Chipboard Sticker. Under the flip up I added more stickers and placed a pink Banner Sticker directly on the photo in some white space.

On the back of the tag I added a photo, placed "oh happy day" Epoxy Phrase Stickers on the white space, and embellished the corners with flourishes from the 8-Page Sticker Book.

The next tag has a rainbow printed on it so I placed a rainbow Chipboard Sticker on top of it and added a gold heart Puffy Sticker. Below the sentiment I added a piece of scalloped Washi Tape. Across the bottom I placed 5 semi-circle Puffy Stickers, backed with the same stickers to create a scalloped border, and then machine stitched around the edges.

On the back of this tag I adhered a floral paper tag (before machine stitching). I layered 8 concentric sized and colorful Floral Die Cuts and added dimension to them by bending and creasing the petals. I attached all the flowers together by stitching 3 French knots through the center and tucked a green leaf also from the Floral Die Cuts under the top right side.

The next tag has a colorful photo and I embellished with a colorful banner Cardstock Sticker trimmed in half, a "hi!" Chipboard Sticker, "love" Chipboard Sticker, Tassel Paper Clip, a colorful checkered paper strip from Paper 12, and a handwritten caption across the bottom.

I created this side of the tag first - I hand stitched through all of the words with a backstitch and coordinating thread. I stamped two hearts with the Acrylic Stamps in two different shades of blue ink onto white cardstock, fussy cut them out, and adhered them above and below the sentiments. Then I machine stitched around the tag.

On the next tag I splashed watered down white acrylic paint and topped it with a large mandala Chipboard Sticker along with a "dream" Ephemera Die Cut tucked underneath. I backed two doily Puffy Stickers on the edge to create a tab.

On the back I added a 2" square photo, framed it with an Ephemera Die Cut, topped it with a purple floral Chipboard Sticker, and added a "discovering" Cardstock Sticker.

The next tag has a photo of us getting ice cream so I made that title with Thickers and embellished with 3 hearts and a "happiness" Cardstock Sticker.

On this side of the tag I stitched a line of Cardstock and Chipboard hearts and wrote journaling in the open space. Easy peasy!

This next tag is also my favorite! Anything with hand stitching :) I backstitched through the 3 "hello"s and then did a chain stitch around the white border. I pierced my own holes about 1/4" apart around the edges of the tag and then did "string art" through, adding sequins here and there for an extra pop of fun and color.

On the back side I added this pink/orange floral paper, machine stitched around the edges, topped it with a mandala Chipboard Sticker, and trimmed a sentiment Cardstock Sticker into individual words placed down the left edge. I also made a hole reinforcer with a reinforce hole punch from a blue part on Paper 12.

On this next tag I added hand stitching details to the three butterflies, partially cut around the wings & bent them up for dimension, and placed a "wonderful" Banner Sticker below. I added a mandala Puffy Sticker over the tag hole for decoration.

A large photo fills this tag which has a lot of pink in it so I added a pink "so much love" Banner Sticker at the bottom (lined up with the banner on the front of the tag), and trimmed a daisy border from an Ephemera Die Cut to tuck under the top edge of the photo.

I edged this next tag with semi-circle Chipboard Stickers and placed colorful sentiment Cardstock Stickers down the middle.

On the back I hand stitched through the sentiment using white thread and embellished with gold foil mandalas from the 8-Page Sticker Book before machine stitching around the edges.

For this next tag with a photo, I stamped a heart from the Acrylic Stamps in pink ink onto white cardstock, cut it out, and added it to the top of the photo. I embellished with a "wonderful" and two flower Chipboard Stickers.

On the back of the tag there's another photo and I embellished with colorful "playground" stickers from the 8-Page Sticker Book, I framed little Fox coming down the slide with a heart Cardstock Sticker, added a colorful hearts paper piece from Paper 12, and added a line of colorful dot Chipboard Stickers below.

On this journaling tag I used a fancy scalloped machine stitch around the edges with gold thread and wrote journaling inside. Across the bottom edge I wrapped Washi Tape and then used a scalloped border punch. I placed a pink heart Cardstock Sticker at the top and re-punched the tag hole.

On the back I added a 2" square photo at an angle and trimmed of the excess. Then I layered a flowerpot Ephemera Die Cut with two Floral Die Cuts and added three French knots through the middle. I topped the photo with a "hello" Epoxy Phrase Sticker and "hello there!" sentiment from the 8-Page Sticker Book.

This tag has a photo edged with a colorful "wonders" Cardstock Sticker with a foiled mandala from the 8-Page Sticker Book tucked behind. I wrote a caption at the bottom of the photo.

The back side of the tag has a photo framed with a Chipboard Sticker and an Ephemera Die Cut with an "enjoy the moment" Cardstock Sticker at the bottom and "today was magic" banner Cardstock Sticker at the top. I trimmed a mandala Chipboard Sticker in half to edge the cluster.

Here is the last tag! It was a large tag from Paper 12 but I trimmed out a section of the middle to make it the same size as one of the smaller tags to finish off the pattern of big tag, small tag, big tag, small tag, etc. I covered the seam with a piece of yellow Washi Tape and added a large "hello there!" Chipboard Sticker on top.

On the back of the last tag I covered the seam with a colorful piece of Washi Tape, added a "love" Ephemera Die Cut to the middle, and placed colorful pennant Puffy Stickers below the colorful semi-circles printed on the tag. DONE! :)

I worked on this mini album over the course of 3 days and had so so so much fun creating it.

I hope you are inspired to create a tag-shaped mini album using Wonders!

If you love making mini albums, soon I am launching PaigePals: a monthly mini album virtual class & kit club! Learn the latest and greatest techniques for creating cute and colorful handmade mini albums like this one for documenting your precious memories every month! No two albums will be alike, expanding your creativity and taking it to the next level! Sign up for my newsletters to receive more information and I'll also share the details here on my blog: http://bit.ly/PaigeEvansNewsletter Thanks so much for stopping by! See you again soon!

SUPPLIES: Patterned papers, stickers, die cuts, Thickers, stamps, paperclip, washi tape, embellishments: WONDERS; reinforce hole punch; white cardstock; white acrylic paint; Sewing machine: Brother; Thread: Coats & Clark; Printer: Canon Pro-100; Canon photo paper


Post a Comment