Fun news: I have a Bungalow Lane Acrylic Stamps Set exclusive to scrapbook.com! This is in addition to the Acrylic Stamps already apart of Bungalow Lane :) I made a layout and pair of cards with the new Acrylic Stamps Set to show you some fun ways to use these exclusive stamps:
Stamped Layout & Cards by Paige Evans
Monday, September 20, 2021
Guest Designer | Kerstin Scheidler
Sunday, September 19, 2021
Hello everyone! I'm Kerstin Scheidler and I'm excited to be Paige's cut file guest designer for September! You can find me on Instagram, Facebook, and Pinterest. Paige has a lot of great cut files and it was really hard to choose. I wanted to show you three different layouts - see below!
Fall is just around the corner and Paige's new Bungalow Lane collection is perfect for it. For my first layout I chose the Pumpkin cut file, cut it to 7x6.5", and centered it on my page. Then I filled the center pieces with different papers from the Bungalow Lane collection. I inserted my photo in the center. On the top right and left I played with the different embellishments from this collection. Leaves, twigs, and butterflies fit perfectly!
Branches and autumn are a perfect combination and the Branch Wreath cut file is fitting for it! I cut it out two times at 8" and placed them both on top of each other in the center of my paper. The most beautiful part of a layout for me is playing with all the different embellishments! Bungalow Lane has great ones! I especially love the little Embossed Puffy Stickers! I arranged the different embellishments in colors - pink, yellow, blue - and embellished them with little flowers and buttons. I placed my photo in the center of the wreath. I love how it turned out!
For the third layout I decided to use the Picture Wheel cut file. I cut it to 8.5" and glued the inner pieces on in a circle. To do this, I laid the frame on my cardstock and glued the pieces in place. After that I removed the frame and decorated! Papers folded, papers rolled, leaves, and flowers - no limits to your imagination here. I cut my photo to the size of the cut out parts and glued it on the top right. I "hate" socks and this photo of me (... laugh ... my feet) fits perfectly!
I had great fun being creative with Paige's cut files! I hope I could inspire you and wish you a great day!
Layout & Cards for Zsoka by Paige Evans
Saturday, September 18, 2021
My sweet & talented friend and Design Team member Zsoka Marko has a shop called A Pocket Full of Happiness and a group of crafters have come together to support her and her business! I made a layout and a set of cards, all featuring Zsoka's Metal Dies paired with Bungalow Lane!
For this first card, I die cut the Rainbow Background Die from Bazzill smooth white cardstock and used spray adhesive to attach it into a piece of the blue striped paper from the 6x8 Paper Pad. Then I die cut the rainbow 5 more times from 5 patterned papers (red is Paper 15, light pink and orange is from the 6x8 Paper Pad, yellow is Paper 8, and green is Paper 24) and did the inlay technique for the little paper pieces to create all the rainbows. I distressed the edges of the panel and machine stitched it onto a white cardstock card base. For some extra texture I created zigzag stitches with gold thread on the edges and then added three groups of white and clear enamel dots from my stash. To finish I added a "thankful" sentiment from the 8-Page Sticker Book with foam squares.
The second card features the Fly Away With Me Die Set which includes two large and two small butterflies as well as the Thank You Die Set. I cut a set of butterflies from Paper 1, Paper 9, Paper 15, and Paper 20. I layered the 4 butterflies from each pattern together and machine stitched down the centers. I distressed the edges of a panel made from Paper 21 and machine stitched it onto a white cardstock card base. I die cut the Thank You Die Set from Bazzill textured white cardstock and inlaid it with Paper 6. I glued the four butterflies onto the card front, trimmed off any excess, then adhered the sentiment to the center with foam adhesive. To finish I added cream and pink enamel dots here & there.
The third card showcases the Love Letters Die Set. I actually made 5 variations of this same card with leftovers from the layout (keep scrolling to see it!). I die cut the Love Letters backings from Bazzill smooth white cardstock and the top layers from a multitude of Bungalow Lane patterned papers (this exact one is Paper 12). I glued the layers together with liquid adhesive. Like the previous cards, I distressed the edges of a paper panel (this is Paper 17), machine stitched it with white and gold thread onto a white cardstock card base, then added the letters with foam squares for dimension. I trimmed a tiny "YOU" word from a sticker in the 8-Page Sticker Book and added it under the "E". I tucked two gold foil leaf Foam Stickers into the letters and finished with three groups of white and clear enamel dots from my stash.
This love card using the Love Letters Die Set is exactly the same except the letters are die cut from Paper 4 and the patterned panel is Paper 17. Instead of foam leaf stickers I added gold foil transparency leaf stickers from the 8-Page Sticker Book. Now I have a bunch of "love you" cards in my stash to grab and send when I need to!
This card features Zsoka's Floral Doily Die Set and Hello Die Set. I was immediately reminded of sunflowers when I saw the Floral Doily Die Set so I went about cutting the pieces from yellow and brown/kraft patterned papers, namely Paper 7, Paper 8, Paper 11, and Paper 14. I backed the center pieces with Bazzill textured white cardstock before adhering them onto the larger flower part with foam adhesive for dimension. I trimmed a panel of the green Paper 5 and added the flowers at opposite corners. After I trimmed the excess flowers, I adhered a couple of the pieces back on the card edges. I love the way all the layered flowers look! Then I distressed the panel edges and machine stitched it onto a white cardstock card base. I die cut the Hello Die Set from Bazzill smooth white cardstock and inlaid it with Paper 21 before adding it with foam squares and liquid glue onto the card. To finish I added more clear and white enamel dots from my stash for a bit of interest.
Here is a look at all the cards with an alternate "LOVE" card. I can't pick a fave :)
Onto the layout!
And just as a refresher, Zsoka and I did a fun collaboration together! She turned a couple of my cut files into metal dies: Floral Border and Floral Corner which you can also find in her Dies Shop! All of the details about these cards are on my blog post HERE.
Have a happy scrappy day!
7th Grade Layout by Zsoka Marko
Friday, September 17, 2021
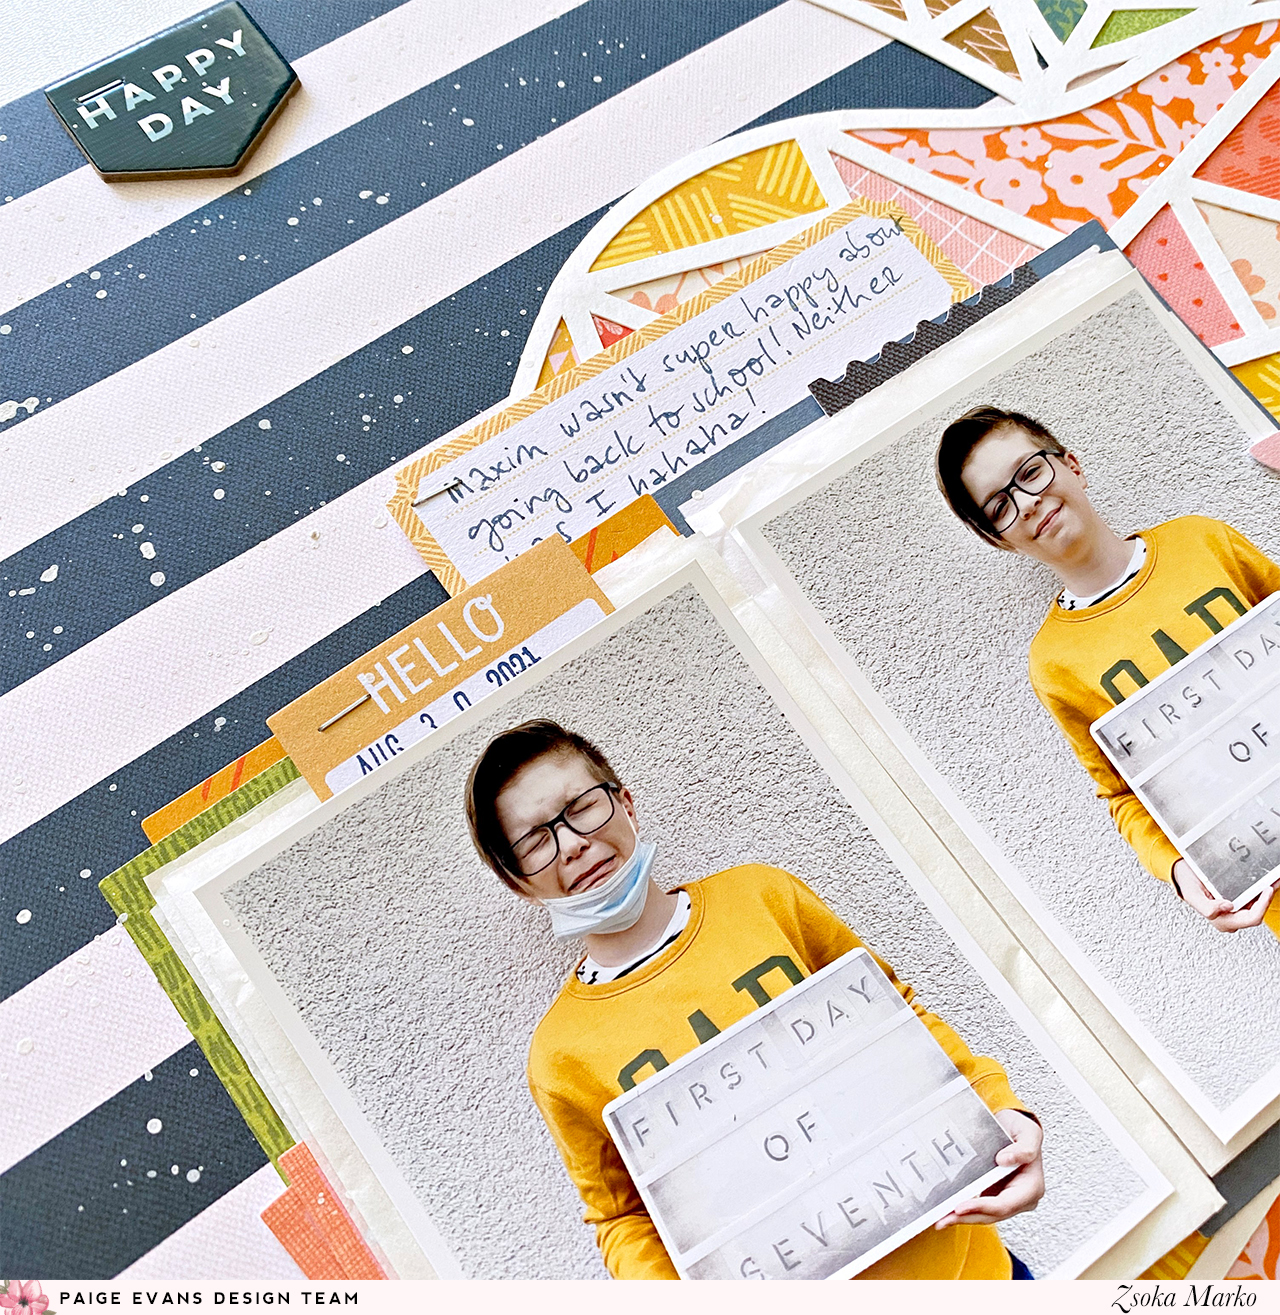
Hi there friends, Zsoka Marko back with a new layout for the Paige Evans Design Team! This is my very first page with the amazing new Bungalow Lane collection! I'm so in love with the colors, patterns, and all the wonderful embellishments! I don't have fall photos yet this year and I'm too lazy to go through old photos, so I decided to go with some recent photos of my kiddo's first day back at school. My whole life, school start meant fall - only since we've been living in Germany does school often start already in summer. There was one year where it started beginning of August and I was so upset haha! I mean, normally it's the biggest heat here, and I was just so sorry for the kids having to sit in a classroom instead of being at the pool! I always started in September and I can't accept this early start LOL. That said, this year he started at the very end of August, so we can consider that fall. The clothes he was wearing that day match Bungalow Lane quite nicely too!
I chose Paige's Geometric Apple cut file because it goes well with the school theme and because it has lots of openings that I could fill with various patterned papers. When I create my first layout with a new collection, I usually want to use every single thing, so a cut file like this is perfect for adding as many patterned papers as you want. I cut it from heavyweight white cardstock in a larger size, then backed it with patterned papers in pink, red, and yellow tones. I considered going the blue boy layout route for a hot minute, but I prefered lots of color!
I layered tissue paper and a few ephemera pieces behind my photos to add some dimension. I glued down the apple on a navy striped background, then my photos as well. I started adding a few embellishments, die cuts, stickers, and alpha Thickers for my title. I wrote my journaling onto a label sticker and partially tucked it behind my photo.
Since the upper left side felt a bit empty, I attached a chipboard there with my Tiny Attacher. I also splattered some white acrylic paint in that corner as well as the bottom right.
I do have a process video to go with this page, if you're interested: https://youtu.be/45_i4uoeedg
Thanks so much for stopping by! Have an awesome day!

Blog: apocketfullofscrap.blogspot.com // Instagram: @zsoka_marko // Facebook: Zsoka Marko // YouTube: Zsoka Marko
Autumn Leaf Mini Album by Amber Mitchell
Wednesday, September 15, 2021
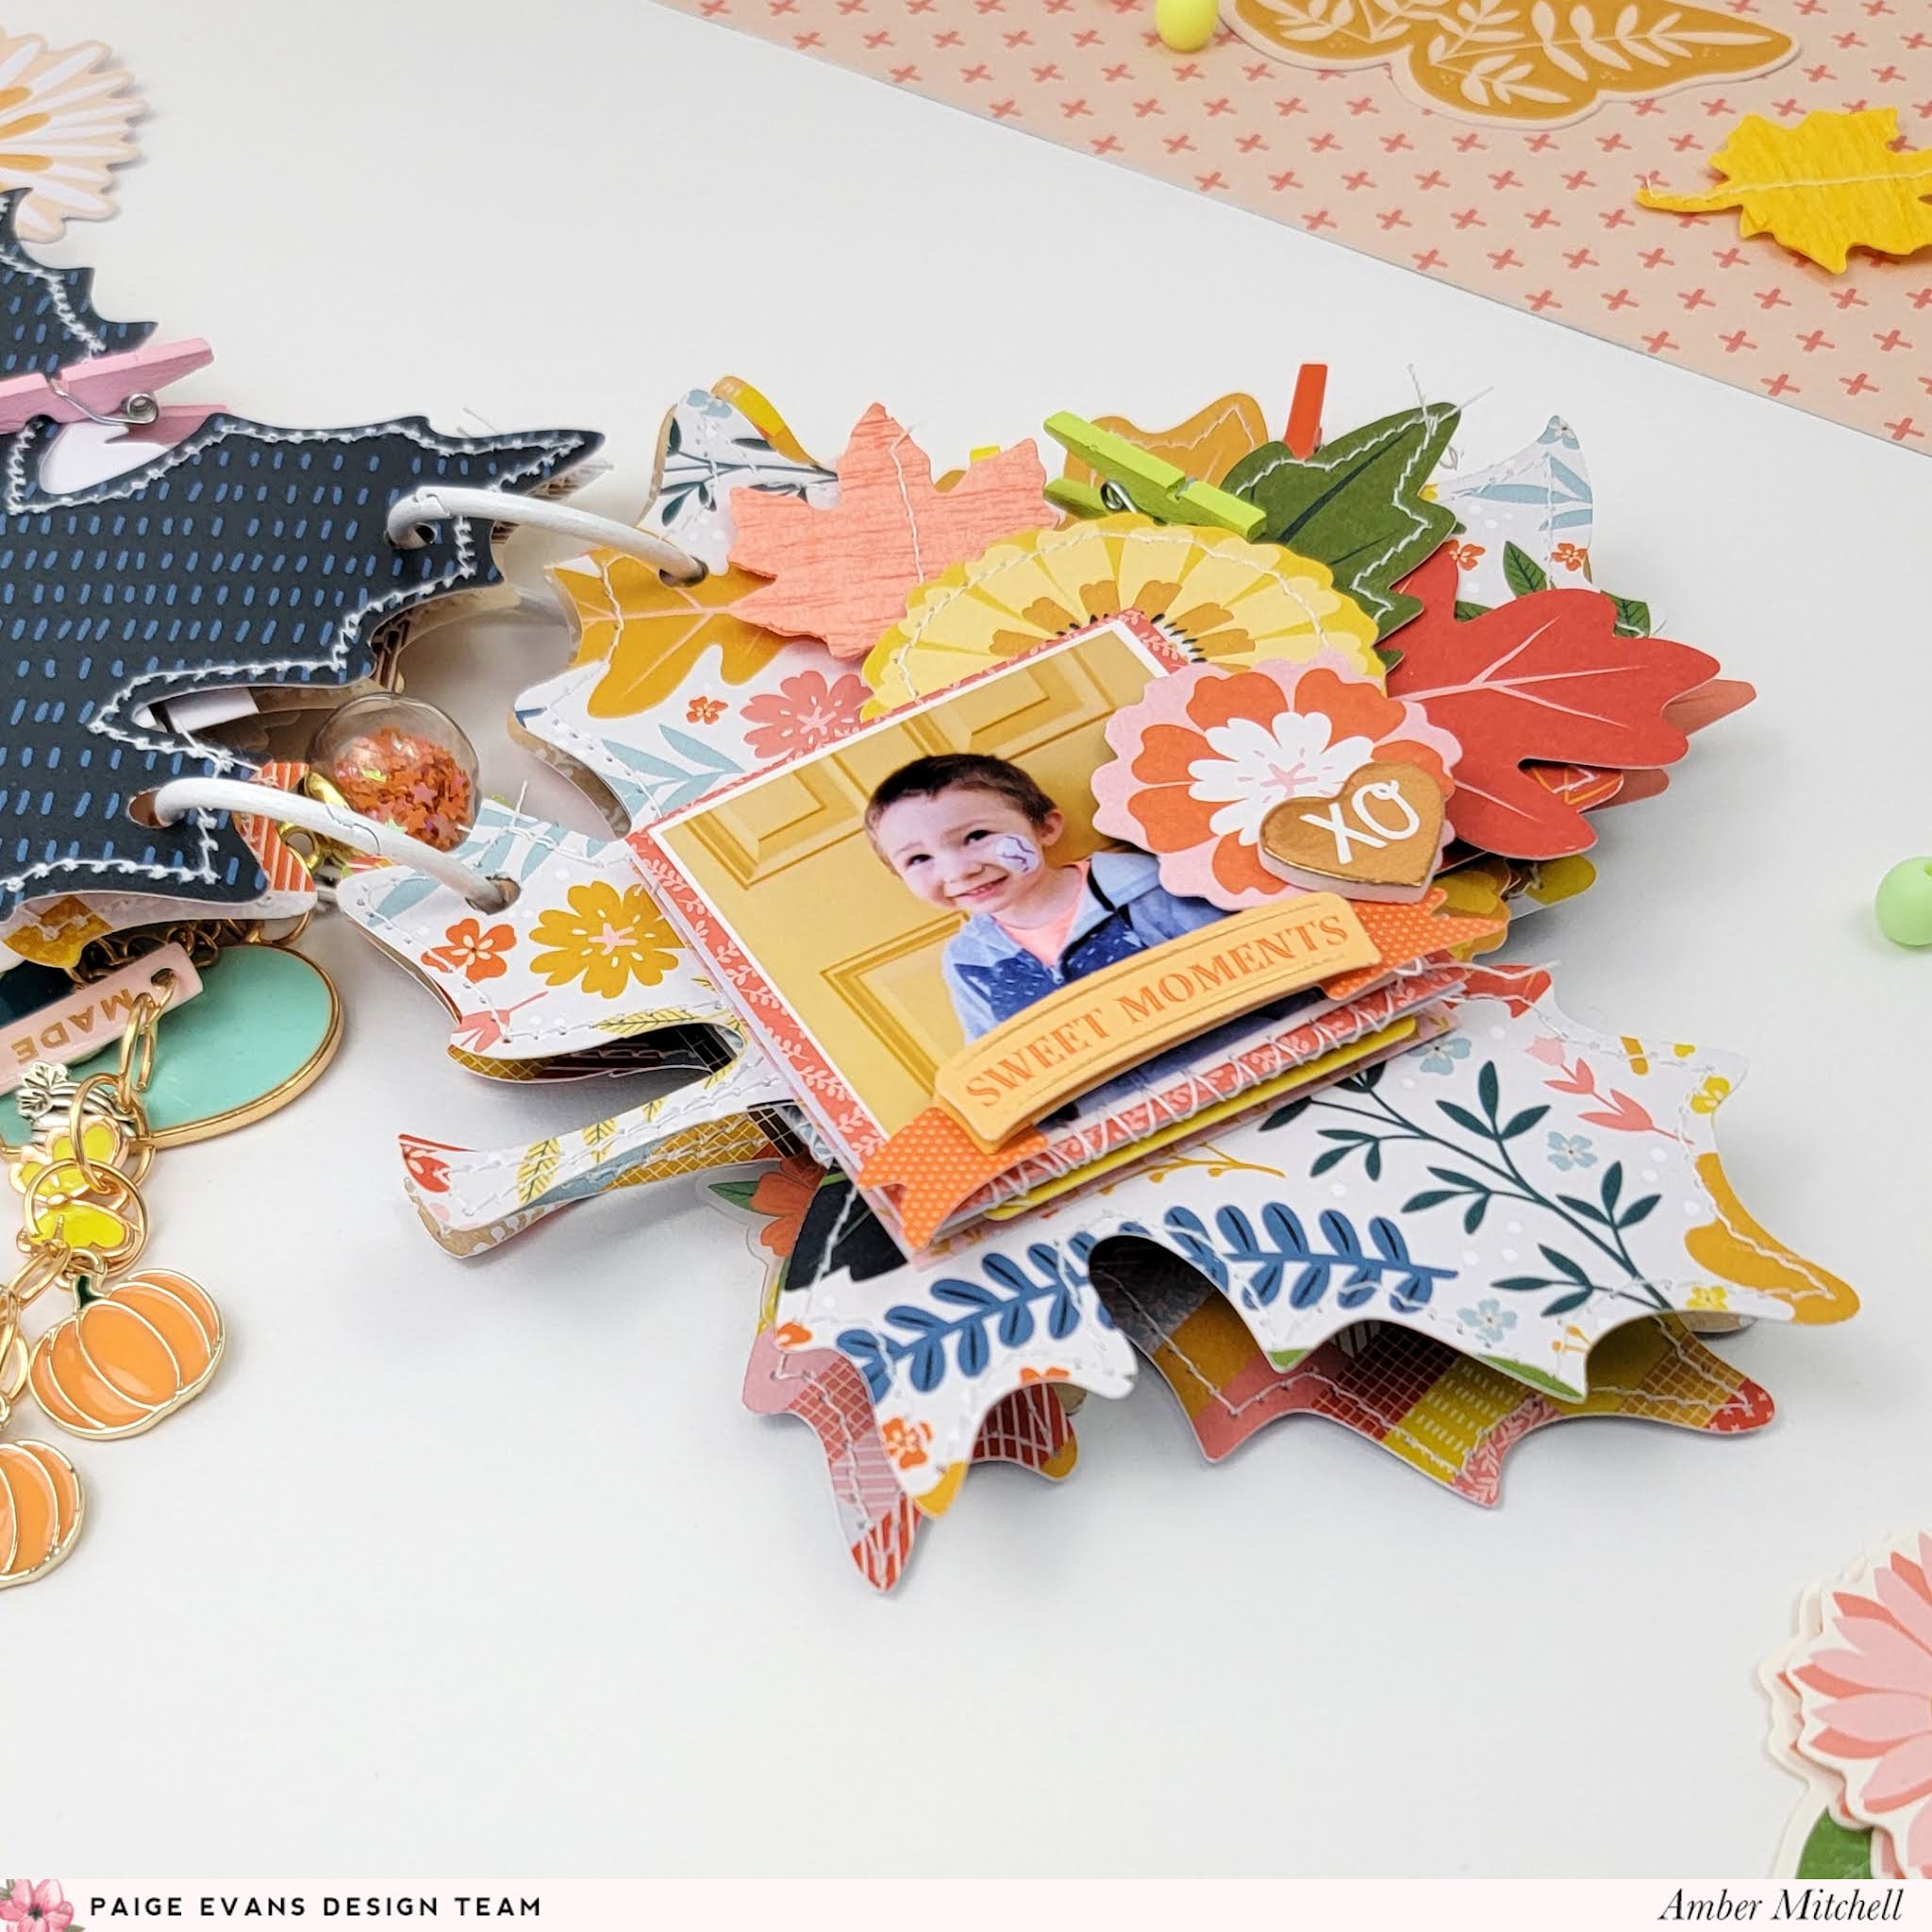
Hello crafty friends, Amber Mitchell here on Paige's blog today to share with you this leaf-shaped mini album I created to usher in the Fall season! To create this album, I used the Bungalow Lane collection and Paige's Large Leaf cut file.
This album consists of five pages that I cut from the following papers from Bungalow Lane: Paper 4, Paper 5, Paper 7, Paper 8, and Paper 10. I resized the Large Leaf cut file to be roughly 5 x 5.5 inches using my Cricut software. I love smaller albums so this size worked perfectly for me!
Next, I machine stitched along the edges of all of my pages to add extra texture. This was a bit time consuming, given all of the corners of this file, but in the end, it was totally worth it!
To bind my album, I opted to use binder rings. To give the cover of this mini a cleaner look, I added some orange eyelets and then some white rings to offset the bright and fun colors in this collection.
I had so much fun embellishing this mini album! The Bungalow Lane collection has so many different types of embellishments and I found myself wanting to use a little bit of everything!
On the cover, I added a large title using the Thickers. I love the knit pattern and the colors of these alphas. To date the mini, I used the Mini Foam Thickers from the Pick-Me-Up collection. These Thickers are some of my favorites; they're perfect for adding titles and dates into small spots.
In this album, I documented memories from Fall 2019. To showcase more than one photo per page, I zig-zag stitched strings of them together using my sewing machine. In between the photos for some fun contrast, I added sentiments from the 2x2 Paper Pads. I also used these pads to mat my photos which measure just under 2 x 2 inches. These strings of photos accordion fold onto one another, which is great way to utilize space when working with a compact mini.
To embellish the rest of my album, I used a mix of the following products: Chipboard Stickers, Epoxy Stickers, Floral Die Cuts, Bird Paper Clips, Stitched Leaves, Embossed Puffy Stickers, Layered Stickers, Foam Phrase Stickers, Cardstock Stickers, and the 8-Page Sticker Book. See; so many fun products to use in this collection! I love how all of the different textures mesh together and stand out all at the same time. It adds a ton of depth to each individual page and made the embellishing process super fun and easy!
For a finishing touch, I added one of the Heart Charms along with some extra charms from my stash to one of the rings. I feel like nothing completes an album like a cute dangle made up of fun bits and pieces.
And that's this album finished! Fall is my favorite season of them all, so creating this album and documenting these memories was so much fun! Thanks for stopping by my post today. I'll see you next time with another fun project!
SUPPLIES: Patterned papers, stickers, die cuts, paper clips, charm, embellishments: BUNGALOW LANE; Die cut machine: Cricut; Cut file: Large Leaf by Paige Evans
Location: California, USA / Blog: Happy Crafty Studio / Instagram: @bambidearr / YouTube: bambidearr / Pinterest: bambidearr
You Make Me Smile Embroidered Layout by Paige Evans
Monday, September 13, 2021
I have a new embroidered layout to share with you today featuring Bungalow Lane!