Be a Fruit Loop by Missy Whidden


Friday, June 30, 2017

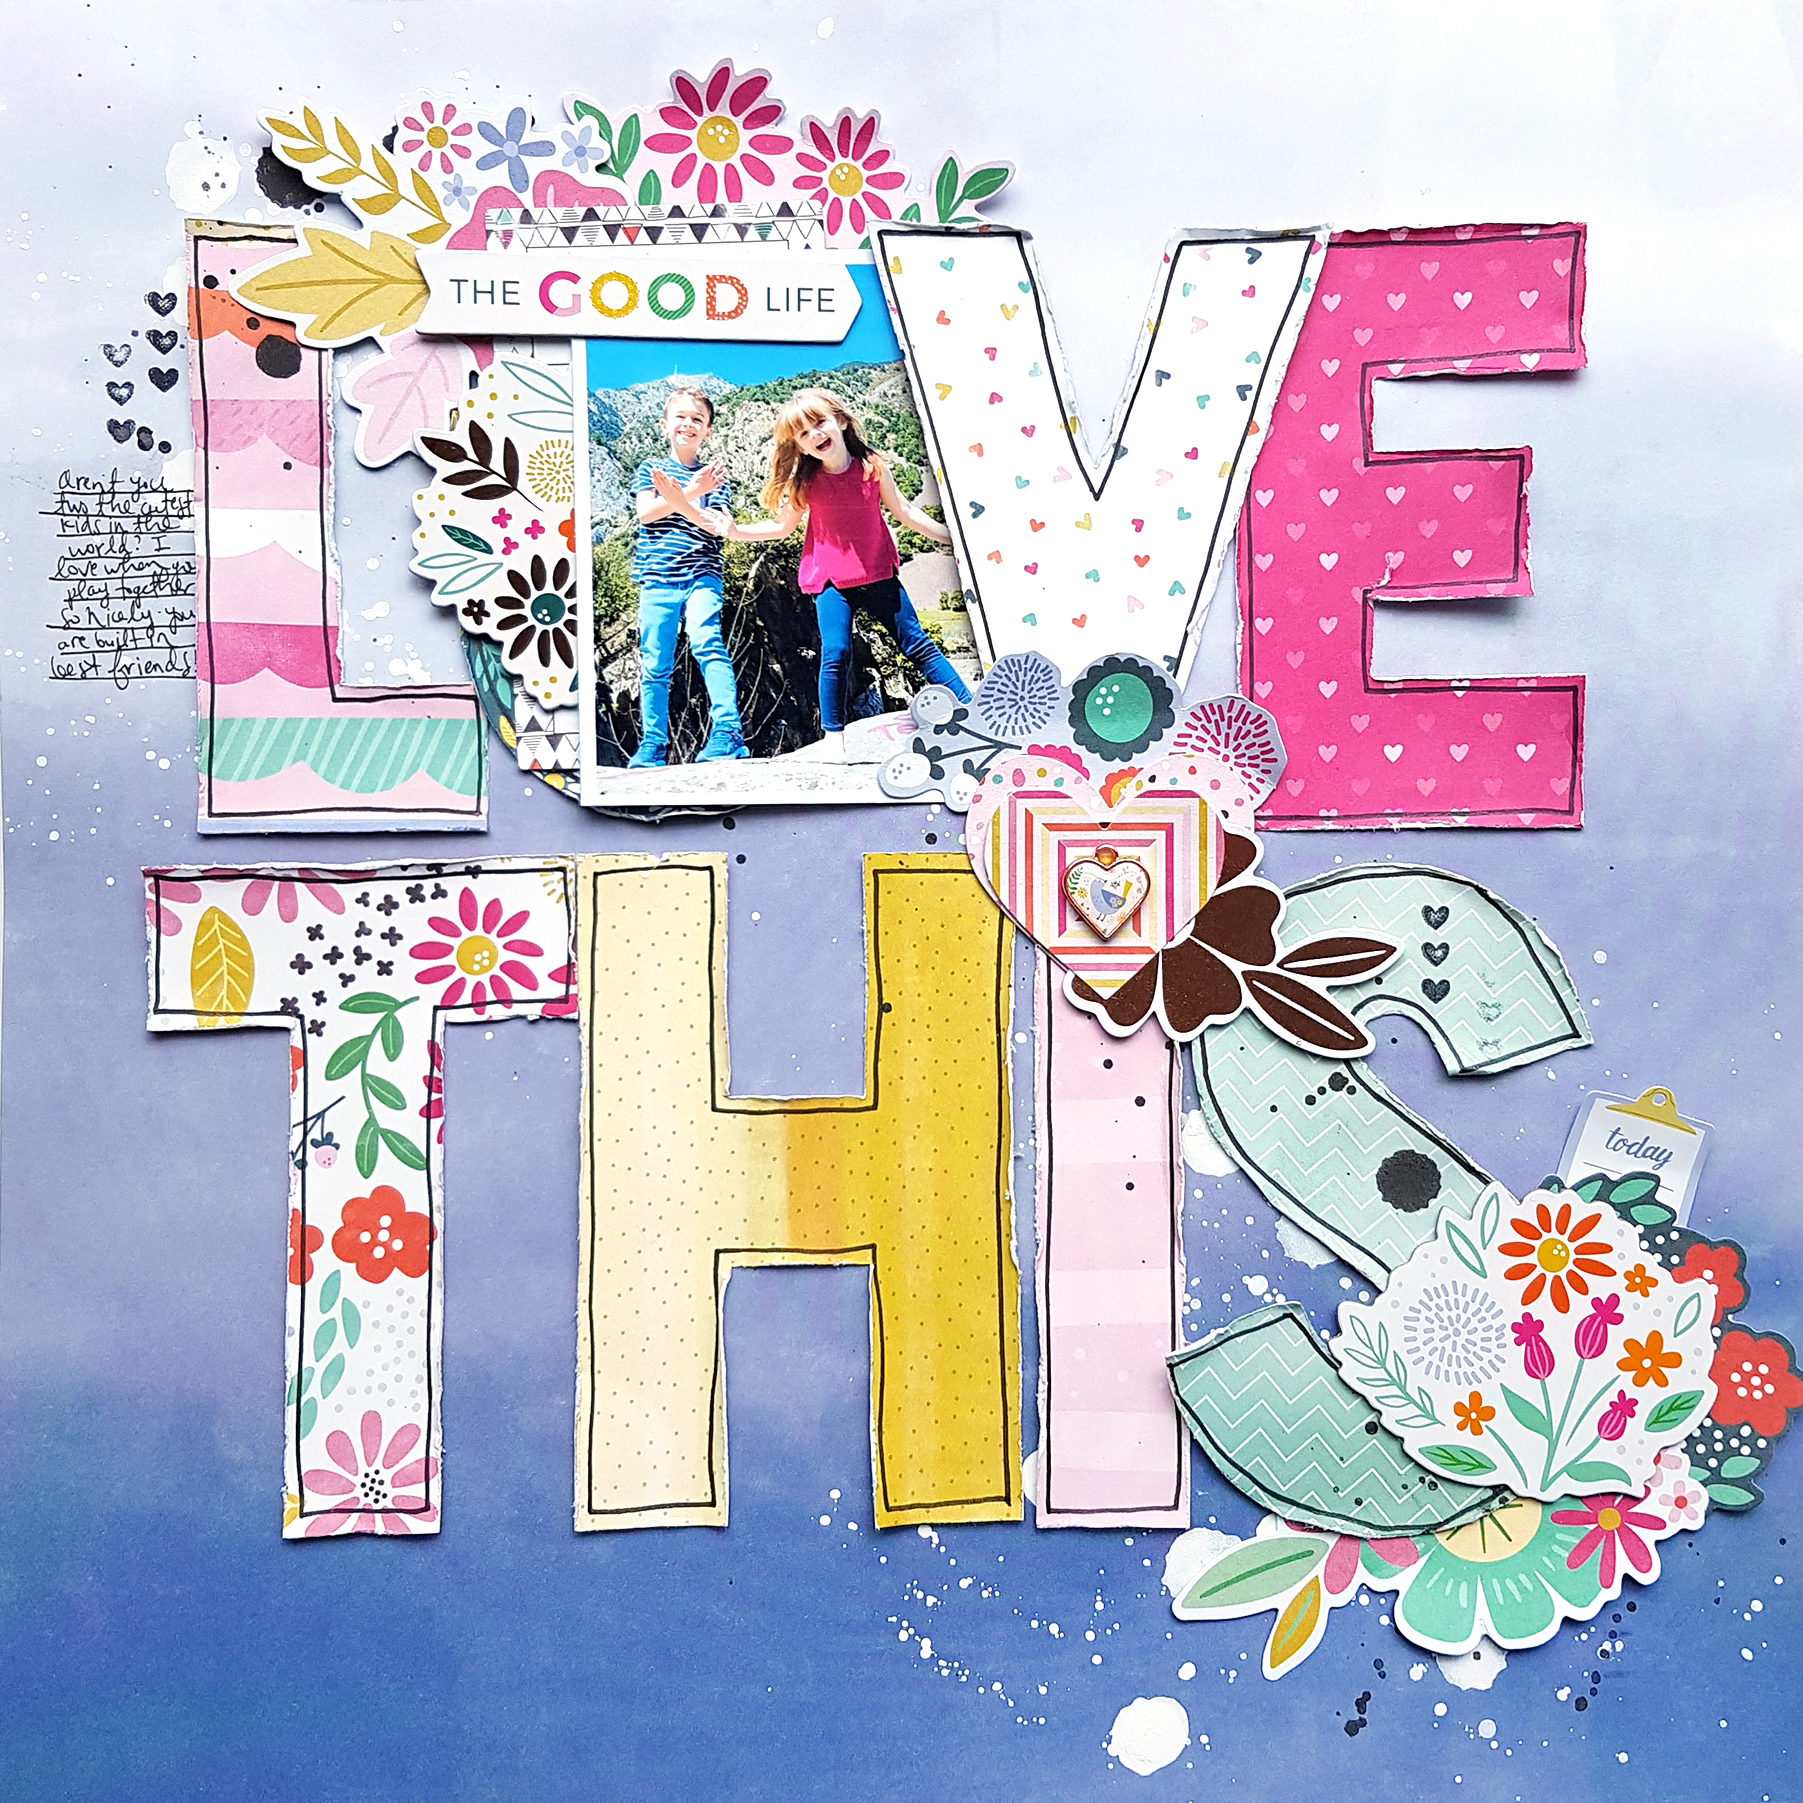
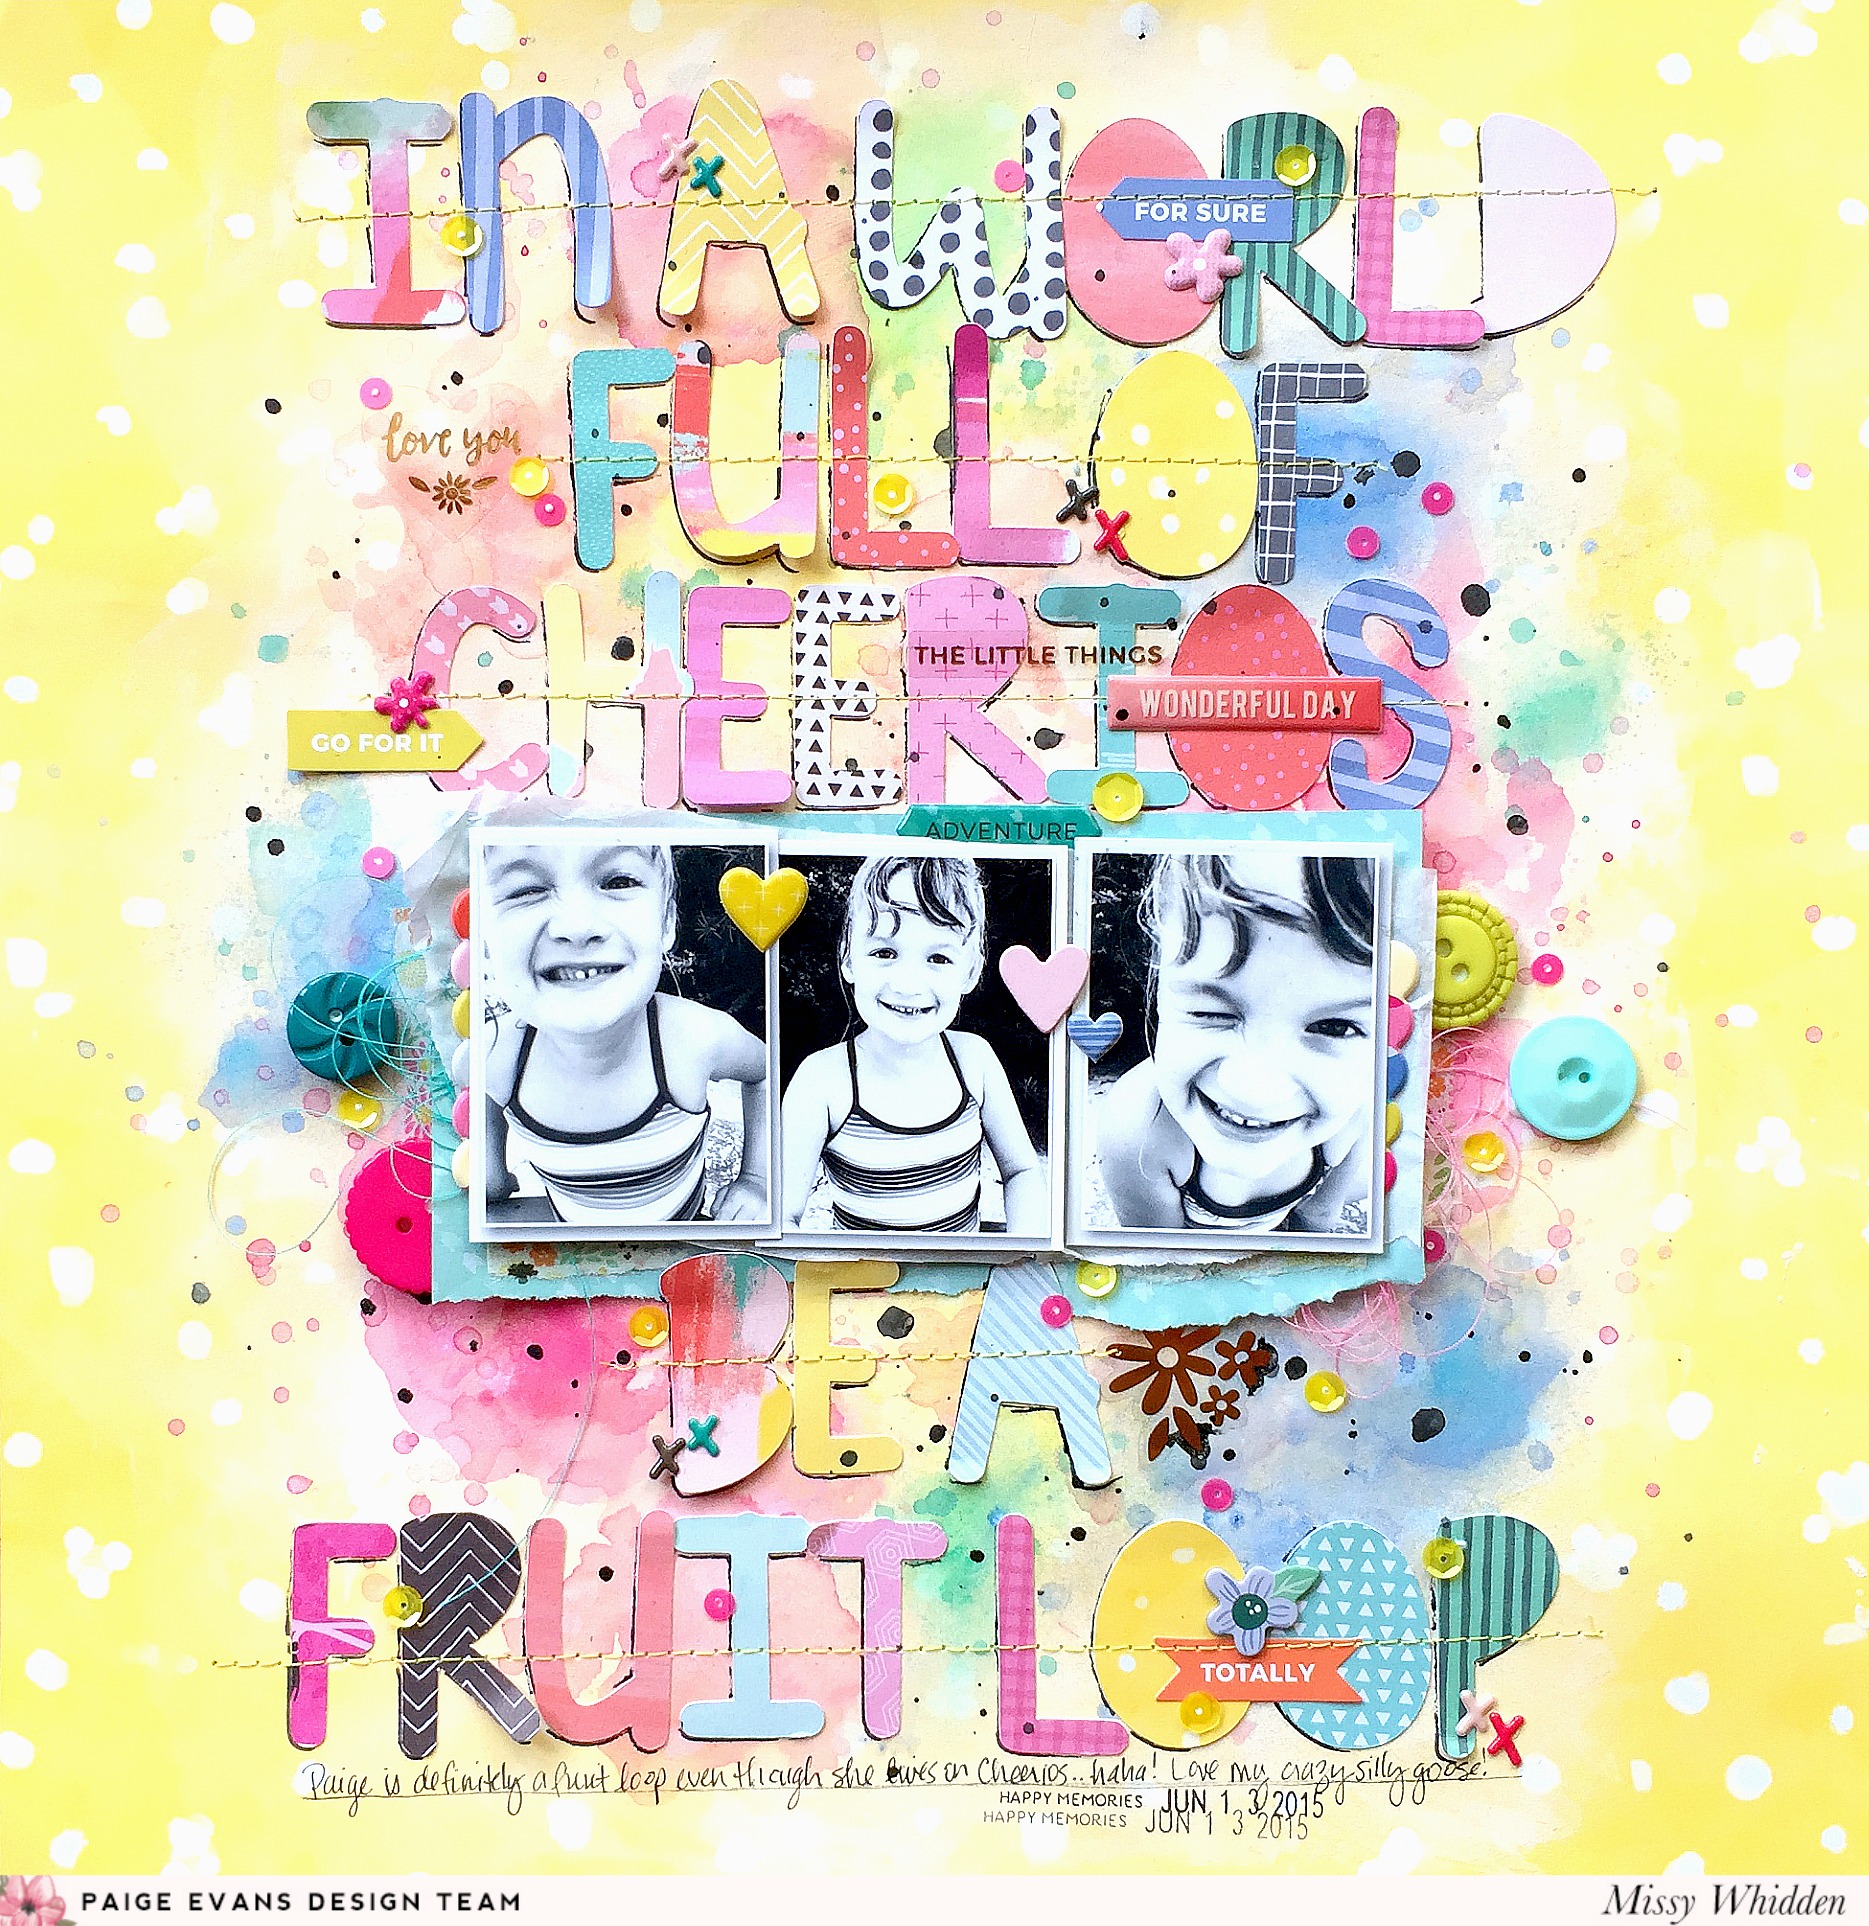
One quick glance at this layout and I bet you can guess who created it! Missy Whidden has such a beautiful and recognizable signature style - the mark of a true artist!
Hey there, friends! Missy here again and I’m sharing a new layout today featuring a few of my favorite techniques. I guess you could say mixed media is definitely my first favorite, but I also love using bright colors, large titles, and stitching. I also love using silly photos of my daughters. I found this awesome quote on Pinterest and had to use it on a page. I used an alpha font cut file from The Cut Shoppe and typed it into my Silhouette software. I chose papers from the Oh My HeartTake Me Away, and Fancy Free 6x6 Paper Pads. The smaller papers are perfect for cutting small shapes. I used Take Me Away Paper 11 as my background. For a few of the letters I did pull some papers from the Fancy Free and Oh My Heart 12x12 Paper Pads. I wanted a very bright and colorful layout and a mix of all these papers was just the ticket! I covered a big portion of my background paper with white gesso. This not only gives me some white space, but it also acts as a barrier so the mixed media won’t soak right into the paper. I used lots of watercolors to create all those splotches of color. Once it dried I played around with all the letters and photos until I got it like I wanted.
I used aqua paper from the Fancy Free 12x12 Paper Pad behind my photos and layered in some tissue paper. I added a bit of torn floral washi tape from the Oh My Heart Sticker Book as well as a few rose gold floral clear stickers. Those Buttons are from Fancy Free and that cute scalloped Puffy Sticker is from Oh My Heart. I wanted to add a pop of color to the solid black areas of my photos so I added a few Oh My Heart Chipboard Stickers and another Puffy Sticker. The sequins are from my stash.
To add a bit more color and texture, I machine stitched through all the lines of words with yellow thread. In random spots, I added a few stickers from the Oh My Heart Sticker Book and here I used a pretty flower from the Oh My Heart Chipboard Stickers. I used a few of the cute X stickers from the Fancy Free Puffy Sticker sheet as well. 
To make the letters stand out a tad more, I created some shadows with a black pen.
I hope this inspires you to create something fun using your favorite techniques! If you’re like me, you have more than one. I love this about scrapbooking… we get to combine all the things we love! Here is my process video:
 SUPPLIES: OH MY HEART6x6 Paper Pad12x12 Paper PadSticker BookPuffy StickersChipboard StickersTAKE ME AWAY: 6x6 Paper Pad, Paper 11FANCY FREE: 6x6 Paper Pad, 12x12 Paper Pad, Buttons, Puffy Stickers
Blog: littlenuggetcreations.blogspot.com  Instagram: @missywhidden  Pinterest: @missywhidden
Facebook: missy.whidden  YouTube: Missy Whidden
It's so fun for me seeing all these patterned papers put together to create a blast of color! Pattern paper is my first love and the more I can use on a layout, the merrier, so this layout is especially awesome!

Santorini Mini Album


Tuesday, June 27, 2017

It's Vacation Week on the Pink Paislee blog and here is a mini album I made for the occasion using the new Summer Lights collection! I just finished taking an online mini album class called Transparent Mini Album by one of my design team members, Stefanie Ried, over at Big Picture Classes. I walked away with the urge to make a mini album STAT!! We even went to Santorini last year just like Steffi so I was excited to incorporate some similar elements with a twist.

First, here is a video flip through of the album:

To make the album, I started by die cutting full-page photos and Summer Lights patterned papers using the "Travel Album Pages" cut file in the Silhouette Store. I recently made a YouTube video showing how easy it is to cut shaped photos into any cut file in your library - such a timesaving feature! As I worked on the album I ended up die cutting lots more photos and pages than what's included in the original cut file - I have a hard time narrowing photos down! I wanted to included them ALL and use ALL of the pretty Summer Lights papers!

For the cover I stitched the Summer Lights Thickers onto a transparency page and added the date to fill in the empty space since "INI" is a lot thinner than "SAN" and "TOR". Because the cover is see-through I wanted something colorful and eye-catching behind it. So I die cut the "stencil flower garden" page from white cardstock and backed it with lots of patterned papers like I love to do.

The next page has a little intro that I hand wrote above strips of patterned paper attached with machine stitching. I embellished a pair of sunglasses die cut with hand stitching and adhered it below. To help make the pages easier to turn, I often added a tab or paper clip or sticker of some sort to the side. In this instance I typed the country Santorini is in (Greece) on my We R Memory Keepers Typecast Typewriter and added it to a patterned paper tab with stitching.

There are quite a few stitched elements throughout this mini album! What can I say? I'm a creature of habit and love hand stitching! On this particular colorful polka dot paper found in Summer Lights I stitched a French knot in a coordinating color through each dot. I stamped the date we went to Santorini on the tab and the right spread is a full-page photo with a sentiment die cut adhered to the bottom.

I embellished this full-page photo with a little typed/printed/trimmed caption (the font is called Remington Noiseless) and added a floral puffy sticker from my Oh My Heart collection below. The right side is a mini pocket page protector where I've added four 2x2" square photos. You'll find lots of these in this album, again, because I couldn't narrow down my photos any more!

The mini album cut file the album is made from includes interactive pocket pages - I simply covered them with patterned paper and stitched around the edges for texture. In the pocket I tucked a few die cuts, a little bit of journaling, and more photos I had leftover and didn't want to toss.

The next spread is an enlarged photo across two pages. This is my absolute favorite photo of the day so it deserved to be well showcased. Like Steffi did in her album only with stamping and vellum, I stitched the island of Santorini through a transparent page and added mini alphabet stickers showing where the two cities we visited are in relation to the island. On the left photo page I layered a sentiment die cut over a shell die cut with stitching and adhered it over some white space so as not to be too distracting.

I like to include information about the places we visit so I referred back to my blog post recap about the day we went to Santorini and copied/pasted/printed it onto vellum. On the left spread I fussy cut some clouds from a Summer Lights paper, hand stitched around the edges, and adhered them to a pretty ombre woodgrain paper. Between the pages I added a "SUMMER" die cut and finished with a die cut tab stitched to the edge of the vellum.

Pocket of mini photos embellished minimally with a sentiment sticker and shell chipboard sticker.

The Summer Lights specialty paper is awesome with all the blocks of colors and sentiments and it's holographic - AND it's adhesive backed! So fun! All I did here was trim a 4 x 3" block, peeled off the backing, folded it in half, punched holes, and added it to the rings. I love this paper. Have I already mentioned that?! :)

Something I often do in my mini albums with little pocket pages is wrap washi tape around the edge for a pop of color - which is exactly what I did here!

I made my own paper clip embellishment by wrapping a piece of folded Oh My Heart floral washi tape around the end and stitching it in place - tucked onto the edge of another mini pocket page, it creates another interactive element helpful for turning to the next spread.

There were a lot of photos in a row, particularly ones of me and my husband, so I added a lovey dovey vellum insert to help break up the photos and add a fun layer. I used a punch to scallop the edge of the vellum as well as a couple pieces of patterned paper and then used my sewing machine to stitch a scalloped border.

All this full page photo needed was a piece of a chipboard wave sticker and a stitched tab with "You & Me" stamped on it (this roller stamp can be found in my Take Me Away collection).

At the top of this photo I journaled with a white pen a quote from Rick Steves - we swear by his travel guides on our adventures! This spread is of two different photos, but they sort of look like one enlarged photo trimmed in half. To help them not be confused as a single photo I added a gold glitter transparency (from a Maggie Holmes line) between and attached a seahorse die cut with a Take Me Away floral paper clip to the top right corner.

The next spread is a photo on the left and pocket page on the right. I added more die cuts and handwritten journaling on a tag in the pocket.

Here I white washed the background of this fun Summer Lights paper and then punched confetti hearts from more patterned paper. I added the hearts as well as sequins color-on-color in a gentle curve over the page. I love the way it turned out especially because I was struggling at first trying to figure out what to do on this page!

The left page is self explanatory hahaha! The right page is another interactive page that pulls out to reveal 3 sections front and back.

I wrapped pieces of Summer Lights washi tape around the entire accordion page, stitched around the edges, then embellished minimally in each section so it's not too busy and overwhelming. Sometimes simple is best! Although that's not very often the case when I scrapbook haha!

On the back side of the accordion pull-out page I stamped and wrote journaling, added a photo to the center, and adhered a large camera sticker to the last section. Done and done!

Even though it's almost at the end of the album, this stitched floral page is the very first page I made! I used the 6x8 Page Doodle Flowers cut file as a stitching template on a transparency and then used a white pen to draw in the smaller flowers.

Here are a few detail photos of some of the pages so far:

Believe it or not I still had a ton of photos I wanted to use some how, some way! So on the left page I adhered a few photos into a block collage and then used my sewing machine to stitch over each seam to create a quilted look. On the right page, I tried my hand at Steffi's famous machine stitching rays!

I've had some random floral and leaf sequins in my stash forever that perfectly match the Summer Lights collection so I made a small transparency pocket and added it between this spread for a fun pop of color. To help "turn the page" (which, by the way, is the name of my next Pink Paislee collection - shipping August 1st!!) I sandwiched a pair of chipboard seashell stickers on the edge and stitched through them.

There are a lot of churches in Santorini - I LOVE the stark white buildings agains the bright blue skies! I gathered all the church photos I could find from the day and added them to the next few pages.


The 2nd to last page is this fun scalloped page that is from the mini album cut file. I hand stitched through a "love this" heart die cut and adhered it to the flap.

On the inside of the scalloped page I adhered a piece of patterned paper, a chipboard seahorse, and then wrote more journaling.

For the last full spread I trimmed a "weekend" chipboard sticker in half and stitched it along with the "hello" piece for a simple embellishment. I love the abstract sunset/water Summer Lights paper which reminded me of the beautiful Santorini sunset, and I hadn't used it yet in the album so this was the perfect place for it. I stamped journaling lines and wrote my final thoughts.

On the back cover I tried something I've never done before! I used embossing ink and stamped the Oh My Heart flower bunch across a transparency page and then I used clear embossing powder and a heat gun to create this really neat texture - it almost looks like water!!

If you've made it all the way through, I applaud you! I know this was a long post with lots of photos but once I started making this album I kept going and going and adding more and more pages! Binder rings come in all sizes which is really handy for occasions like this when my album kept getting bigger and bigger - I just increased the size of binder rings and I was good to go!

The very last thing I did was make a dangling charm for the top ring - it's an assortment of buttons, sequins, jewels, an Oh My Heart heart charm, and tassel.


I hope you are inspired to use the Summer Lights collection to document your vacation memories! It's such a versatile line with beautiful colors!

SUPPLIES: Patterned paper, stickers, paper clips, die cuts: Pink Paislee; Vellum, cardstock, transparency paper, pen, adhesive: American Crafts; Cut files: Travel Album PagesStencil Flower Garden6x8 Page Doodle Flowers; Die cut machine: Silhouette Cameo 3; Thread: Coats & Clark; Embroidery floss: DMC

Favorite Technique Layout by Steffi Ried


This week I asked the designers sharing projects to create a layout in her "signature style". One quick glance at this layout and you know it's by Stefanie Ried! With the large photo, white background, and epic machine stitching, this trifecta of techniques is the ultimate "Steffi" layout!
Hello everyone, Steffi here back again with a new post! If you ask me about my favorite technique it is definitely sewing. I love all my colorful sewing threads and the look of seams in my mini books and on layouts. Sometimes it gets a little bit crazy and my sewing machine runs all over the layout. Just like this! I will show you how this layout was created in a photo tutorial.

As the sewing is in the foreground, I took a large photo and added the colorful rays. For this I have chosen different threads matching colors from the different Paige Evans collections.
Next, I marked the center point on the layout so I know from where I am sewing with the sewing machine the rays.
So that the colors blend into each other, I've sewn a few color beams into the previous color in between. Thus the transition is fluid.
I have partly sewn the decorations on the layout. First the beams were sewn and finally the individual parts. Then the layout is finished!
I hope you liked my favorite technique. And what is your favorite? Until next time!
Blog: steffiried.blogspot.com / Instagram: @steffiried / Pinterest: @steffiried / Facebook: stefanie.ried.96 YouTube: Steffi Ried
Steffi always inspires me to use my sewing machine more! The texture and color machine stitching adds can't be beat!

"Love This" Layout


Monday, June 26, 2017

Here is another one of the layouts from my Paige's Pages 12 class at Big Picture Classes!

LOVE THIS by Paige Evans
DESCRIPTION: I made another version of this layout using Take Me Away so this time I used Oh My Heart!
JOURNALING SAYS: Aren't you two the cutest kids in the world? I love when you play together so nicely - you are built in best friends! (I need to add somewhere that this photo was taken in Andorra la Vella, Andorra.)
HOW TO: Check out Paige's Pages 12 to watch the start-to-finish process video!
SUPPLIES: Patterned paper die cuts, heart charm, stickers, stamps: Oh My Heart by Paige Evans / Pink Paislee; Die cut machine: Silhouette Cameo 3; Title cut file: Paige Evans; Paint: Plaid; Watercolors: Loew Cornell; Pen, adhesive: American Crafts; Ink: StazOn
I'll be back to share my other three layouts from Paige's Pages 12 over the next few weeks with lots of other blog posts between :)

Mermaid Hair Don't Care Stitched Doily Layout


Saturday, June 24, 2017

Pink Paislee just released a new collection called SUMMER LIGHTS and I've been having a blast playing with it! The colors are right up my color-lovin' alley.
DESCRIPTION: I've still got about 20,280,183 doily shapes in my library that I haven't used so... another large doily background it is!
JOURNALING SAYS: Random pics of you are my favorite - a moment in time captured. (The main layout photo was apparently taken before I added the journaling directly on the photo - you can see it in the detail shots below and in the process video at the end).
HOW TO: Die cut a doily from Paper 08 of the Summer Lights collection by Pink Paislee then use spray adhesive to attach it to a vanilla cardstock background. Pierce a hole every 1/8" or so around the entire doily. Backstitch through the holes using colors of thread that match the colors of the patterned paper. I loooove the texture it adds! In the center of the page, adhere a photo onto doilies and layer in die cuts, stickers, and chipboard. Use a white pen to journal directly on the photo.
SUPPLIES: Patterned paper, die cuts, stickers: Pink Paislee; Cardstock, adhesive: American Crafts; Doilies: Wilton; Cut file: Doily by Loni Harris; Die cut machine: Silhouette Cameo; Embroidery floss: DMC; Pen: Edding
Check out how this layout came together in this start-to-finish process video:

I've already made another layout and an entire mini album with the Summer Lights collection that I'll share soon!
Paige Taylor Evans © // Quinn Creatives DESIGN