The One with the 25 DAYS Class!


Friday, October 31, 2014

So happy/elated/excited/thrilled to announce I'll be contributor in the 25 DAYS Class at Studio Calico taught by the one and only amazing Stephanie Bryan!

ABOUT 25 DAYS:
Join us for 25 DAYS and record all your special holiday moments with Stephanie Bryan. Stephanie will be teaching this class to coordinate with Ali Edwards' December Daily® kit, and she’ll share plenty of prompts and videos to give you that extra bit of motivation you need to make a gorgeous album during the busiest season of the year. Stephanie will share foundation pages beginning in November, and she’ll provide daily updates through December to culminate in a complete album.

BONUS DIGITAL FILES:
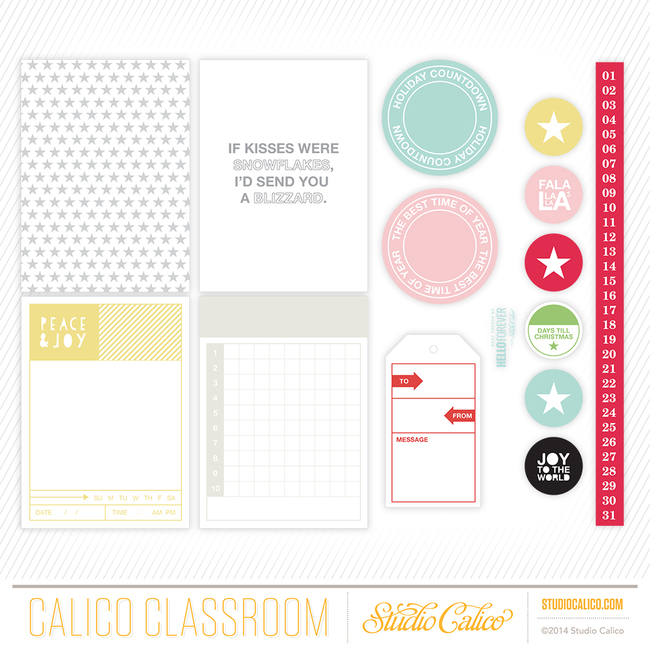
- Printable Journal Cards & Accents from Hello Forever (shown above)
- Cut files from Hello Forever
- Photo collage templates in 3x4, 4x6, and 6x8" from Shanna Noel
- Digital brushes of the stamps in the class kit (shown below)

Watch Stephanie talk about 25 DAYS in a little preview:

BY ENROLLING IN 25 DAYS YOU'LL RECEIVE:
- 7 videos from Stephanie covering getting organized, foundation pages, finished pages, and 4 techniques you can incorporate into your own pages.
- A PDF with a detailed look at Stephanie's foundation pages.
- Daily PDFs starting December 5th that share Stephanie's completed pages, along with her tips and tricks for keeping up with her album in the busy holiday season.
- A peek into the albums of our 5 contributors - Jen KinkadeKelly NoelNicole Reaves, & Paige Evans - they'll each be sharing 5 pages during December.
- Access to a class message board and gallery, where you can share and learn with your teacher and fellow students.
- Weekly challenges to inspire you to use what you've learned.

While supplies last, 25 DAYS students will receive an exclusive class kit (see image below!) containing journal cards, a 4x3" stamp set, tulle ribbon, badges, and die cut stars. This kit will ship for free, no matter where you live. Quantities are limited, so enroll now to reserve yours!

WHAT YOU'LL NEED:
Stephanie Bryan will be working with the class kit and a mix of items from the Ali Edwards' December Daily® kit and Studio Calico kits and completing her album in a Handbook
RECOMMENDED SUPPLIES FOR 25 DAYS:
If you'd like to work from your own stash, here are some products you might want to have on hand:
- Your favorite holiday papers, embellishments and journaling cards
- Holiday themed stamps
- Ink and mist in your favorite colors
- Alphabet and Number stickers, Thickers, or chipboard to mark each day
SPECIAL OFFER:
In order for the promo to apply correctly, you must have both the Merry and Bright foil countdown stickers and Number Wood Veneers in your cart. Code must be entered at checkout. Offer not valid on previous purchases. Refunds will not be issued for misused or non-entered codes. Offer expires 11/8/14 at noon EST and is valid while supplies last.

Hope to see you in the classroom of 25 DAYS!

The One with October 2014


Like the banner says:
Wish I could claim this as my own house, but alas, it's Pottery Barn :)

This October was SO MUCH FUN! I'm hoping to use most of these photos in an "October Occasionally" mini album in the next few weeks. Stay tuned.

We set up for Halloween in September, a tad early, but what can I say? I blame the PX (the army's version of Target) - they had Halloween stuff out at the beginning of September so we got some twinkle light strands and the kids wanted them up as soon as we got home, I just had to oblige :)

On October 14th Fox turned 4! We had our own little shindig on his actual birthday. 
And then on Saturday we had a party with a bunch of his friends. I recycled a lot of decorations from his 1st birthday party (that I guess I am now finally recovered from, enough to have another official party 3 years later!) 
Spooky spooky!

Foam boards I turned into headstones.
A betwitching Halloween garland from my mom's etsy shop - Tassel Love.
A LOT more kids came than I was planning on! It was a blast! Well, Fox cried the entire time, poor guy haha. "It's my party and I'll cry if I want to!"
The kids pretty much opened the present they brought Fox, it was funny. 
Not really related to spooky things, but they happened in October: Fox got a Justin Bieber haircut and he colored all over himself with a red marker.

Janey trying on the babysitter's glasses. Nerd alert! :)
Thank you Pinterest for the abundance of crafty ideas. We spent a morning painting paper plates like candy corn.

First you paint the outer ring orange, an inner ring of yellow, and leave the middle white. 
Trim them in slices like a pizza and you've got candy corn!

One of these years I'll get crafty and actually make my kid's costumes. This year I got Fox a Thor costume from a friend and I bought Jane's Elsa dress from Bailey's Blossoms. Done and done and I think they look pretty darn cute :)

Why yes Jane is carrying around a car. She is SO much like Fox. She wants to do everything he does, say everything he says, and be exactly like him.

I couldn't narrow them down. Can ya blame me?! :)

Chris was gone this week at a dental conference down in Garmisch so I took the kids solo to the ward Trunk-or-Treat. We only stayed for a half hour cuz the kids were running in opposite directions! I had about three mild heart attacks because I kept losing one of them!

We didn't make it out to the pumpkin patch this year and the commissary ran out of pumpkins pretty early in October. I read on Facebook that the commissary down in Vilseck had some so I was planning to go get a few this past Monday. But then I read on Facebook that the Grafenwöhr commisarry got a shipment and I (and half of the people on the base!) were there right after they opened and snagged a few. Success!

Last night we had a blast carving pumpkins. The smell of pumpkin guts is my fave :)
Fox's smiley face drawing haha. Fox's face haha.

Fox, being the silly boy he is with a hand fetish, didn't even reach inside once to scoop out seeds. That's the best part! Maybe next year. Mine is on the left, Fox's is in the middle (he re-did his smiley face with big holes like we told him to) and Chris's is on the right. Jane got the shaft.
I love that Chris cut Fox's pumpkin exactly like he drew it!
Then tonight was the big night! We went next door first.

And then the other next door.
The one day a year it's actually nice to have our houses super duper close together! Because on Halloween, time = candy!
Fox has got this trick-or-treating business down pat.
Such a memorable October. The holidays are getting more and more fun as the kids get older and more into them!

HAPPY HALLOWEEN!

The One with the Studio Calico WALDEN Layout Video


Thursday, October 30, 2014

I have a how to video up on the Studio Calico blog today featuring supplies from the WALDEN scrapbook kits (WALDEN, CONCORD, PINE HILL, and BAKER BRIDGE)!
 photo WithYoubyPaigeEvansforBlog.jpg
WITH YOU by Paige Evans

DESCRIPTION: For this layout I was asked to feature paper scraps - right up my alley, right?! I picked out papers from the kits that were softer and more muted to match the soft colors in the photos of me and Fox.

WALDEN:


PINE HILL:

BAKER BRIDGE - no papers, but I did use a lot of embellishments from this kit:

 JOURNALING SAYS: I love hanging out with you Fox! You make me laugh, you pick me flowers, you give me hugs, you're so sweet! I love you!

HOW TO: Punch two squares from each selected pattern (in the video I punched three squares, but that ended up being too many - unless you want leftovers for another project!). Trim each square in half to make a bunch of triangles. Lightly draw a line using a pencil diagonally across a light gray cardstock layout background. On the bottom right corner, begin placing the triangles in right angles. Flip over all of the triangles, place a bit of adhesive on each triangle, then you can place the paper pieces more quickly. There will be gaps because I wasn't making any kind of pattern, but I like the consistent look of inconsistencies. Once all the triangles are placed, trim off the excess. Add washi tape across the edge to define the border. Place photos in the middle then layer and embellish around the photos and add a title. Journal on a die cut under the right photo. Drop white spray mist around the layout to finish.

VIDEO: Here is the video to watch how this layout was made from start-to-finish:
SUPPLIES: Scrapbook kits: WALDEN CONCORDPINE HILL, and BAKER BRIDGE by Studio CalicoCardstockadhesivepen: American Crafts; Enamel dots: Studio Calico; Spray mist: Mister Huey's by Studio CalicoKesi'Art; Ink: StazOn

 photo WithYouDetail1byPaigeEvansforBlog.jpg
 photo WithYouDetail2byPaigeEvansforBlog.jpg
Thanks for taking a looksy!

The One with the American Crafts HALLOWEEN Layout


Wednesday, October 29, 2014


I have a layout up on the American Crafts blog with a Halloween theme!
 photo TrickorTreat2013byPaigeEvans.jpg
TRICK OR TREAT 2013 by Paige Evans

Description: I was totally inspired by Christin Grønnslett for this layout. Sometimes when I'm in a creative rut I find it helpful to try new techniques and styles to push me in new directions. So, thank you Christin for inspiring me :)

Journaling says: You wanted to be a spooky ghost for Halloween and I had so much fun making your costume at home! Boo!

How to: Watercolor shades of orange across a white cardstock layout background then drop white acrylic paint and black India ink around it - let the cardstock dry. Layer patterned paper blocks and a grid of photos on the center. Tuck Halloween-themed tags, die cut, wood veneer, cork, stickers, and more under and around the photos. Journal on a tag and stamp the date below. Glue sequins all around to finish. 

Supplies: Cardstock, patterned paper, cork, wood veneer, stickers, sequins, die cuts, roller date stamp, pen, adhesive: American Crafts; Ink: StazOn; Watercolors: Mister Huey's by Studio Calico; India ink: ProArt; Paint: Americana
 photo TrickorTreat2013DetailbyPaigeEvans.jpg
Happy (ALMOST!) Halloween!

The One with Studio Calico WALDEN Layouts!


Monday, October 27, 2014

The WALDEN kit and add ons: CONCORDPINE HILL, and BAKER BRIDGE are now available for subscribers at Studio Calico!

Another winning month - I made SIX layouts! I'll share five today and the sixth is coming in a start-to-finish video on Thursday. The colors, the themes, the embellishments. So. Much. Goodness. Let's begin!
 photo BirthdayGirlbyPaigeEvansforblog.jpg
BIRTHDAY GIRL by Paige Evans

DESCRIPTION: So thankful to Catherine for asking me to create more exclusive cut files this month! Here is the background cut file for November that I featured on this WALDEN main kit only layout using my Silhouette CAMEO:

JOURNALING SAYS: At two years old you are always talking, pestering Fox, looking for ways to get into mischief, a picky eater, great hugger, so darn cute, loves new people, and all-around darling! Love you!

HOW TO: Die cut the WALDEN background cut file from white cardstock. Hand cut diamonds from the patterned papers in the WALDEN kit then stitch them between the die cut diamonds. Back the die cut page with colorful floral patterned paper. Print and cut out the WALDEN printable by In a Creative Bubble, WALDEN printable by Hello Forever, and the WALDEN labels by Hello Forever. Layer a journaling card printable, doily, photo, and labels/sentiments on the bottom left corner, stamp the date in black ink, add a wood veneer heart, and curve the title around the photo using the puffy Thickers. On the top right corner layer printables, write journaling, and stick on a wood veneer heart. Drop blue spray mist around the layout to finish.

SUPPLIES: Scrapbook kit: WALDEN by Studio CalicoWhite cardstockadhesive, pen, roller date stamp: American Crafts; Ink: StazOn; Printables: In a Creative Bubble for Studio Calico and Hello Forever for Studio Calico; Label printables: Hello Forever for Studio Calico; Spray mist: Mister Huey's by Studio Calico; Sewing machine: Brother; Thread: Coats & Clark; Background cut file: Paige Evans for Studio Calico; Die cut machine: Silhouette CAMEO

*********************************************************************************

 photo HappyDaybyPaigeEvansforBlog.jpg
HAPPY DAY by Paige Evans

DESCRIPTION: I know, I'm a "one trick pony," but I can't help it - this wreath shape from the WALDEN Christmas Stamp set was calling my name and begging to be die cut with my Silhouette CAMEO!
JOURNALING SAYS: We had such a fun time eating treats and eating ice cream and exploring Karlovy Vary in the Czech Republic. We can't wait to go back!

HOW TO: Turn the digital brush wreath from the WALDEN Christmas Stamp set into a cut file then die cut it from white cardstock. Back each section with patterned papers in the WALDEN kit. Adhere the "wreath" on an aqua cardstock layout base. Tuck printable labels under three sides - journal on the bottom two and stamp the date in black ink on the top label. Layer printables, a photo, fox badge (how appropriate for Fox!), alphabet stickers, and wood veneer arrow inside the wreath. Drop white spray mist around the layout to finish.

SUPPLIES: Scrapbook kit: WALDEN by Studio Calico; Cardstock (aqua, white), adhesivepenroller date stamp: American Crafts; Ink: StazOn; Printables: In a Creative Bubble for Studio Calico and Hello Forever for Studio Calico; Label printables: Hello Forever for Studio Calico; Spray mist: Mister Huey's by Studio Calico; Wreath cut file: WALDEN Christmas Stamps by Studio Calico; Die cut machine: Silhouette CAMEO

*********************************************************************************

 photo AllOvertheWorldbyPaigeEvansforBlog.jpg
MAKE MEMORIES ALL OVER THE WORLD by Paige Evans

DESCRIPTION: On this layout I wanted to feature the Amy Tangering stitching template in the CONCORD add on. Originally I thought it would be fun to feature tiny photos of us from all over Europe, but it just didn't fit. Future layout perhaps!

JOURNALING SAYS: It felt like we were on top of the world in Mürren, Switzerland!

HOW TO: Watercolor with a rainbow of colors across the top half of a vanilla cardstock layout base - let it air dry completely or use a hair dryer to quicken the process. Pierce holes for stitching using the Amy Tangerine template in the CONCORD add on across the top. Back stitch through the holes, changing colors of thread where the paint changes color. Yes, it's a time-consuming labor of love, but I enjoy it so! Back a wood veneer earth with a photo then layer it over printable labels and a notebook page die cut on the bottom center of the layout. Stamp the date in black ink, add chipboard letter stickers (from the PINE HILL add on) in a curve to complete the title, and write journaling on a label. Drop white spray mist around the layout to finish.

SUPPLIES: Scrapbook kits: CONCORD and PINE HILL by Studio CalicoVanilla cardstockadhesivepenroller date stamp: American Crafts; Label printables: Hello Forever for Studio Calico; Spray mist: Mister Huey's by Studio Calico; Watercolors: Mister Huey's Watercolors Set by Studio Calico; Ink: StazOn

*********************************************************************************

 photo FreeasaBirdbyPaigeEvansforBlog.jpg
FREE AS A BIRD by Paige Evans

DESCRIPTION: The other cut file I designed for the month is these feathers:
So with my handy dandy Silhouette CAMEO I die cut them from selected papers from all of the kits (WALDENCONCORDPINE HILL, and BAKER BRIDGE) and used them as a whimsical background.

JOURNALING SAYS: I love to watch you run free, without a care in the world.

HOW TO: Watercolor muted colors across a white cardstock layout background and let it dry. Meanwhile, die cut the WALDEN feather cut files from selected papers in all of the kits (WALDENCONCORDPINE HILL, and BAKER BRIDGE). Back three of the outlined feathers with black & white photos then arrange them along with the rest of the feathers on the layout. Stitch the feathers in place. Create a title on the bottom right corner and journal below. Minimally embellish with puffy star stickers, a button, and die cuts as shown.

SUPPLIES: Scrapbook kits: WALDENCONCORDPINE HILL, and BAKER BRIDGE by Studio CalicoWhite cardstockadhesivepen: American Crafts; Watercolors: Mister Huey's Watercolors Set by Studio Calico; Sewing machine: Brother; Thread: Coats & Clark; Die cut machine: Silhouette CAMEO

*********************************************************************************

 photo DetailsbyPaigeEvansforBlog.jpg
DETAILS by Paige Evans

DESCRIPTION: Even after creating my four required layouts (actually five, including the start-to-finish video layout coming Thursday!) I still felt the itch like I wasn't quite finished yet! The die cuts from the Open Book by Maggie Holmes ephemera pack in the CONCORD add on just had to be used. All of them. On one layout. I left only a few out!

JOURNALING SAYS: Can we just take a second to talk about how darling you are? Even when you're pushing our buttons you're cute!

HOW TO: Place the open oval floral frame in the center of a pink cardstock layout base. Glue the gold baker's twine from the BAKER BRIDGE add on around the frame and tie a bow of it below. Layer nearly all of the die cuts from the Open Book by Maggie Holmes ephemera pack in the CONCORD as well as a couple of the vellum leaf die cuts from the BAKER BRIDGE add on under and around the frame. Trim a black & white photo into a slightly smaller oval and place it inside the frame. Lift up a few of the die cuts with foam squares and bend up other edges slightly to create dimension. Stamp the date in black ink on the bottom, glue a few sequins and enamel dots around in a visual triangle, then drop black spray mist around the layout to finish.

SUPPLIES: Scrapbook kits: CONCORDPINE HILL, and BAKER BRIDGE by Studio CalicoCardstockadhesivepenroller date stamp: American Crafts; Enamel dots, sequins: Studio Calico; Spray mist: Mister Huey's by Studio CalicoKesi'Art; Ink: StazOn

*********************************************************************************

Studio Calico offers three types of monthly kits - Scrapbook, Card, & Project Life® - as well as add on kits and shop items to complement them. A new kit is revealed on the 27th of each month (at noon EST if you're a subscriber, at midnight EST if you aren't). For more information (or to start your own subscription!), visit StudioCalico.com!

See you again at the next reveal on Thanksgiving Day - November 27th! 
Paige Taylor Evans © // Quinn Creatives DESIGN