Mixing Up Some Magic Layout by Noelle Culp


Thursday, August 31, 2023

Hi crafty friends! Noelle Culp here today with a new layout featuring using Paige's Mixer and Holly Sprig cut files as well as her Sugarplum Wishes collection!
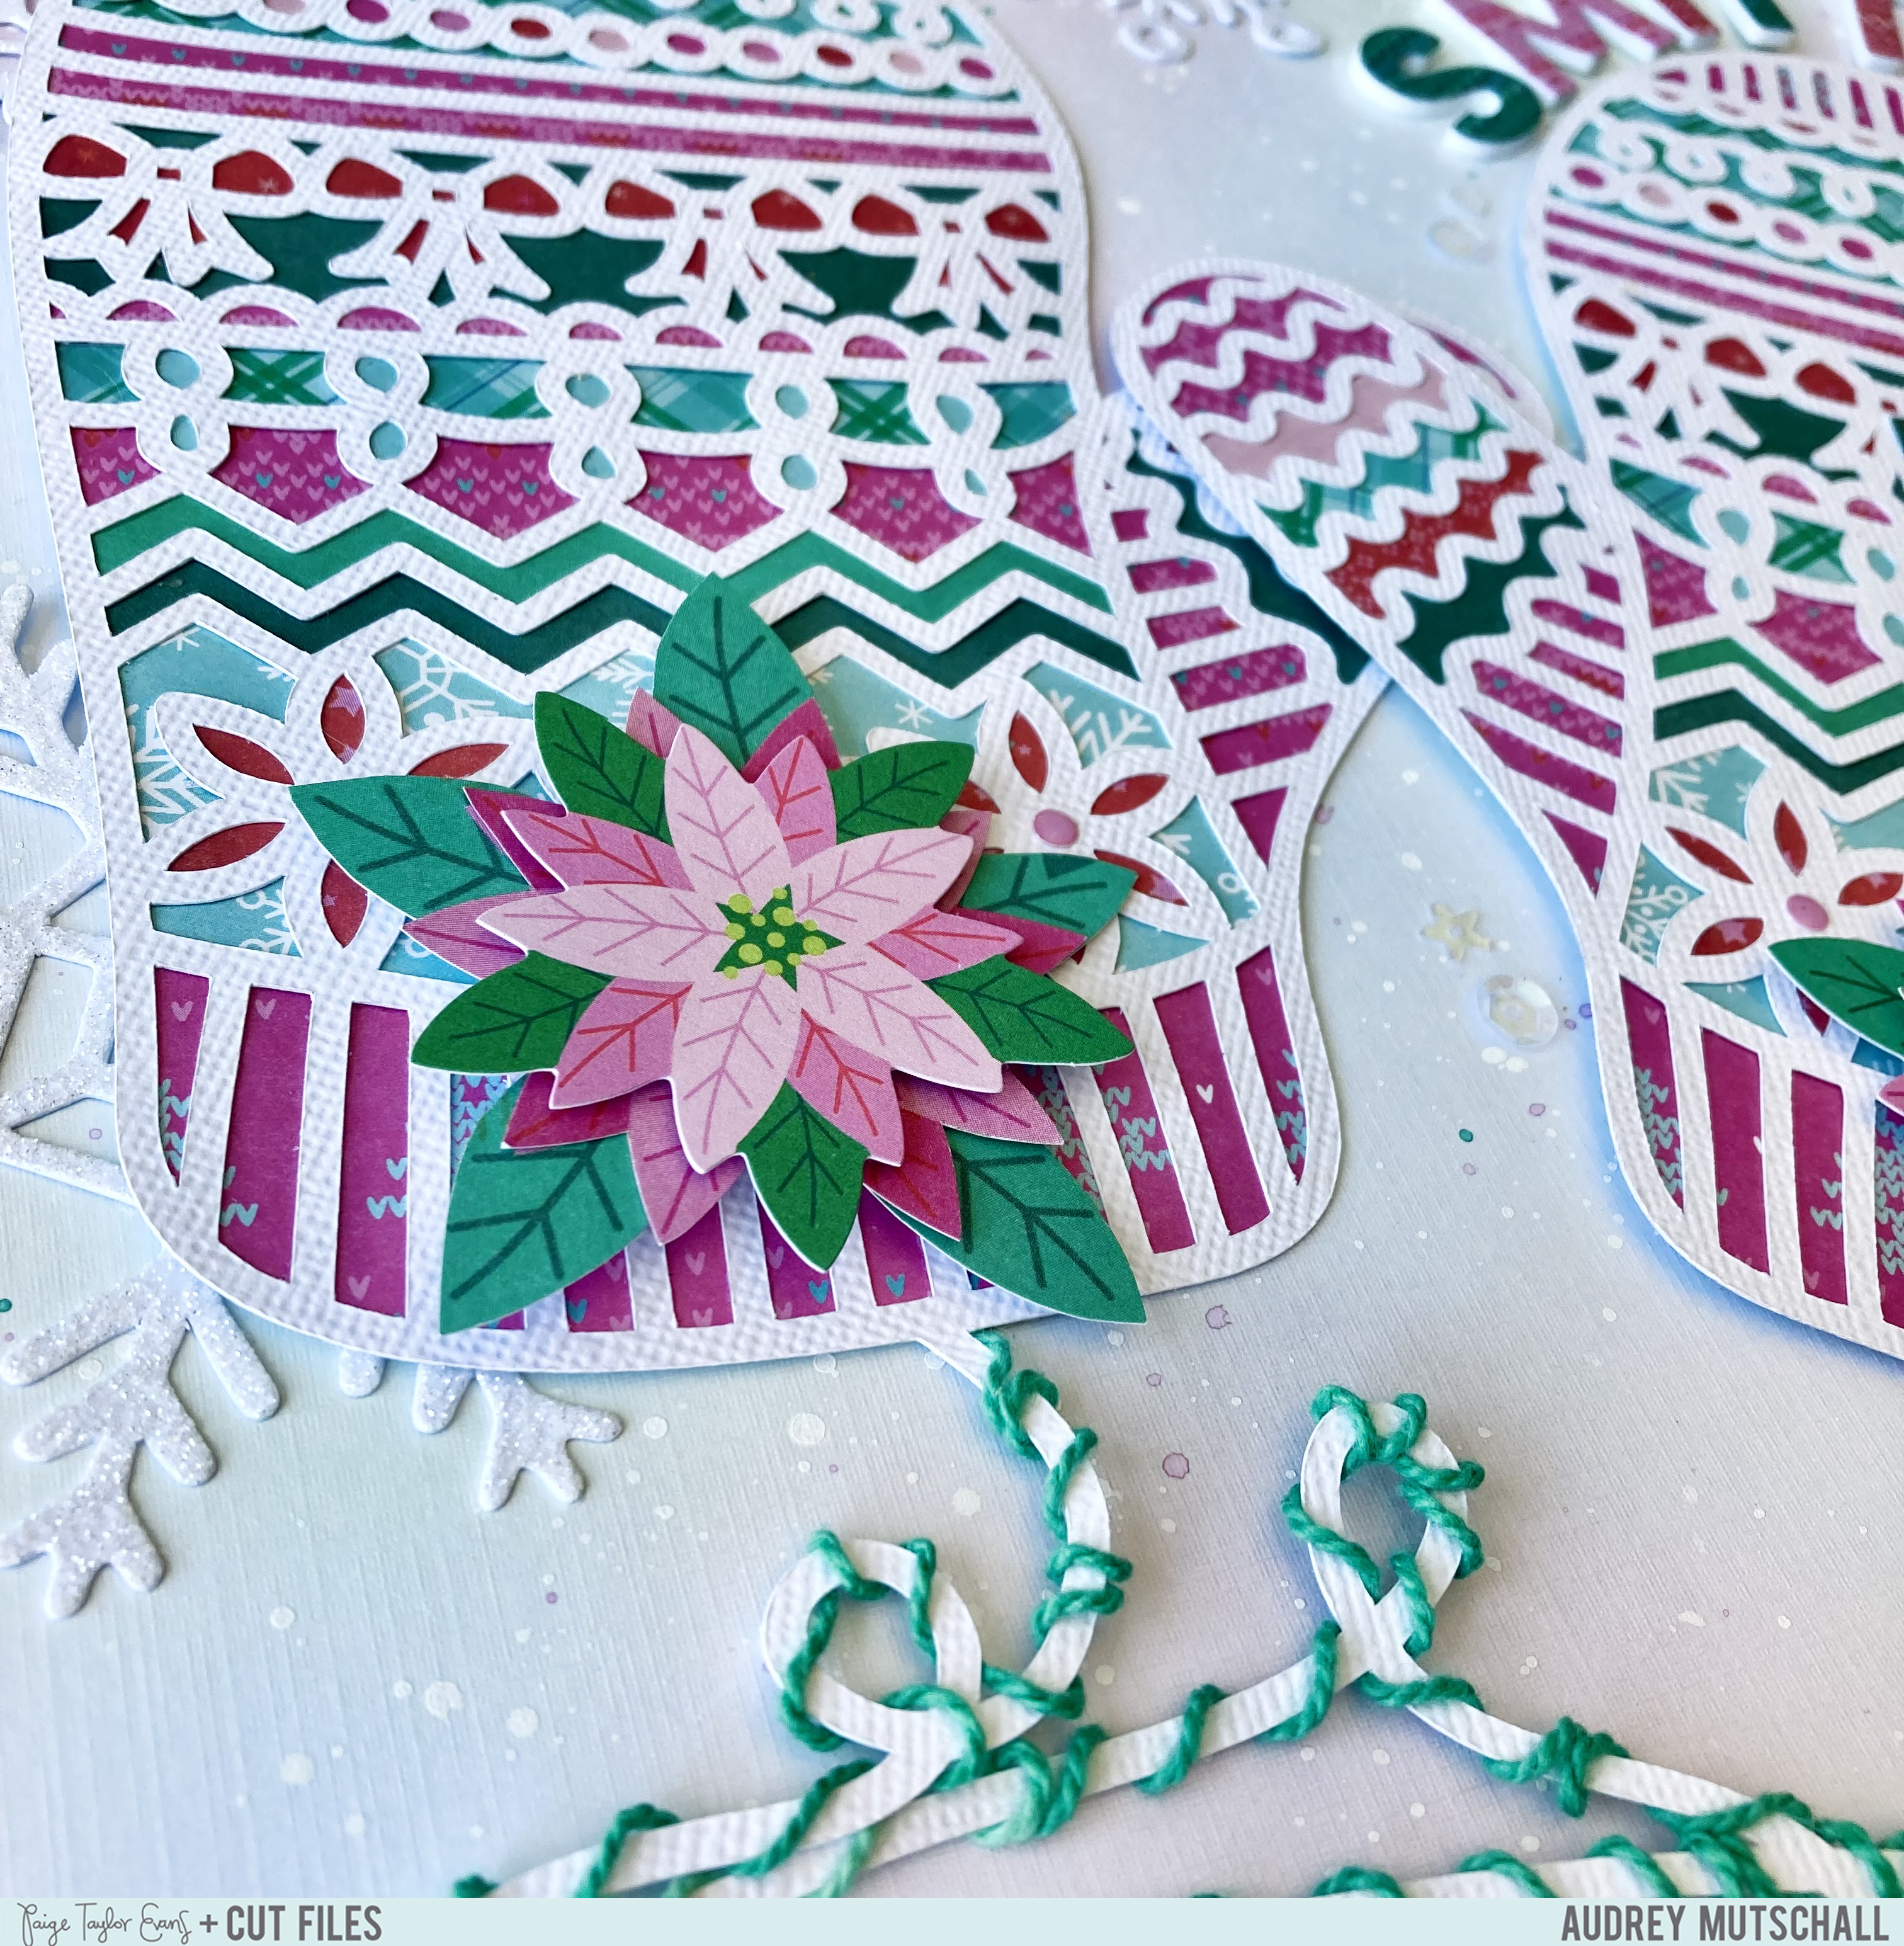
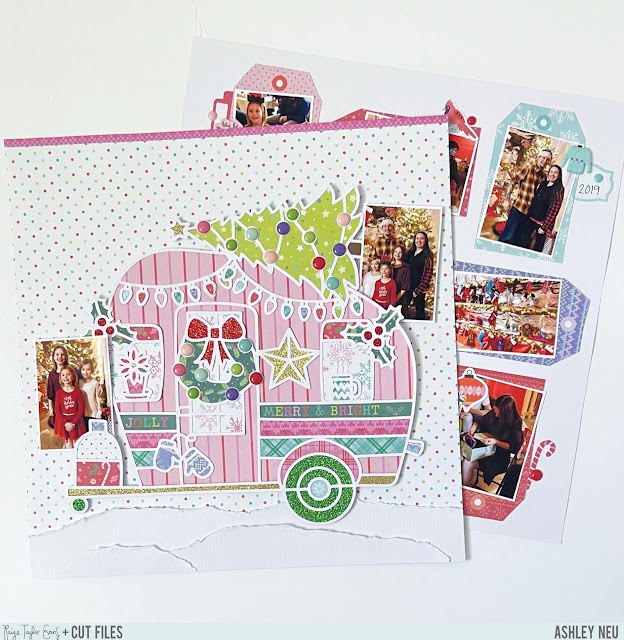
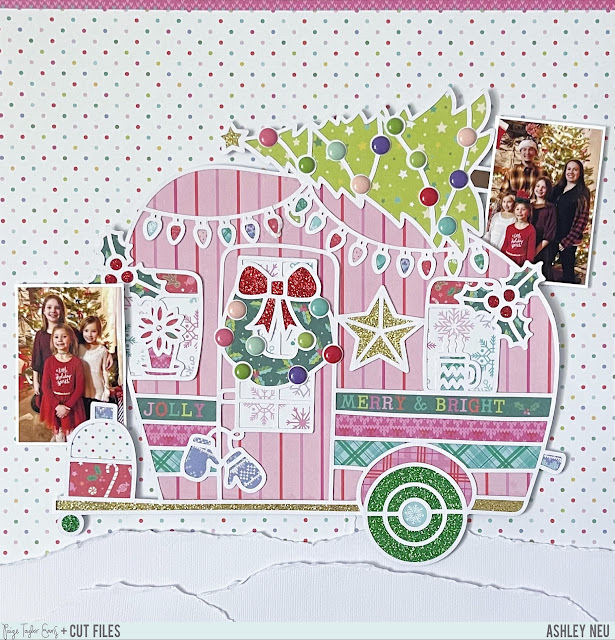
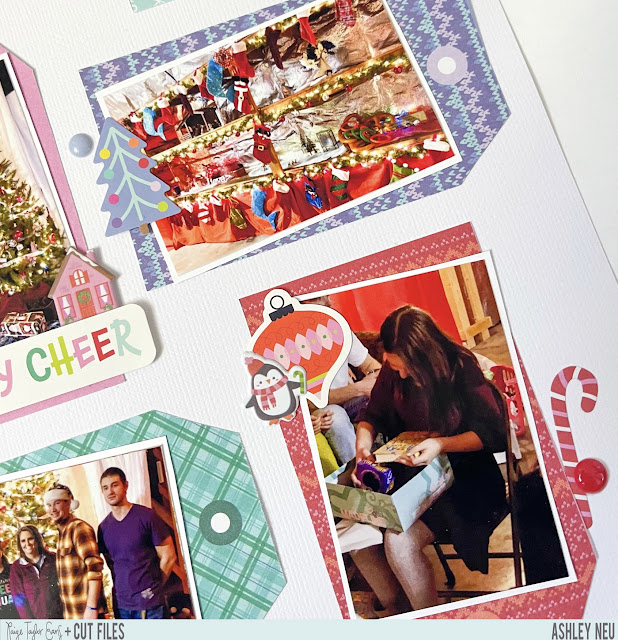
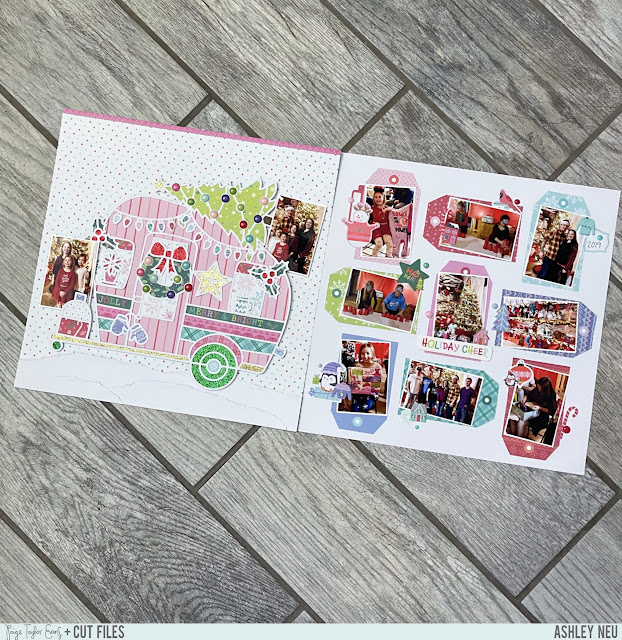
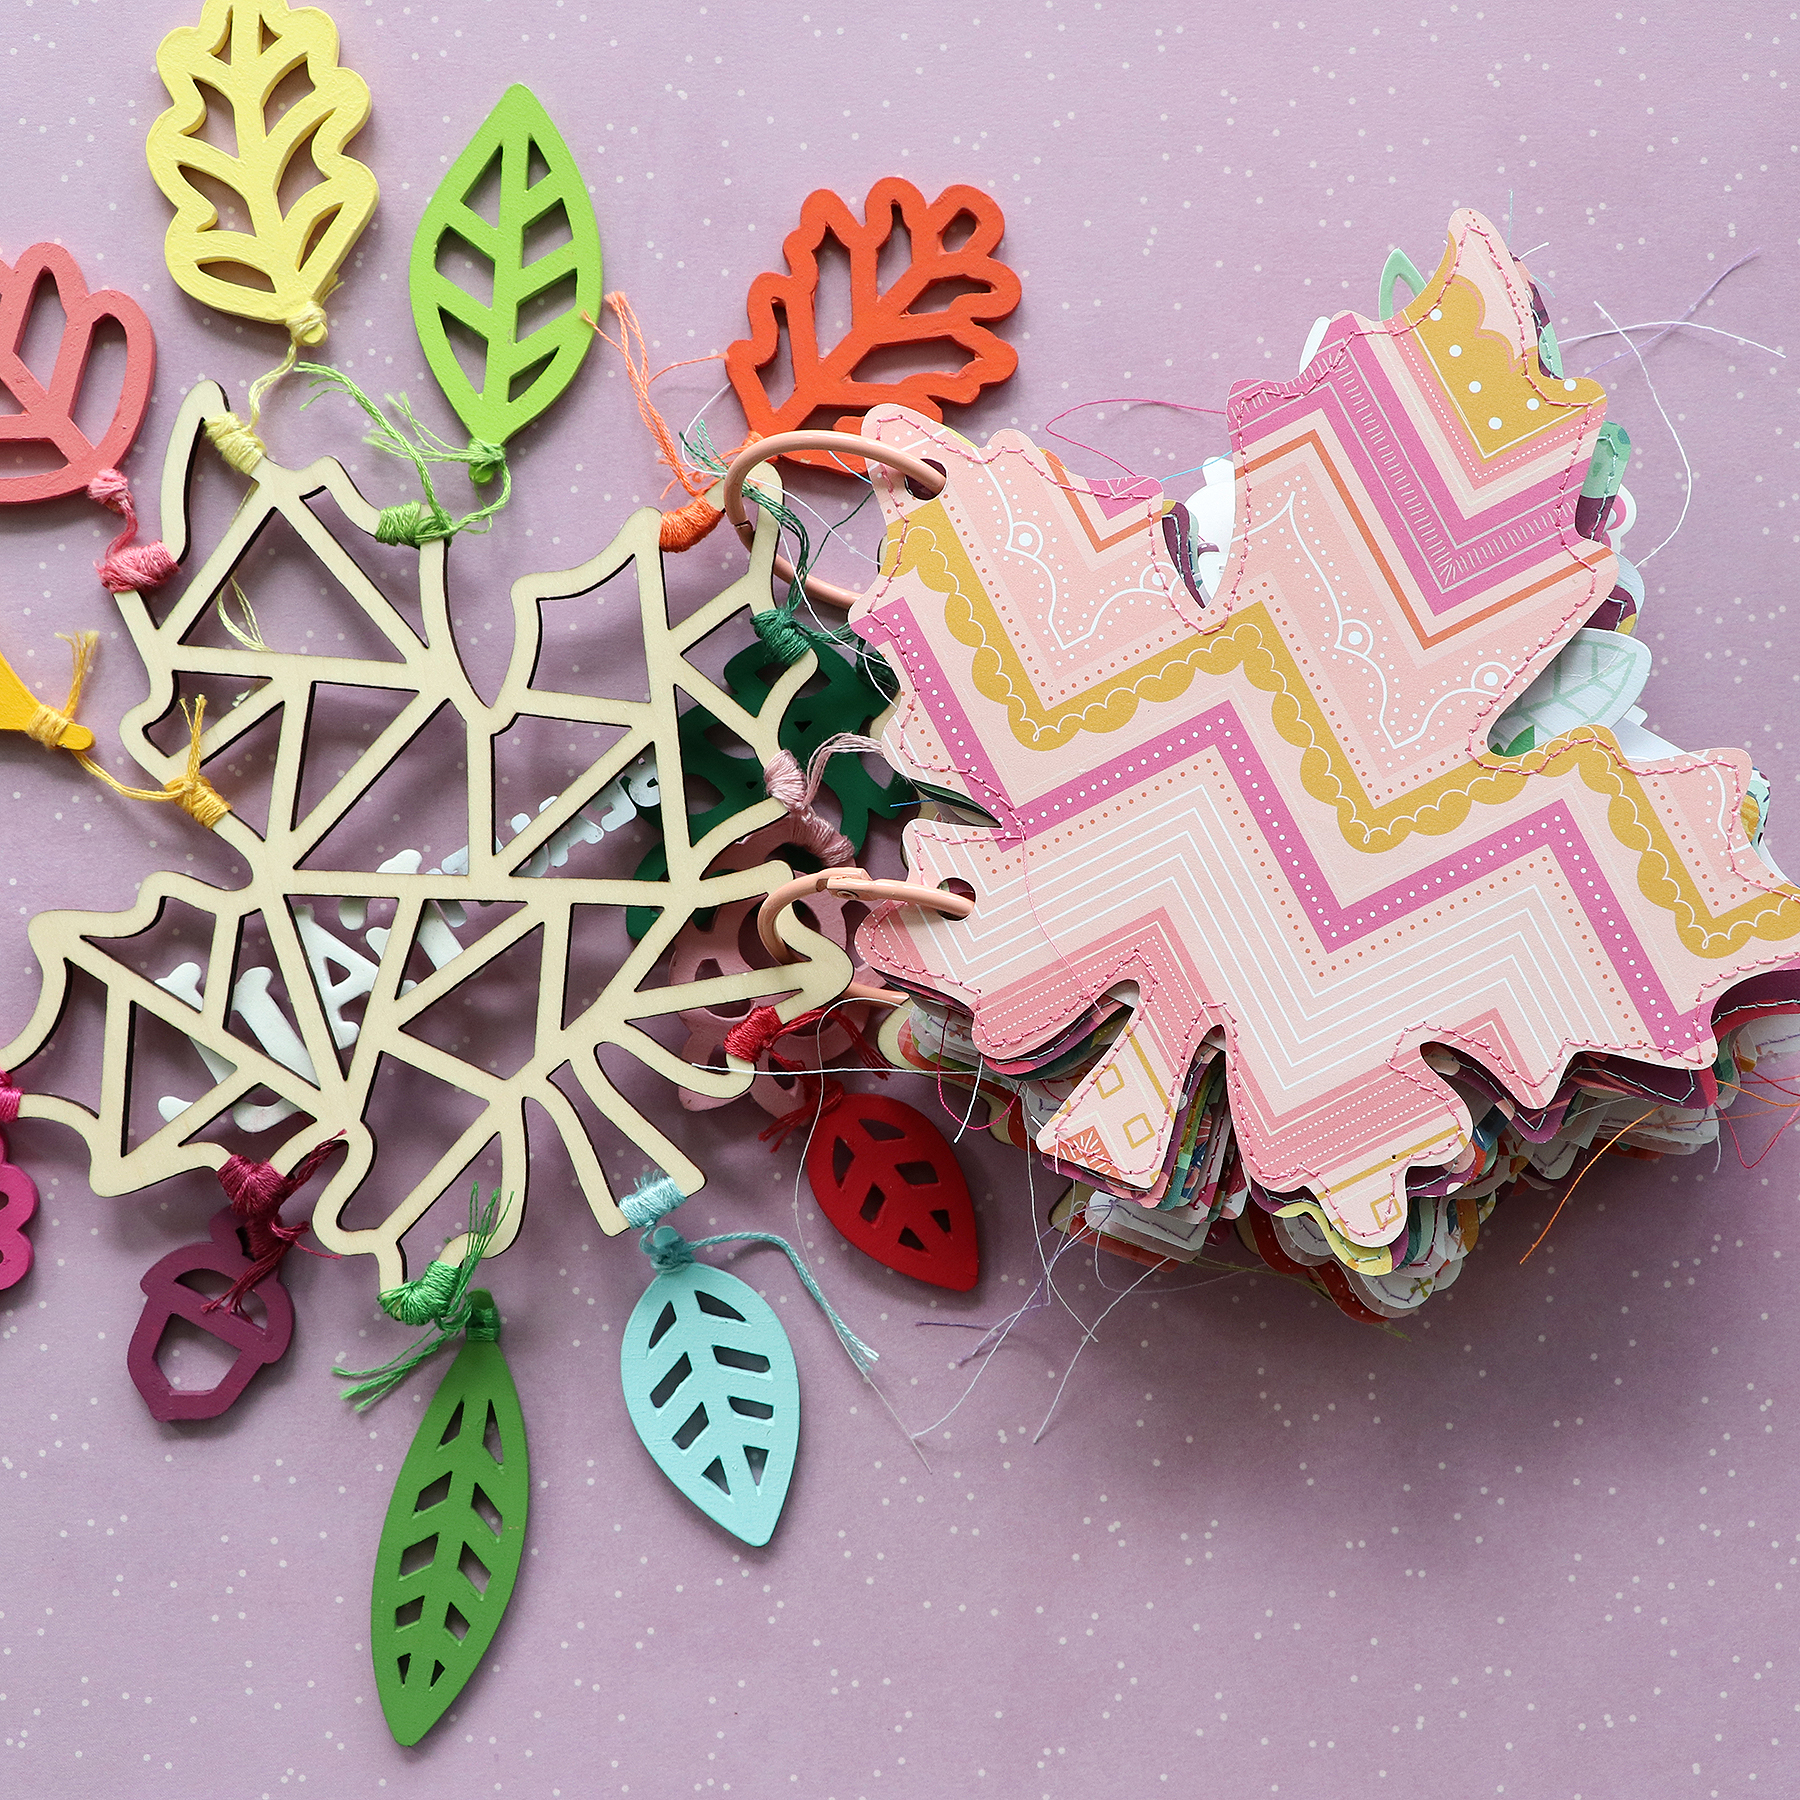
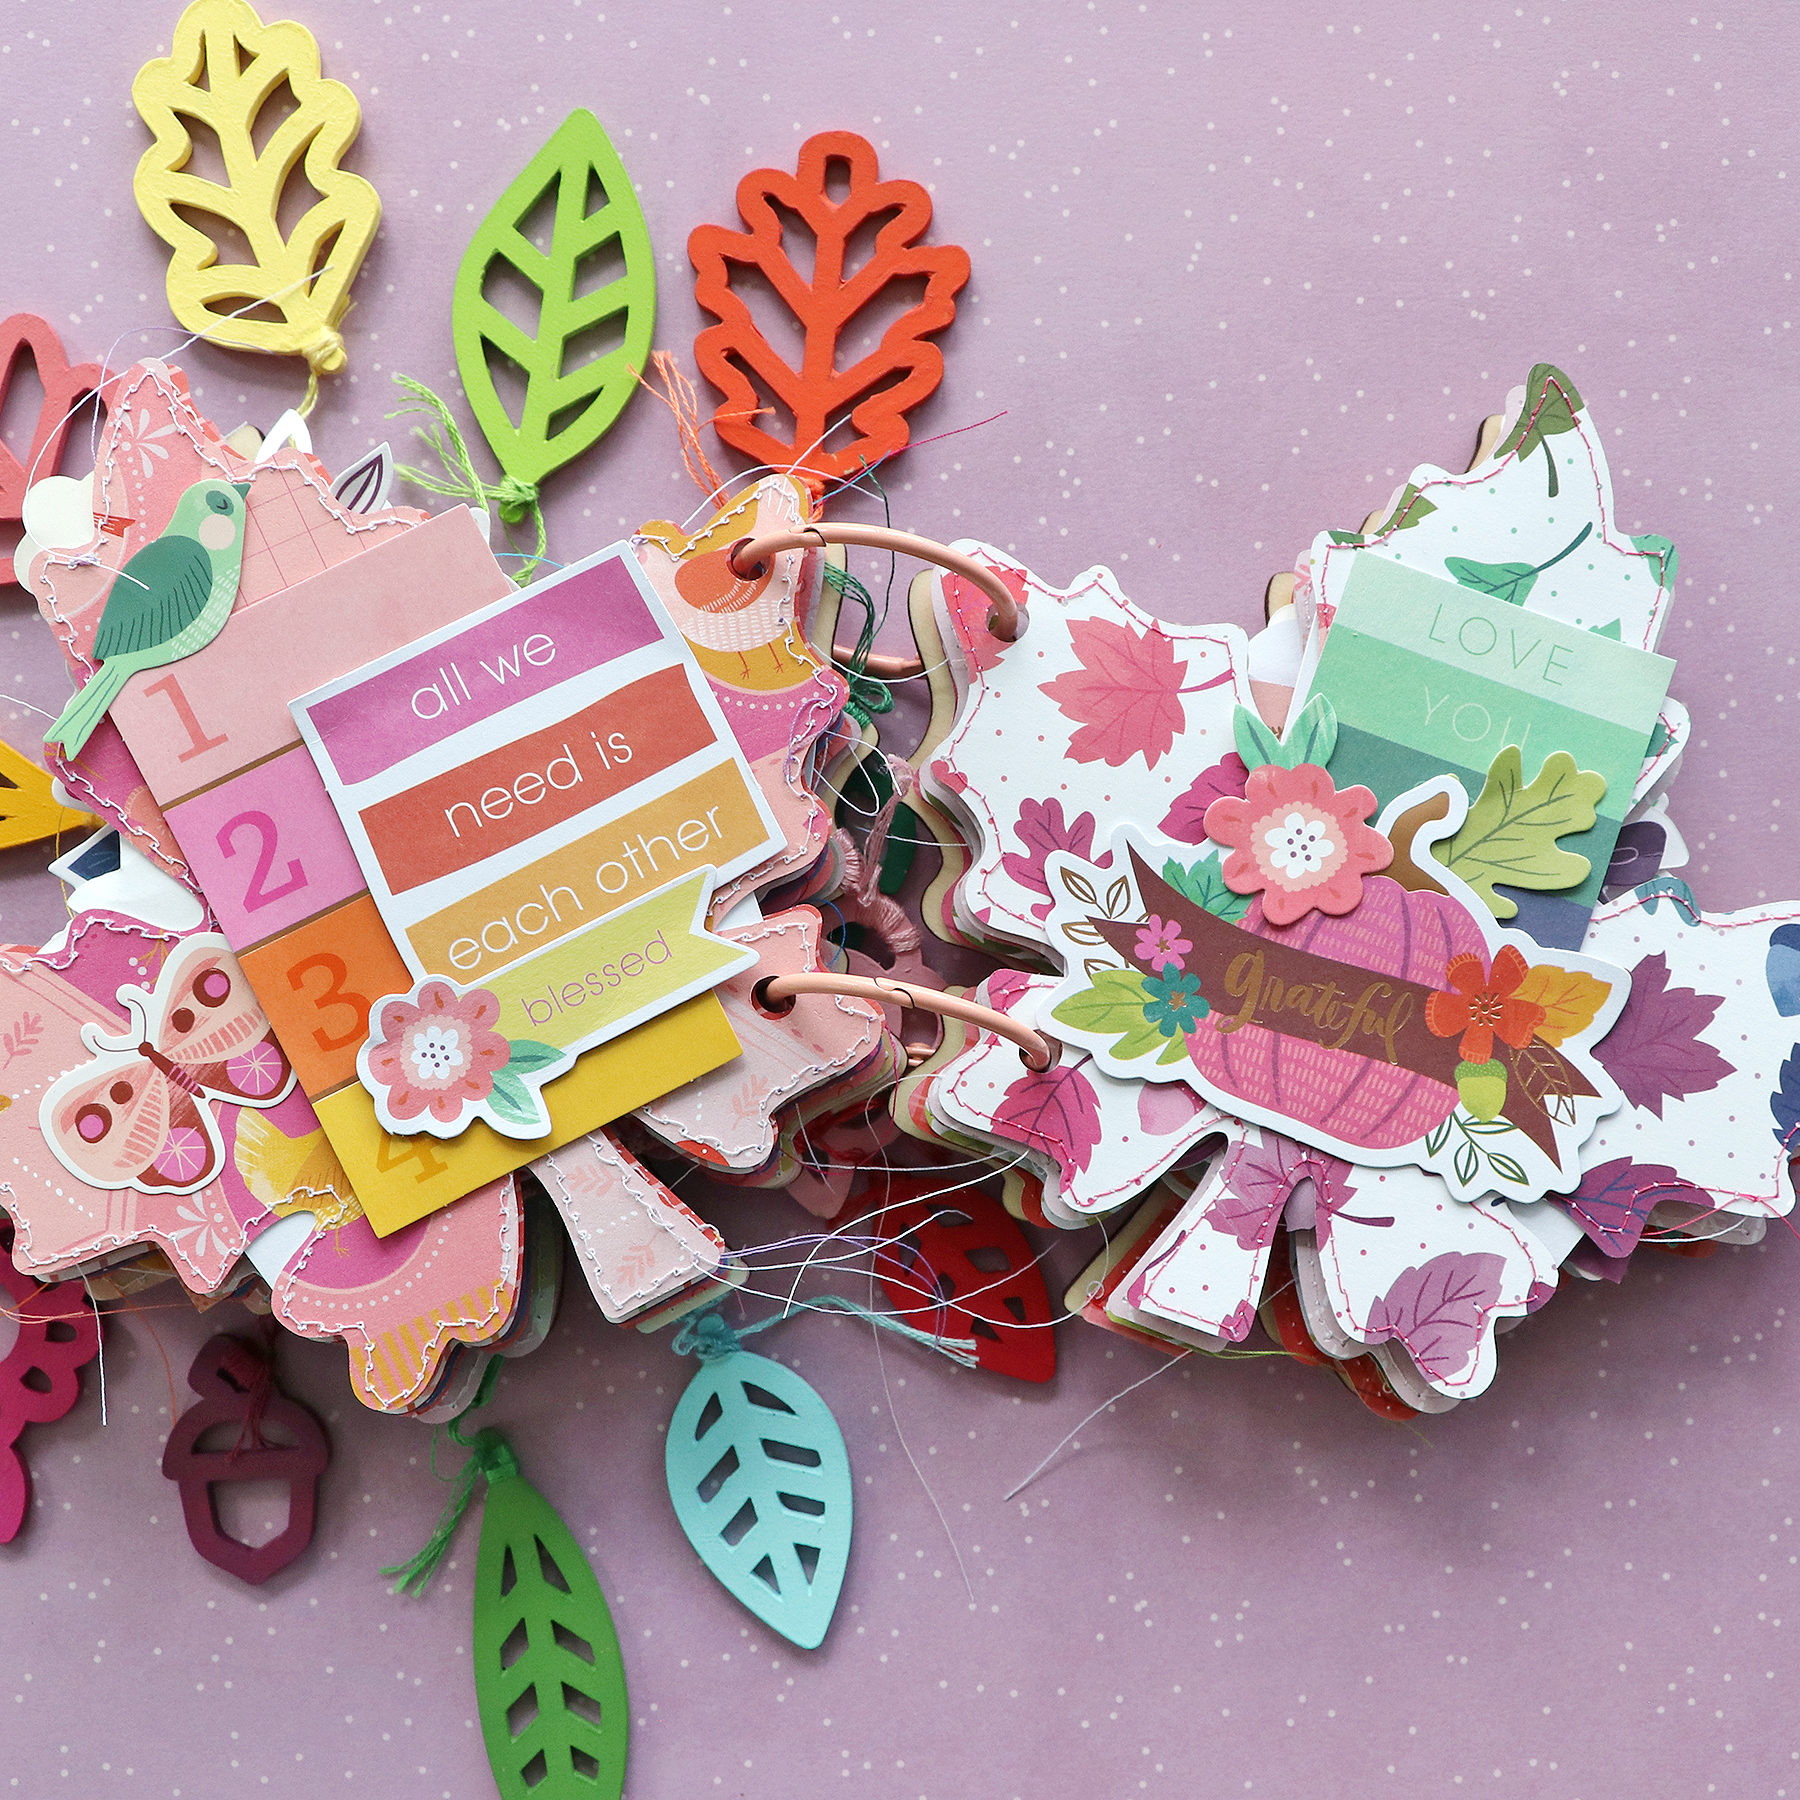
I started by backing the Mixer cut file using Paper 1 and Paper 11. To add some Christmas vibes I backed the Holly Sprig cut file with assorted papers from the 12x12 Paper Pad. I then turned the mixing bowl into a shaker by adding some Sequins. On my background I used a stencil and texture paste that I added a bit of silver color to. I then adhered the cut files and placed my photo (backed with a tag from Paper 1 and the blue snowflake paper from the Boxed Cards). I finished with a Foam Sticker and added a title with Thickers.
I love how this page turned out and I hope it inspires you to try Paige's Mixer and Holly Sprig cut files as well as her Sugarplum Wishes collection!
SUPPLIES: Patterned papers, die cuts, stickers, sequins, Thickers, embellishments: SUGARPLUM WISHES; white cardstock; Cut files: Mixer and Holly Sprig by Paige Evans

Holiday Cheer Layout by Lisa Fonseca


Wednesday, August 30, 2023

Hey friends! Lisa Fonseca here today sharing my new Christmas layout using Paige's Star from the 2020 Christmas Cut Files and her Sugarplum Wishes collection.
I backed all of the big triangles of the Star using papers from the 6x8 Paper Pad. Then I backed the whole star using vellum so that the little triangles had a semi-transparent look. What I did with this cut file is that I cut it out from white cardstock then I filled up the hole that the star created in the sheet with Paper 10 and then I placed the star into its hole again. Since almost the whole star is backed with other papers, you're only able to see the paper underneath vaguely, through the vellum in the little triangles. I added decorations around the star from the Sticker Book and Enamel Dots. For the title I used the Mini Thickers (which I LOVE) and Cardstock Stickers.
Get your Christmas photos out and go crazy with this wonderful new Sugarplum Wishes collection along with the Star from the 2020 Christmas Cut Files!
SUPPLIES: Patterned papers, stickers, Thickers, die cuts, paper clip, embellishments: SUGARPLUM WISHESvellum; Cut file: Star from the 2020 Christmas Cut Files by Paige Evans

Do You Wanna Build a Snowman? Layout by Kelly Daye


Tuesday, August 29, 2023

Hello friends! Kelly Daye here sharing a sweet layout using Paige’s Sugarplum Wishes collection and Do You Wanna Build a Snowman? cut file. A fun, festive, family competition instead of Gingerbread Houses, LOL.
I cut the Do You Wanna Build a Snowman? cut file from white cardstockPaper 12 was perfect for backing the cut file with lots of fun colors and patterns. One sheet did the trick. I cut the center out of it to make the letters, then used the rest of it as my border. The snowman was paper-backed with Paper 1. It’s actually a tag sheet, but you don’t have to just make tags. The patterns and colors are often unique and not found in the rest of the collection. The very top of his hat is Paper 6. I used another sheet of white cardstock to make the Stitched Scalloped Border. You can get the cut file for free here. It’s chain stitched with 6 strands of DMC floss #4502. I love the look of scalloped stitching. Before embellishing, I used the Stencil with Distress Oxides to add snowflakes around the background. The ephemera seems endless and it’s all so cute! I embellished my layout with Mini Puffy StickersEphemera Die CutsFoam Stickers, and glittery snowflakes from the Sticker Book. To add a bit of detail to the photo, I popped it up on an embossed piece of white cardstock with a bit of mauve ric-rac and stars from the Foam Stickers. The buttons on the snowman are Enamel Dots. Don’t they look like yummy candy? Finally, sparkle is a must so I added a wee sprinkle of Sequins.
I can’t wait to see your own Sugarplum Wishes projects and hope you're inspired to try the Do You Wanna Build a Snowman? cut file! Be sure to share them at Paige’s Happy Scrappy Place so we can cheer you on!
SUPPLIES: Patterned papers, stickers, die cuts, enamel dots, sequins, stencil, embellishments: SUGARPLUM WISHES; white cardstockDistress Oxides; Cut file: Do You Wanna Build a Snowman? by Paige Evans

Sweater Weather Layout by Kat Flores


Monday, August 28, 2023

Hi scrappy friends! Kat Flores here and I’m happy to be back on Paige's blog sharing another layout featuring Sugarplum Wishes and her Christmas Trees cut file. We don't have snow here in Mexico City or nearby lol, however, I wanted to make a winter scene to document a cold December day with my nephew.
I cut the Christmas Trees from white cardstock, backed it with papers from the 6x8 Paper Pad, then I painted watercolors on top. I used foam adhesive to add it over snowy mountains made with the snowflake paper from the 12x12 Paper Pad. I used watercolors to add a few splatters then I put my photo next to the cut file and finished by adding embellishments from the Sticker BookEphemera Die Cuts, sequins from the Acrylic Sweaters & Sequins, and Enamel Dots.
I love how the layout turned out! I had so much fun creating this colorful layout and I hope it inspires you to use Paige’s Sugarplum Wishes collection and her Christmas Trees cut file. Have a wonderful day and happy scrapping!
SUPPLIES: Patterned papers, stickers, die cuts, enamel dots, sequins, embellishments: SUGARPLUM WISHES; white cardstock; Cut file: Christmas Trees by Paige Evans

Moments (Bookshelf) Layout by Paige Evans


Sunday, August 27, 2023

 I taught a Virtual Layouts Class last week and here is one of the pages we made featuring a paper pieced bookshelf!
The class is available online
 HERE.

I used the Round Trip collection by Maggie Holmes to create this scene and documented a photo and me and Jane in our flower shirts. This might be one of my favorite layouts of all time :) I can't wait to re-create it with more collections! In fact, I'm going to miniaturize it for my upcoming Halloween 4x4 album class!
Upon purchase of the Virtual Layouts Class a PDF will be emailed with the link to the YouTube video on the first page, a list of supplies to buy or gather from your stash, photo sizes, instructions, any homework needed to be completed before the class, and templates to download/print/cut. The class is saved for rewatching at your convenience.
Let me know if you have any questions about anything, always happy to help!
I hope you are inspired to check out my Virtual Layouts Class featuring a paper pieced bookshelf!

Purse with a Folded Squares Mini Album by Paige Evans


Saturday, August 26, 2023

On Wednesday I taught a Purse with a Folded Squares Mini Album Class and it's available online HERE!

I used the Round Trip collection by Maggie Holmes to create this fun and interactive mini album.
Techniques include photo flips, custom tags complete with matching ribbons, a magnetic closure, and tips for making the most of this folded squares style of album!
I did add machine stitching to the edges of my pages, but that step is optional. I just LOVE adding stitching for texture!
I filled my Purse with a Folded Squares Mini Album with pictures from my most recent girls' trip to Vegas! The colors and sentiments throughout the Round Trip collection by Maggie Holmes are perfect for matching Las Vegas!
You could add even more pages! Or less, whatever you prefer :)
Here are pictures of the 5 embellished squares in my Purse with a Folded Squares Mini Album! Let me know if you have any questions about anything!
Fronts of the tag inserts:
And the backs of the tag inserts:
Upon purchase of this Purse with a Folded Squares Mini Album Class a PDF will be emailed with the link to the YouTube video on the first page, a list of supplies to buy or gather from your stash, photo sizes, instructions, any homework needed to be completed before the class, and templates to download/print/cut.
The class can be watched whenever you have time - it was recorded so you can watch as often as you like!
I love seeing how you take these ideas and make them your own! Change the collection, change the sizes, add more pages, less pages - make it YOU! I love making mini albums and hope to inspire you to try making them too!
Be sure to check out my Purse with a Folded Squares Mini Album Class using the Round Trip collection by Maggie Holmes! Have a happy scrappy day!

Oh Christmas Tree Layout by Jackie Ashton


Friday, August 25, 2023

Hi friends! Jackie Ashton here sharing a layout using Paige's Sugarplum Wishes collection and her Christmas Tree Background cut file.
To start my layout, I cut the Christmas Tree Background from white cardstock and kept the file as the outline. Then added it to Paper 10 which I trimmed down to 11.5" square and added this on top of white cardstock. I backed my photograph with papers from the 6x8 Paper Pad and added foam behind to give it some dimension. To the side I added two tags trimmed from Paper 1, adding some ribbon from my stash. The Cross Stitch Kit is a great addition to this collection and allowed me to add more texture to my layout with one of the cute tree designs. For my title I used the lovely Thickers and finished my layout with Ephemera Die Cuts and Enamel Dots.
I love how this page came together using the Christmas Tree Background and Paige's new Sugarplum Wishes collection! I hope you're inspired in some way by it! Thanks for stopping by!
SUPPLIES: Patterned papers, stickers, Thickers, die cuts, enamel dots, embellishments: SUGARPLUM WISHES; white cardstock; Cut file: Christmas Tree Background by Paige Evans

Angel Layout by Heidi Lewis


Thursday, August 24, 2023

Hi friends, it’s Heidi Lewis here on the blog today! I am OBSESSED with Paige’s newest collection Sugarplum Wishes so I’m going to keep rolling with the Christmas projects, even though it’s only August LOL. This layout was inspired by a quote I saw on Pinterest.
To make this layout, I cut the Angel from the 2020 Christmas Cut Files out of white cardstock. I also cut out a solid backing piece from transparency paper. Next, I adhered the Angel to the transparency paper, flipped it over, and colored the backside with alcohol markers. I used the pretty little angel from the Sticker Book as my muse for coloring the angel. I love how the colored acetate looks like stained glass, which is fitting for a Christmas layout. Once I finished coloring, I adhered the angel to a plain white background. I wanted to make the angel to be the star of the show, so I kept the rest of the embellishments simple. I tucked a picture of my kitty hiding in the Christmas tree under the angel’s wing and then cut a Floral Die Cut in half and added it to either side of the angel. I added my title using a combination of Thickers and Mini Thickers. Then I added almost EVERY star sticker that I could find to create the sensation that the angel is flying!
I hope you feel inspired by the fun title, the technique, the Angel cut file, or the Sugarplum Wishes collection! Thanks for stopping by!
SUPPLIES: Patterned papers, die cuts, stickers, Thickers, embellishments: SUGARPLUM WISHES; white cardstock; Cut file: Angel from the 2020 Christmas Cut Files by Paige Evans

Joy Layout by Heather Rubert


Wednesday, August 23, 2023

Welcome, friends! It’s Heather Rubert back on Paige's blog and I’ve got another Christmas layout to share! This time I used one of the Acrylic Stamps from Sugarplum Wishes and Paige’s Joy Joy Joy cut file to make a funny, festive page.
The main feature of the page is a stamped and watercolored poinsettia wreath. I took the Acrylic Stamps and I stamped two full sheets of poinsettias onto smooth white cardstock. I used waterproof black ink to make sure my outline wouldn’t get washed away during the coloring process. Then I got to watercoloring, using a combination of plain watercolors and Lindy’s Gang magical powders (I used the colors Pretty in Pink, Salt Water Taffy, and Berliner Filling Fuschia). I love the sparkle added to the flowers! I cut a large circle from dark green cardstock and backed it with white cardstock. Next I fussy cut all those poinsettias and arranged them in a wreath design around the hole in the green cardstock. For an extra pop of pink, I cut the Joy Joy Joy cut file from the pink plaid paper in the Sugarplum Wishes 6x8 Paper Pad. The whole cut file wouldn’t fit on the page, so I cut off just one “JOY” and topped it off with a bow from the Ephemera Die Cuts. For the funny subtitle “...OR NOT” I used just green letters from the Mini Thickers to coordinate with the rest of the page. A couple more embellishments and white acrylic paint splatters finished up the layout!
I had so much fun playing with the Sugarplum Wishes Acrylic Stamps. I hope you feel inspired to check out Sugarplum Wishes and be sure to check out her collection of Christmas cut files for some awesome inspiration! Thanks for stopping by and stay scrappy!
SUPPLIES: Patterned papers, die cuts, stickers, Thickers, embellishments: SUGARPLUM WISHES; white cardstock; white acrylic paint; Cut file: Joy Joy Joy by Paige Evans

Mittens Layout by Audrey Mutschall


Tuesday, August 22, 2023

Hello friends! Audrey Mutschall here with a new layout featuring Paige’s Mittens from the 2019 Christmas Cut Files and her new Christmas collection called Sugarplum Wishes!
I used white cardstock for the Mittens and backed it with a variety of pink, red, and green patterned papers from the 12x12 Paper Pad6x8 Paper Pad, and the Boxed Cards. The Enamel Dots were perfect for adding a little sparkle to the center of each poinsettia in the cut file and I used fussy cut flowers from Paper 1 and pink poinsettias from the Floral & Snowflake Die Cuts to create layered flowers for each mitten. I wrapped the mitten strings with variegated green embroidery thread to add texture and color and because it just looks so fun! The background is white cardstock with very faint pink and green ink splotches along with white acrylic paint splatters. I added a few of the gorgeous sparkly snowflakes from the Floral & Snowflake Die Cuts around the page as well as a few sequins. My photo is matted onto two layers of patterned paper from the Boxed Cards and I added two bows from the Ephemera Die Cuts. Lastly, I used both the large Thickers and the Mini Thickers to create my title.
I had so much fun backing these pretty Mittens from the 2019 Christmas Cut Files and I hope this layout inspires you to use Sugarplum Wishes for all your Christmas scrapbooking projects!
SUPPLIES: Patterned papers, stickers, Thickers, die cuts, enamel dots, embellishments: SUGARPLUM WISHES; white cardstockwhite acrylic paint; Cut file: Mittens from the 2019 Christmas Cut Files by Paige Evans

Christmas Glamper Double Page Spread by Ashley Neu


Monday, August 21, 2023

Hello friends! It’s Ashley Neu back on Paige’s blog to share my next project for the Paige Evans Cut File Design Team! I have created a fun double page spread using the Sugarplum Wishes collection and Christmas Glamper cut file.
To begin I cut the Christmas Glamper from white cardstock and backed it with papers from the 6x8 Album, Paper 11, and some fun glitter paper! Anyone else want to live in this beautiful glamper? I know I would and the inside would be just as colorful! After adding torn white cardstock to Paper 5 to create snow, I adhered the cut file and photos with foam adhesive. I finished off this page by adding enamel dots to the tree and the wreath from my stash.
Next was the right page and I wanted to create a fun collage of photos using Paper 1 which has so many cute tags! I picked some of my favorites and laid them out in a grid style, alternating the direction of them. I printed my photos out at 2x3” and adhered them to the tags in a tilted fashion.
To embellish this page, I decorated tone-on-tone using the Sticker Book, Cardstock Stickers, Ephemera Die Cuts and Mini Puffy Stickers. I also added more enamel dots. I just love the whimsical look of this double page spread!
Thank you so much for stopping by Paige’s blog today! I hope you’ve enjoyed reading the process of creating this double page spread and you're inspired to pick up the Sugarplum Wishes collection and check out the Christmas Glamper cut file! Have a wonderful day!
SUPPLIES: Patterned papers, stickers, die cuts, embellishments: SUGARPLUM WISHESwhite cardstock; Cut file: Christmas Glamper by Paige Evans

beautiFALL Mini Album by Paige Evans


Sunday, August 20, 2023

Hi scrappy friends! Here is the second project I made using the Glowforge Aura!
I used my older Truly Grateful collection for all the papers & embellishments.
I printed a large Geometric Leaf for the front cover, a solid leaf for the back cover, and a bunch of small leaves, and acorn, and flowers from wood. I painted all the little pieces to match Truly Grateful.
I made a bunch of pages from the Truly Grateful patterned papers and machine stitched around each one using a different color of thread.
I attached all the little leaves onto the cover using string and made the title "BEAUTIFALL" on the cover with epoxy letters and Thickers.
I left the first page blank so it wouldn't compete with the cover piece.
On each spread I embellished with bits and pieces from Truly Grateful and left spots for photos.
Let me know if you have any questions about anything! Here are pics of all the spreads.
I hope you are inspired by this mini album! Thanks for stopping by and have a happy scrappy day!
SUPPLIES: Patterned papers, stickers, die cuts, sequins, Thickers, sequins, embellishments: Truly Grateful
Paige Taylor Evans © // Quinn Creatives DESIGN