Miles & Smiles Layout by Audrey Mutschall


Friday, June 30, 2023

Hello friends!! Audrey Mutschall here with a new layout featuring Paige’s Bus from the 20 Summer Cut Files! I absolutely love creating scenic pages and this Bus was perfect for documenting photos from a recent trip to Red Rock Canyon! I chose paper and embellishments from the Blooming Wild collection and had so much fun creating a vintage style bus for my layout.

I used white cardstock for the cut file and backed it with patterned papers from the 12x12 Paper Pad and the 6x8 Paper Pad. I embellished the bus with Chipboard Stickers, Floral Die Cuts, and some Mini Flower Puffy Stickers. With the bus complete, I got to work on the background. I lightly inked a blue sky and green grass onto white cardstock using Catherine Pooler inks and then cut out mountains to layer across the background. I used inks in shades of yellow, pink, and peach to add color to the mountains, and then glued them to the background. Next, I cut a curvy pathway from yellow Paper 20, added it to the foreground, then stitched along the edges with variegated embroidery floss. With the scenery complete, I adhered the bus to the background using foam tape for extra dimension, and placed two photos to the right side of the cut file. My title runs along the bottom of the layout and is made using Foam Alpha Thickers. Lastly, I embellished the page with more Mini Flower Puffy Stickers, a Chipboard Round, stickers from the 8-Page Sticker Book, and some fussy cut butterflies from Paper 16.

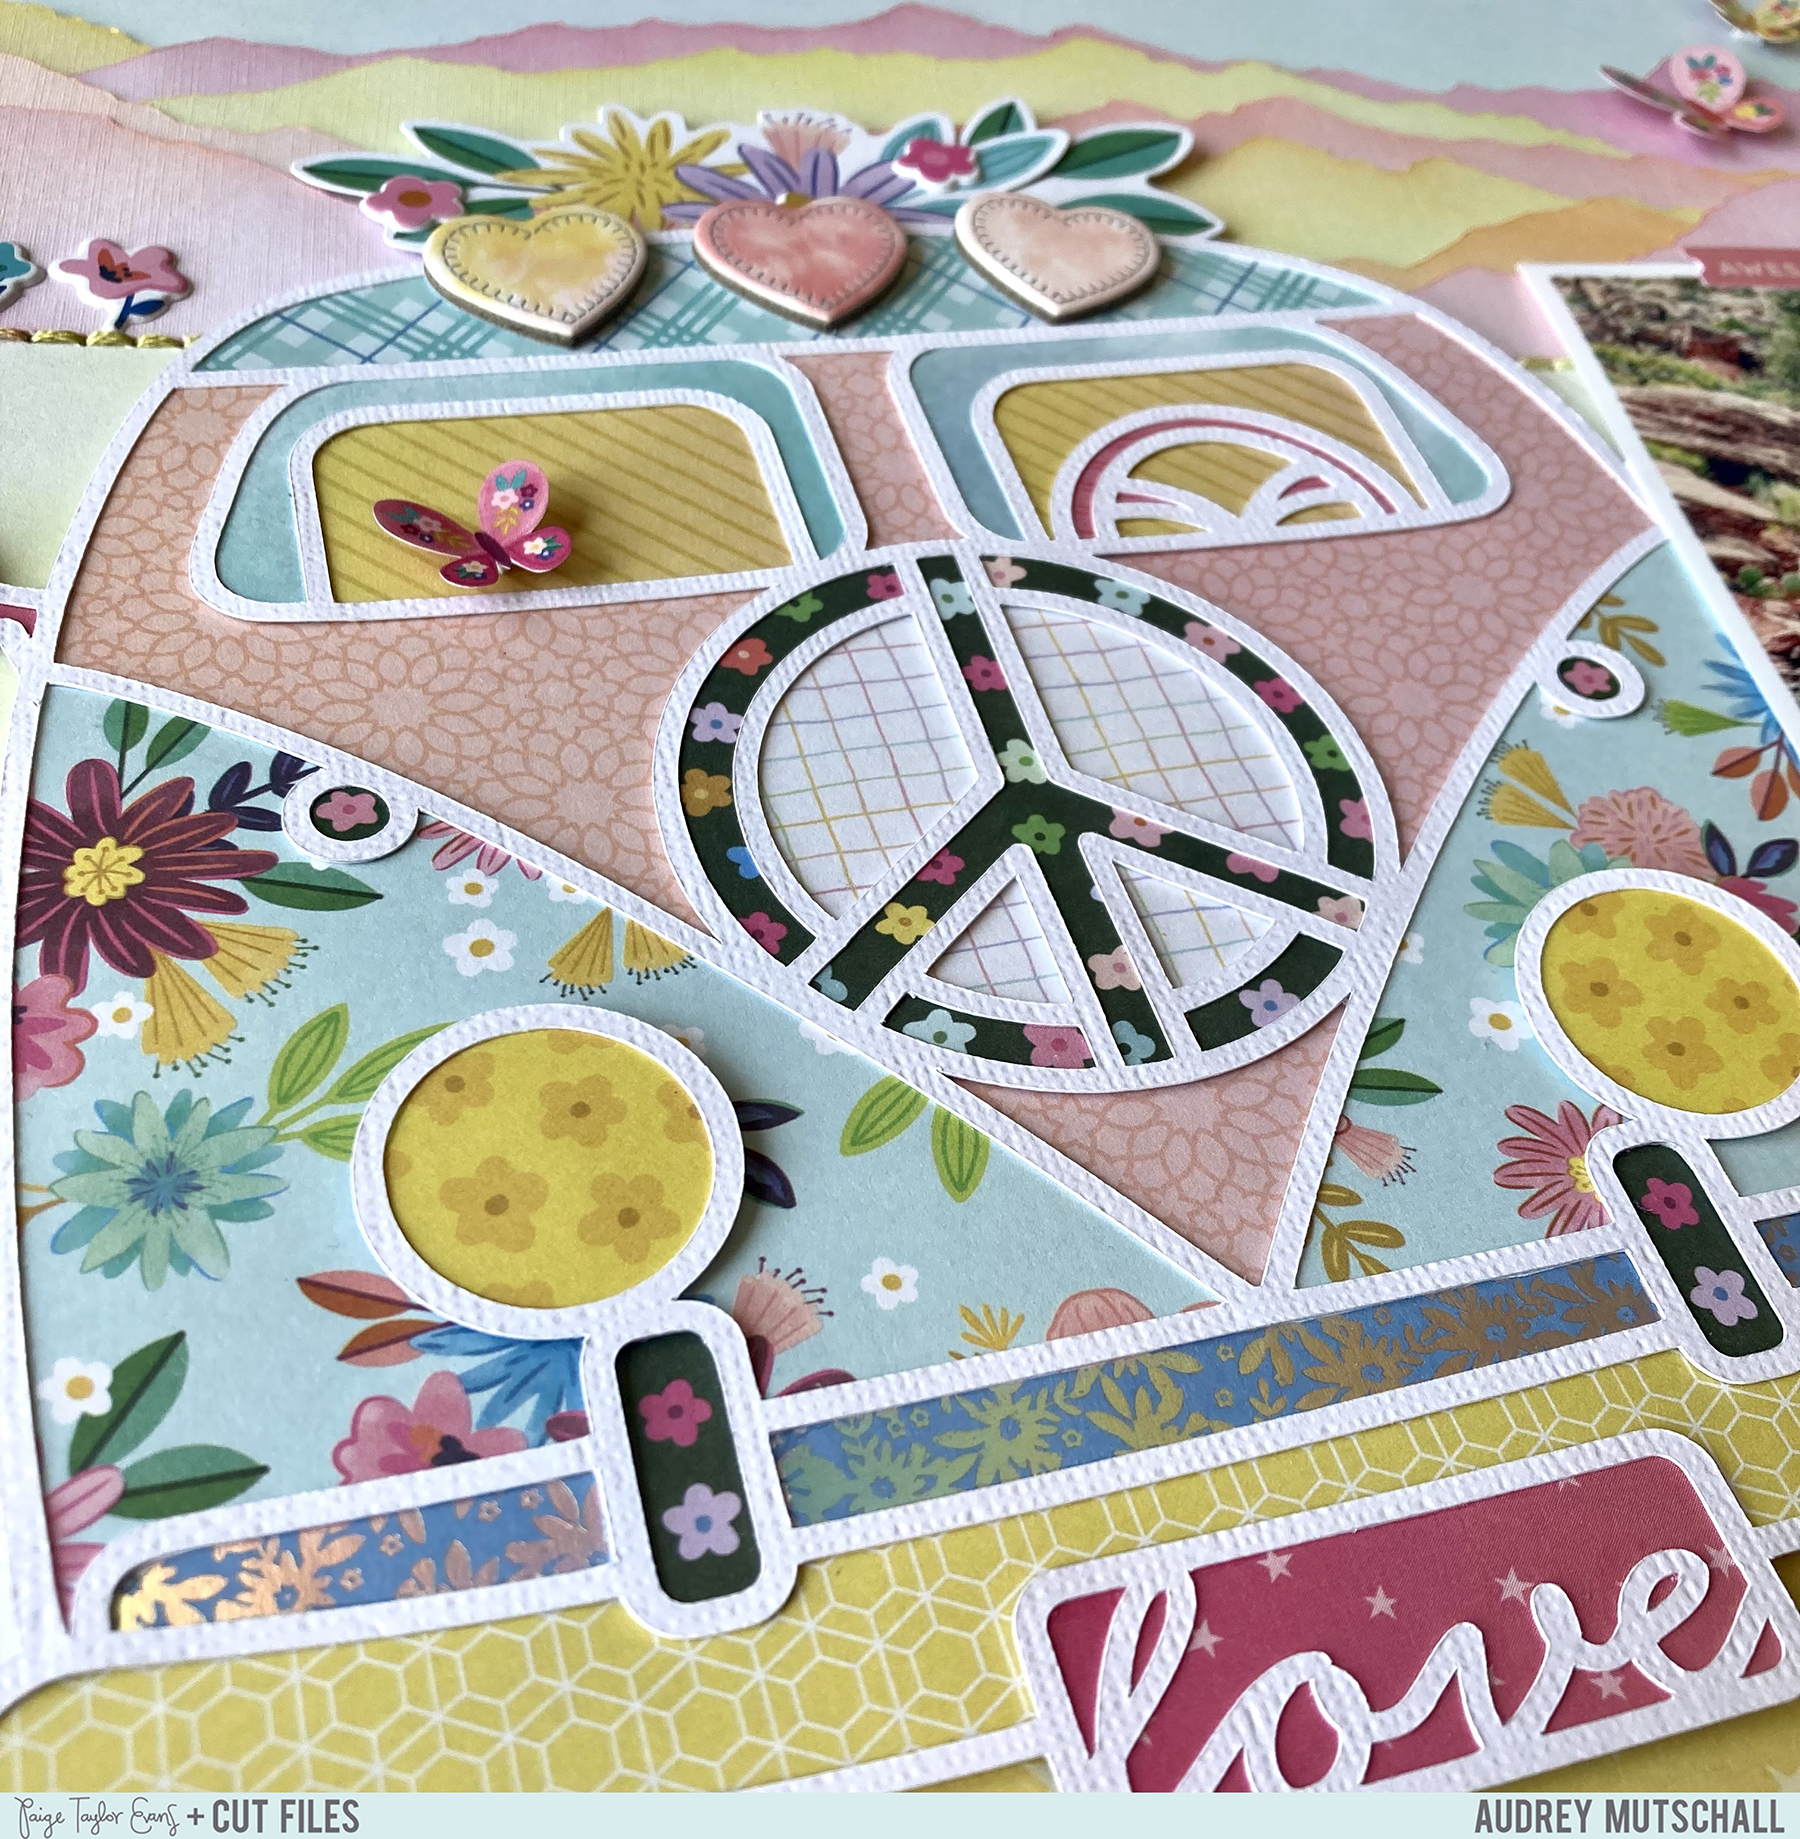
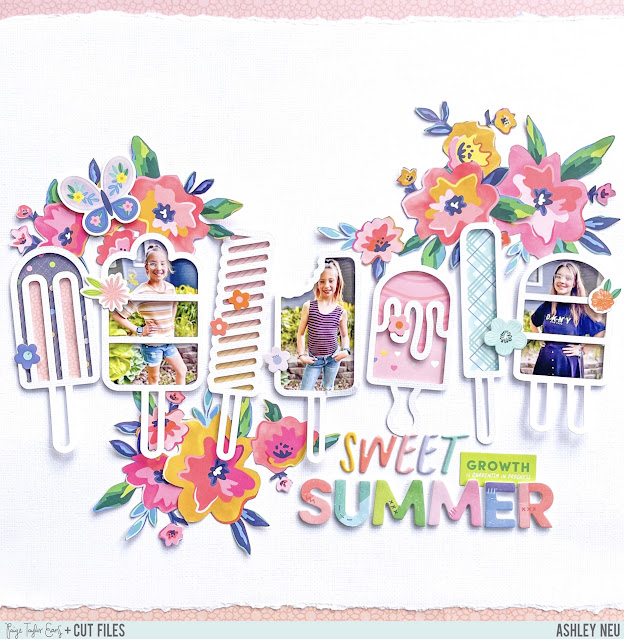
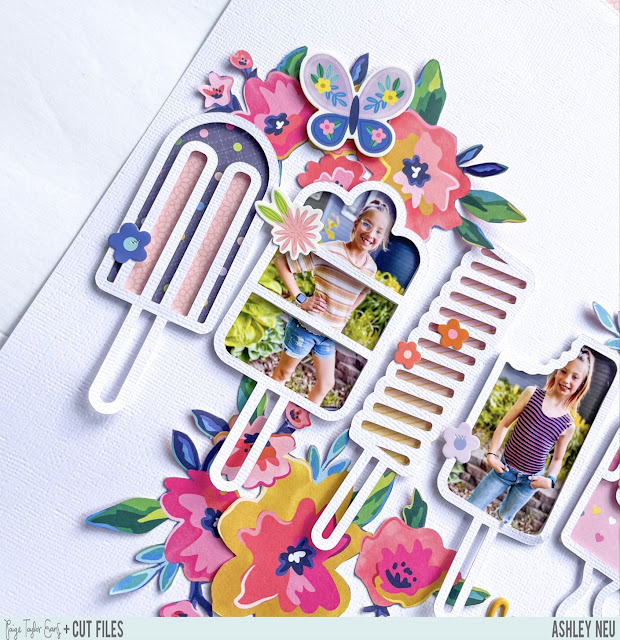
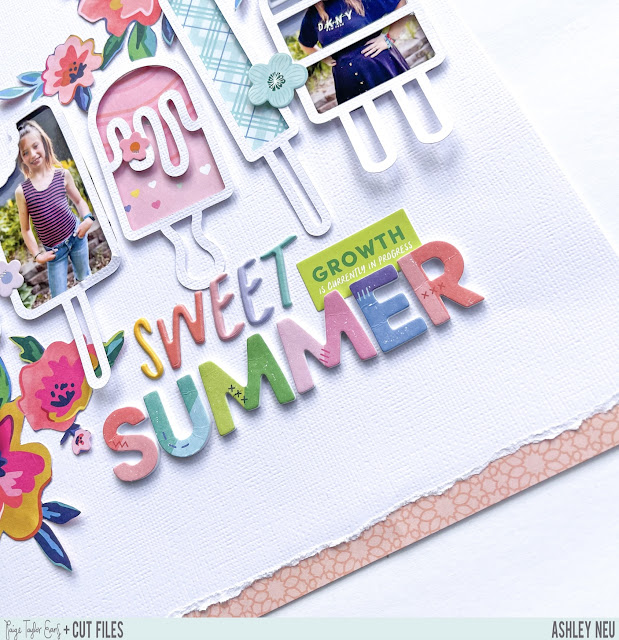
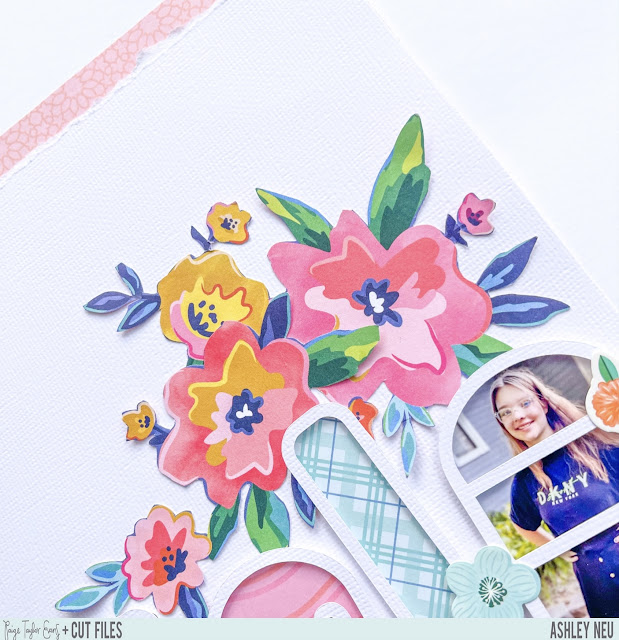
I hope this inspires you to use this adorable Bus cut file to document those summer road trip photos along with the Blooming Wild collection! Paige’s bundle of 20 Summer Cut Files has so many adorable designs for all those summer memories.

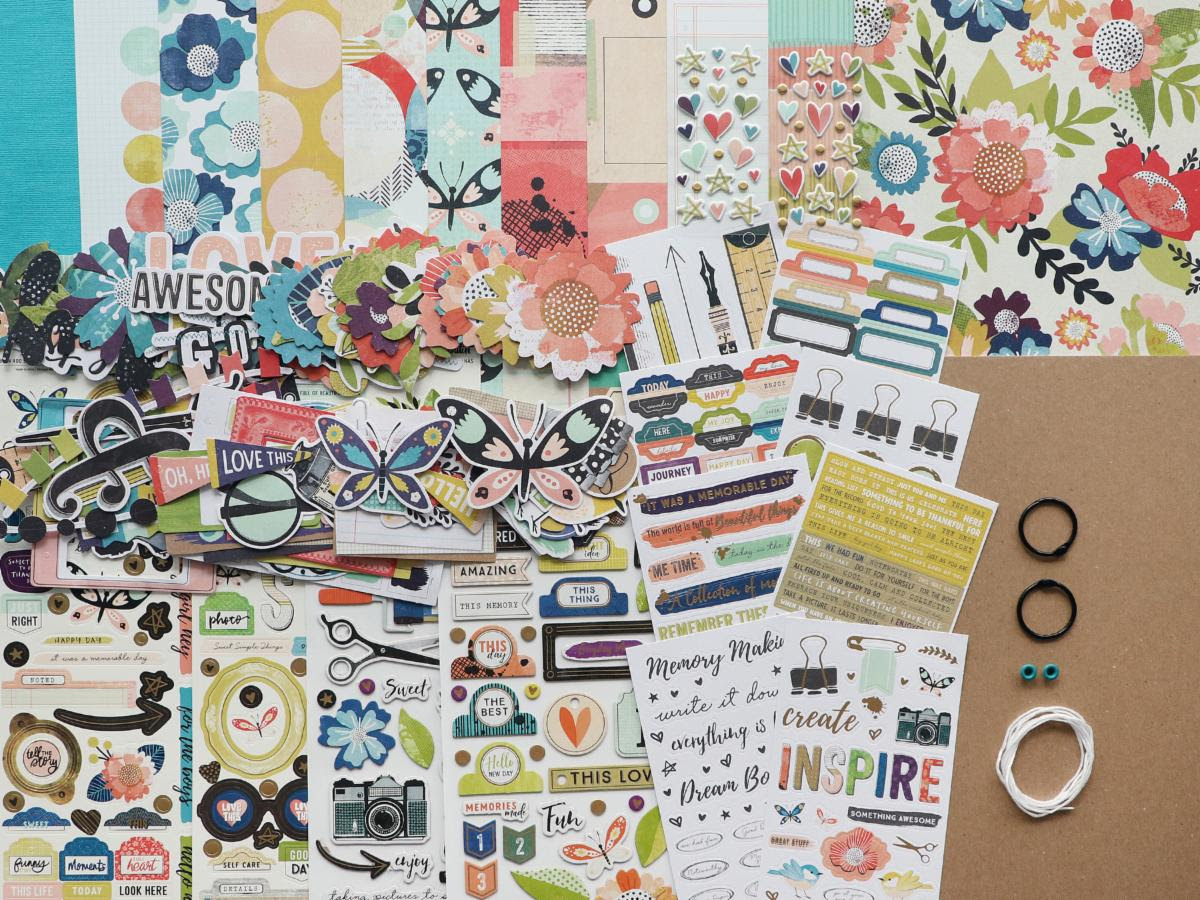
SUPPLIES: Patterned paper, sticker, Thickers, die cuts, embellishments: BLOOMING WILDwhite cardstockCut file: Bus from the 20 Summer Cut Files by Paige Evans

Instagram // Facebook // Pinterest

Sweet Summer Layout by Ashley Neu


Thursday, June 29, 2023

Hello scrappy friends! It’s Ashley Neu here and I’m so excited to share my next project for the Paige Evans Cut File Design Team using her 24 Summer Cut Files to create this super fun, colorful & summery layout! I love to document my girls’ first day and last day of school but I sometimes do it without using the traditional school theme. So for my layout today, I used the Popsicles from the 24 Summer Cut Files along with the Blooming Wild collection.

I backed 4 of the popsicles with the 6x8 Paper Pad using foam adhesive to give those fun shadows to the layout. I was originally going to layer my photos over the cut files but I couldn’t seem to get them to fit properly without covering too much of the cut files so I went with plan b and included the photos inside of the cut files. This is super easy to do and gives a fun touch to your layout!!

After adhering the cut files onto white cardstock, I wanted to include a fun and colorful title to match these adorable popsicles so I used a combination of the Thickers and the Puffy Phrase Stickers to create my “Sweet Summer” title. The white background was looking a little plain to me so I tore a strip off of the top and bottom and adhered 2 strips of Paper 23.

The flowers from Paper 2 are absolutely gorgeous and of course I wanted to include them on my layout! I fussy cut a few bunches out and tucked them in on 3 spots on my layout. They were the perfect touch to this fun summer layout! The rest of the embellishing were some tiny flowers from the Cardstock Stickers as well as an adorable purple butterfly and a phrase sticker!

Creating with cut files is my favorite thing to do when I scrapbook! I hope I’ve inspired you to use the Popsicles from the 24 Summer Cut Files along with Blooming Wild!

SUPPLIES: Patterned papers, stickers, Thickers, die cuts, embellishments: BLOOMING WILD; white cardstock; Cut file: Popsicles from the 24 Summer Cut Files by Paige Evans

Instagram // YouTube // Facebook // Pinterest

Blooming Wild Mini Album/Journal by Amber Mitchell


Wednesday, June 28, 2023

Hello crafty friends! Amber Mitchell here on Paige's blog today to share with you a fun mini album/journal combo that I created using the Blooming Wild collection!

To create the covers of this project, I used two pieces of chipboard that measured 4 x 7 inches. I wrapped the front cover with a plain white sheet of cardstock. I wrapped the back cover using a dark navy patterned paper from the 12x12 Paper Pad. I created the spine using a trimmed down sheet of paper that measured 5 x 6.75 inches. I scored this paper on the 5-inch side at 1.75 inches on both ends (this gives the project a 1.5-inch spine). I then creased and folded along these scores lines and used the newly created tabs to attach the spine to the inside edges of both my covers. For a bit of extra fun, I added a thin sheet of acetate to the spine before doing this. It wraps around the outside of the spine and adds a bit more character and texture to the project! To finish off the base of this project, I added white elastic cord to the spine that I later used to bind my pages.
To create the first set of pages for this project, I used a pair of journaling cards that I cut from Paper 1. To the inside of these pages, I added a spot for journaling and a 3 x 4-inch photo mat.

I made the second set of pages by trimming a piece of paper down to 3.5 x 7.25 inches. I folded this paper in half and then added two 3.25 x 3.25-inch photo mats to the inside of the pages. To decorate the front cover of these pages, I used a mix of flowers from the Floral Die Cuts. On the back cover, I added a small photo mat that I outlined using a frame from the Chipboard Frame Stickers.


To add more space for journaling, I created two small journals using patterned paper and dotted paper. I created the first journal by folding a sheet of paper that I trimmed down to 5.75 x 7 inches in half. I then added a few sheets of dotted paper to the inside of this page. To embellish the cover of this journal, I machine stitched strips of trim to the empty spaces in the patterned paper. I was hesitant to try this, but in the end, I was really happy with the result and I loved how much extra texture it added. I then created a title for the cover of this journal by using a few of the Chipboard Stickers. I also clipped a couple of extra journaling cards to the front inside cover and back outside cover of this journal.

To create the second journal, I folded a sheet of paper that measured 6.5 x 7.5 inches in half. I also added dotted paper to the inside of this journal. To embellish the cover of this album, I used some of the letters from the Chipboard Alphabet Outlines to spell out "HEY". I added a couple of fussy cut butterflies on top of these and added another fussy cut icon, this time a flower, behind the "Y".

I used stickers from the Sticker Book to decorate some of the pages throughout both journals. Throughout the rest of the album, I used pieces and icons from the Journaling SpotsEphemera Die CutsPuffy Phrase Stickers, and Cardstock Stickers to fill in any empty spaces and add some finishing touches!

To finish off the spine, I attached a fun and colorful mix of charms using a heart-shaped paperclip.

Thanks so much for stopping by my post today! I'll see you next time with another fun project!

SUPPLIES: Patterned papers, stickers, embellishments, die cuts: BLOOMING WILD

Location: California, USA / Blog: Happy Crafty Studio / Instagram: @bambidearr / YouTube: bambidearr / Pinterest: bambidearr

Sunglasses Layout by Yui Oku


Tuesday, June 27, 2023

Hi everyone! Yui Oku here today with a new layout using Paige's Sunglasses from the 24 Summer Cut Files along with her Blooming Wild collection!
I wanted to put the cut file on the center of layout. For balance I decided to put papers on both edges: I trimmed Paper 5 and punched it with a lace punch. This collection has a lot of cute blue papers so I used 6 of them! I punched them with 4 kinds of lace edge punches and trimmed them to different lengths. I arranged them on the edges of my page. For the sunglasses I chose Paper 5Paper 8, and Paper 20. I added blue word stickers from the Cardstock Stickers and flowers cut out from Paper 7. For the title I found a blue "great" from the Chipboard Stickers and made "TIMES" with blue, green, and yellow alphabet stickers from the Project Pad. Lastly I added a yellow bird from the Ephemera Die Cuts, a silver bird from the Sticker Book, a Mini Flower Puffy Sticker, and hearts from the Cardstock Stickers.

I hope this layout inspires you to use Paige's Blooming Wild collection and the Sunglasses from the 24 Summer Cut Files!

SUPPLIES: Patterned papers, stickers, die cuts, embellishments: BLOOMING WILD; white cardstock; Cut file: Sunglasses from the 24 Summer Cut Files by Paige Evans

Blog // Instagram // YouTube // Facebook

Graduation Layout by Valerie Bisson


Monday, June 26, 2023

Hi friends! Valerie Bisson here today and I’m so happy to share a brand new layout with you featuring the Banners from Paige's 20 Summer Cut Files bundle paired with her Blooming Wild collection.

For my layout I chose to scrapbook a graduation photo of my daughter and thought the banners nicely fit the the theme of my page. Starting with the background I went with Paper 20, to which I added some stars with texture paste using the Stars Background Cut File as a stencil. Next I cut the Banners from the 20 Summer Cut Files from white cardstock and backed it with Paper 21. Then I adhered it to the page and added machine stitching across the top of each row of banners. I also added foam squares to the banners to give them some dimension. Then I matted my photo in white cardstock and Paper 21 and tucked it in with the banners. For embellishments I used the Thickers, Sticker Book, Cardstock Stickers, Chipboard Stickers and the Mini Flower Puffy Stickers. I also added in the mini alpha Thickers and Layered Bouquet Stickers from Splendid.

Thank you so much for stopping by and I hope you have fun creating with the 20 Summer Cut Files!

SUPPLIES: Patterned papers, stickers, embellishments: BLOOMING WILD and SPLENDID; Cut files: Banners from the 20 Summer Cut Files and Stars Background by Paige Evans

Friends Forever Stars Layout by Paige Evans


Sunday, June 25, 2023

Here is one of the new layouts from my Make Your Memory book with Better Day Books!
In the chapter about LAYOUTS you'll find the step-by-step photo tutorial including the steps for making these fun stars.
How cute would this be in 4th of July colors?!
I used my Splendid collection to create a bunch of dimensional stars in three different sizes and scattered them around the page in a frame to bring the focus to the photo in the middle.
I hope you are inspired to purchase my Make Your Memory book and try the tutorial to make your own layout featuring these fun folded paper stars!

SUPPLIES: Patterned papers, stickers, die cuts: SPLENDID; Watercolors: Pastel Dreams by Prima; white acrylic paint

June Virtual Classes & New In-Person Events!


Friday, June 23, 2023

Join me next Wednesday June 28th for a day of virtual crafting using the Print Shop Collection by my friend Vicki Boutin!
First I will teach you how to create a Double Tag Flip Mini Album which holds 42 photos (with room for more!), a mix of styles and types of tags, layered embellishing, and more!
***********
After an hour break for lunch, come back for a 12x12 Scrapbook Layouts Class! I will teach you how to create two 12x12 pages featuring rolled patterned papers and accordion fold paper butterflies!
***********
Upon purchase of either class a PDF will be emailed with the link to the YouTube video where the class takes place on the first page, a list of supplies to buy or gather from your stash, photo sizes, instructions, any homework needed to be completed before the class, and templates to download/print/cut. The class is recorded for watching at your convenience in case you can't attend the live. Let me know if you have any questions and hope to see you soon in my Double Tag Flip Mini Album Class and then my Rolled Paper & Accordion Fold Butterflies Layouts Class!
***********
Click HERE for all the info about this amazing event!
***********
Click HERE to go to the Facebook page with all the info for this fun event!

Pool Party Layout by Phil Donahue


Thursday, June 22, 2023

Hello scrappy friends! Phil Donahue here on Paige's blog with a colorful summer layout featuring her Pool Cut File along with elements from her Blooming Wild collection! This layout features a photo of my niece having a personal pool party in the backyard early last summer. The pinks, aquas, and yellows from the photo inspired the color scheme of this layout!
To begin, I searched through Blooming Wild for all of the aqua, yellow, and pink papers I could find to use in various ways on the layout. Papers were from the 6x8 Paper Pad12x12 Paper Pad, and scraps I've accumulated from previous projects. I love using paper pads for embellishments because the sheets don't have patterns on the back so I feel like I'm not losing out on using patterns! Next, I resized the Pool Cut File to about a 6" in width and cut it out of white cardstock. I backed the 'P', 'L' and sunburst 'O' with various patterned papers from the pile I made. For the beach ball 'O' shape, I created a shaker element: I cut a piece of acetate to glue directly behind it then placed pieces of 1/8 inch foam adhesive strips behind that. I poured yellow, aqua, pink (continuing the theme), and iridescent sequins inside the circle then backed with a piece of vellum. A 12x12" piece of white cardstock served as the base for my layout. I used a recycled piece of plastic film from packaging and crumbled it up then blotted watered down Distress Oxides (echoing the color scheme) to add color and texture to the page. I die cut various sized circles from from the selected papers and adhered them to the middle of the page leaving about a 2-inch white border above and below. I also added Chipboard Rounds and backed some die cut circles with adhesive foam to add even more dimension. I cut my photo out with a larger circle die and backed it with white car stock to make it pop on the colorful page. I adhered the backed cut file and photo side-by-side in the center of my background. Final touches was adding clusters of enamel dots and rhinestones in the aqua, yellow, and pink color scheme all over the page!
I hope you found some inspiration from this layout and want to try the Pool Cut File along with Paige's Blooming Wild collection!

SUPPLIES: Patterned papers, stickers, die cuts, embellishments: BLOOMING WILD; white cardstockDistress Oxides; Cut file: Pool by Paige Evans

Tropical Wreath Layout by Noelle Culp


Wednesday, June 21, 2023

Hi crafty friends! Noelle Culp here today with a new layout featuring using Paige's Tropical Bunches from her 24 Summer Cut Files along with the Garden Shoppe collection!

I wanted to create something bright and colorful to match with my photos from Pandora at Animal Kingdom. After cutting out the Tropical Bunches from white cardstock I backed it with patterned papers. I also cut the top portion of Paige's Rose Wreath Cut File out of the dark blue Paper 14. For the background, I brushed on a few pink Distress Oxides and also added a few white acrylic paint splatters. I adhered down both cut files and added my title using Thickers. I added a bunch of Floral Die Cuts and splashed more white acrylic paint over it. I added some green leaves using a few die cuts. Finally I added my photos into the mix.

I love how this page turned out! I hope it inspires you to try Paige's Tropical Bunches from the 24 Summer Cut Files along with Garden Shoppe!

SUPPLIES: Patterned papers, die cuts, stickers, embellishments: GARDEN SHOPPEwhite acrylic paintDistress Oxides; white cardstock; Cut files: Tropical Bunches from the 24 Summer Cut Files and Rose Wreath by Paige Evans

Summer Summer Summer Layout by Lisa Fonseca


Tuesday, June 20, 2023

Hi scrappy friends, Lisa Fonseca back with a fun layout using Paige's Summer Summer Summer from her 24 Summer Cut Files along with the Blooming Wild collection!

I backed the title with colorful papers from the 6x8 Paper Pad and since the cut file has this 80s kind of vibe, I tried to use patterned papers that had the same vibe. I love how it turned out and the colors match perfectly! I then added a lot of fussy cut and Floral Die Cuts, birds, and insects and it looks so lovely.

I hope you like it and are ready for a happy summer and that you're inspired to use the Summer title from the 24 Summer Cut Files along with Blooming Wild!

SUPPLIES: Patterned papers, stickers, die cuts, embellishments: BLOOMING WILD; Cut file: Summer Summer Summer from the 24 Summer Cut Files by Paige Evans

Blog // Instagram // YouTube // Facebook // Pinterest

Flamingo Layout by Kelly Daye


Monday, June 19, 2023

Hello friends, Kelly Daye here with a layout made with Blooming Wild, Garden Shoppe and the Flamingo from Paige’s 24 Summer Cut Files. You can also buy a few favorite cut files from the bundle in Paige’s shop.

On a recent trip to New York, I was overjoyed to visit Macy’s during their annual Flower Show. The entire main floor had amazing installations of fresh blooms and that inspired the title of my layout, ‘Live Life In Full Bloom’. I used Thickers for the title, gluing them to the edge of the cut file and dusting their backs with baby powder so they wouldn’t stick to anything else. The flamingo was cut from white cardstock then paper-backed and then stitched. I paper-backed the rainbow with a mix of Blooming Wild (BW) and Garden Shoppe (GS). From the top: orange-Paper 7 GS, yellow-Paper 20 BW, bright pink-Paper 16 BW, pink-Paper 11 GS, light mauve-Paper 6 BW, mauve-Paper 22 GS, green-Paper 12 BW, aqua-Paper 14 BW, and light blue-Paper 24 BW. Once finished, I popped it up on background Paper 4 GS, a pretty alternative to a plain white background. Once paper-backed, the rainbow was chain stitched with all six strands of these DMC floss colors:

Rather than paper-backing the flamingo, I wanted it to stand above the rest of the cut file. So in Silhouette, I released the compound path of the cut file and dragged the inside line of the Flamingo off the mat. I then made the items left on the mat a compound path again. I used the offset tool on the outline of the flamingo, to make it a bit larger. It was this offset that I covered in sequins from head to toe. Each individual sequin was applied with liquid glue (whew!). My sparkly, sequined covered flamingo was popped up with more 3D foam tape. I tucked a number of flowers from the Floral Die Cuts around the finished cut file then added my photos. The tone-on-tone stickers over each photo are from the Sticker Book.

I hope you’re inspired to take a look at both of Paige’s Summer Cut File Bundles here and here, or the individual cut files, to create something pretty from your own summer memories! Thanks so much for visiting today!

SUPPLIES: Patterned papers, stickers, Thickers, die cuts, embellishments: BLOOMING WILD and GARDEN SHOPPE papers; Cut file: Flamingo from the 24 Summer Cut Files by Paige Evans

PaigePals5 Kits & Virtual Classes For June-September 2023


Friday, June 16, 2023

 
I am so very excited to continue teaching live virtual classes with accompanying kits so you can create the projects along with me in PaigePals5 which consists of 4 kits and 8 virtual classes to make 4 mini albums and 8 layouts! Read on for all the info for how you can participate in them all, see pictures of the kits, class descriptions, sneak peeks of the class projects, and ordering info below!!
June Mini Album & Layouts Kit
Wednesday June 28th 2023
Mini Album Class from 11am-1pm Eastern Time
Layouts Class from 2pm-4pm Eastern Time
In the mini album class we will create a double tag flip album and in the layouts class I will teach you how to create two 12x12 scrapbook pages: one features rolled paper and the other accordion fold paper butterflies! A PDF with the list of basic craft supplies to purchase or gather from your stash, photo sizes, templates, any homework needed to be completed before the class, and the links to the YouTube where the classes take place will be emailed to you upon purchase. The videos are saved for re-watching whenever you have the time.
July Mini Album & Layouts Kit

Wednesday July 26th 2023
Mini Album Class from 11am-1pm Eastern Time
Layouts Class from 2pm-4pm Eastern Time
In the mini album class we will create a fun hot air balloon and in the layouts class I will teach you how to create two 12x12 scrapbook pages: one features pre-cut flowers for layering and the other is a hand cut title! A PDF with the list of basic craft supplies to purchase or gather from your stash, photo sizes, templates, any homework needed to be completed before the class, and the links to the YouTube where the classes take place will be emailed to you upon purchase. The videos are saved for re-watching whenever you have the time.
August Mini Album & Layouts Kit
Wednesday August 23rd 2023
Mini Album Class from 11am-1pm Eastern Time
Layouts Class from 2pm-4pm Eastern Time
In the mini album class we will create a paper purse with a folding squares mini album to go inside and in the layouts class I will teach you how to create two 12x12 scrapbook pages: one features a paper pieced bookshelf and the other a dynamic background of folded squares! A PDF with the list of basic craft supplies to purchase or gather from your stash, photo sizes, templates, any homework needed to be completed before the class, and the links to the YouTube where the classes take place will be emailed to you upon purchase. The videos are saved for re-watching whenever you have the time.
September Mini Album & Layouts Kit

Wednesday September 20th 2023
Mini Album Class from 11am-1pm Eastern Time
Layouts Class from 2pm-4pm Eastern Time
In the mini album class we will create a wooden house and in the layouts class I will teach you how to create two 12x12 scrapbook pages: one features a hand stitched circle and the other paper pennants on paperclips! A PDF with the list of basic craft supplies to purchase or gather from your stash, photo sizes, templates, any homework needed to be completed before the class, and the links to the YouTube where the classes take place will be emailed to you upon purchase. The videos are saved for re-watching whenever you have the time.
Prices
I am selling all PaigePals5 kits together as a bundle to streamline the process. Any kits left after 2 weeks will be made available individually.

USA: 4 kits with the 8 virtual classes: $350 + $15 shipping - purchase HERE

INTERNATIONAL: 4 kits with the 8 virtual classes: $350 + actual shipping costs. *Please send me email (paigetaylorevans@gmail.com) with your mailing address to get an exact shipping quote.

VIRTUAL CLASSES ONLY: All 8 virtual classes: $140 (save $30!) can be purchased HERE.

INDIVIDUAL CLASSES:
Double Tag Flip Mini Album: Virtual Class Only
Rolled Paper & Accordion Fold Butterflies Layouts: Virtual Class Only
Hot Air Balloon Mini Album: Virtual Class Only
Die Cut Flowers & Hand Cut Letters Layouts: Virtual Class Only
Purse with Folded Squares Mini Album: Virtual Class Only
Bookshelf & Folded Squares Layouts: Virtual Class Only
Wooden House Mini Album: Virtual Class Only
Stitched Circle & Paperclip Pennants Layouts: Virtual Class Only
How to Purchase
To purchase, click HERE to find the listing directly on my website OR you can send me an email paigetaylorevans@gmail.com with the following information and I will reply in the order I receive them:

1) Your name
2) Shipping address + phone number
3) PayPal email address or Venmo
4) What you would like to order

A PayPal/Venmo request will be sent within 24 hours of emailing me your order. Please be sure to pay the request within 48 hours, after that the request will automatically be canceled and offered to the next person on the waiting list.

Kits will ship within 72 hours of payment received and you will get an email from stampscom with your tracking #. If you haven’t received your box after 4 weeks from when you receive the shipping notification, please email me.

Please let me know if you have any questions and I can't wait to create with you virtually!!
THANK YOU!!!
Paige Taylor Evans © // Quinn Creatives DESIGN