December Daily Spread with Bungalow Lane by Stefanie Ried


Tuesday, November 30, 2021

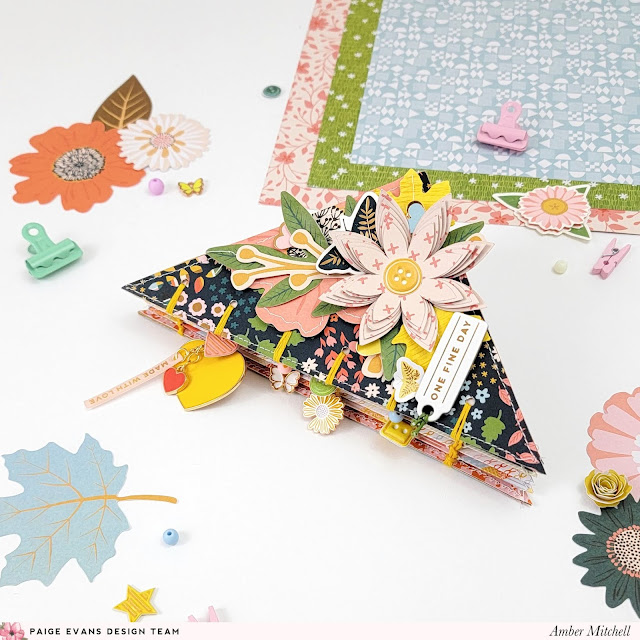
 Hello and welcome to a new project by me, Stefanie Ried! I am currently filling the last few pages in my December Daily from last year. I didn't manage to finish it last year, unfortunately. So I'm just catching up on it. One challenge that I love the most is incorporating a non-Christmas collections into my mini albums, such as Bungalow Lane. Oh how much fun I had doing this.

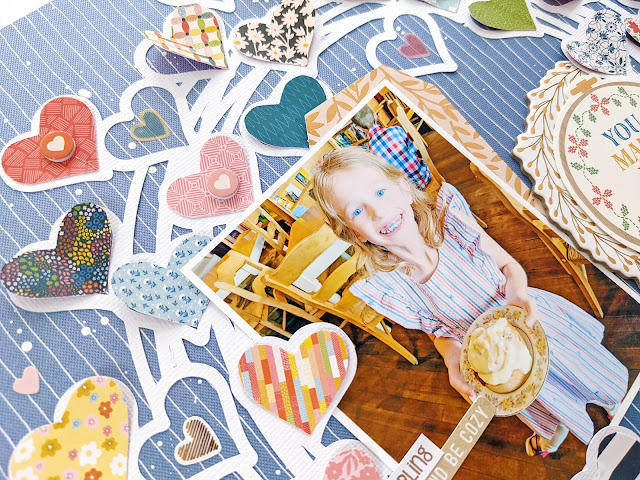
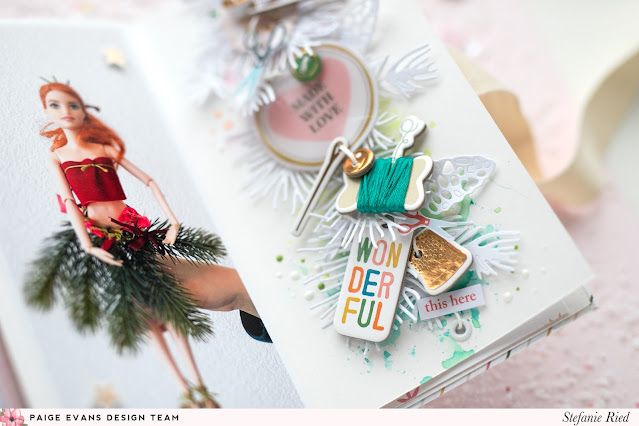
My daughter made her Barbie a Christmas outfit. She loves to make clothes for her dolls out of all different kinds of materials. I had to capture this creation. So many cute embellishments from the Bungalow Lane collection go perfectly with this photo!

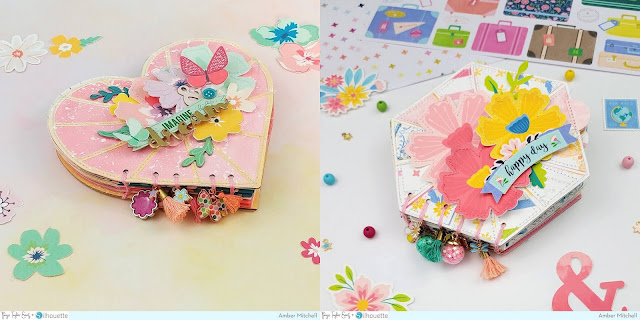
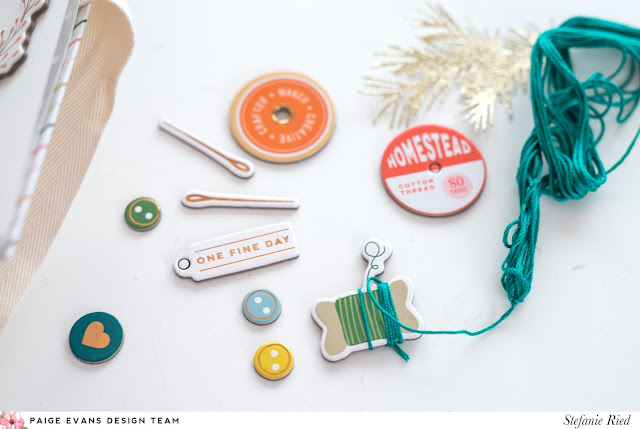
For example, I wrapped the Chipboard Sticker thread spool with real thread.

I created the background with watercolors.

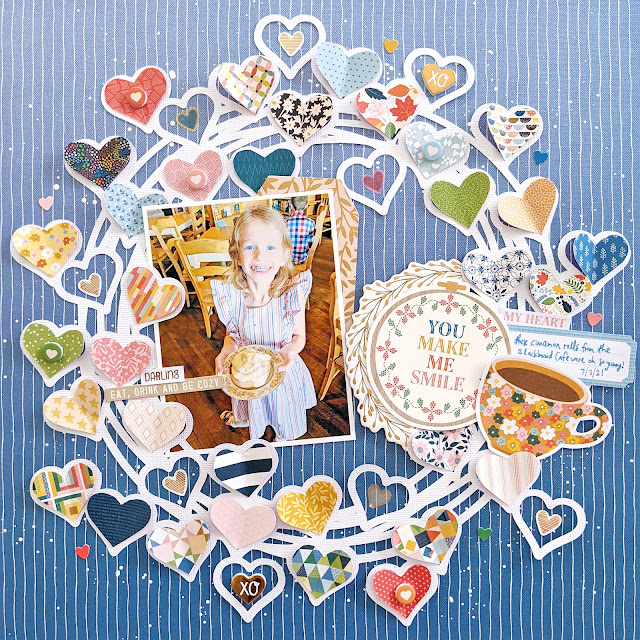
Then on a line punched out of white fir branches I added embellishments. I love adding stickers in this style to mini album pages.

 Thanks for stopping by :) Until next time! Have a great start to December!


SUPPLIES: Patterned papers, stickers, die cuts, embellishments: BUNGALOW LANEwhite cardstock
Blog: steffiried.blogspot.com / Instagram: @steffiried / Pinterest: @steffiried / Facebook: stefanie.ried.96 YouTube: Steffi Ried

You Make Me Smile Layout by Paige Evans


Monday, November 29, 2021

  Here is the other layout I teach you how to make in my Bungalow Lane Layouts Virtual Class!

This layout features the technique of enhancing a cut fileIf you don't have an electronic die cutting machine, I have the Hearts Wreath Cut File available to purchase as a pre-cut file in my shop HERE
A PDF with a list of supplies, photo sizes, instructions, templates, a link to my private PaigePals Facebook Group, and a link to the YouTube video will be emailed within 24 hours of purchasing the class HERE. Please check your spam folders for emails from paigetaylorevans@gmail.com as more often than not my emails are hidden.
Let me know if you have any questions! Thanks so much!
SUPPLIES: Patterned papers, die cuts, stickers, embellishments: BUNGALOW LANEwhite cardstockwhite acrylic paint; Cut file: Hearts Wreath by Paige Evans

This is Our Happy Place Layout by Paige Evans


Sunday, November 28, 2021

 Here is one of the layouts I teach you how to make in my Bungalow Lane Layouts Virtual Class!

This layout features a few fun techniques such as hand stitching, adding dimension to Floral Die Cuts, and unique mirrored layering!
A PDF with a list of supplies, photo sizes, instructions, templates, a link to my private PaigePals Facebook Group, and a link to the YouTube video will be emailed within 24 hours of purchasing the class HERE. Please check your spam folders for emails from paigetaylorevans@gmail.com as more often than not my emails are hidden.
Let me know if you have any questions! Thanks so much!
SUPPLIES: Patterned paper, die cuts, stickers, embellishments: BUNGALOW LANE

Oh What a Day! Layout by Zsoka Marko


Saturday, November 27, 2021

Hey there lovelies, Zsoka Marko here with a new layout to share today that I've created with the beautiful Bungalow Lane collection!

Now that it gets dark so early, I seem to like to sit down with Netflix/Prime and just stitch away more than any other time of the year. So I was in need of a stitching project! Now you must be asking yourselves "Huh? What is she talking about? There is no hand stitching anywhere on this project!" True, ha! BUT that's the idea I had for this page! So I was browsing through Paige's cut files and I soon decided to go with some simple butterflies that are easy to stitch. My idea was to add an offset to the cut file in Silhouette Studio and then stitch that, then add some patterned paper butterflies inside. But by the time I finished cutting my butterflies it got so late, I didn't want to stitch anymore hahaha! Oh dear. I did stitch on my next layout though, not a whole lot, but it's something!

Anyway, the cut file I chose for this page is the Butterfly Cluster. I wanted to cut some from the gorgeous Floral Transparency and add them as the top layer to every butterfly. I haven't cut acetate with my Cameo in years but I did remember I had used the highest blade setting (10) for it before. So that's what I did now too with double pass... Didn't work. I sent the mat back several times after seeing they didn't cut through, and without me noticing, every time the blade just cut in a slightly different position. Maybe it's to do with the material because this has never happened to me before. Anyway, I started over, and this time I changed the settings to SIX passes, just to be sure. Welllll... I could kind of pop them out but it wasn't easy. I have an old Cameo 2, so maybe the newer versions work better! There are three butterflies in the Floral Die Cuts so I wanted to use those too. All three colors are in the acetate sheet so it was perfect! I went through the papers and selected a few that matched those colors. The dark blue color is not in the patterned papers, at least not on a big enough surface to cut butterflies from. So basically I went with pinks and yellows. I chose the less busy ones because I was going to add the acetate on top which is busy enough. I ungrouped the cut file and rearranged the butterflies. I knew I wanted to use two bigger ones for my photos, the rest I cut from patterned papers.

I then layered them up (3 paper layers plus 1 acetate), glued the paper layers together, but only in the middle. I glued them in place on my layout, my photos as well. By the way, the photos I just fussy cut out using the die cut butterflies as templates. Then I added the acetate, one butterfly at a time, and stitched everything down.

Next, I added my title using the Thickers. I also placed some Foam Phrase Stickers and little hearts also from the Foam Phrase Stickers here and there to add interest to my page. To finish it off, I added my journaling and stamped my date on a tab sticker from the 8-Page Sticker Book. I'm obsessed with these by the way. I wouldn't mind if there was a full pack of them in every collection haha!

That's it for today! I hope I could inspire you in some small way! Thank you so much for stopping by! Have a wonderful day!


SUPPLIES: Patterned papers, transparency paper, stickers, die cuts, embellishments: BUNGALOW LANEwhite acrylic paint; Cut file: Butterfly Cluster by Paige Evans

Blog: apocketfullofscrap.blogspot.com // Instagram: @zsoka_marko // Facebook: Zsoka Marko // YouTube: Zsoka Marko 

Once-A-Year Shop Sale!


Friday, November 26, 2021

 **Once-a-year Paige Evans Shop SALE! **
Now through December 1st enjoy 20% off all of my past virtual classes and most of my previous cut file bundles with coupon code BLACKFRIDAY! HERE is the link to my shop: www.bit.ly/paigeevansshop When checking out, it says "Have a promo coupon? Redeem your coupon". Click on the "Redeem your coupon" and enter BLACKFRIDAY to apply the discount.


**Etsy Shop SALE!**

Now through December 1st enjoy 70% off regular cut files in my Etsy shopwww.etsy.com/shop/pagebypaige


Happy shopping!

25 Days of Christmas Cut Files 2021


Celebrate the holiday season with your own scrapbooking advent: 25 Days of Christmas Cut Files!

One new and exclusive Christmas-themed cut file will be emailed to you every day from December 1st through December 25th! Click HERE to purchase. From traditional icons like Santa and Christmas trees, to backgrounds, titles, and lots of festive designs between, you're sure to love using these cut files for making your memories merry this December! There will be an example created with every cut file so you'll get lots of ideas for how to use them. These cut files will only be available as a bundle and not sold individually anywhere else and they will all be different from the 25 Days of Christmas Cut Files 2019 & the 25 Days of Christmas Cut Files 2020! Happy holidays!

********************

25 Days of Christmas Cut Files 2019

Here are all the cut files from the 25 Days of Christmas Cut Files 2019 backed and in my December Daily - find the entire blog post HERE.

********************

25 Days of Christmas Cut Files 2020

Here are all the cut files from the 25 Days of Christmas Cut Files 2020 backed and ready to go into my December Daily - find the blog post of my completed album HERE.

********************

BLACK FRIDAY SPECIAL: All regular cut files are 70% off in my Etsy shop now through Tuesday November 30th! HAPPY HOLIDAYS!

Thanksgiving 2020 Mini Album by Paige Evans


Thursday, November 25, 2021

 I made a mini album for the upcoming YouTube Holiday Inspiration Series over at Scrapbook.com featuring their Fancy Nested Circle Dies and my Bungalow Lane collection!

Here is the start-to-finish process video so you can see how to create this mini album:
I began by die cutting all 7 layers of frames in the Fancy Nested Circle Dies from a different Bungalow Lane patterned paper. I chose colors and patterns that reminded me of Thanksgiving since that's what I documented - our Thanksgiving 2020. I had my Cameo cut out inner circles, glued the die cut frames on top, then machine stitched around all the circles for fun texture. Then I punched a hole through the top of every circle to eventually connect them together with a yellow loose-leaf binder ring. I also added a little circle made with a reinforce hole punch on the front and back of each page over the hole.
On the cover I made the title by cutting a "thank you" Foam Phrase Sticker in two then finishing the title "THANKSGIVING" with Mini Foam Thickers from my old Whimsical collection but they're still available at JoAnn, yay! I added a heart from the Embossed Puffy Stickers between. That's about all that'll fit on this smallest circle so onto the next!
On the backside of the cover I trimmed an "eat, drink and be cozy" sentiment Cardstock Sticker into three pieces, added them with liquid glue to reinforce the adhesive, and embellished with three button Embossed Puffy Stickers. On the front of the 2nd circle I added an orange leaf Chipboard Sticker, yellow crepe paper Stitched Leaf, a light orange heart, and yellow "family time" sentiment from the Cardstock Stickers.
The back of the 2nd page has a colorful "all the comforts of home" Chipboard Sticker topped with a yellow heart/button Layered Sticker. The 3rd page features the first photo. I got a little techy in Silhouette Studio, dropping photos into concentric circles, printing them out, then creating an offset so my Cameo could cut them all out. I layered a leafy Ephemera Die Cut under the photo and attached it with foam squares for dimension. I slipped on a pink Bird Paper Clip to the top and added a gold heart Cardstock Sticker to the bottom.
On the back of the 3rd page I added a floral watering can Layered Sticker along with two sentiments from the 8-Page Sticker Book. The 4th page has a photo adhered with foam squares and embellished with a blue "home sweet home" banner Chipboard Sticker, orange "a perfect afternoon" banner Cardstock Sticker, a light pink floral sprig from the 8-Page Sticker Book, and a trio of buttons from the Embossed Puffy Stickers.
On the back of the 4th page I typed and printed journaling in a circle, cut around it, then added it on top of a round black/gold foil wreath Ephemera Die Cut and adhered it with foam squares. I tucked a gold leaf Cardstock Sticker under the left side and added a gold, round heart Chipboard Sticker on the top right. On the 5th page I framed a round photo with a wreath Chipboard Sticker and added a gold foiled "thank you" sticker from the 8-Page Sticker Book.
The back of the 5th page has a photo of desserts - my favorite part of Thanksgiving :) I adhered the photo with foam squares and simply added a navy "thankful" sticker from the 8-Page Sticker Book and a pink heart from the Embossed Puffy Stickers. The 6th page has a family photo and then I added "WELCOME" letter stickers from the Foam Phrase Stickers around the bottom curve. I tucked semi circles from the Chipboard Stickers under the rest of the photo to create a scalloped border.
On the back of 6th page I layered two house Chipboard Stickers with a "home" Ephemera Die Cut between and since we had Thanksgiving at 3 different houses I put a "3" at the beginning and "S" at the end to say "3 HOMES" - those are from the Thickers.
On the 7th and last page, I layered two photos first. I scored across the top of the front photo and adhered the flap to the second photo. I placed three Floral Die Cuts along the right side and topped them with a round heart Chipboard Sticker, yellow button Cardstock Sticker, and a pink heart Embossed Puffy Sticker. I used the Classic Type Numbers and Characters Dies also from scrapbook.com to make the "2020" numbers from Bungalow Lane papers and adhered them around the bottom curve of the top photo.
On the back of the photo flip I added one more house Chipboard Sticker, some tree Cardstock Stickers, and a gold "make happiness" Ephemera Die Cut. To finish I stitched "THANKSGIVING" Thickers around the bottom curve of the photo.
On the back of the album I added a "home sweet home" Cardstock Sticker. I connected all the pages together with a yellow loose-leaf binder ring and added a pink Heart Charm onto the ring for the finishing touch!
Here are all the fronts of the pages:
And here are all the backs of the pages:
All-in-all this entire mini album came together in just under 3 hours - that's a record for me! With the base of the mini album made lickity split with the help of the Fancy Nested Circle Dies and paired together with my Bungalow Lane collection, this album is quick and easy! Thanks for stopping by, see you again soon!
SUPPLIES: Patterned paper, stickers, die cuts, Thickers, charm, embellishments: BUNGALOW LANE; Metal dies: Fancy Nested Circles and Classic Type Numbers and Characters by Scrapbook.com; Sewing machine: Brother; Thread: Coats & Clark

Triangle Coptic Book by Amber Mitchell


Wednesday, November 24, 2021

Hello crafty friends! Amber Mitchell here on the blog today to share with you a coptic book I created using the beautiful Bungalow Lane collection.

This past year, I have made two coptic books that were shaped. The first one was a heart the second was a hexagon.

Since making those two books, I have been itching to make another shaped one. Picking a shape can be tricky, however, as you need a straight edge to bind the books. As such, I decided to stick with a general shape this time around: a triangle.

To make the covers for this book, I took two sheets of paper that measured 5.25 x 5.25 inches. I then cut them down the middle, corner to corner. These acted as my outer and inner linings for the covers and I made them using Paper 6 and Paper 11. To strengthen the covers and make them more durable, I repeated the above step with some heavyweight kraft cardstock. I added two sheets of this in-between the linings and then machine stitched all of the layers together.

To make the signatures for this book, I took three sheets of paper that measured 5 x 5 inches, stacked them, and folded them in half corner to corner. I repeated this process until I had a total of six signatures. I used the We R Memory Keepers Crop-A-Dile to add six holes along the edges of both of my covers. These are spaced at one-inch intervals.

I used my covers as a guide to mark where the holes in my signatures needed to be and used an awl to make those holes. I chose to use a mustard-colored embroidery thread to stitch my book together. I love how this color complements the colors in the cover. If you're new to coptic bookbinding, I'd highly recommend Paige's easy-to-follow, step-by-step class.

To embellish this book, I started with the binding. I used some matching charms from my stash, including one of the Heart Charms and Embossed Puffy Stickers from Bungalow Lane. For the cover, I made a paper flower using Paige's Layered Flower and Leaves cut file. I layered this up with pieces from the Floral Die CutsCardstock Stickers, and Chipboard Stickers. And that's this fun, shaped coptic book done!

Thanks so much for stopping by my post today! I'll see you next time with another fun project!


SUPPLIES: Patterned papers, stickers, die cuts, paper clips, charm, washi tape, embellishments: BUNGALOW LANE; Cut file: Layered Flower and Leaves by Paige Evans; Coptic Bookbinding Class

Location: California, USA / Blog: Happy Crafty Studio / Instagram: @bambidearr / YouTube: bambidearr / Pinterest: bambidearr

Paige Taylor Evans © // Quinn Creatives DESIGN