Pre-Order Sequin Albums!


Saturday, September 30, 2023

PRE-ORDERS ARE NOW OPEN for two styles of 4x4" sequin albums made in collaboration with Gi DeMello from Brazil! I love these unique, one-of-a-kind, sparkly & bespoke albums and I'm so excited to be able to get them into your hands too!!
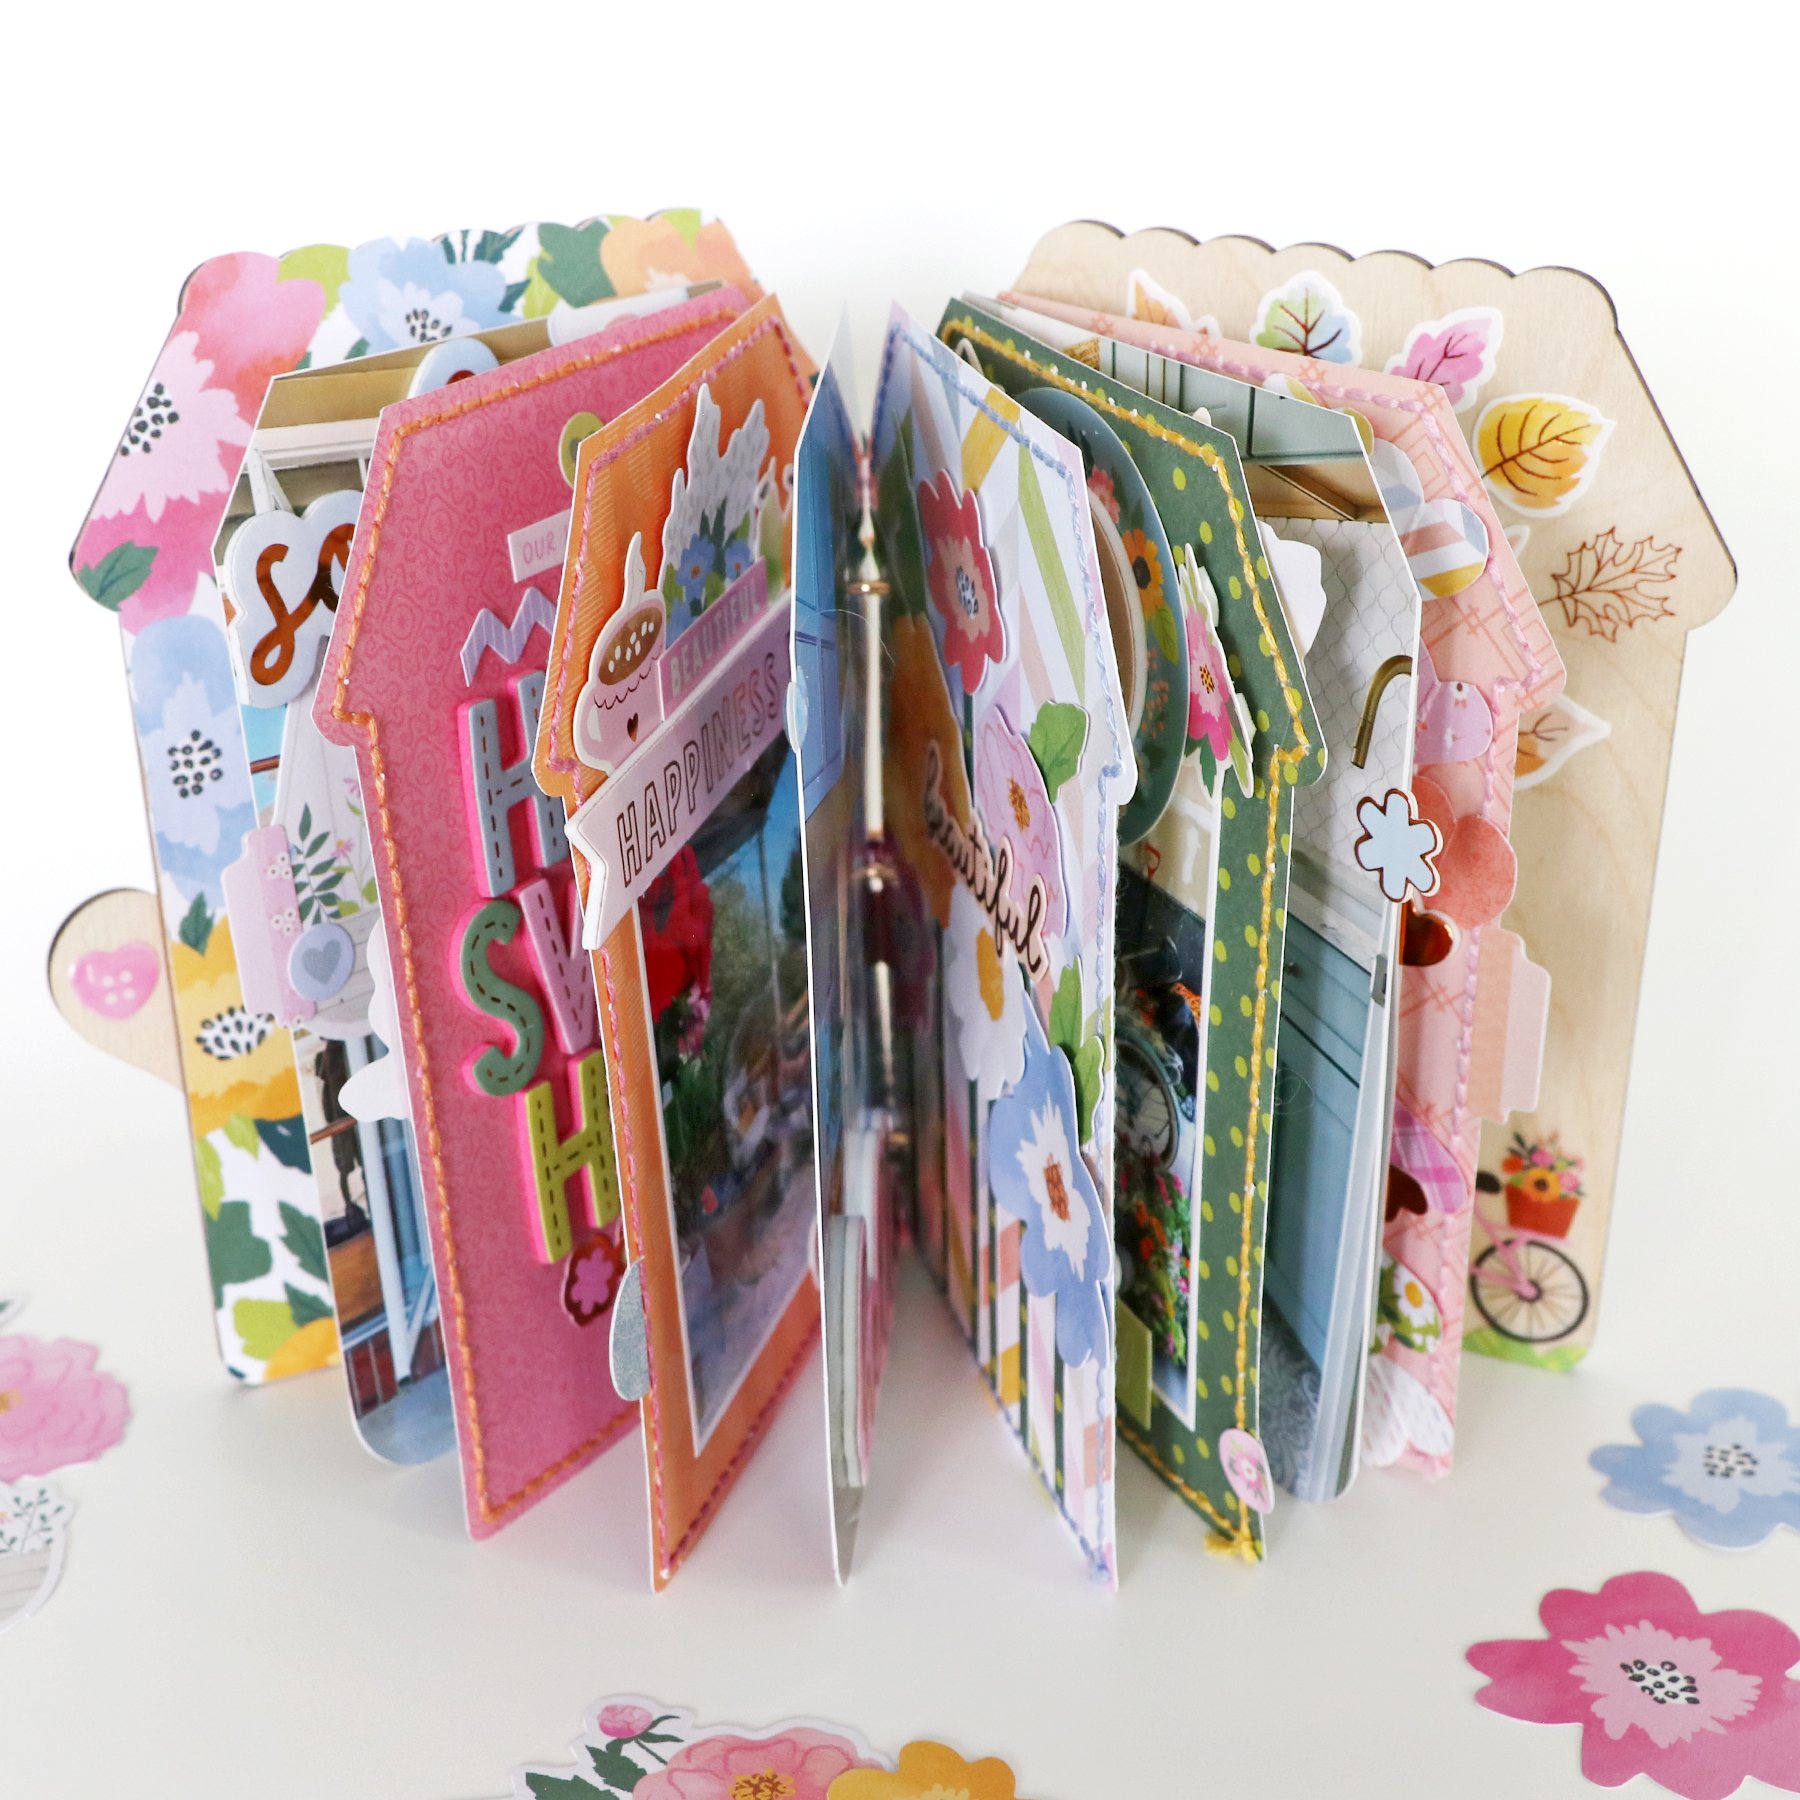
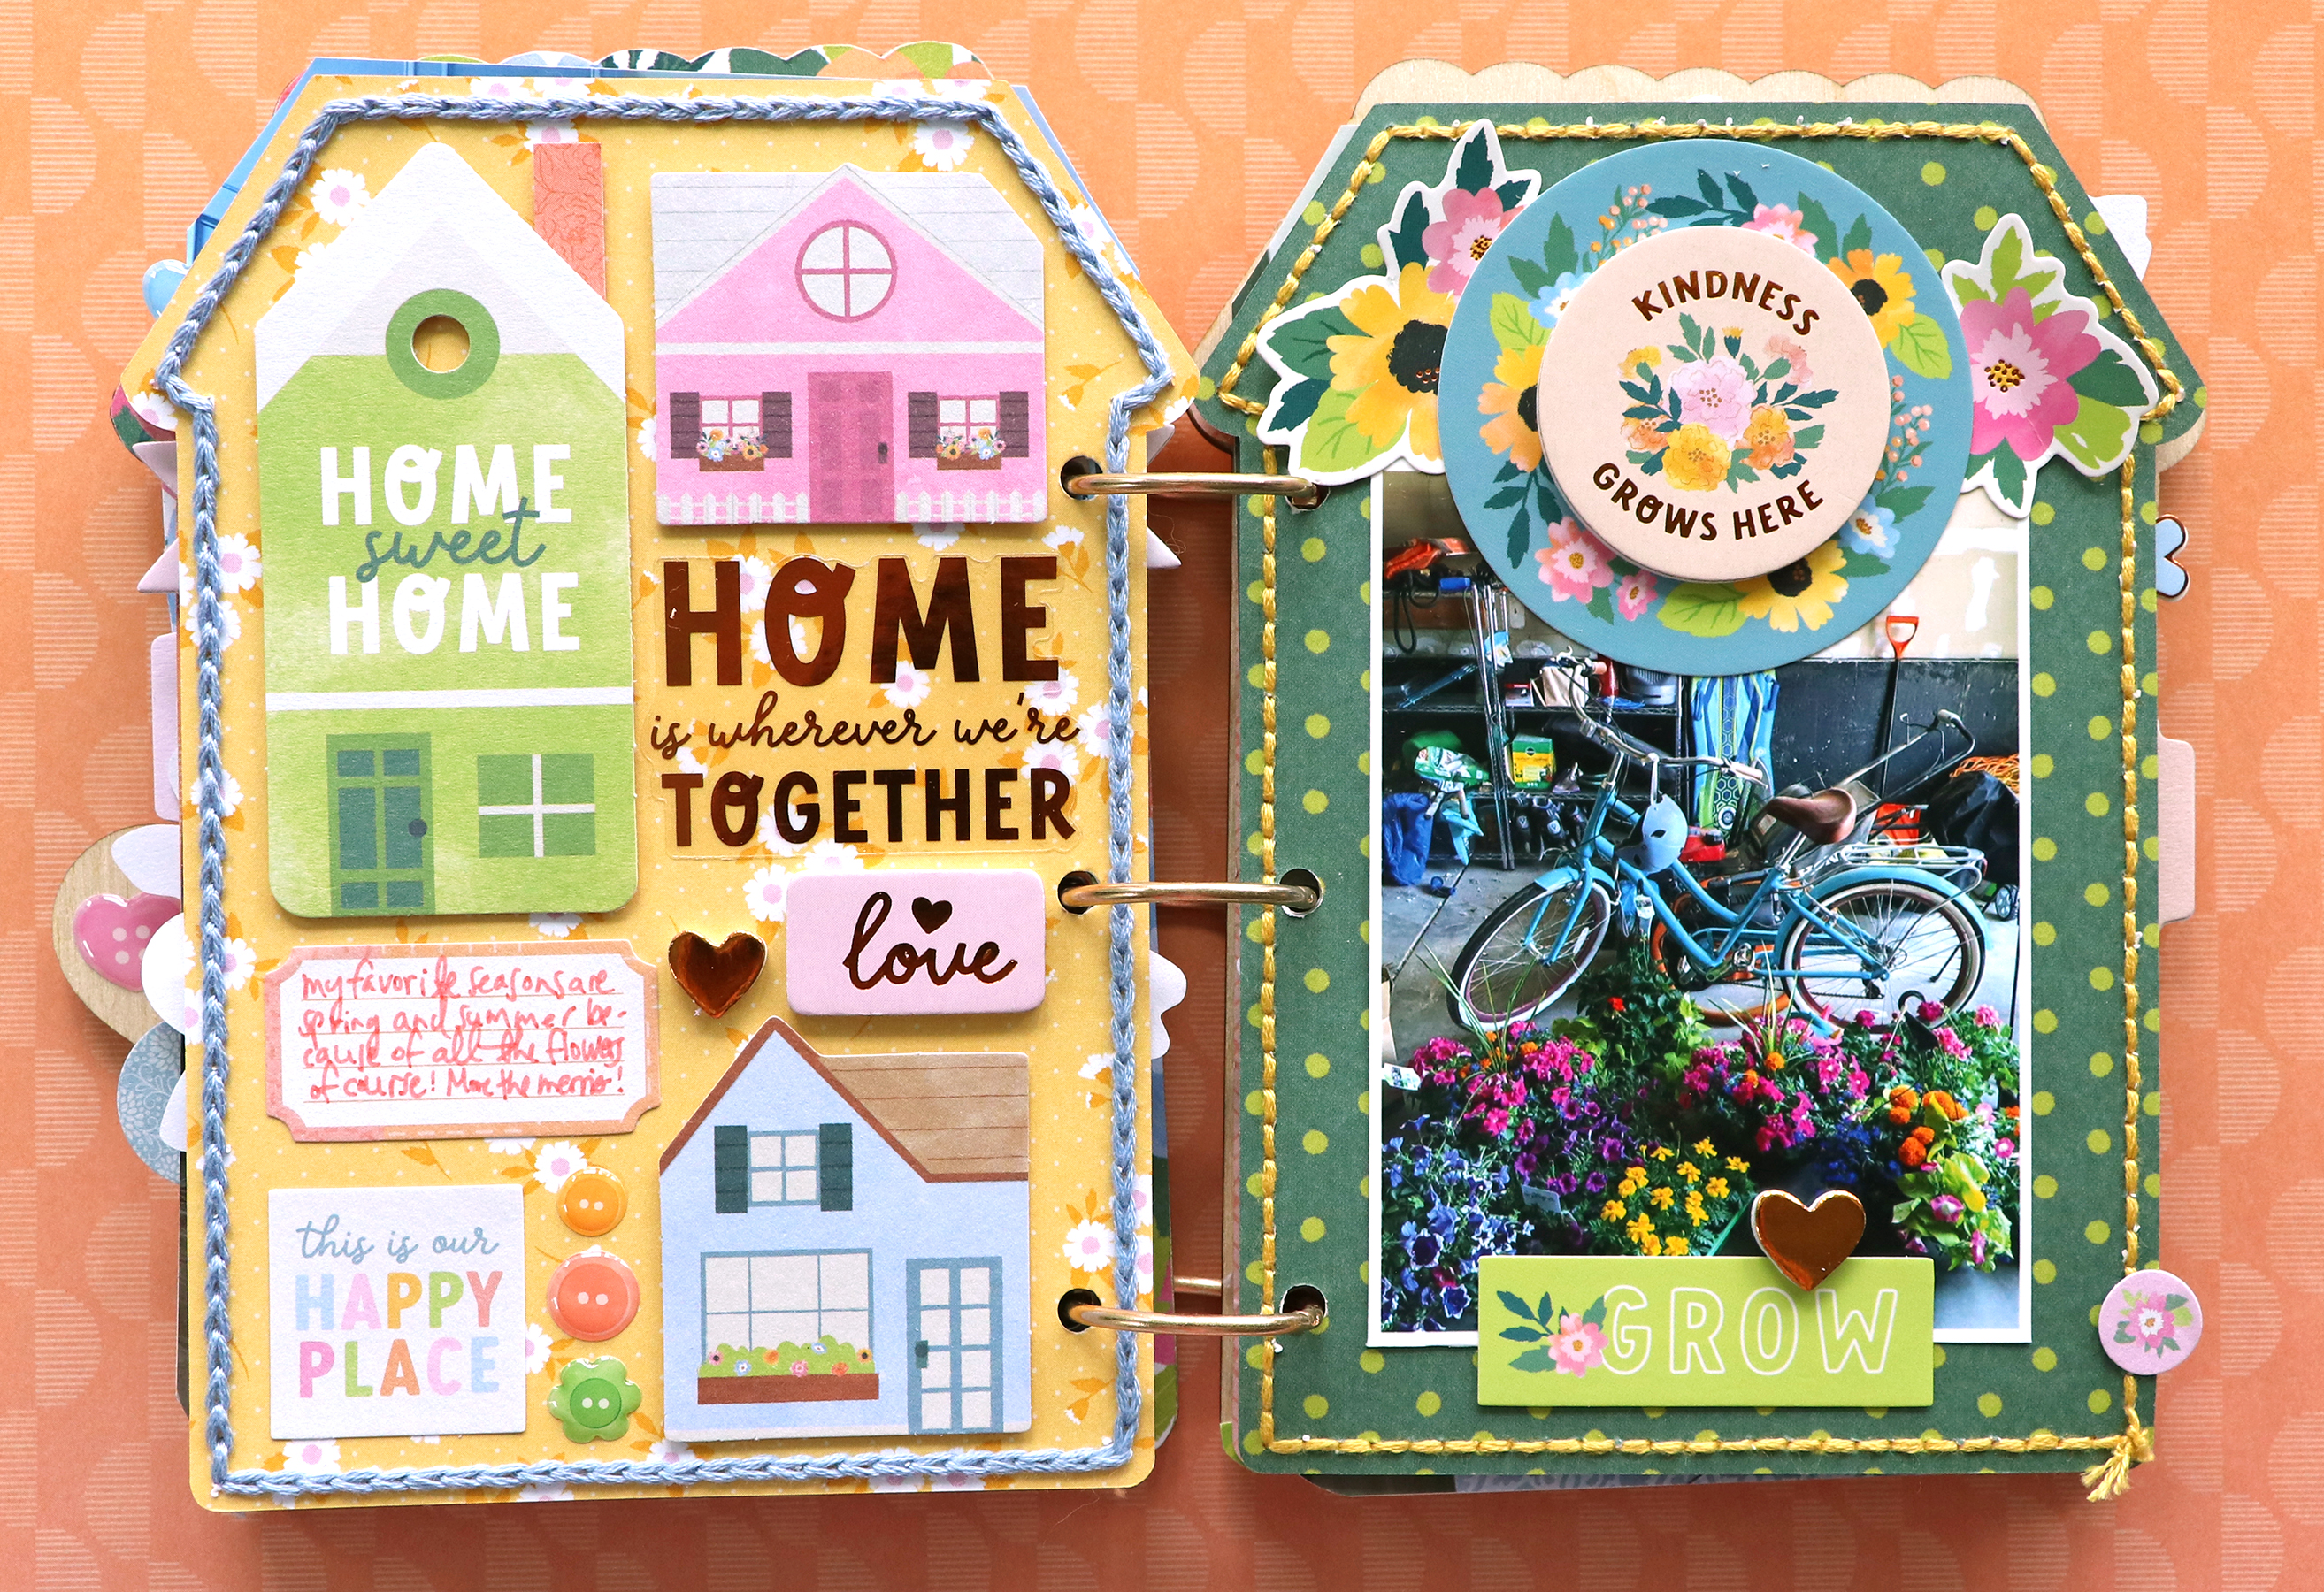
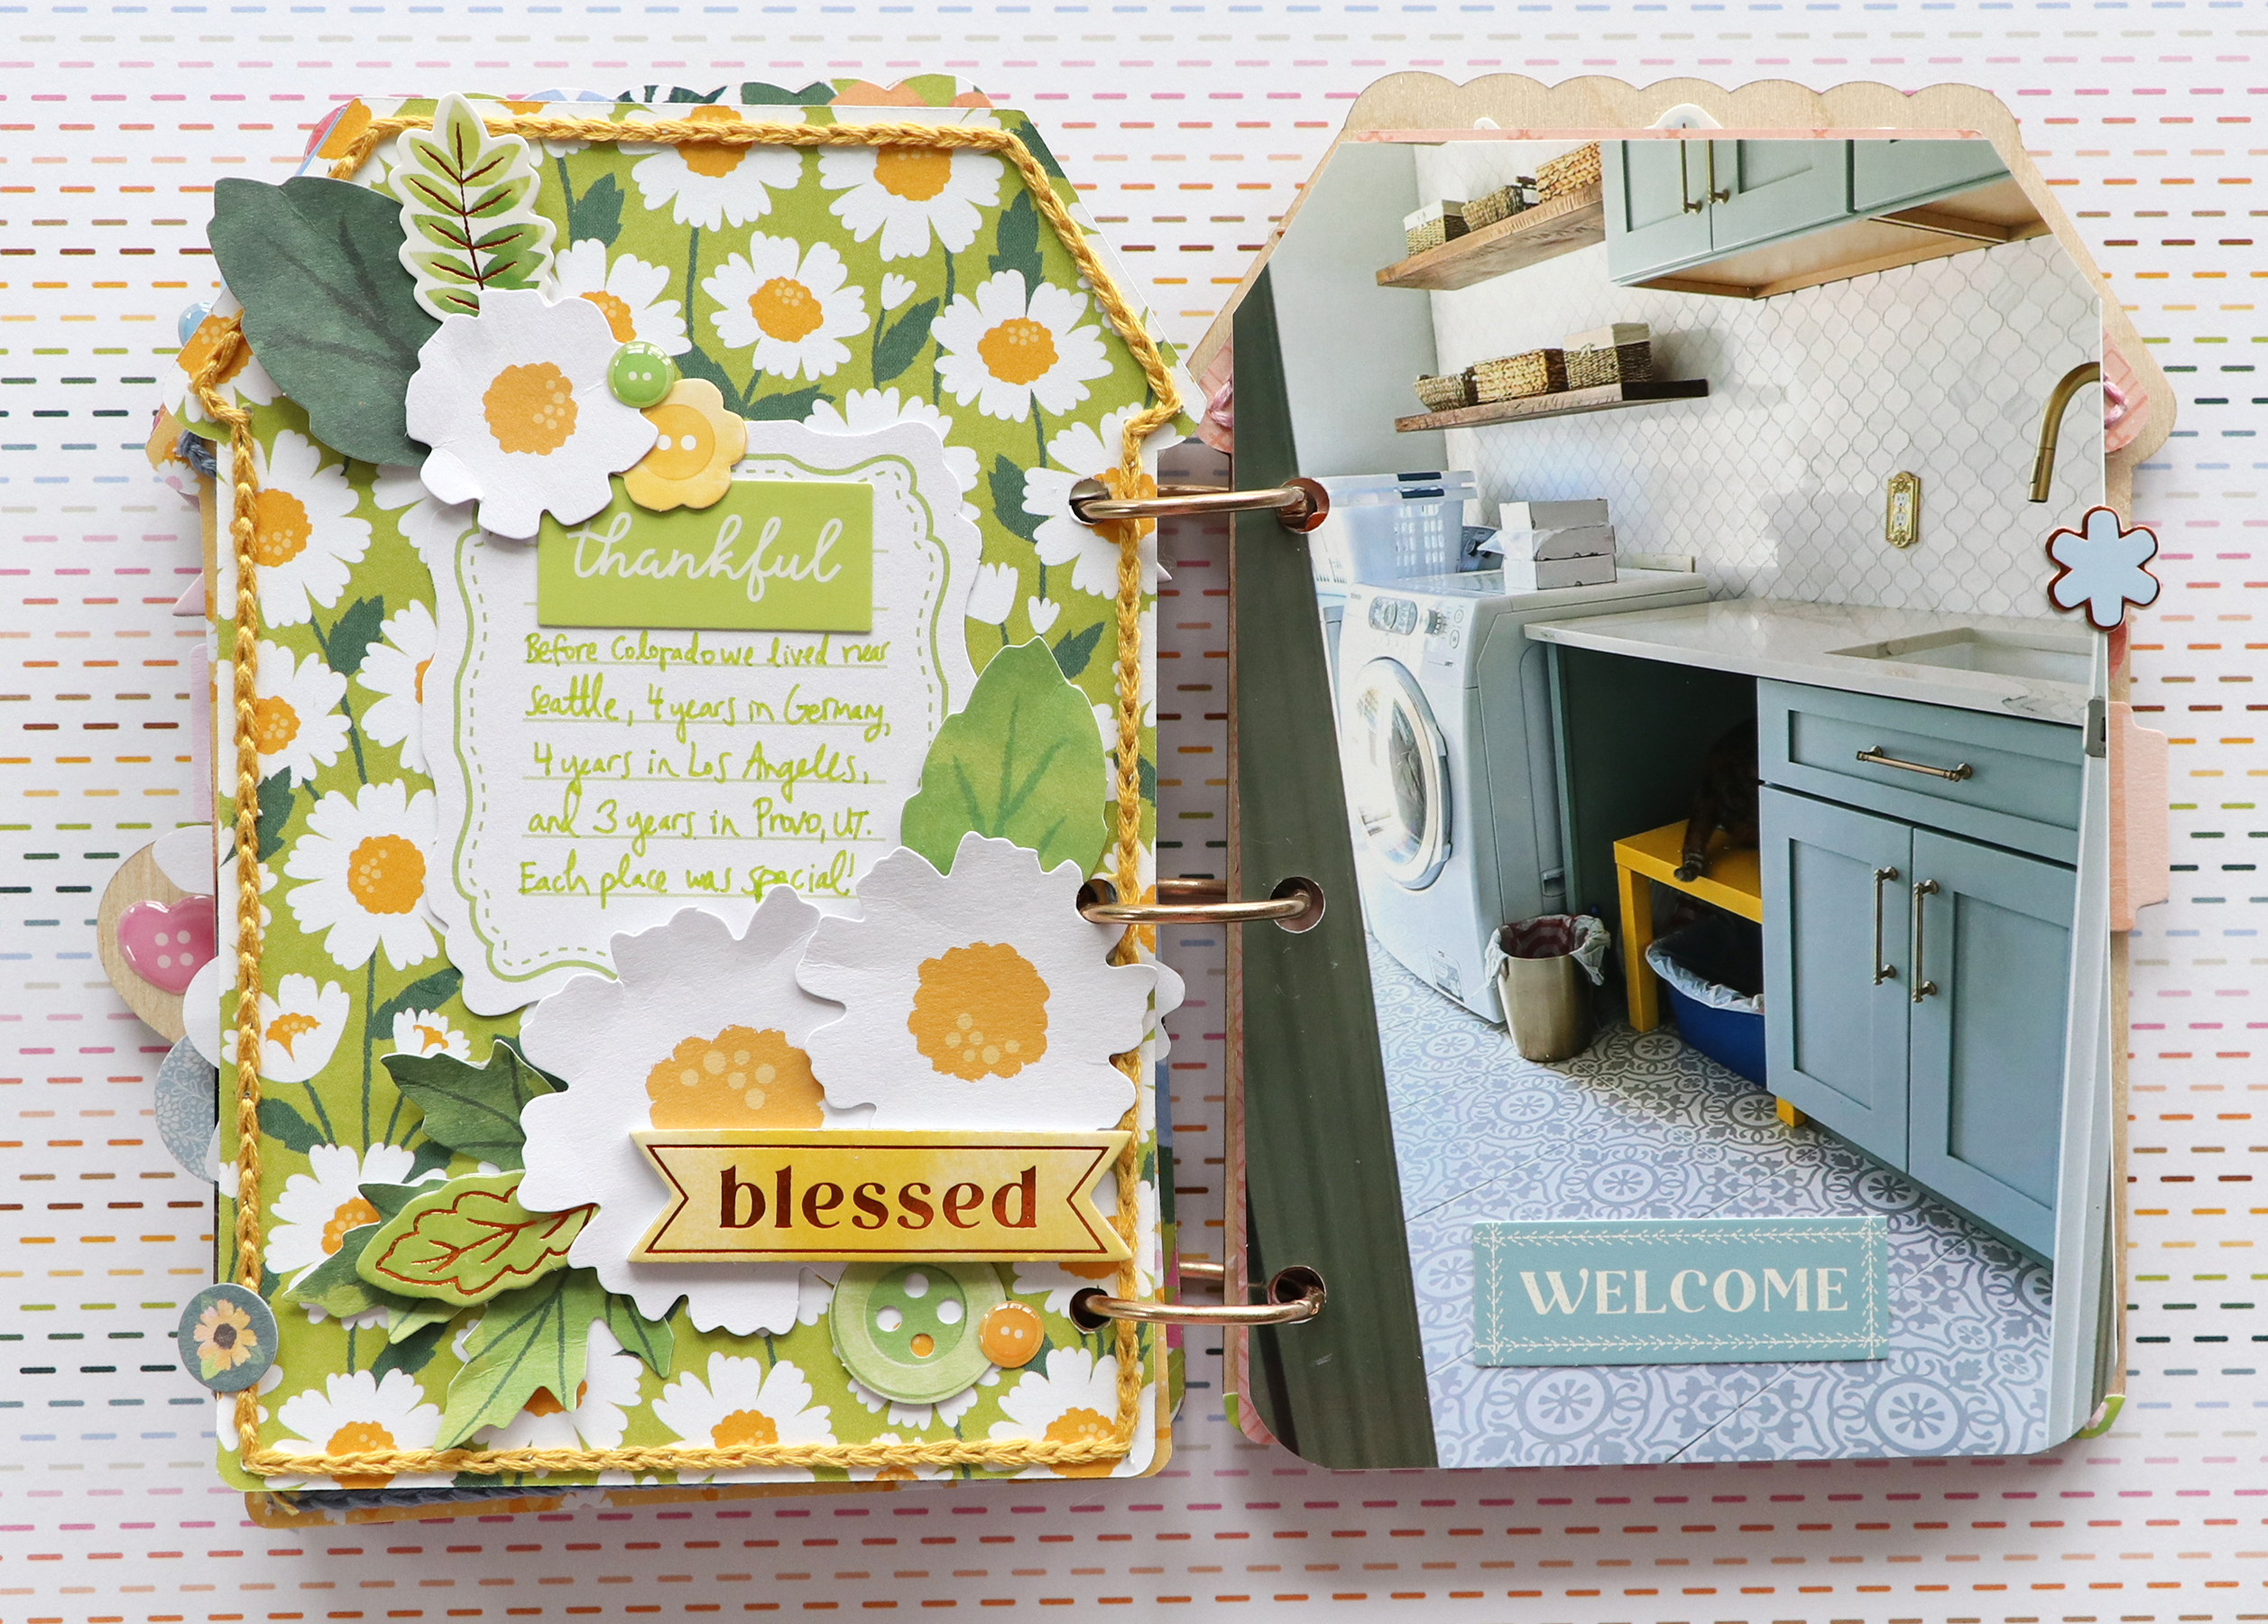
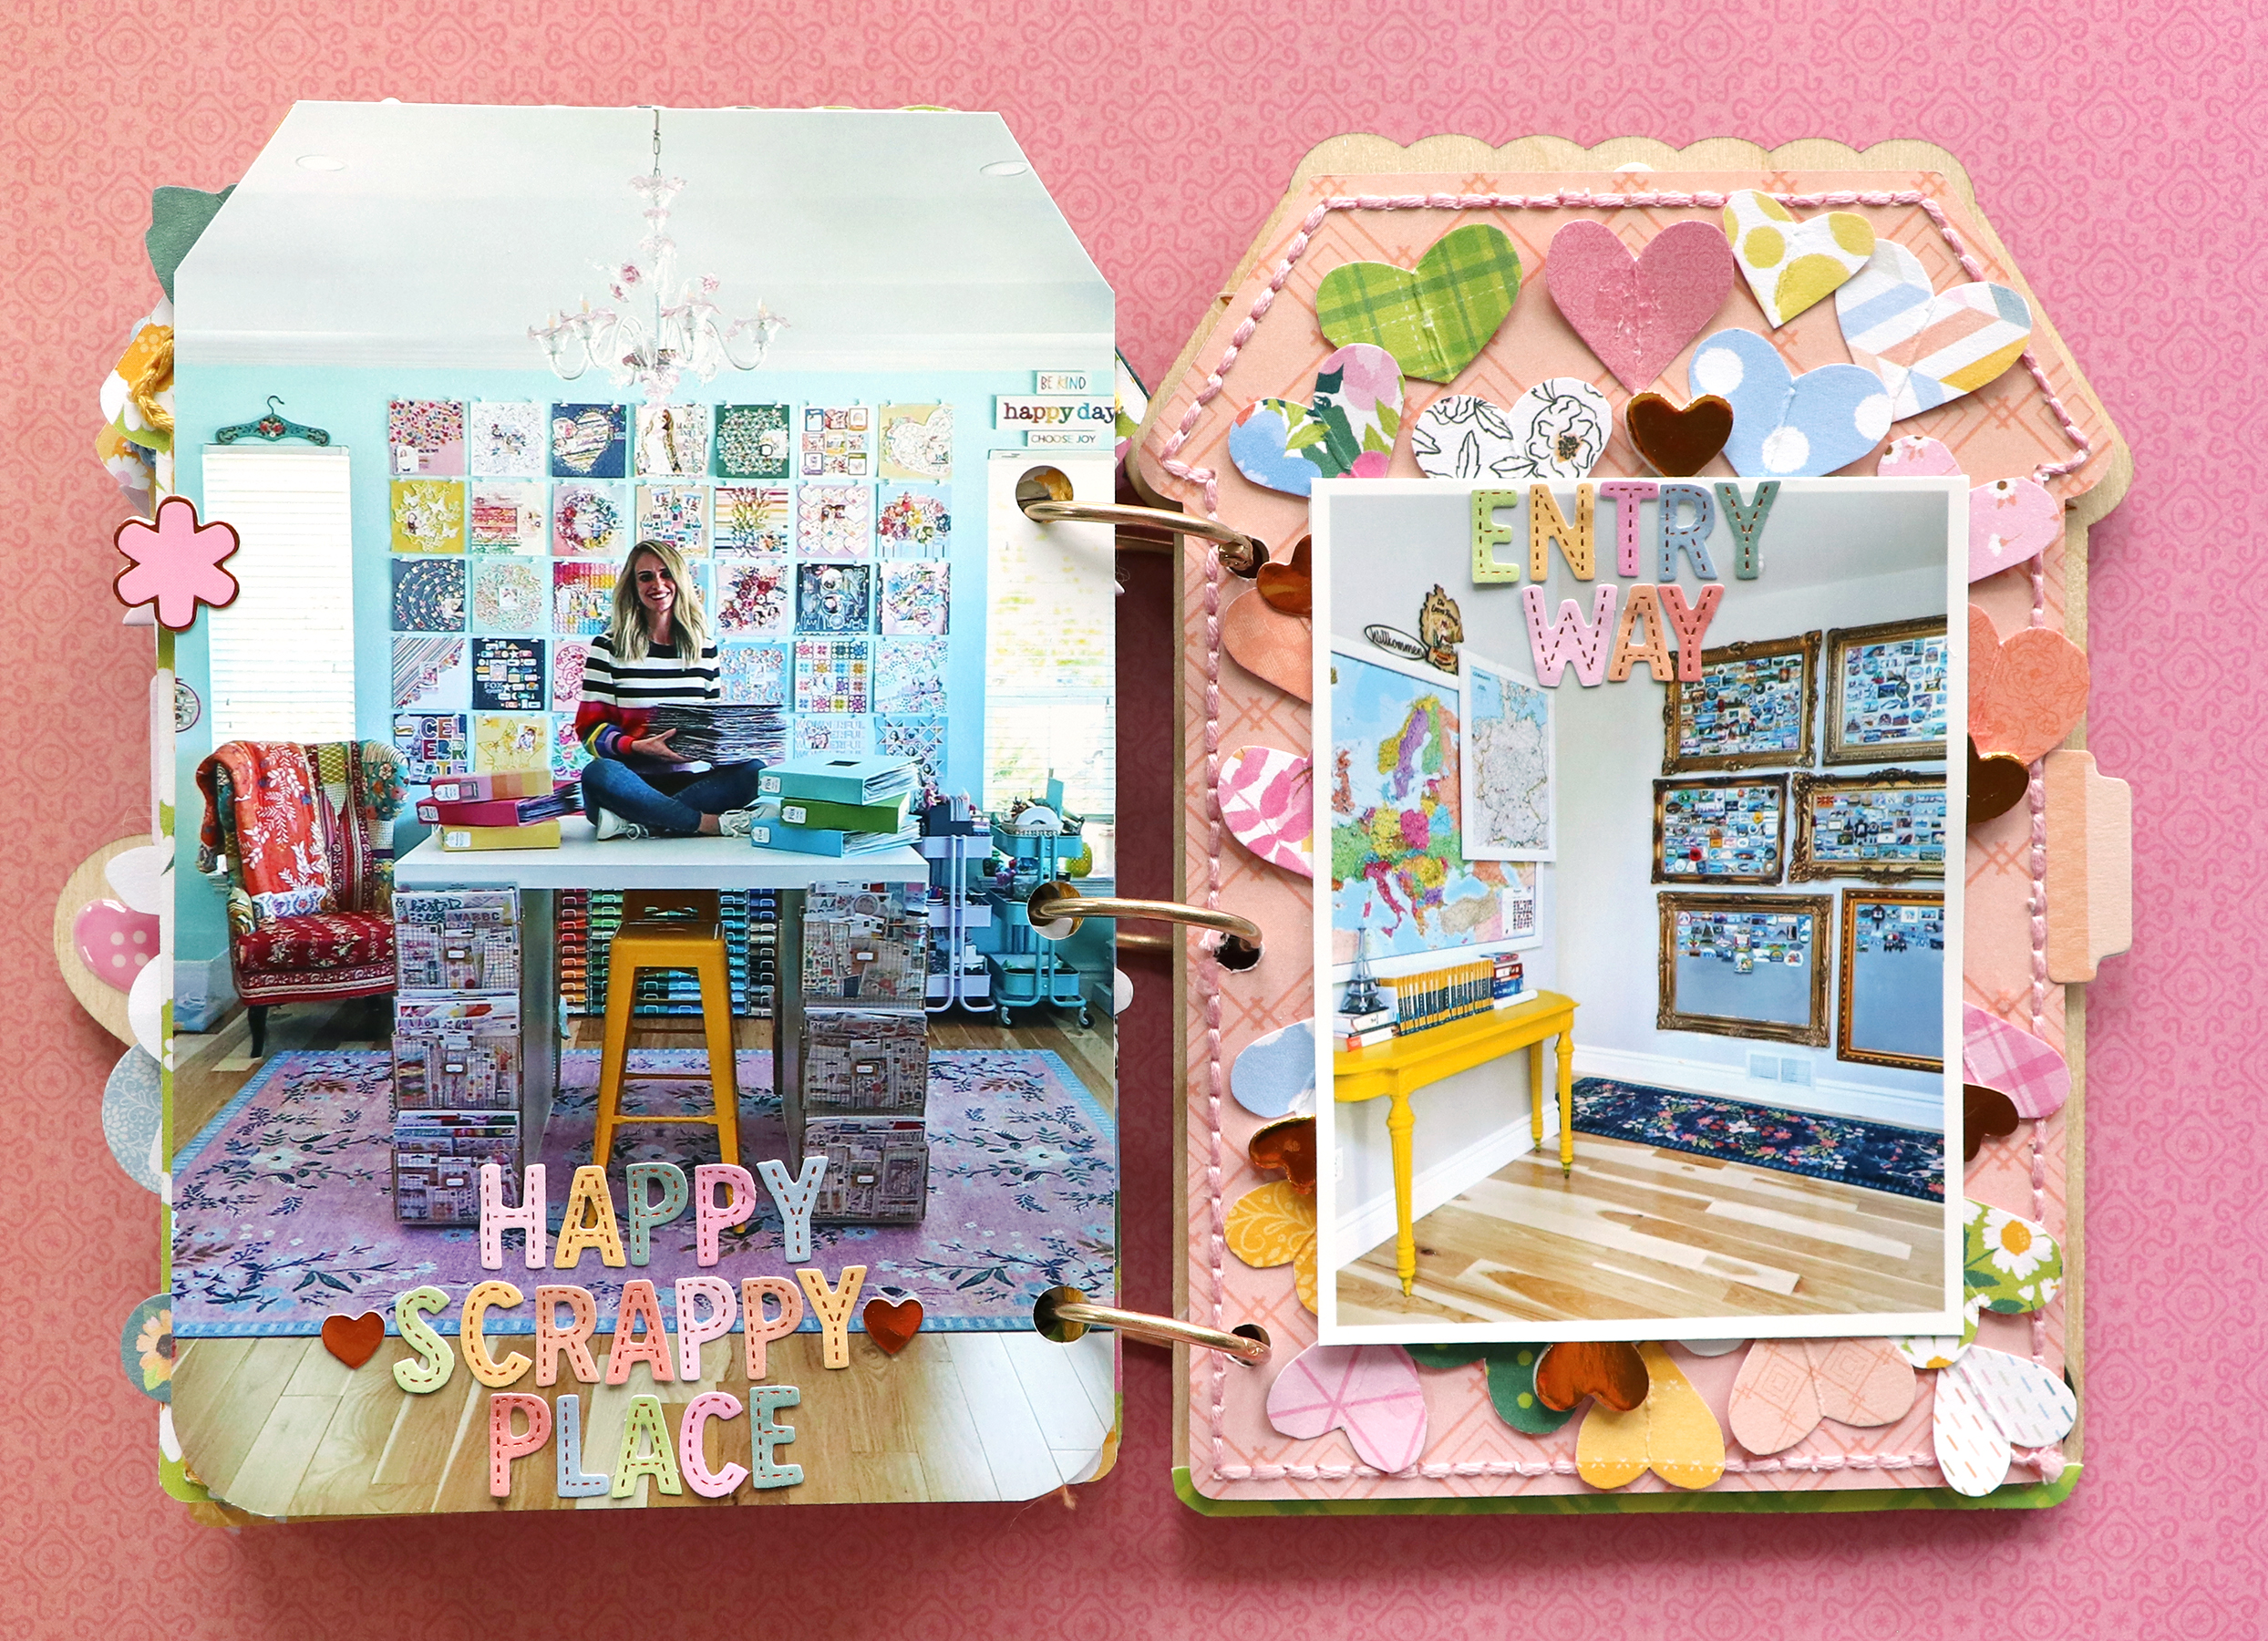
PRE-ORDER a gorgeous 4x4" sequin album to match my Blooming Wild collection!
*************************************************
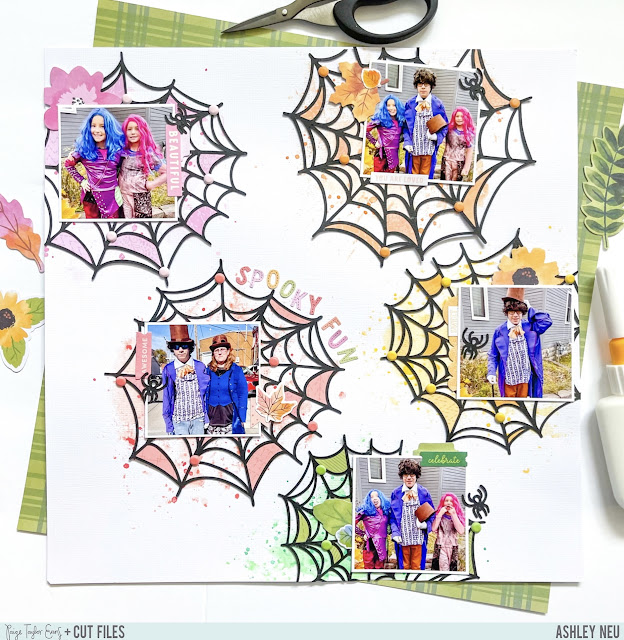
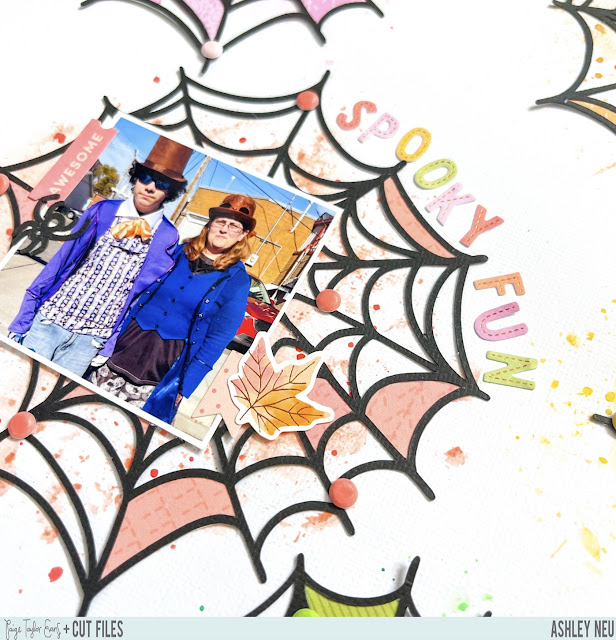
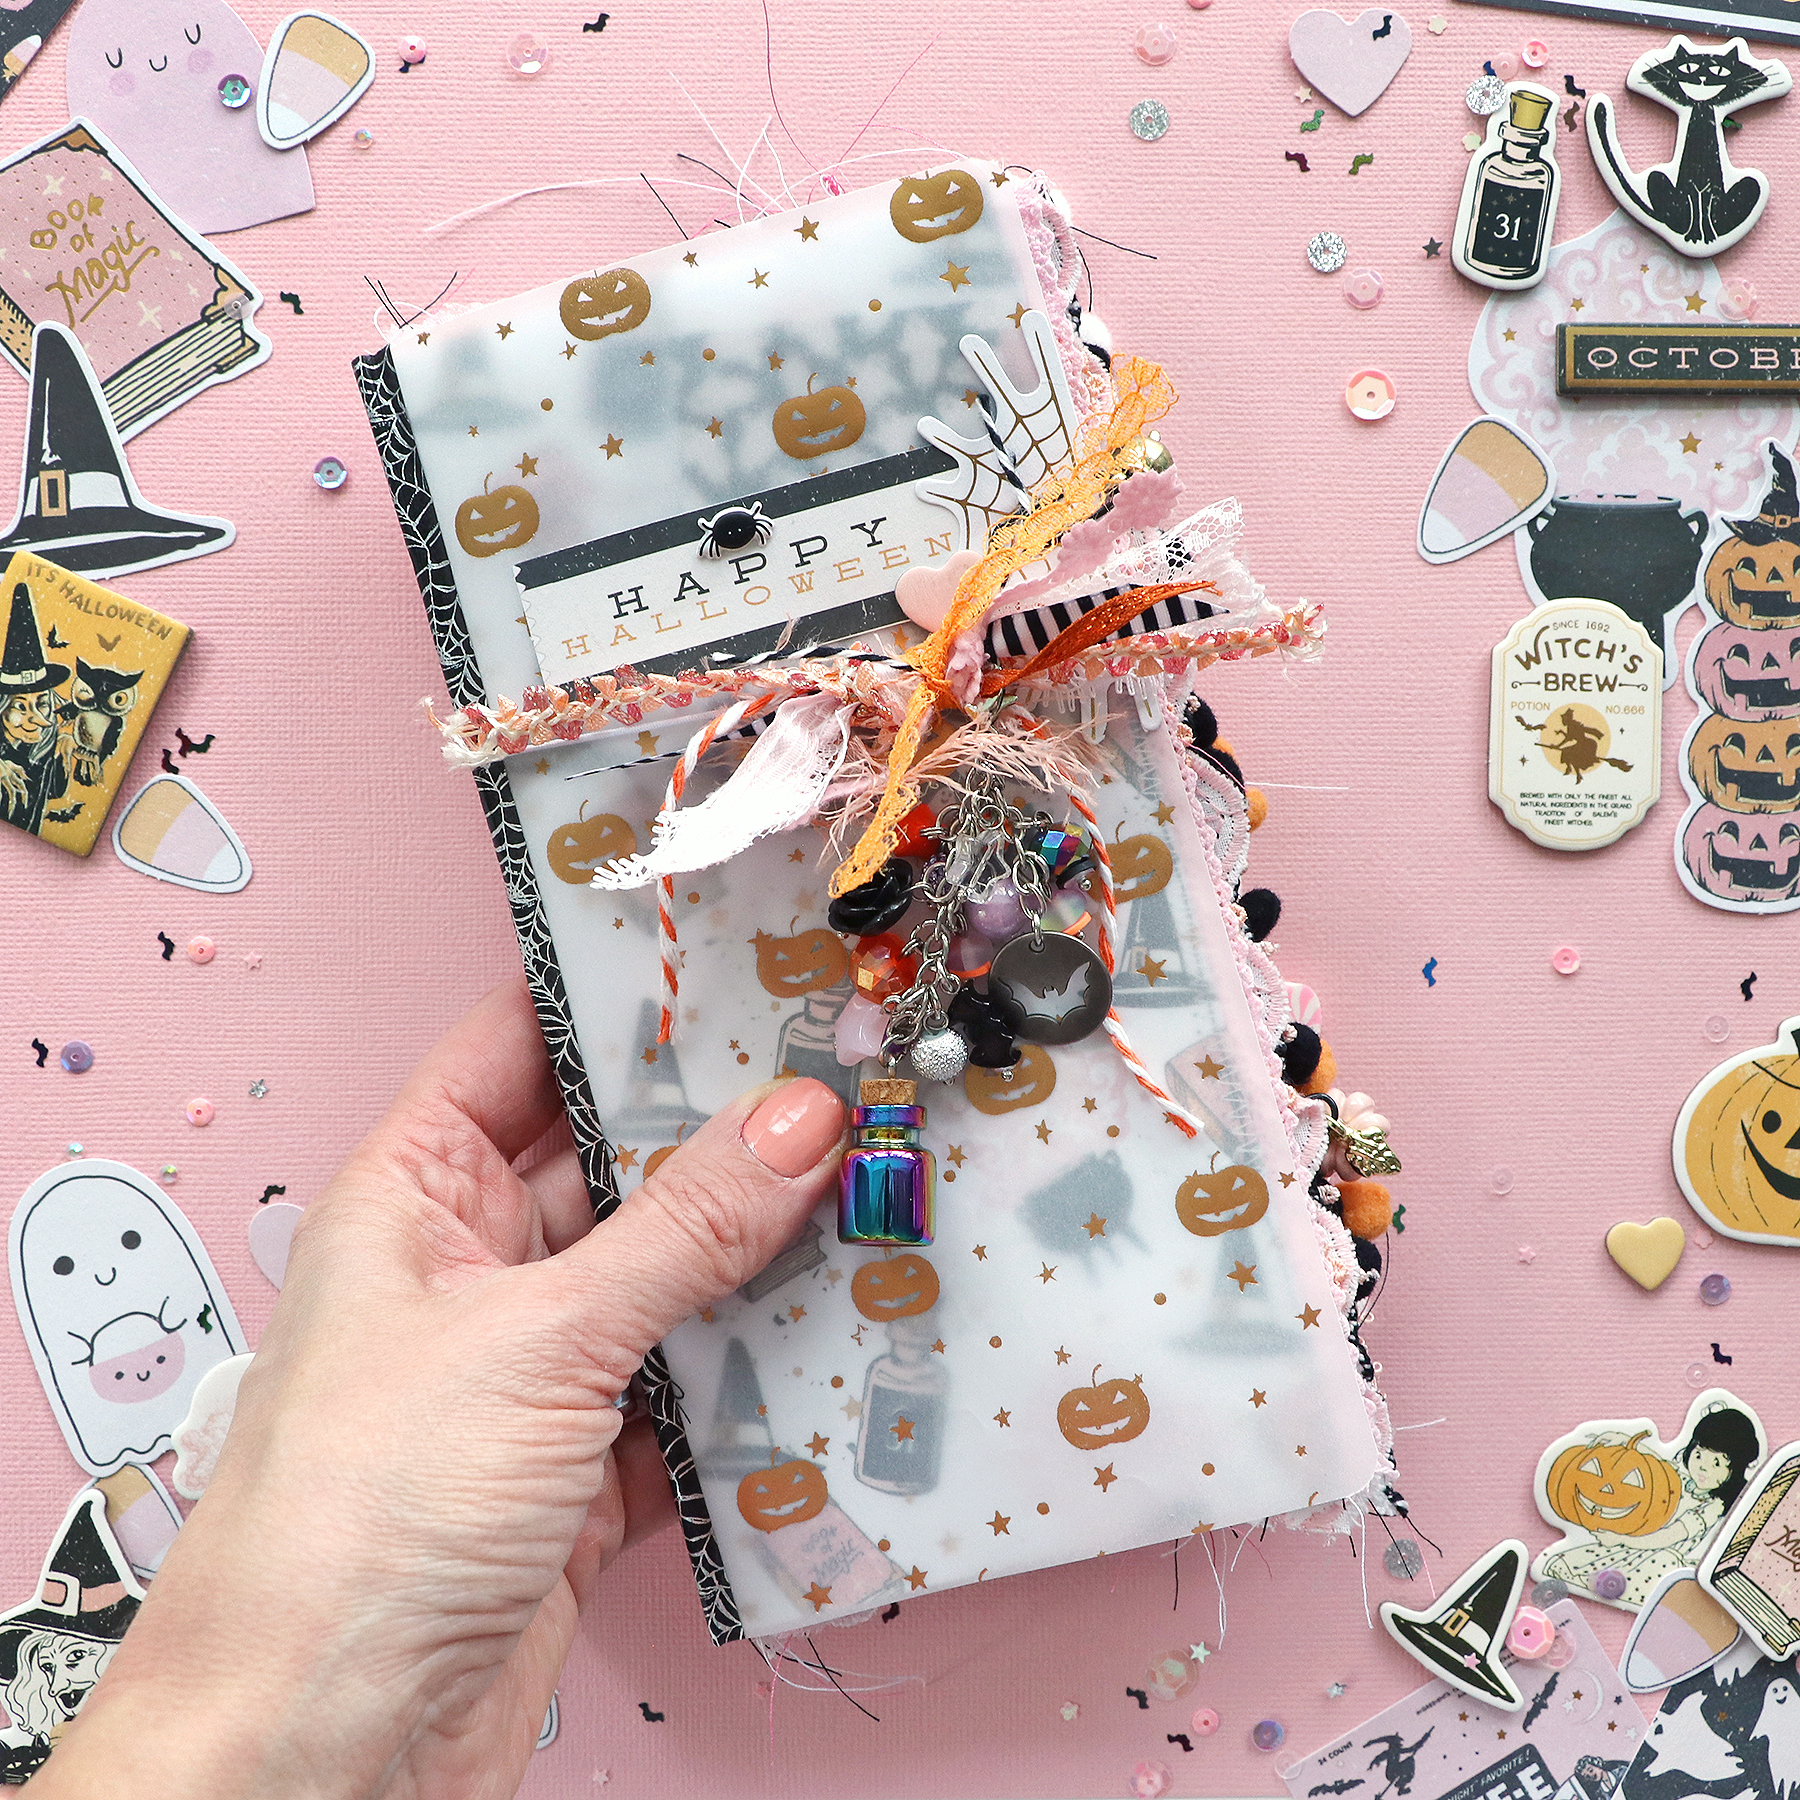
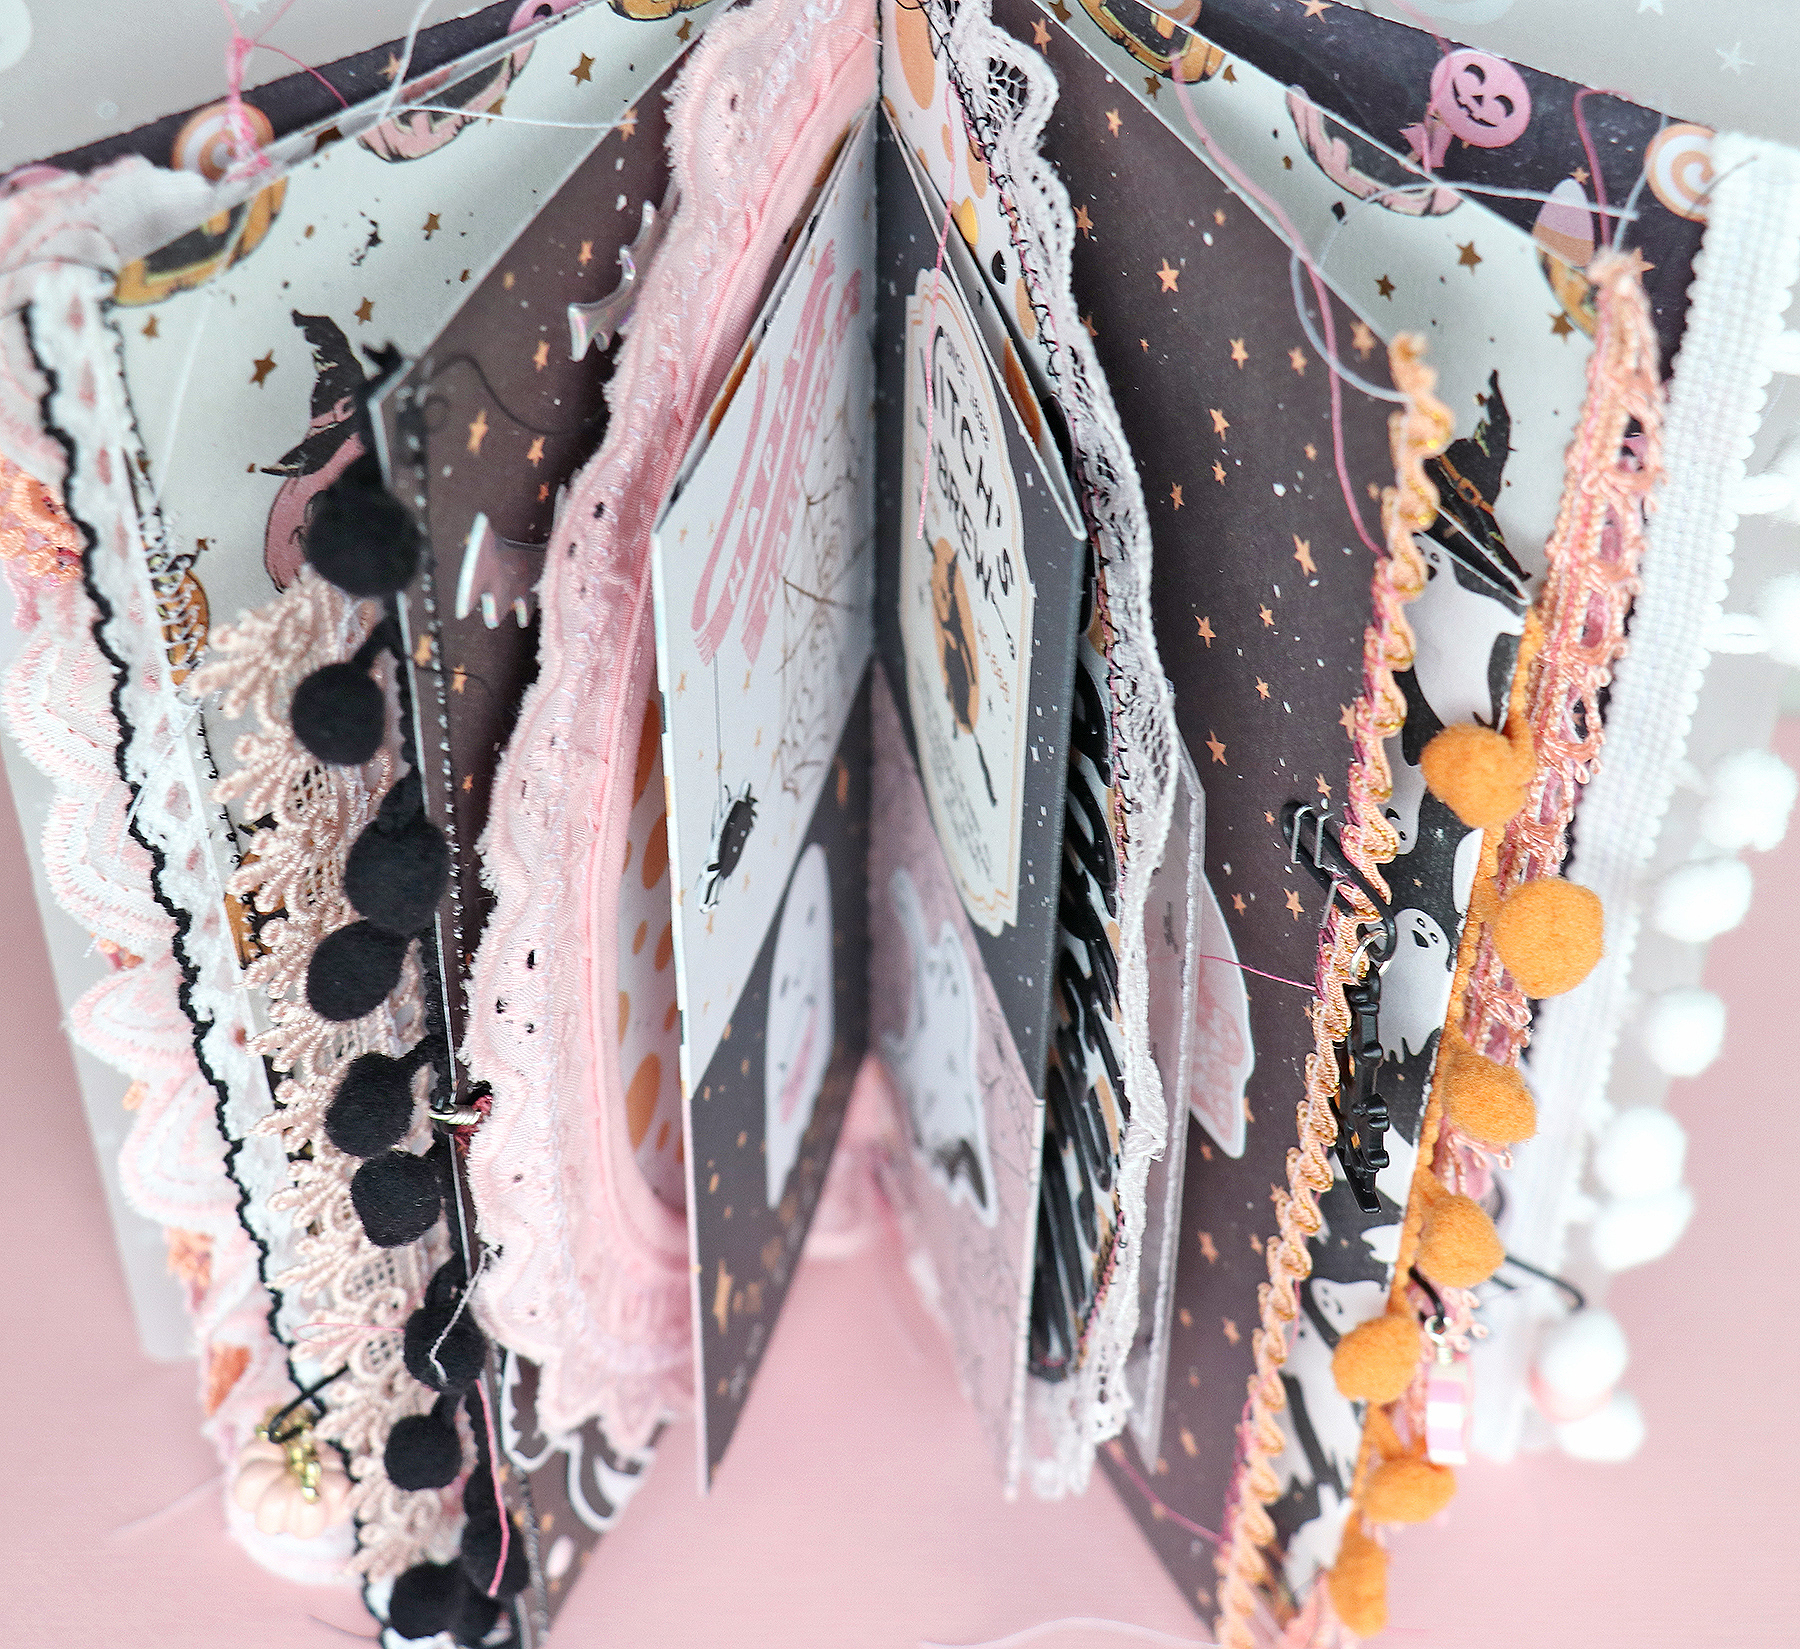
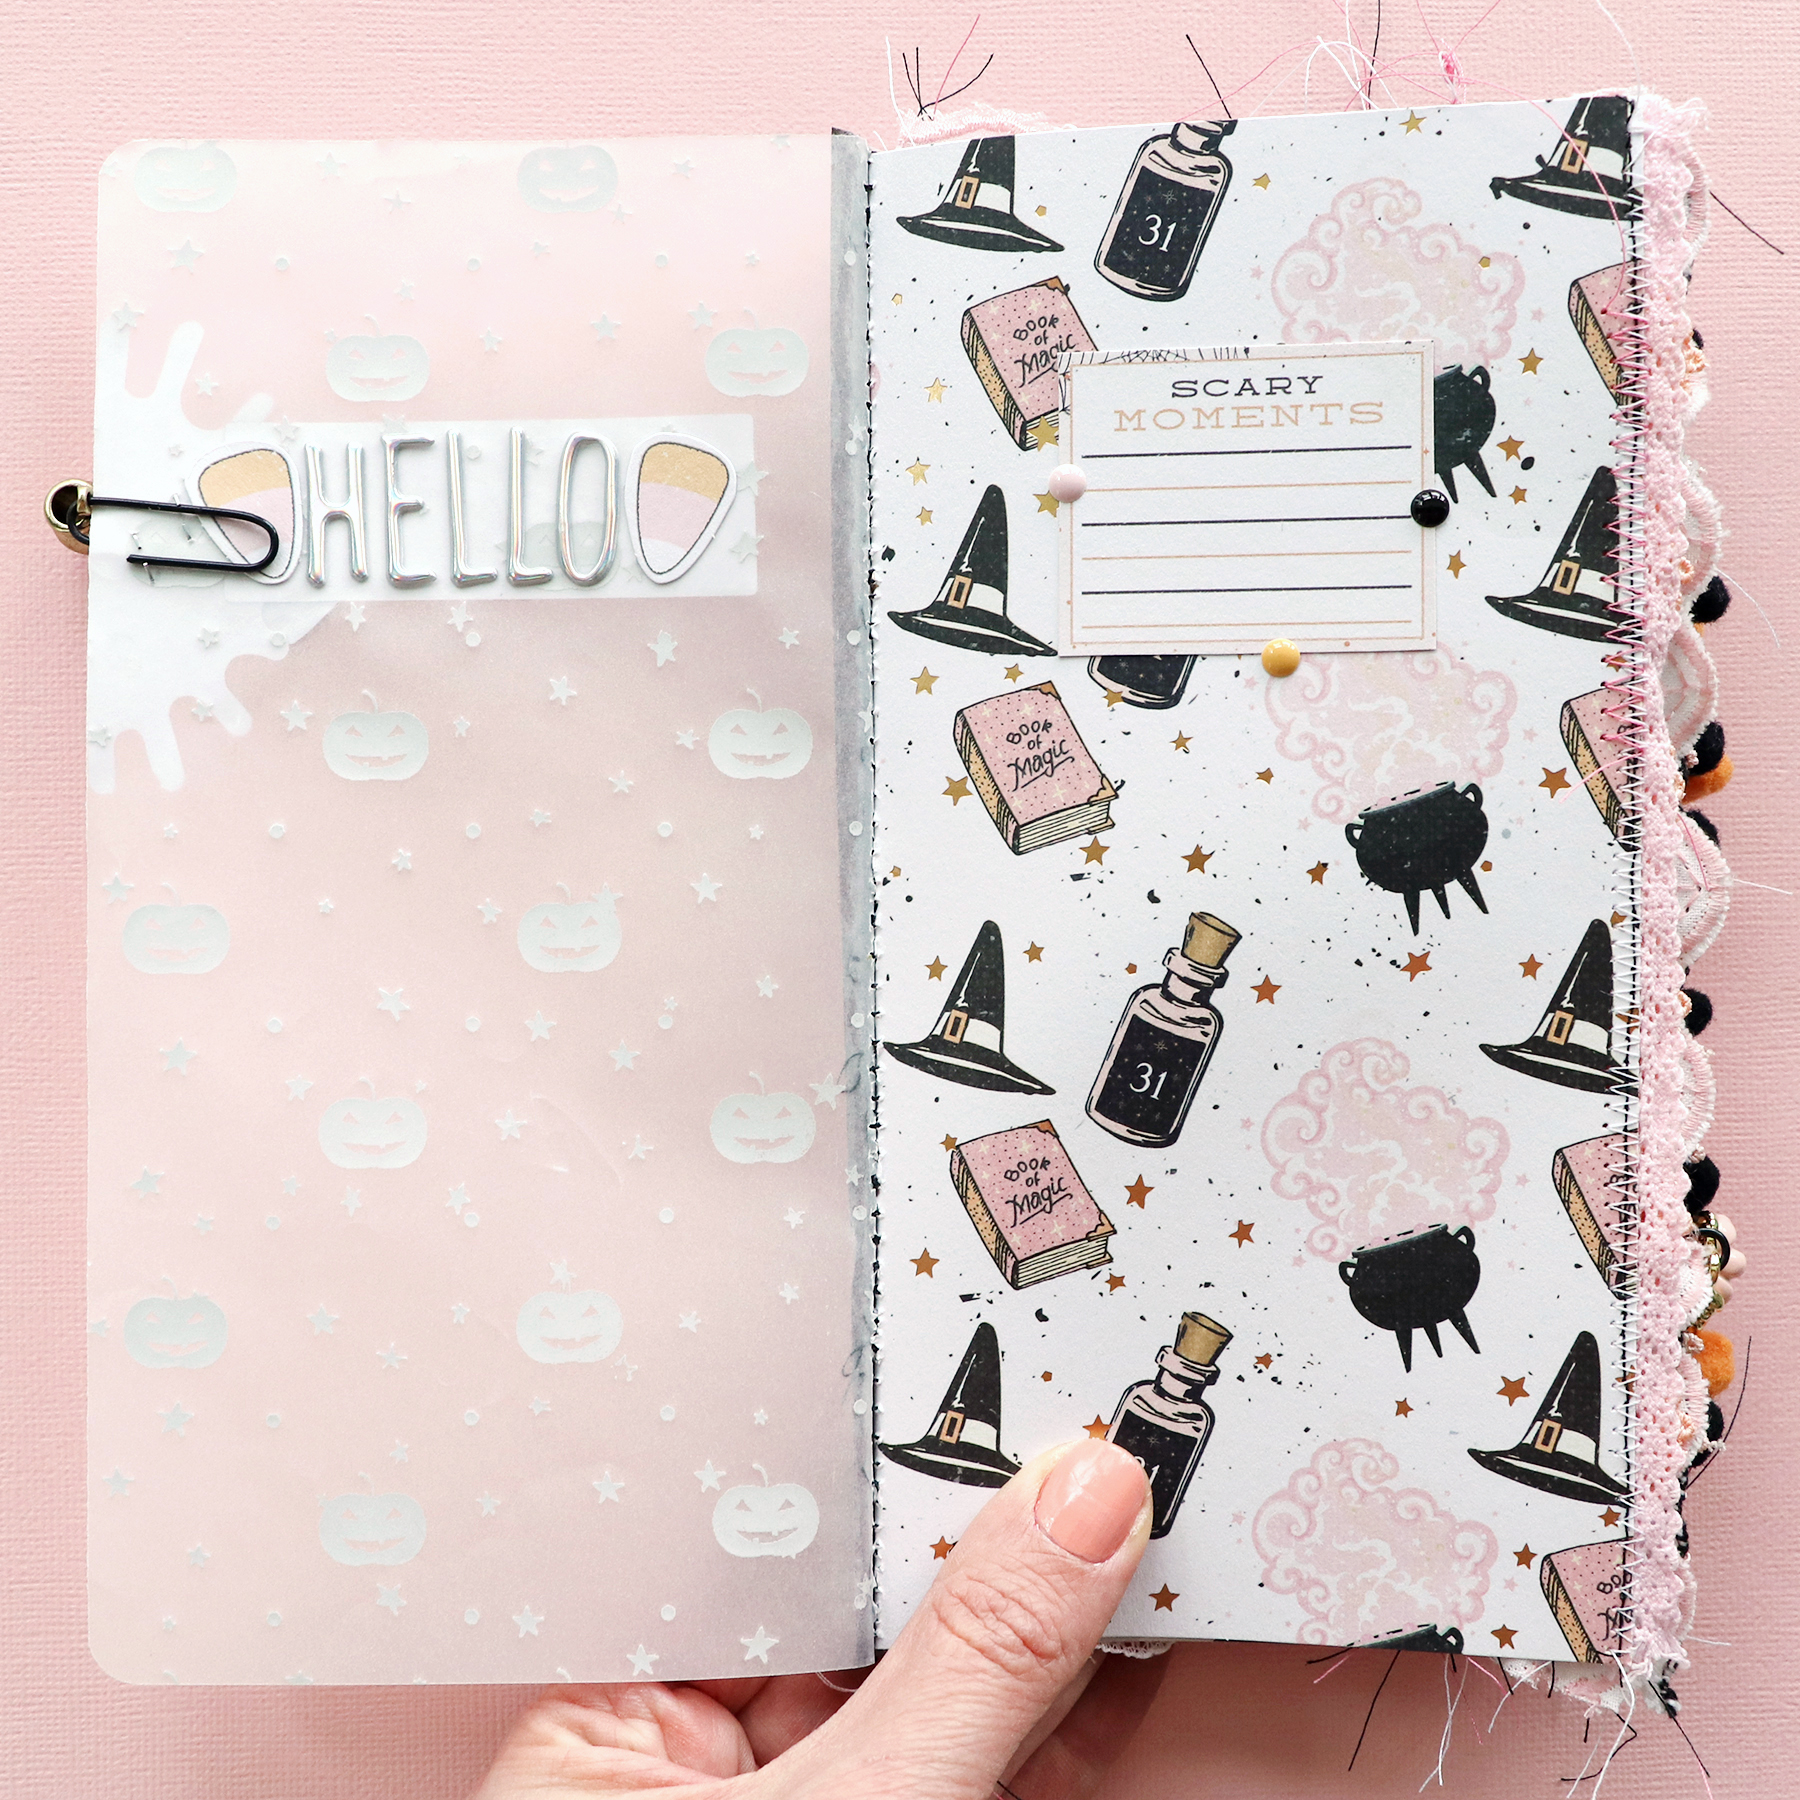
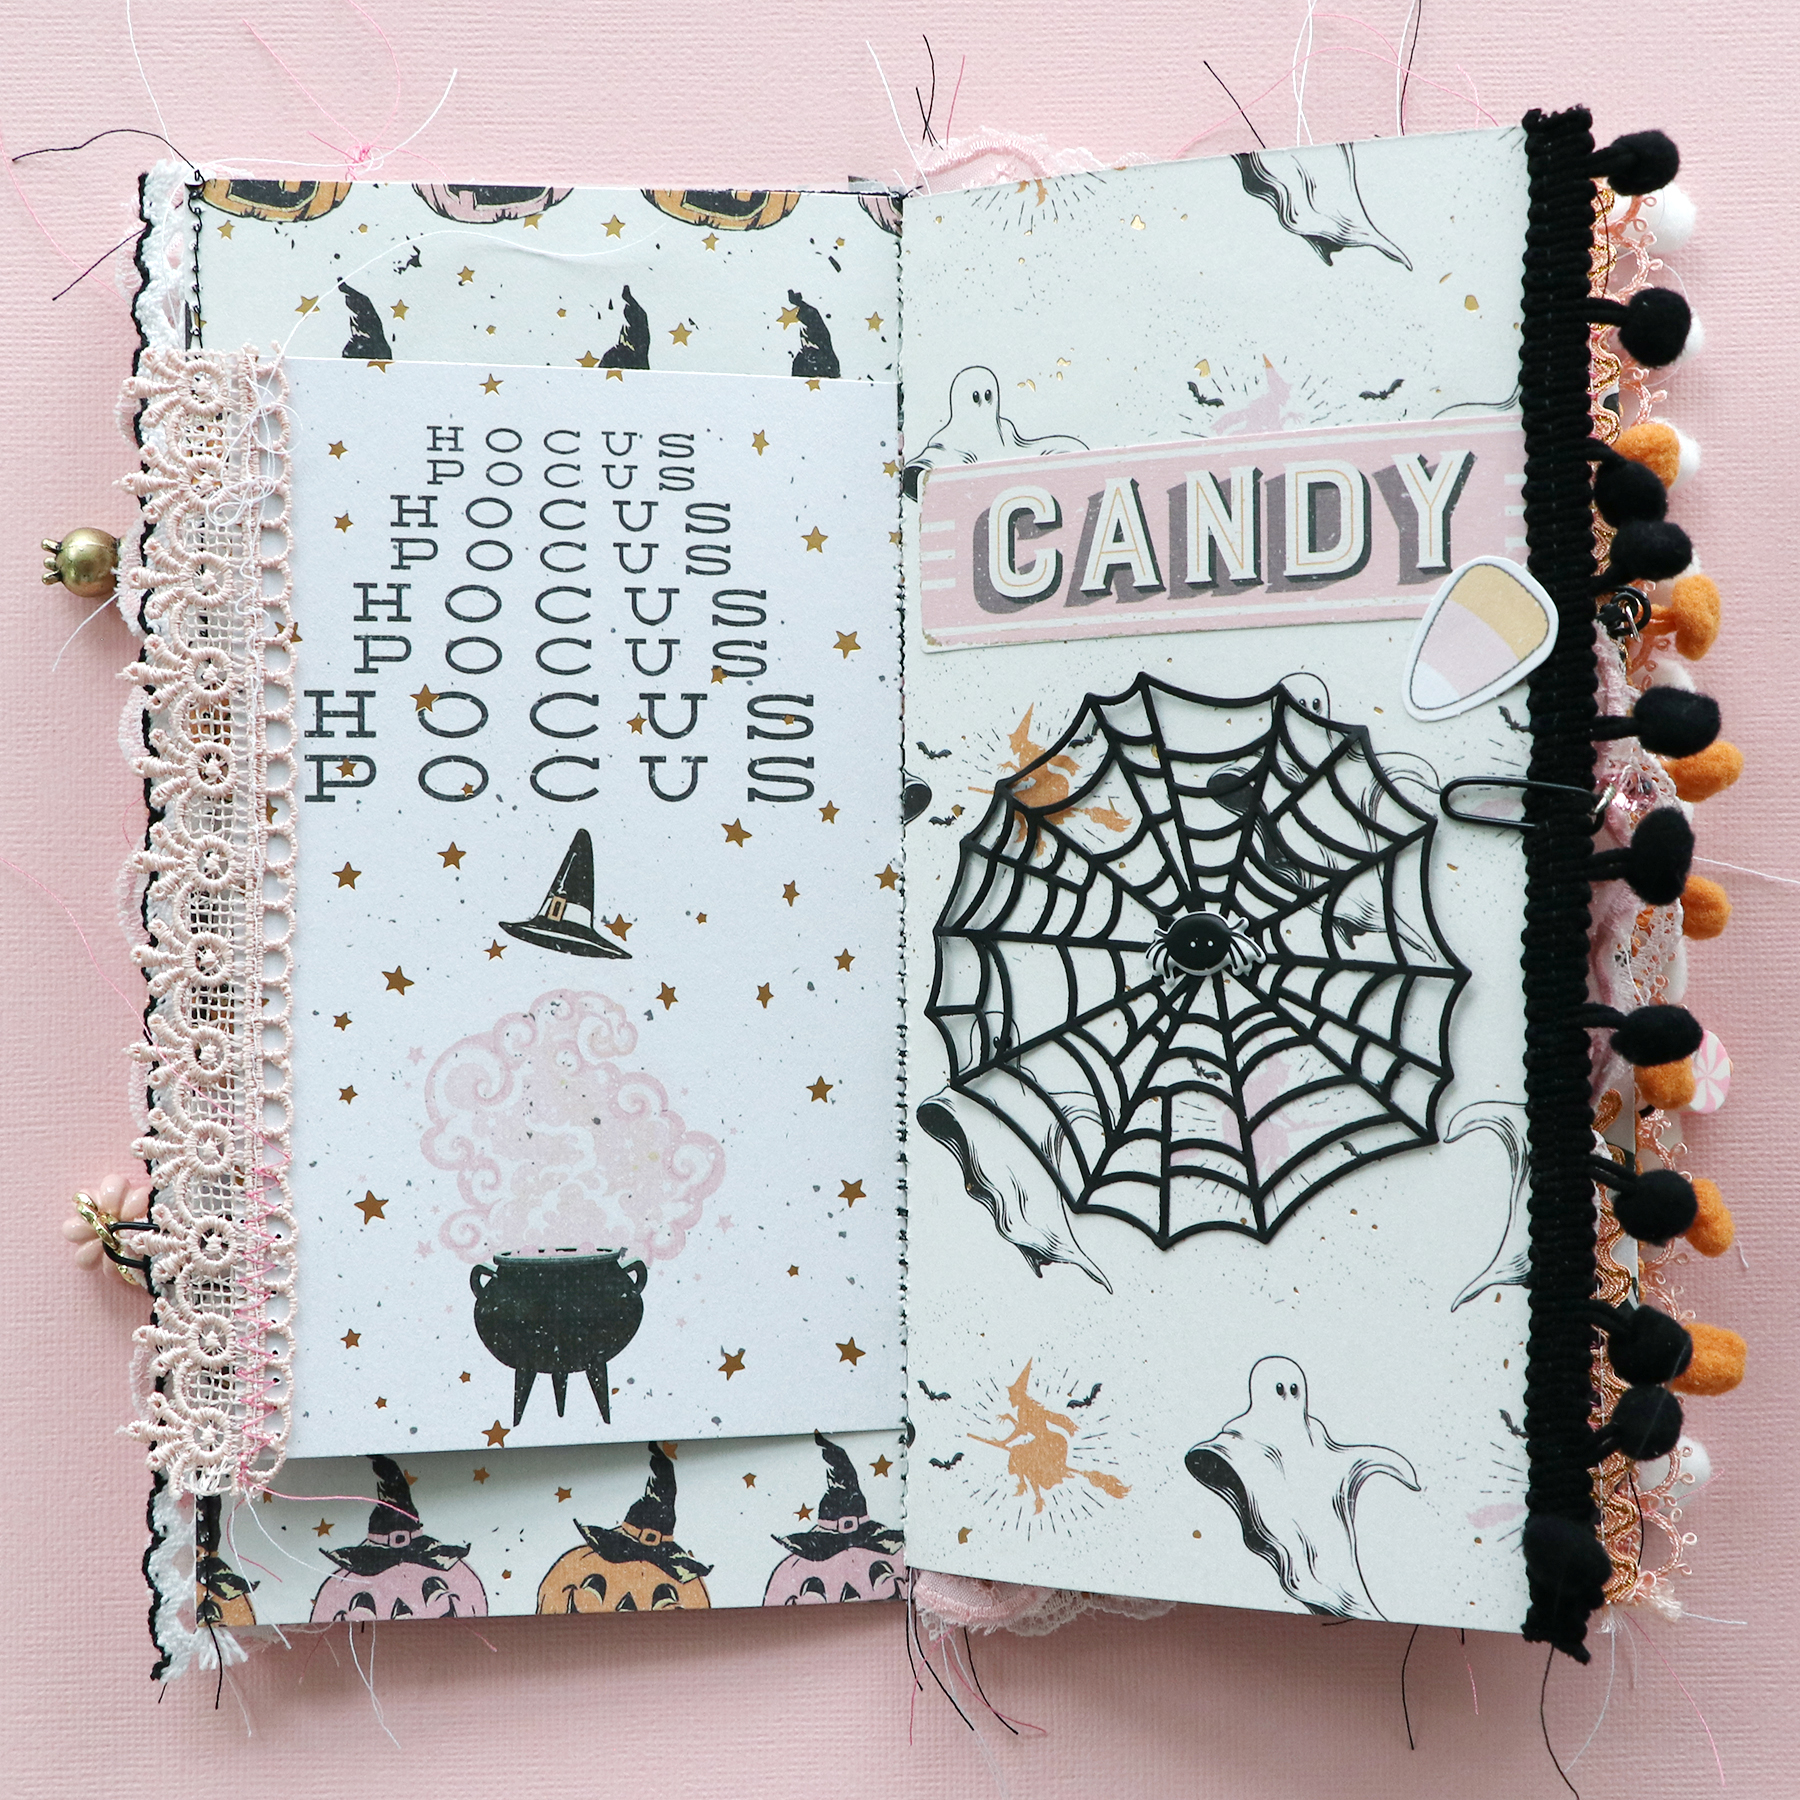
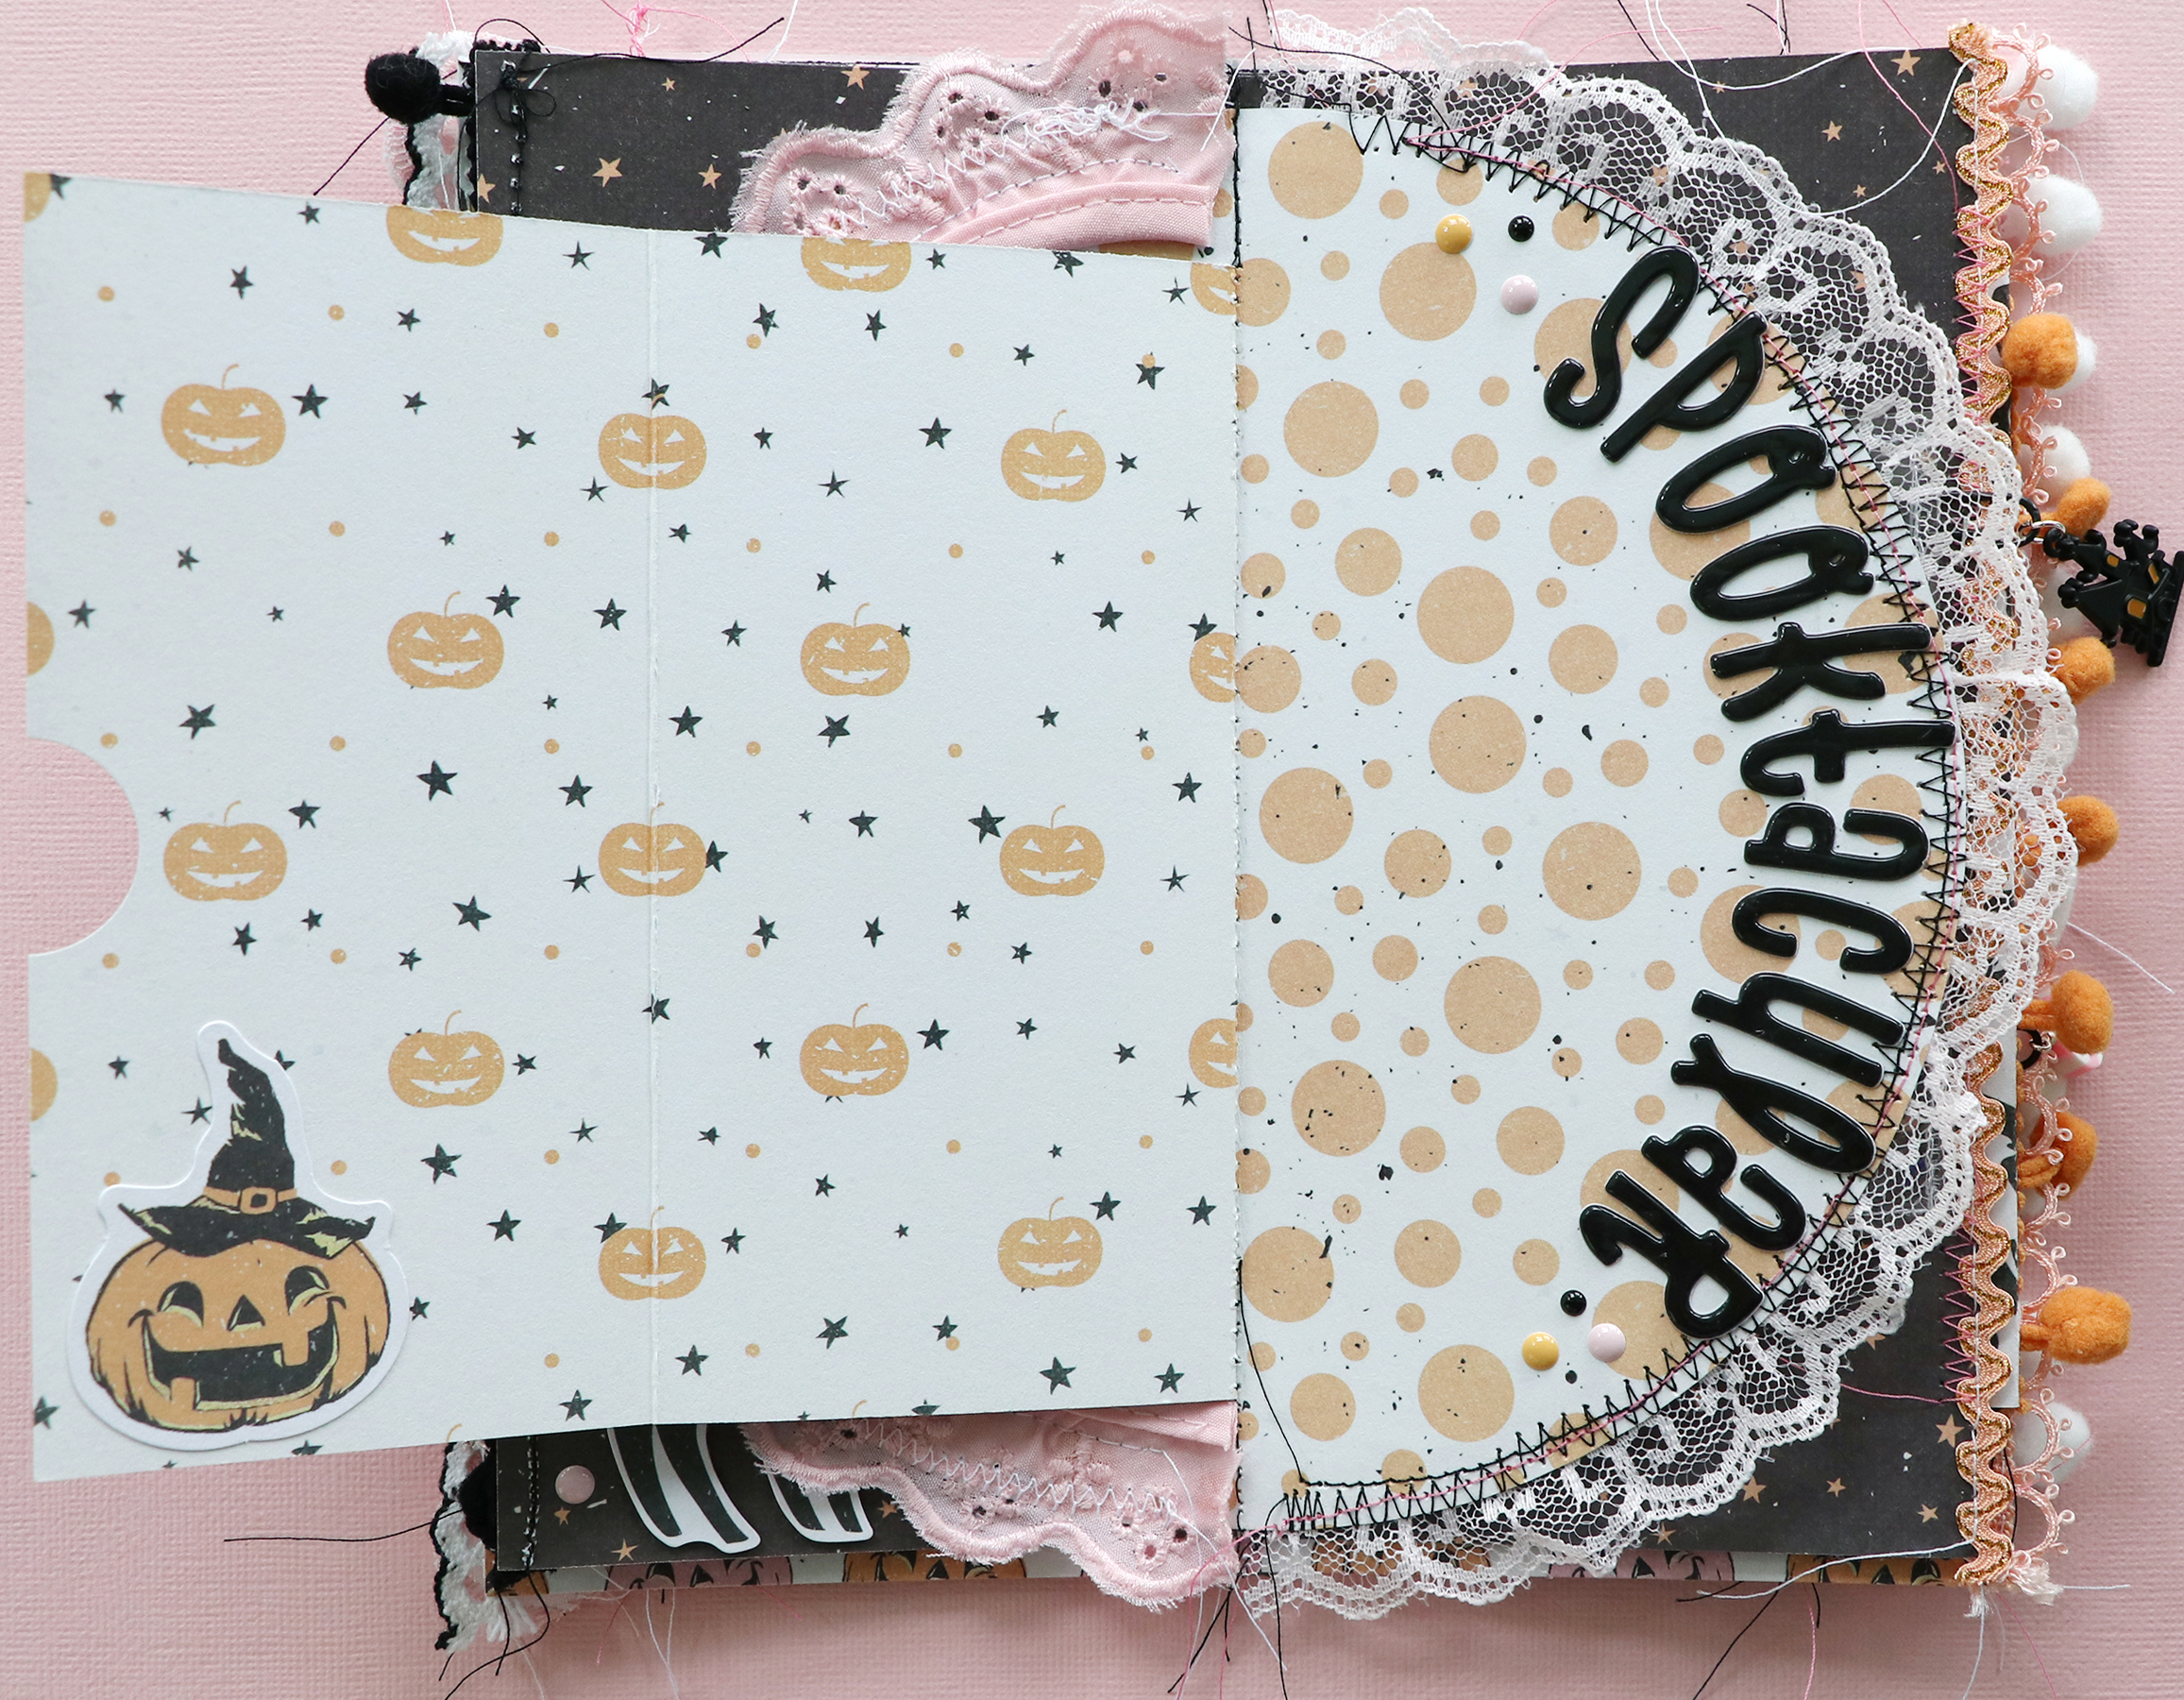
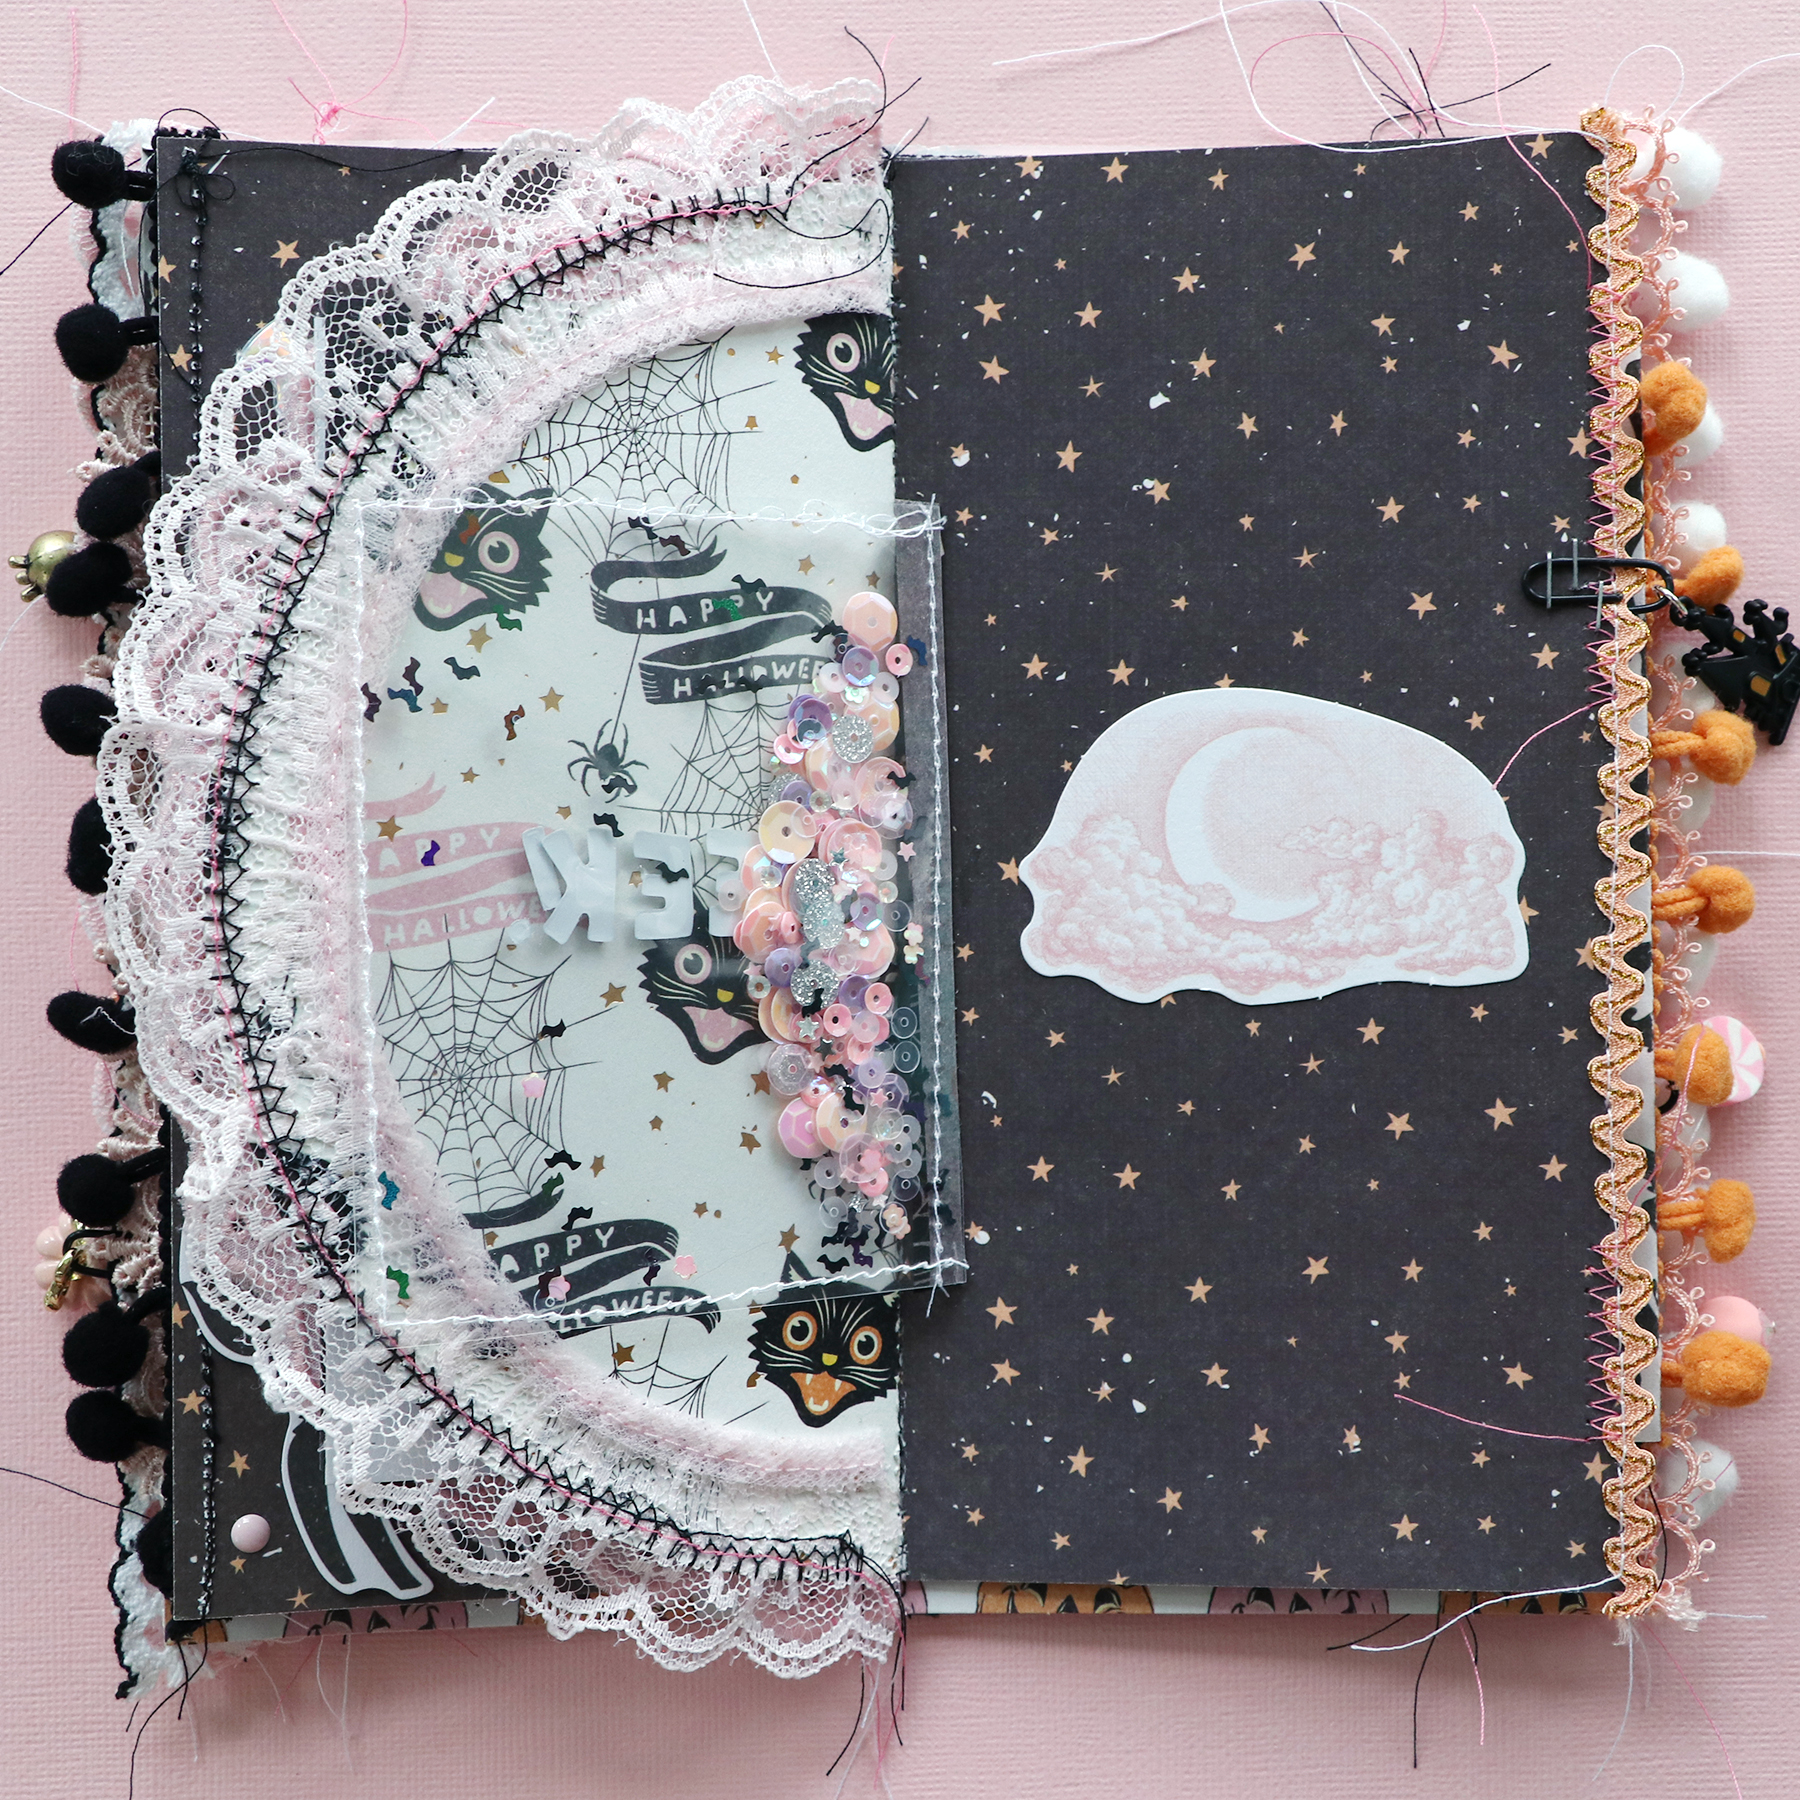
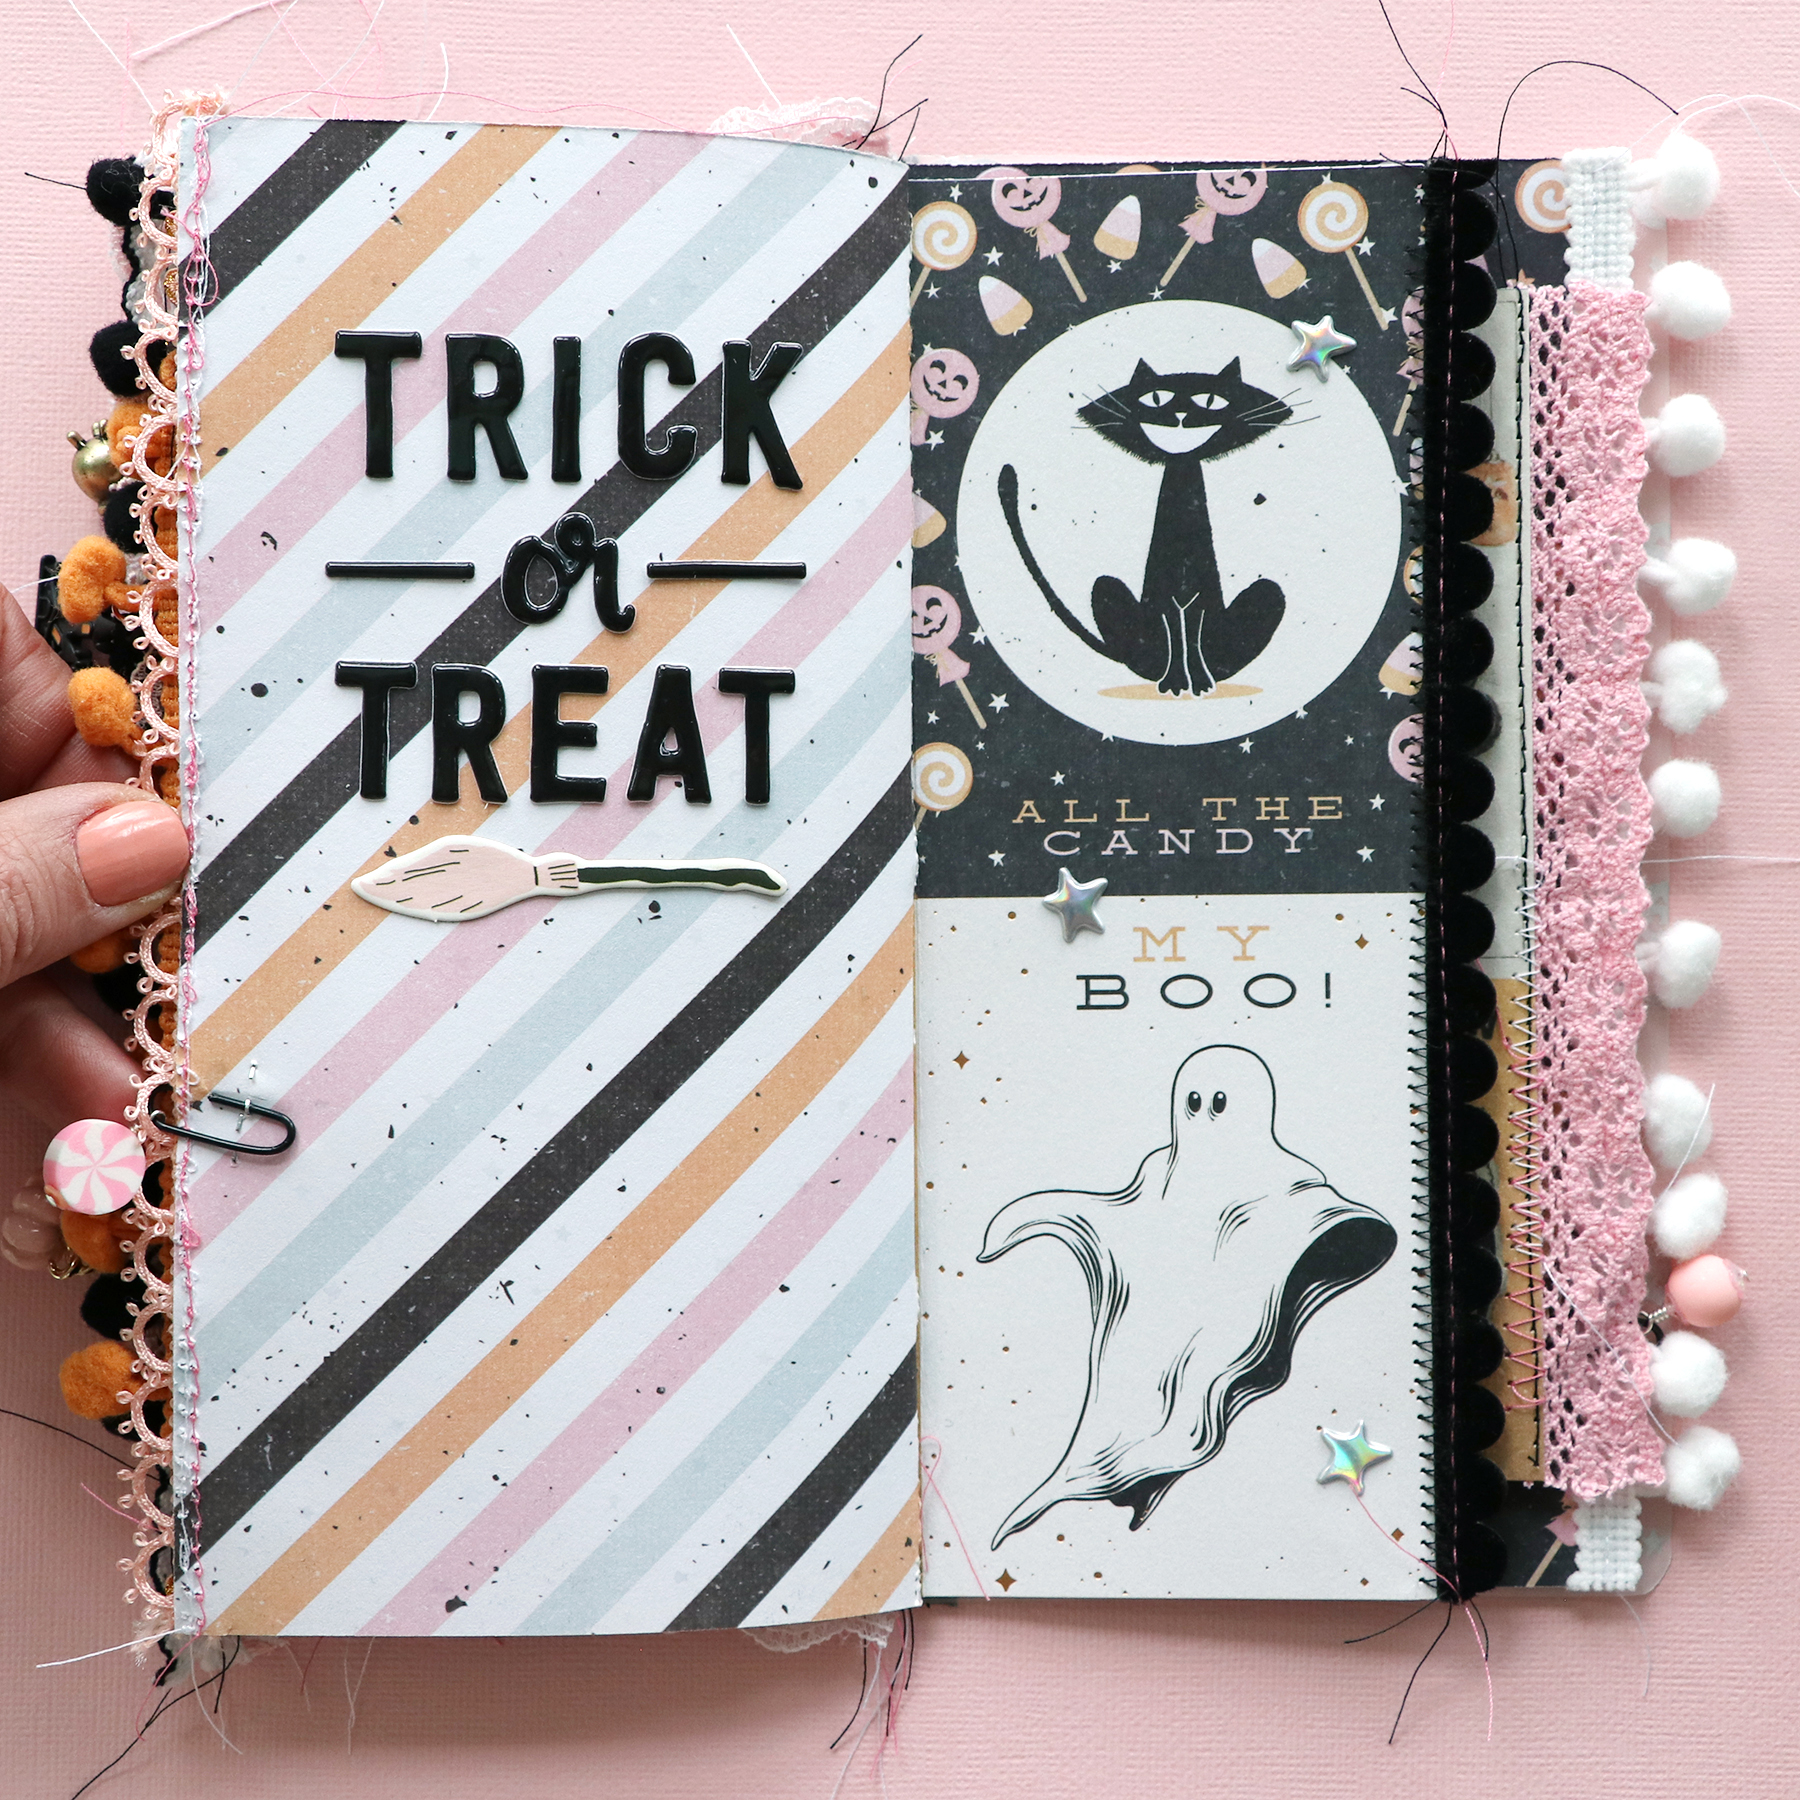
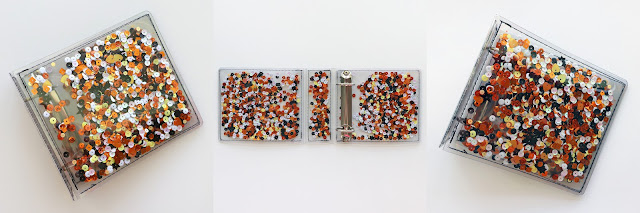
PRE-ORDER a spooktacular 4x4" sequin album to go along with my Halloween 4x4 Mini Album Class!
*************************************************
I also have custom 4x4" Page Protectors by PTE (that's me - Paige Taylor Evans!) to go inside!
*************************************************
PLEASE NOTE: pre-orders will be open for the next week and then it takes another month for Gi to make them and me to receive them so I am hoping to have them ready to ship to you by the end of November. If you pre-order either sequin album with other items from my shop I will hold your entire order until they arrive then ship everything together. I will refund shipping overages with orders of multiple items, I just can't figure out how to do correct shipping on my site, I do apologize for that but rest assured you will only pay actual shipping costs. If you live internationally and would like a shipping quote, please email me at paigetaylorevans@gmail.com

Pumpkin Layout by Jackie Ashton


Friday, September 29, 2023

Hi everyone! Jackie Ashton here with my next project using the Pumpkin from the 13 Halloween Cut Files! For my project I used the lovely Garden Shoppe collection.
To start my layout, I cut the Pumpkin from white cardstock and backed it using patterned papers from the 12x12 Paper Pad. I added splatters of ink to my background and added foam behind the pumpkin before adding it to the center. I printed two pictures to 3x4 and backed them with patterned papers from the 6x8 Paper Pad and mounted them over the right hand side of the pumpkin. Using Paper 13, I cut two tags and added them to the left side of my photographs. I chose to use an Ephemera Die Cut as my title.
I love how this page came together using the Pumpkin from the 13 Halloween Cut Files and Paige's Garden Shoppe collection! I hope you're inspired!
SUPPLIES: Patterned papers, stickers, die cuts, enamel dots, embellishments: GARDEN SHOPPEwhite cardstock; Cut file: Pumpkin from the 13 Halloween Cut Files by Paige Evans

Sorta Spooky Layout by Heidi Lewis


Thursday, September 28, 2023

Hi friends, it's Heidi Lewis back on the blog today! It's my favorite time of year. I love BOTH fall and Halloween, which together make Falloween! There's no need to buy a specialty collection to document your Halloween photos when you can use a fall collection in your stash such as Garden Shoppe by Paige Evans!
 
This layout documents a trip to a local pumpkin patch which had skeleton décor galore! Paige's Sugar Skull from the 13 Halloween Cut Files was the perfect fit for my photos. I love coloring intricate cut files such as this one because it creates a colorful image but is much faster than backing each little piece. I cut out the Sugar Skull from white cardstock and then colored everything but the teeth with alcohol markers. A plain black background adds a spooky vibe and helps the colors pop of the page! I couldn't choose just one photo for the layout, so I made two vertical strips with 4 photos each. I layered Floral Die Cuts around my photos to match the floral skull. Then I added a Thickers title and layered Cardstock Stickers and Foam Phrase Stickers above and below the title to fill the extra negative space. I used journaling stickers from the Sticker Book to add my caption and date. Scalloped stickers (also from the Sticker Book) placed at the bottom of the page add a little pop of color to finish off the layout.

I hope you feel inspired to pair Garden Shoppe with Paige's 13 Halloween Cut Files!
SUPPLIES: Patterned papers, die cuts, stickers, Thickers, embellishments: GARDEN SHOPPE; white cardstock; Cut file: Sugar Skull from the 13 Halloween Cut Files by Paige Evans

Spiderweb Layout by Heather Rubert


Wednesday, September 27, 2023

It’s almost spooky season! It’s Heather Rubert here on the blog today and I’m sharing a minimalist layout for my favorite time of year. For this layout I used Paige’s Blooming Wild collection and the Spiderweb Frame from the 20 Halloween Cut Files.
I wanted to use this cut file a little differently, so after cutting the Spiderweb Frame from the solid purple paper in the Project Pad, I cut up the four webbed corners into separate pieces. I used three of the four sections - I’ll save the fourth for a future project! I knew I wanted to use some mixed media on this layout so I dabbed on some purple watercolor with a round sponge brush. For my photos, I fussy cut orange, purple, and yellow papers from the 6x8 Paper Pad. These created a mat around the photo and added some fun, spooky colors. For my title, I used a word from the Puffy Phrase Stickers. Additional embellishments came from the same sticker set, the Sticker Book, and the Chipboard Stickers.
I hope this layout inspires you to make a Halloween layout with Blooming Wild and the Spiderweb Frame from the 20 Halloween Cut Files! The bundle has so many fun options to work with! Have a great day and happy scrapping!
SUPPLIES: Patterned papers, die cuts, stickers, Thickers: BLOOMING WILD; white cardstock; Cut file: Spiderweb Frame from the 20 Halloween Cut Files by Paige Evans

Cauldron Layout by Audrey Mutschall


Tuesday, September 26, 2023

Hi friends!! Audrey Mutschall here with a new layout featuring Paige’s Cauldron from the 13 Halloween Cut Files! My daughter received a Magic Mixie Cauldron for her 5th birthday and we had lots of fun taking photos as it bubbled and released swirling smoke before revealing the toy inside! The Blooming Wild collection coordinated perfectly with the colors in my photos so it was a natural choice for this page.
I started by cutting the Cauldron from white cardstock and then cutting an offset with an indigo colored cardstock. I placed the indigo offset behind the white layer and glued the two together. The dark colored offset adds dimension to the cut file and helps make the words more visible. I backed the bottom of the cut file with pink striped Paper 16 from the 6x8 Paper Pad and two purple patterns from starburst Paper 22. The top of the cut file is backed with watercolor Paper 18. For the bubbles I chose a few different techniques: I turned some of them into sequin shakers by placing sequins between two layers of vellum. I also backed some of the bubbles with vellum and glued sequins on top then backed others with patterned paper from starburst Paper 22, and topped them off with sequins as well. I just love the added sparkle from the sequins! For the background, I stenciled overlapping circles using inks in shades of purple, pink, blue, green, and yellow to coordinate with the watercolor paper that I’d used to back the top of the cut file. This was such a fun and easy way to make “bubbles” on the background. I matted my photos with white grid Paper 5 and added strips of pink star patterned paper from one of the Boxed Cards. Lastly, I embellished with Chipboard Stickers, the Sticker Book, and some stars and sequins from my stash.
I hope this inspires you to check out Paige’s amazing bundle of 13 Halloween Cut Files! Many of them can be used to document occasions other than Halloween!
SUPPLIES: Patterned papers, stickers, die cuts, embellishments: BLOOMING WILDwhite cardstockvellum; Cut file: Cauldron from the 13 Halloween Cut Files by Paige Evans

Spooky Fun Layout by Ashley Neu


Monday, September 25, 2023

Hello scrappy friends! It’s Ashley Neu back to share another layout, this time using Paige’s Garden Shoppe collection to create a Halloween layout! One of my favorite things about Paige’s collections is their versatility. You can create so many layouts with different themes from the same collection! I used this fall collection because of the colors. I thought they would work perfectly to create a colorful Halloween layout. I also used Paige’s Spiderweb from the 13 Halloween Cut Files.
To get started, I shrunk down the Spiderweb in Silhouette Studio and duplicated it so that I had 5 spiderwebs. I did vary the sizes slightly so that they weren’t all the exact same. After cutting the spiderwebs from black cardstock, I grabbed Paper 9 and backed random sections in each spiderweb. I wanted each spiderweb to have its own color so that I could use tone-on-tone embellishing and add some mixed media. After backing the cut files, I moved onto creating the background. I grabbed a piece of white cardstock and my watercolors to start the process. Under each spiderweb, I did the smooshing technique where I put a small amount of watercolor on a piece of plastic and then I “smooshed” it onto the white cardstock. I glued each spiderweb onto the coordinating colors and then added my five 2.5” square photos, one to each spiderweb. I wanted a small and colorful title so I used the tiny alpha stickers from the 8-Page Sticker Book to spell out “Spooky Fun”. To embellish each spiderweb, I used tiny phrase stickers, floral pieces and the tiny spiders that are from the cut file. All of the embellishments came from either the 8-Page Sticker Book or the Sticker Book from the Blooming Wild collection. The tiny puffy dots are from my stash.
I hope you love this Halloween layout as much as I do! I challenge you to use a non-Halloween themed collection and create a fun and whimsical Halloween layout! Thank you for stopping by Paige’s blog today and have a wonderful day!
SUPPLIES: Patterned papers, stickers, Thickers, die cuts, embellishments: GARDEN SHOPPENotebook Border Punchwhite cardstock; Cut file: Spiderweb from the 13 Halloween Cut Files by Paige Evans

Home Sweet Home Mini Album by Paige Evans


Sunday, September 24, 2023

Last Wednesday I taught a Wooden House Mini Album Class and it's available online HERE!
I used my Garden Shoppe collection to create this album that features photos from our home-sweet-home!
Techniques include adding full 4x6" photos, a paper pieced garden, layering tips, and more, all held between a pair of custom wooden covers that I designed! I am currently sold out but may have more in MY SHOP soon. Since they're sold out, the class does include the template to create your own covers from chipboard or patterned paper or whatever you like!
I added hand stitching to the edges of the patterned paper pages, but that step is optional. I just LOVE adding stitching for texture and that "home"spun look!
You could add even more pages if you use larger binder rings! Or less, whatever you prefer :)
Here are pictures of the rest of the spreads in my Wooden House Mini Album! Let me know if you have any questions about anything!
Upon purchase of this Wooden House Mini Album Class a PDF will be emailed with the link to the YouTube video on the first page, a list of supplies to buy or gather from your stash, photo sizes, instructions, any homework needed to be completed before the class, and templates to download/print/cut.
The class can be watched whenever you have time - it was recorded so you can watch as often as you like!
I love seeing how you take these ideas and make them your own! Change the collection, change the sizes, add more pages, less pages - make it YOU!
I love making mini albums and hope to inspire you to try making them too!
Be sure to check out my Wooden House Mini Album Class & my Garden Shoppe collection! Have a happy scrappy day!

Thirty-One Traveler's Notebook by Paige Evans


Saturday, September 23, 2023

I made this Traveler's Notebook as a gift for Frank Garcia using his Thirty-One collection with Prima! His current Halloween collection with Prima is called Twilight and it's equally BOOtiful!
Here is a quick flip through of the album:
I made this TN in a single afternoon before flying to California! It might look like it took days to make, but a few simple tricks and you've got a faBOOlous mini album ready to hold memories!
I started by cutting down the patterned papers from the Thirty-One collection to 8x8" and smaller. The vellum cover I trimmed to 8.25" square and rounded the corners. There are quite a few cut-apart pages in Thirty-One so I trimmed some of those down and then scored between the cards. I also made a 7.5" round page.
I scored all the pages in half, stacked them together, then machine stitched straight down the center 3 times with black thread. The pile of papers was very thick so I was nervous it wouldn't work but my sewing machine managed to stitch through all the layers like a charm! To make the spine more secure I wrapped washi tape around it.
Next I stitched ribbons and trims onto the edges of all the pages. This is my favorite thing to do with mini albums the past few years. I just LOVE the texture, whimsy, and interest it adds!
When stitching the trims I used black, white, and pink threads to match the colors of Thirty-One.
To keep the album closed I tied a piece of elastic around and then knotted more ribbons & trims around it. The final touch is a spooktacular charm by Emily Inspired Designs clasped onto the knot. 
Time for embellishing! I used lots of bits & pieces from the Thirty-One collection and then added some things from my Halloween stash and my own Halloween goodies which you can find in MY SHOP.
I left lots of space for Frank to add his own photos and journaling.
I made interactive flip-ups by attaching cut-apart cards and die cuts with washi tape.
For even more cuteness I slid charms onto paperclips and stapled them onto the page edges.
Having all the different sizes and shapes of pages makes it so fun to flip through - you never know what the next page might bring!
I used a 1" circle punch to notch the edges to help make opening these next couple flaps easier.
The center-fold is a fun and interactive cut-apart page the I trimmed and scored to fit inside the parameters of a standard 4x8" traveler's notebook.
I poured sequins into a 4x4 pocket page protector, trimmed it down to 3.5x4", stitched it closed, then attached it into the album with washi tape.
Too cute to spook!
More flip-ups and pull-outs!
I signed the back :)
And that's this TN in a nutshell!
Let me know if you have any questions about this album - it was super quick & easy to make!
Have a fang-tastic day!
SUPPLIES: Patterned papers, die cuts, stickers: Thirty-One by Frank Garcia
Paige Taylor Evans © // Quinn Creatives DESIGN