
Hi crafty friends! Amber Mitchell here on Paige’s blog today to share with you a layered mini album that I created using the Blooming Wild collection and the Mini Cinch Tool.

Going into this project, I knew that I wanted it to have layered covers. I love the look of the front cover being shorter than the back cover. It allows the pages to peak through and provides a glimpse of all the fun bits and pieces that make up the album as a whole!

I used two different sizes of medium weight chipboard for my covers. The front cover measures 4.25 x 4.5 inches and the back cover measures 4.5 x 7.5 inches. I wrapped the front cover in white 65lb cardstock. I wrapped the back cover in a dark green floral paper from the 12x12 Paper Pad.

For the spine I used a sheet of patterned paper that measured 4.25 x 5 inches. I first scored this paper on the 5-inch side at 1.5 inches on both ends. I then folded the entire paper in half along the 5-inch side. Once folded in half, I used the Mini Cinch Tool to punch four divots into the middle crease of the paper. I then unfolded the sheet and used the tabs on the ends to secure the spine to the inside of both my front and back cover. An optional piece I added here was a thin layer of acetate to the spine before adhering it down. This gives the project more texture and interest!

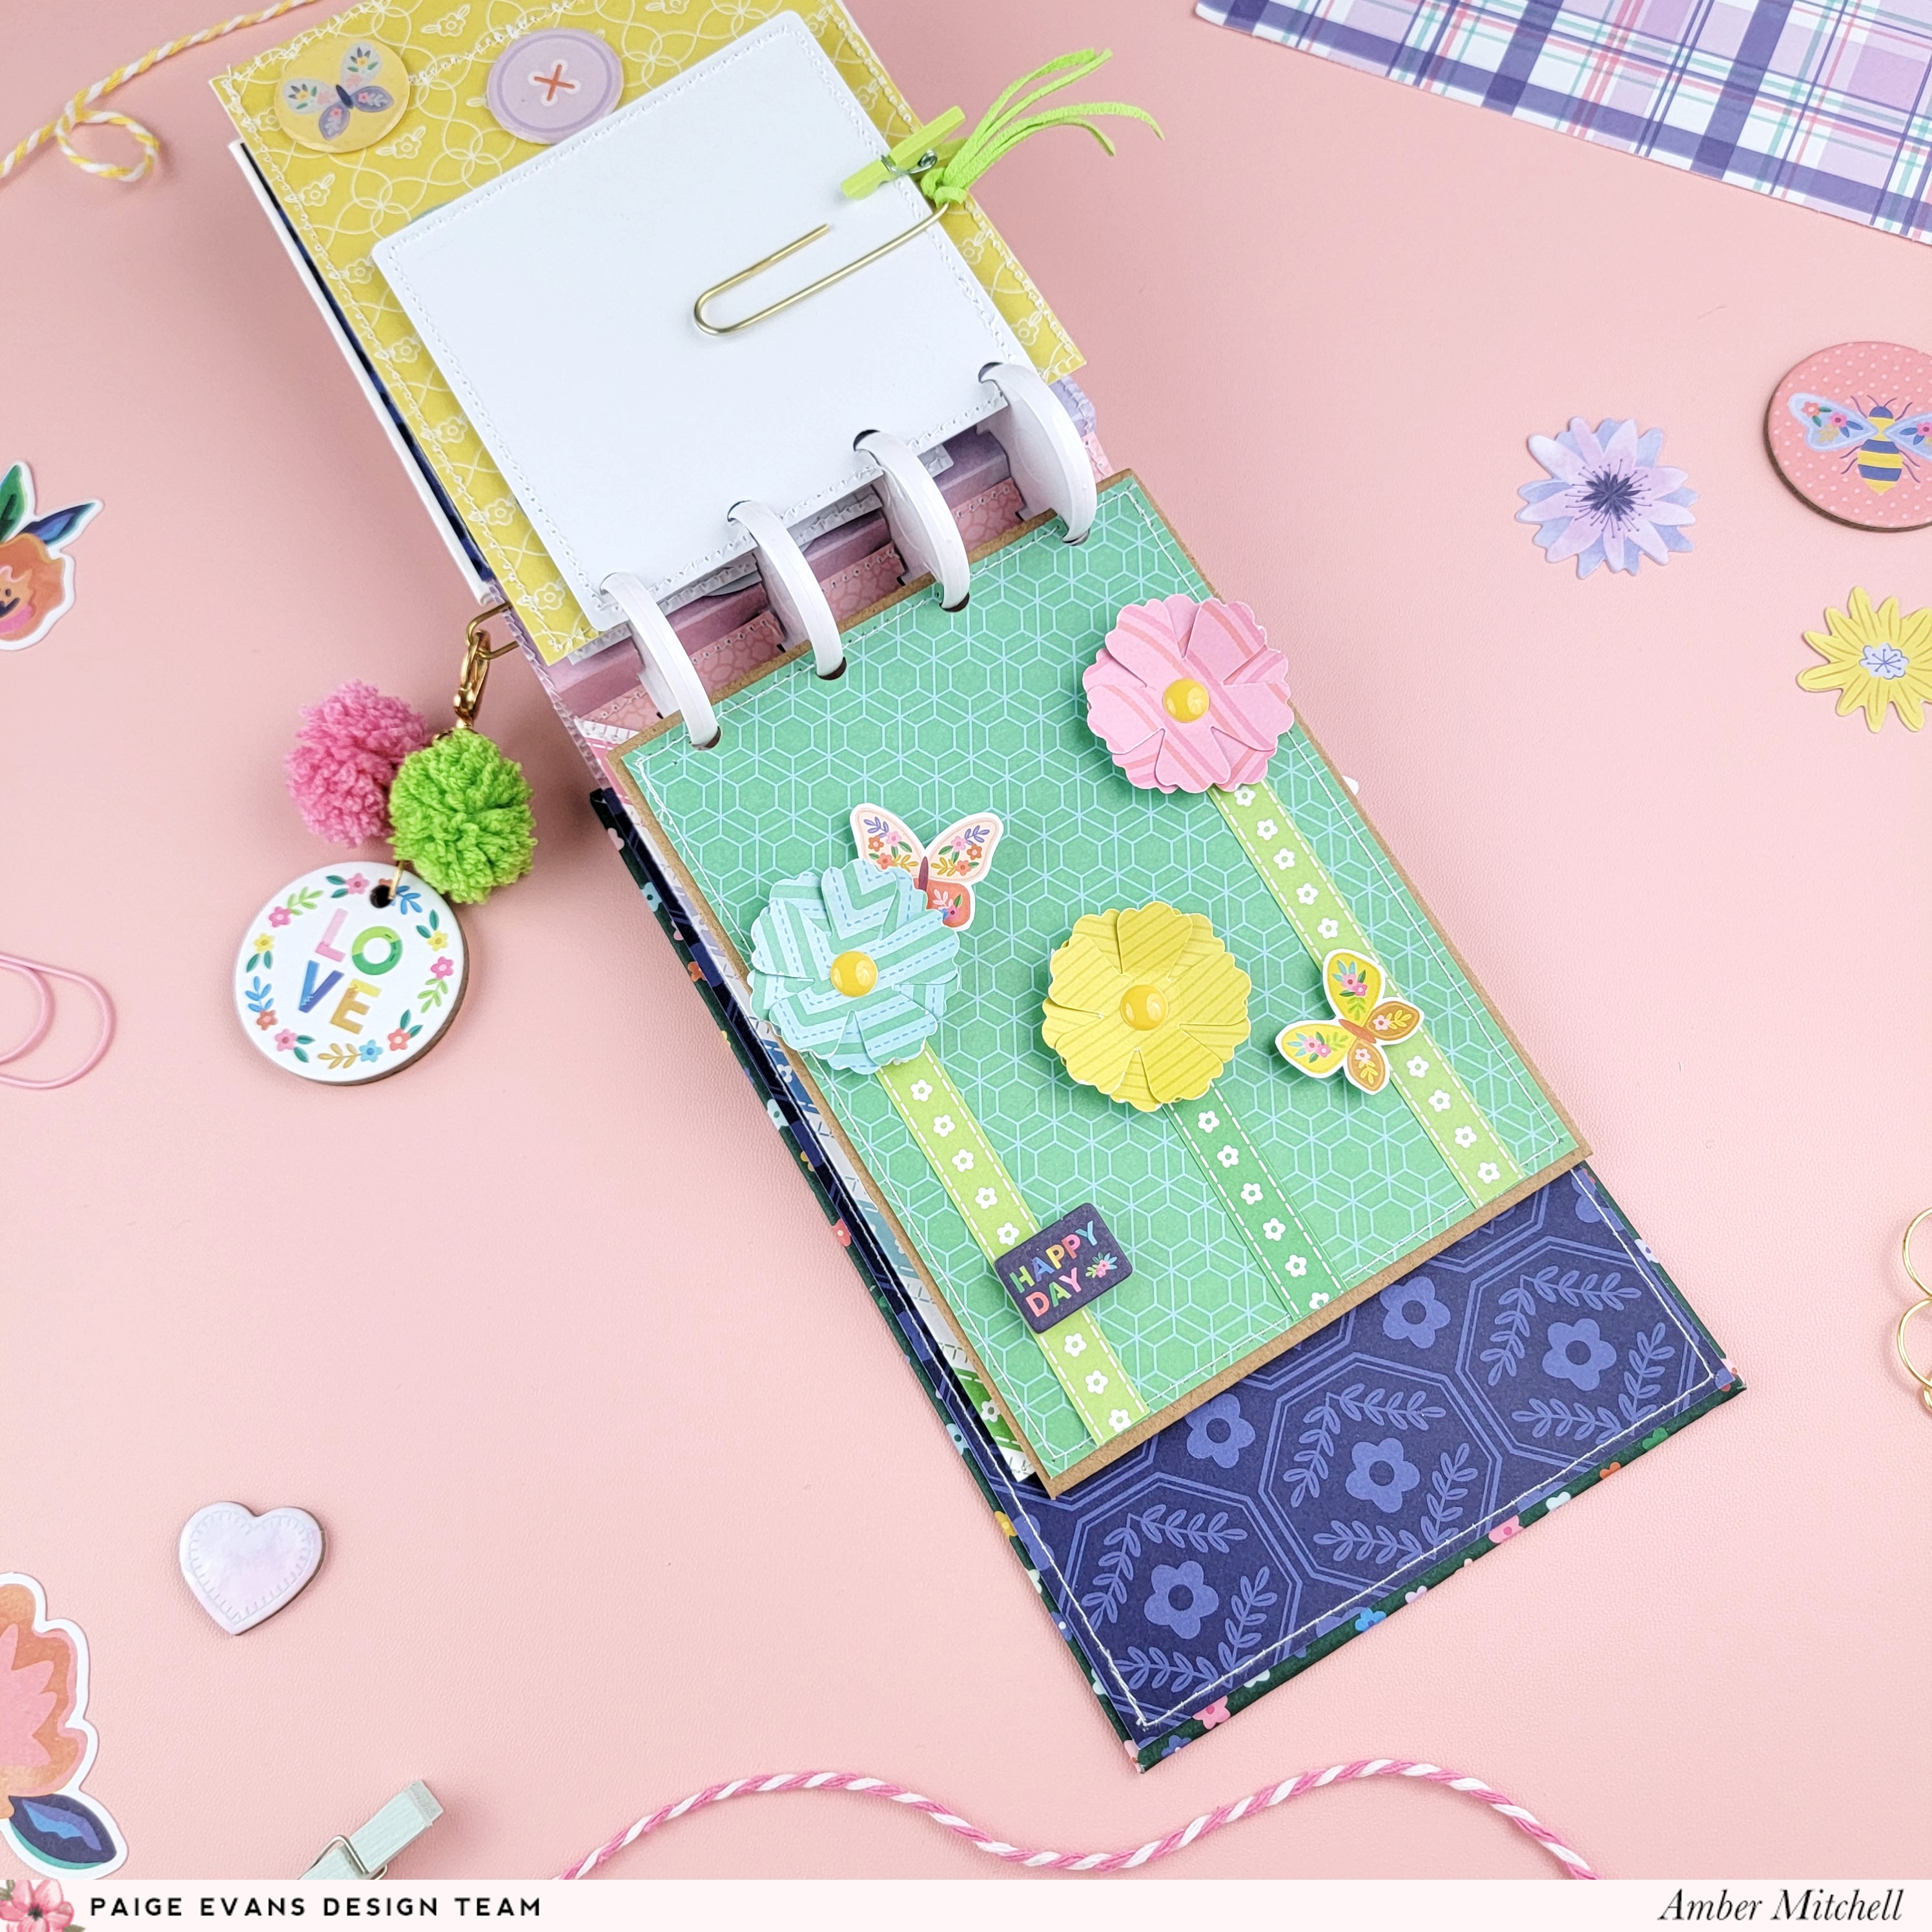
With the spine glued down, I added the inner linings to both covers. I then attached the Cinch Disks to the four holes that I punched earlier. For the pages I used a variety of sizes and styles to add more character to the project. This included cut-aparts, thread tied envelopes, and fold out pages. For some smaller decorative pages I added journaling pieces from the Ephemera Die Cuts.

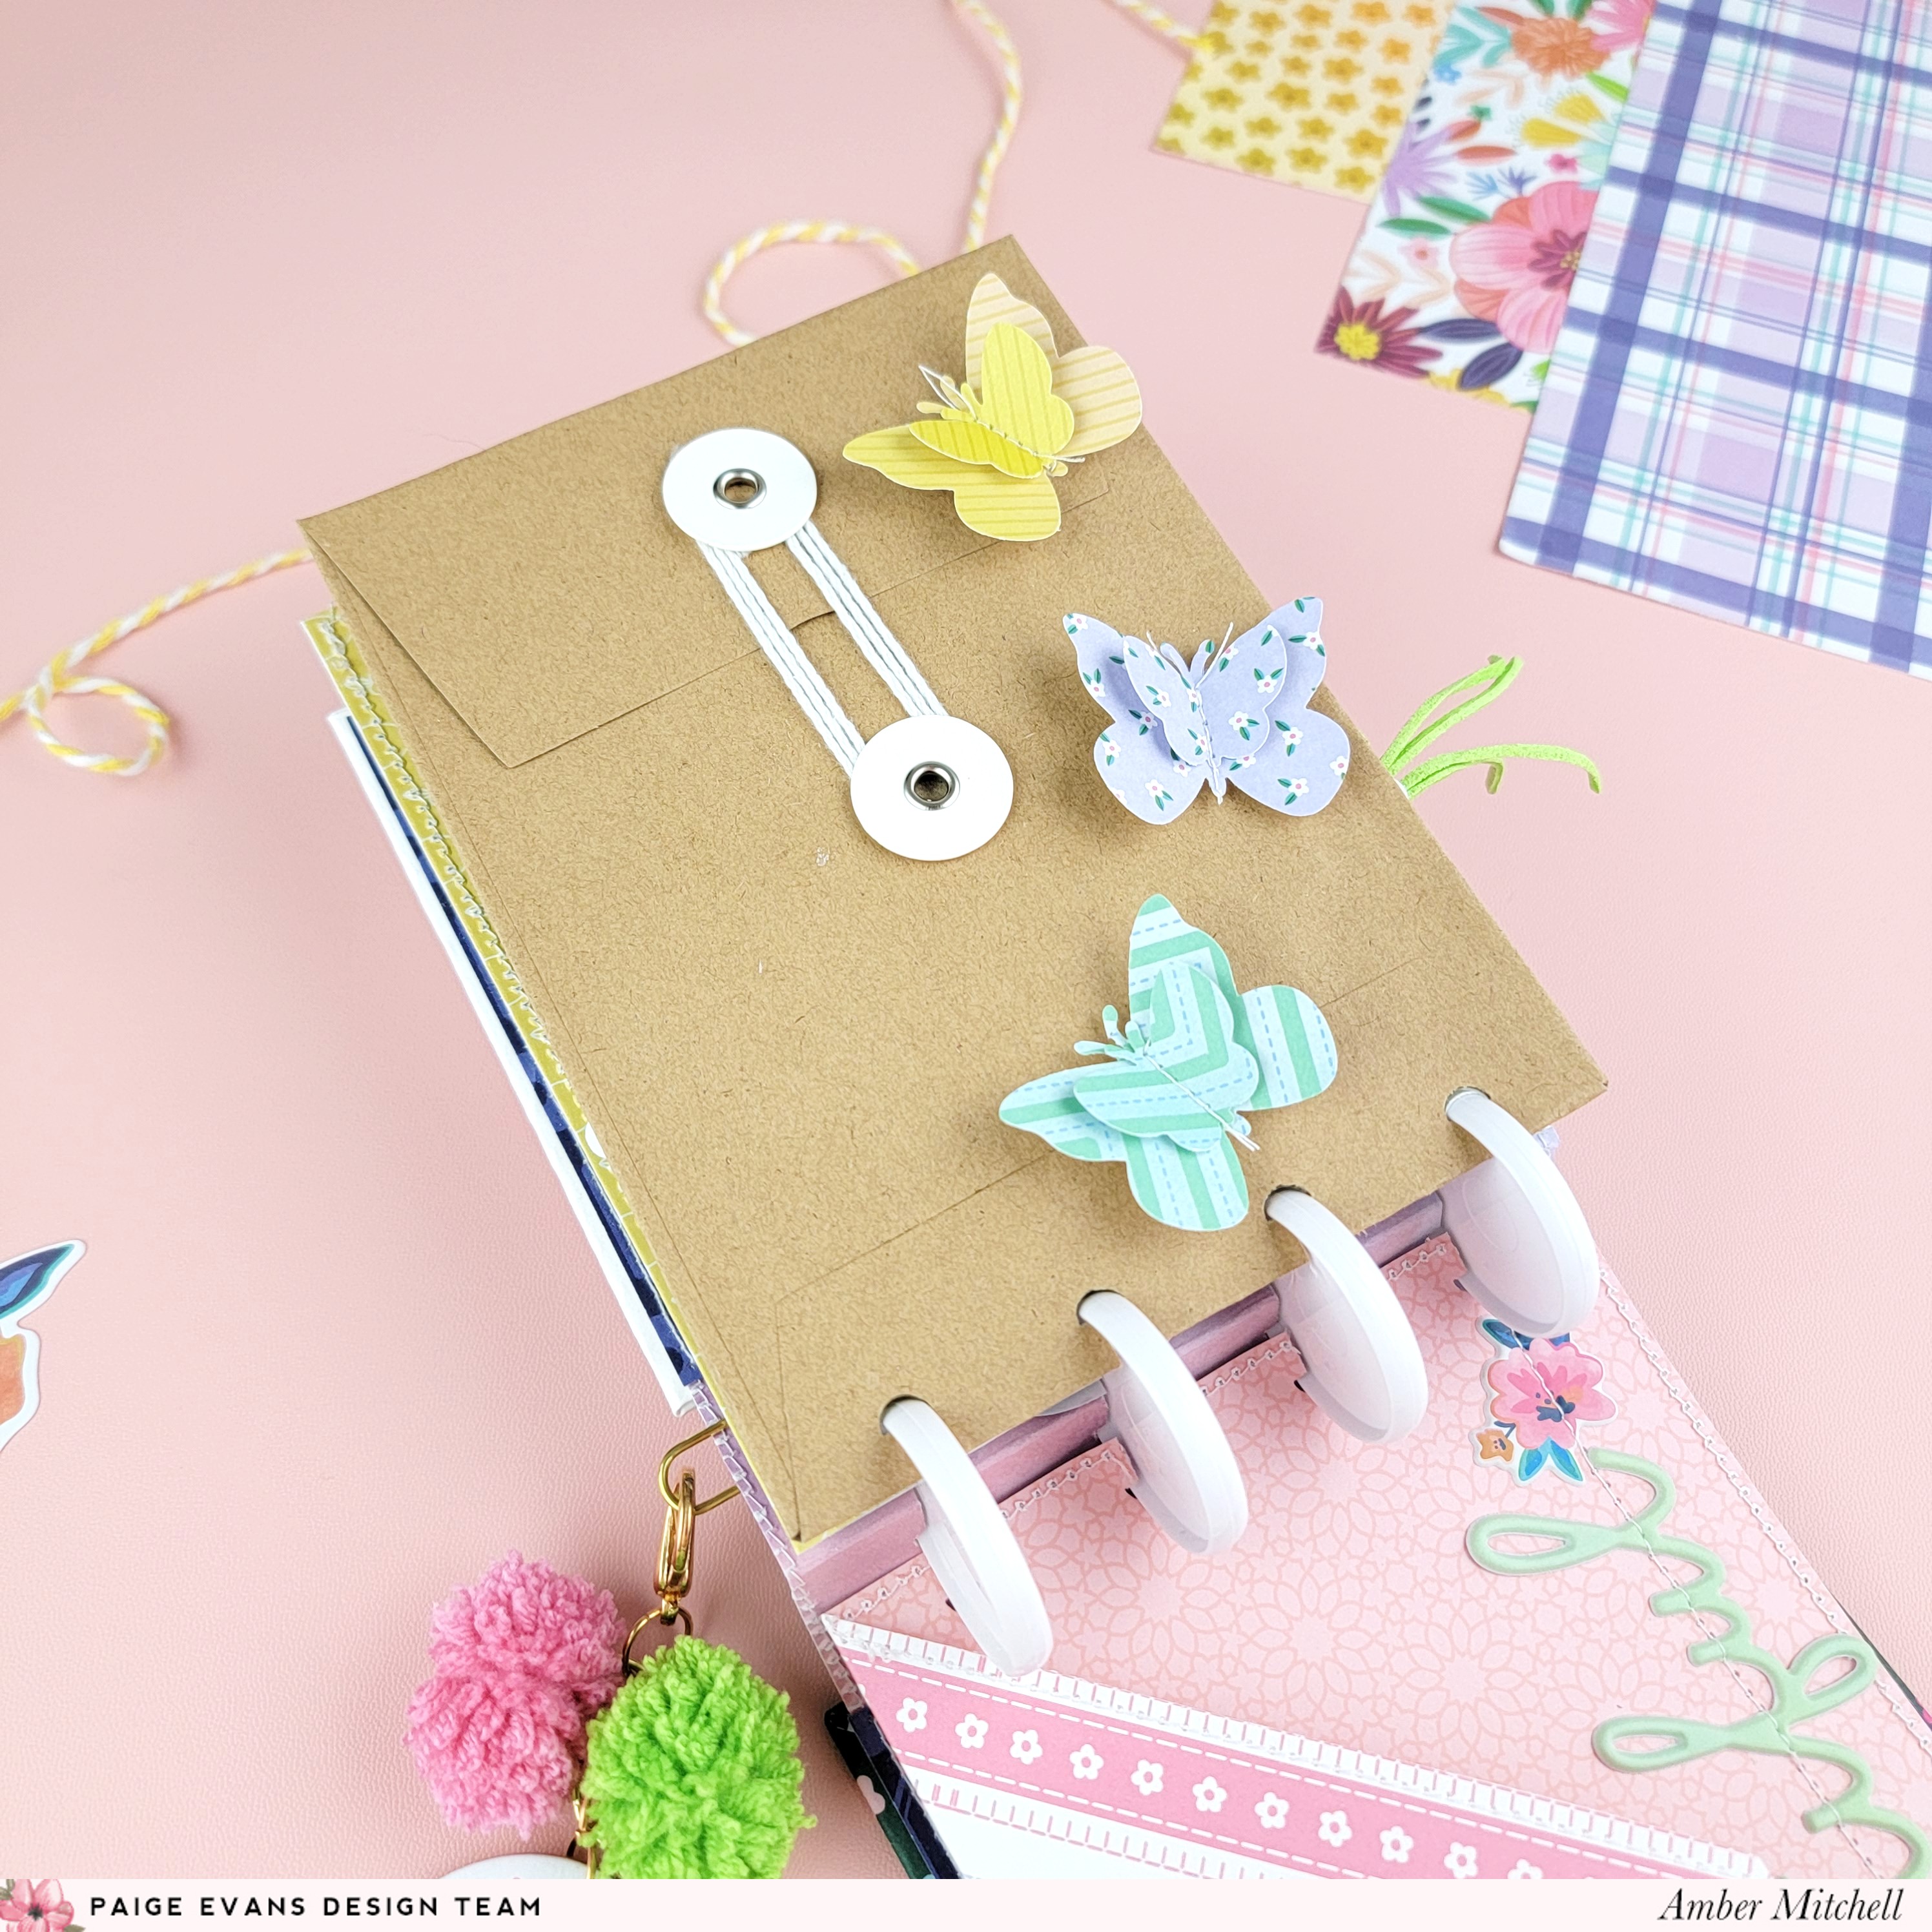
On the front cover I created a heart filled with colorful flowers that I created using Paige’s Rolled Flowers cut files. I attached a gold paper clip to the spine and added homemade pompom charms to it. I also added a large disk charm that I created using two of the Chipboard Rounds to this. I punched holes at the tops and glued them together back-to-back before using a jump ring to attach them to the paperclip. When it came to embellishing the pages I used a mix of all the embellishments from the Blooming Wild collection.

One of the pages features some hand-crafted flowers that I created using a flower punch. To these flowers I added stems using strips of green patterned paper and fussy cut butterflies that I cut from a paper in the 6x8 Paper Pad. I added some finishing touches using the Mini Flower Puffy Stickers, Floral Die Cuts, and handmade layered butterfly embellishments!
To decorate one of the pages in this album I added several handmade epoxy embellishments it. To create these embellishments I used the Blooming Wild Digital Collection to print small, 1-inch icons. I then used a 1-inch circle punch to punch these out individually and then added a 1-inch epoxy sticker to the top of each one. This was both a fun way to embellish a page and showcase the fun icons in this collection!

To add sentiments and titles throughout the pages I used pieces from the Sticker Book, Cardstock Stickers, and Puffy Phrase Stickers. To keep the larger sentiments forever in place I used my sewing machine to stitch over them, securing them down.

Most of the pages in this album are decorative as I plan for photos to be added at a later time. Thanks so much for stopping by my post today! I hope you feel inspired to create a layered mini album!
SUPPLIES: Patterned papers, embellishments, stickers, die cuts; BLOOMING WILD; Mini Cinch Tool; Cinch Disks; Cut files: Rolled Flowers by Paige Evans

Location: California, USA / Blog: Happy Crafty Studio / Instagram: @bambidearr / YouTube: bambidearr / Pinterest: bambidearr


Post a Comment