Pre-Order a Star Spangled Sequin Album


Friday, July 3, 2026

Hello scrappy friends! Last weekend my 4th of July kits and extra albums sold out within 24 hours - THANK YOU!!! I know some of you were sad to miss out so don't worry - I've got you! I have opened up pre-orders for a Star Spangled Sequin album which includes access to the virtual class!

🇺🇸 🇺🇸 🇺🇸

PLEASE READ: THIS IS A PRE-ORDER FOR THE STAR SPANGLED SEQUIN ALBUM & ACCESS TO THE VIRTUAL CLASS ONLY, NO OTHER SUPPLIES ARE INCLUDED. I anticipate receiving and shipping the albums by the end of September so please note this is months past the 4th of July. Also, this is not instructions for how to make a sequin album, the star spangled sequin album is handmade by Gi DeMello. Also, an electronic cutting machine is required to cut out some of the cut files.

I love the 4th of July! Family + food + fireworks = FUN!! 2025 was the 5th year in a row that my entire family gathered together in the historic town of Wallace, Idaho to celebrate and I love documenting our memories in a 6x8” scrapbook! Check out all of my previous 4th of July scrapbooks in a YouTube playlist HERE. We’re currently in Wallace again making more memories so I will have another 4th of July kit & class next year!!


🇺🇸 🇺🇸 🇺🇸 🇺🇸 🇺🇸 


The live virtual class will take place Saturday July 18th from 9am-12pm Mountain Time. During class I will show you how to decorate the cover, attach the charm, and teach you the techniques for starting the foundation pages.


🇺🇸 🇺🇸 🇺🇸 🇺🇸 🇺🇸 


PLEASE NOTE: Standard page protectors DO NOT FIT onto the binder rings as is, we wrap the page protector edges with washi tape and use a template to make the holes. I wanted larger binder rings to fit more pages but couldn’t find page protectors to fit so we make them fit - where there’s a will there’s a way!


🇺🇸 🇺🇸 🇺🇸 🇺🇸 🇺🇸 


Gi DeMello is the maker of these amazing sequin albums! The size of this star spangled sequin album is approximately 8½ x 9” with a 2½” spine, 2” binder rings, and the pages are a mix of 13 foundation pages and 22 pocket pages.

This year's 4th of July scrapbook features 35 spreads, 181 photos of various sizes to showcase all your patriotic memories, and techniques include hand stitching, interactive photo flips, backing a cut file, a star sequin shaker page, and so much more! - all finished off with decorative ribbons & trims edging the pages for the ultimate festive look & feel!

After purchasing, my host site called Ecwid will email you the class PDF that contains a list of craft supplies to purchase, written instructions, photos, and the live class YouTube video tutorial link on the first page. The class will be recorded so you can can go at your own pace and watch/re-watch whenever you have time.

BONUS FREEBIE!! As a thank you, once you pre-order a Star Spangled Album, I'll include the PDF download for my 4th of July class from last year valued at $30 and includes links to the templates, cut files, and videos!

IN THE SHOP

New in the shop: 4th of July ribbons & trims bundles! This is a package of (19) red/white/blue ribbons & trims cut to 8.5" for adding to the edges of 6x8" album pages and page protectors. I had 71 different ribbons in my excess stash so if you purchase more than 1 bundle I will do my best to make sure you get different packages for a wide variety!

There has already been lots of EEKcitement for my upcoming Haunted House Sequin Album Kit & Class filled with my BooVille Halloween-themed collection with Pinkfresh Studio so I am doing something a little different than I've ever done to hopefully ensure that everyone who wants a kit will get one - read all about the DEPOSIT option HERE!

Best Dad Layout by Monique Lowe


Thursday, July 2, 2026

Hi creative friends! Monique Lowe here sharing a bright and happy new layout celebrating Father’s Day with my two kids and hubby. I mixed three of Paige’s gorgeous collections on this page — Legendary, Crafted Moments, and Lovely Lane — and they work together beautifully. I do love a mix ‘n match layout!
I kicked things off by cutting a stack of 2" squares from patterned papers across all three collections. I chose a full rainbow of colors, distressed the edges, and arranged them in two diagonal rows across a sheet of white 12x12 cardstock. Before sticking anything down, I added a splash of yellow watercolor and a few black paint splatters for texture and movement. Once the background was dry, I stuck down the paper squares with foam tape for dimension. For my photos, I backed them with Beauty Ahead Paper and Living My Story Paper - the colors matched the squares they would sit over so the rainbow flow stayed uninterrupted. I layered the photos so they overlapped slightly, giving that cozy, family‑moment feel. Next, I added tone‑on‑tone ephemera die cuts and cardstock stickers along the diagonal design. To bring in more interest, I grabbed a sheet of Doing My Best Paper and fussy cut some of the geometric shapes, tucking them above and below the rows of squares. I finished my layout with a sweet journaling die cut tag (complete with ribbon), plus a bold title using large hand‑drawn then fussy cut letters from Scenes from Today Paper and a few navy Mini Puffy Alpha Stickers to complete the look.
Thanks so much for stopping by today! I hope this colourful page inspires you to dive into your stash and get creative too!
SUPPLIES: Patterned papers, stickers, die cuts: CRAFTED MOMENTSLOVELY LANE, and LEGENDARY

Twilight Crop Weekend Layout by Jackie Ashton


Wednesday, July 1, 2026

H1! Jackie Ashton here sharing a scrapbook layout created with the beautiful Crafted Moments collection. This collection is packed with gorgeous colors, soft patterns, and delicate florals, making it perfect for documenting special memories.
I started my layout with a sheet of white cardstock to keep the design fresh and clean. I wanted to create a playful background with lots of movement so I used both a 3-inch and 2-inch circle punch to cut circles from a variety of patterned papers from the 12x12 Paper Pack. I arranged the circles across the cardstock, allowing the different colors and patterns to create a fun, balanced composition. To add extra detail and texture, I incorporated some hand stitched circles throughout the layout. The stitching helps add extra texture to the page. I also used a circle stencil to blend in soft stenciled details to the background, giving the background more depth and visual interest without overwhelming the design. My photograph became the focal point of the page, so I backed it with a few layers of patterned papers from the 6x8 Paper Pad. Layering these smaller scale patterns helped frame the photo beautifully while tying it into the rest of the layout. I added 3D foam beneath the photograph to help lift it off the page and create extra dimension. For the title I used navy Mini Puffy Alpha Stickers which fit perfectly without overpowering the design. To finish everything off, I added a few Floral Die CutsEphemera Die Cuts, and Enamel Shapes around the photograph, adding softness and bringing the whole layout together with a lovely decorative touch. Thank you for stopping by!
SUPPLIES: Patterned papers, stickers, die cuts, enamel dots: CRAFTED MOMENTS

Instagram // Facebook // Pinterest

Crafted Moments Layout by Inessa Persekian


Tuesday, June 30, 2026

Hi friends! Inessa Persekian here and today I'm sharing a layout made with Paige's Crafted Moments collection. I had so much fun creating this page and finding a creative way to use some leftover pieces from a previous project.
I started with the Stay Curious Paper, using the pink side as my background - the soft pattern and muted color was the perfect foundation for my design. While working through the collection, I had some leftovers from the Crafted Moments Paper. I had already used several of the hexagons on another layout, leaving me with the top portion of the paper. Rather than letting it go to waste, I decided it would make a fun design element for this page. I adhered the remaining section across the top of the layout using foam adhesive to give it a little dimension and help it stand out from the background. The raised layer adds extra interest and creates a nice element for the page. I also added a few Puffy Stickers to the center of select hexagons for additional texture. For my photo, I matted it using one of the papers from the 6x8 Paper Pad which helped frame the image and bring the purple into the bottom half of the page. I then layered embellishments from both the Floral Die Cuts and the Ephemera Die Cuts as well as Enamel Shapes around the photo cluster to create a balanced design with lots of detail. One of my favorite finishing touches was a butterfly that I fussy cut from the Full of Hope Paper. I love how it adds movement and a whimsical touch to the layout while bringing in another beautiful element from the collection. This page is a great reminder that even leftover scraps can become standout design features. I absolutely love how this layout came together and how the layers, dimension, and embellishments work together to highlight my photo. Thanks so much for stopping by today and I hope this inspires you to look at your leftover pieces in a whole new way!
SUPPLIES: Patterned papers, stickers, die cuts, enamel dots: CRAFTED MOMENTS

Living the Sweet Life Layout by Audrey Mutschall


Monday, June 29, 2026

Hello friends! Audrey Mutschall here sharing a new layout made with the oh-so-pretty Crafted Moments collection.
When I saw the Enjoy the Pause Paper with all the adorable little treats on it, I knew I needed to fussy cut them and make a tea party scene celebrating life’s sweet moments. I started by drawing and paper-piecing a jam jar, which I then stitched around to give a homespun feel. I chose white cardstock for the background of my layout and added a piece of the One Good Thing Paper to the bottom of it which I covered in vellum to soften the pattern. Next I placed my jam jar on the left side of the layout and matted my photo with pink patterned Stay Curious Paper. Once the large elements were arranged on my page, I got to work fussy cutting tea mugs and muffins and cake slices from the Enjoy the Pause Paper, as well as lemon wedges from the Inner Glow Paper. I scattered these around the bottom of the page, and then adhered them with foam tape to add a little extra dimension. Next I cut a large title in two different fonts using white and pink cardstock and then added gold Mini Puffy Alphabet Stickers from the Lovely Lane collection. Lastly, I embellished with Chipboard Stickers, Puffy Stickers, Floral Die Cuts, Ephemera Die Cuts, and Enamel Shapes. I had so much fun creating this tea party scene and I hope it inspires you to check out Paige's Crafted Moments collection!
SUPPLIES: Patterned papers, die cuts, stickers, rub-ons: CRAFTED MOMENTS; Gold Mini Puffy Alphabet Thickers: LOVELY LANE; white and pink cardstock; DMC embroidery floss; Fonts: Clementine Creamery and DTC Gorgeous Skywalk

🇺🇸❤️🤍💙 4th of July Kit & Live Class! 💙🤍❤️🇺🇸


Friday, June 26, 2026


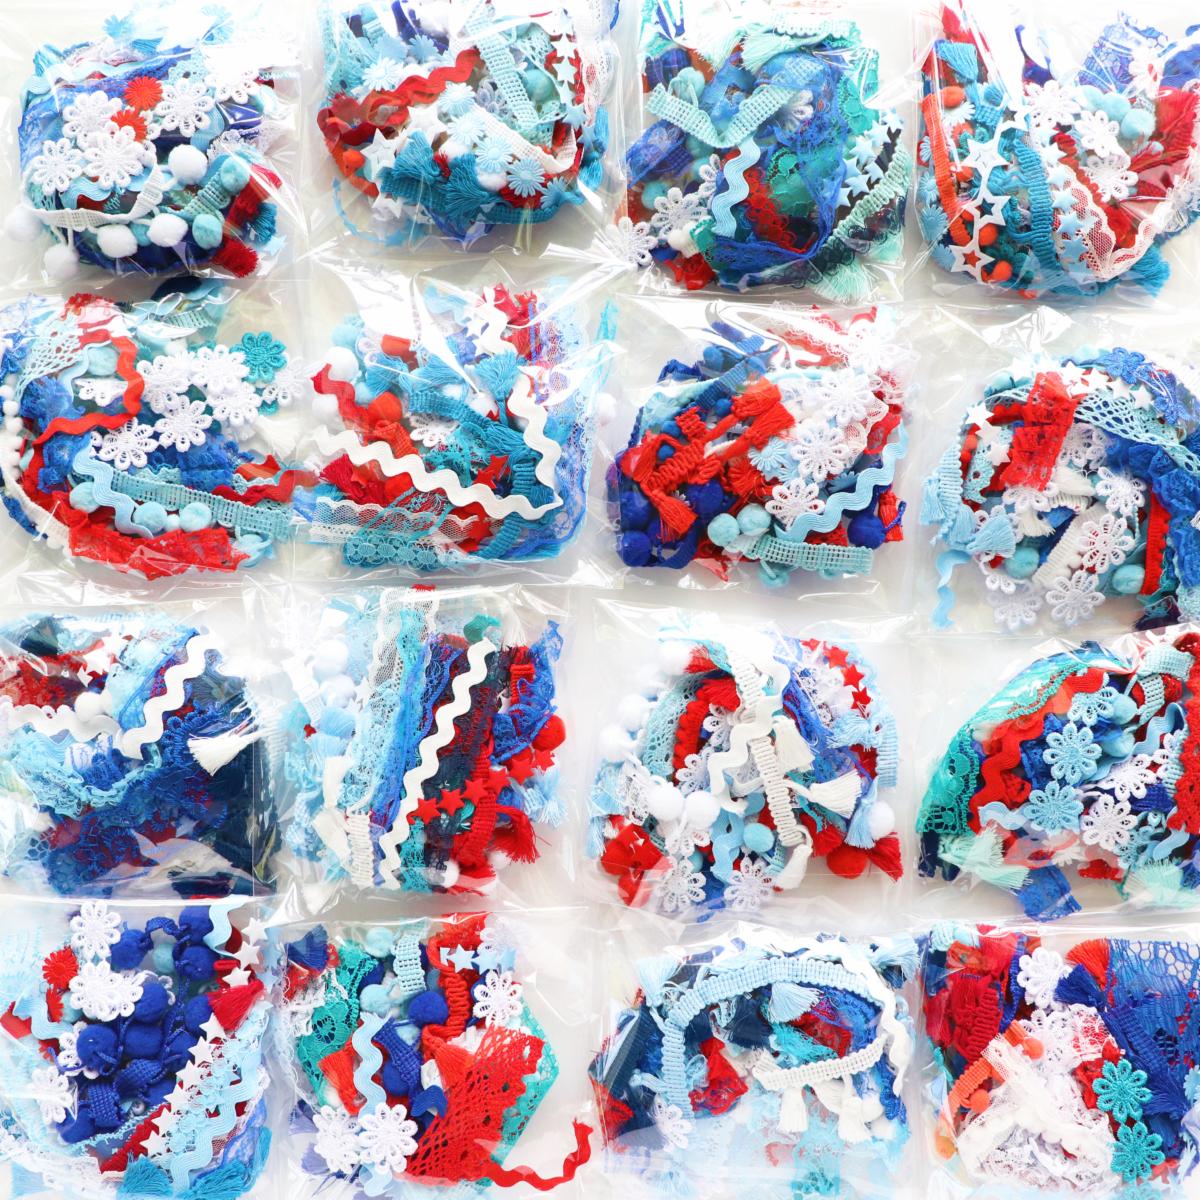
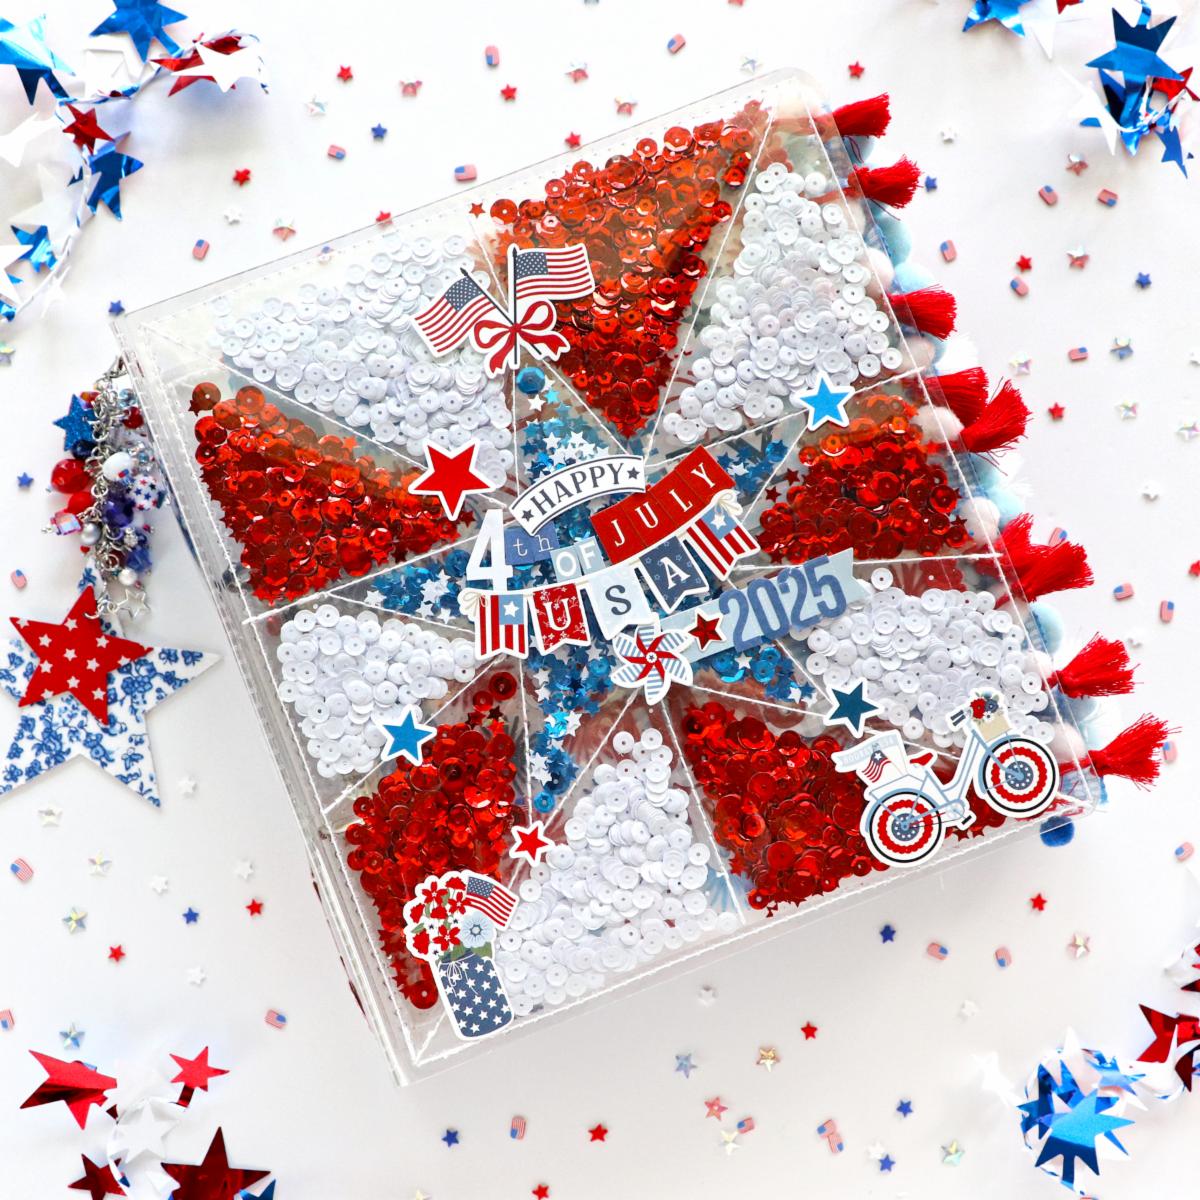
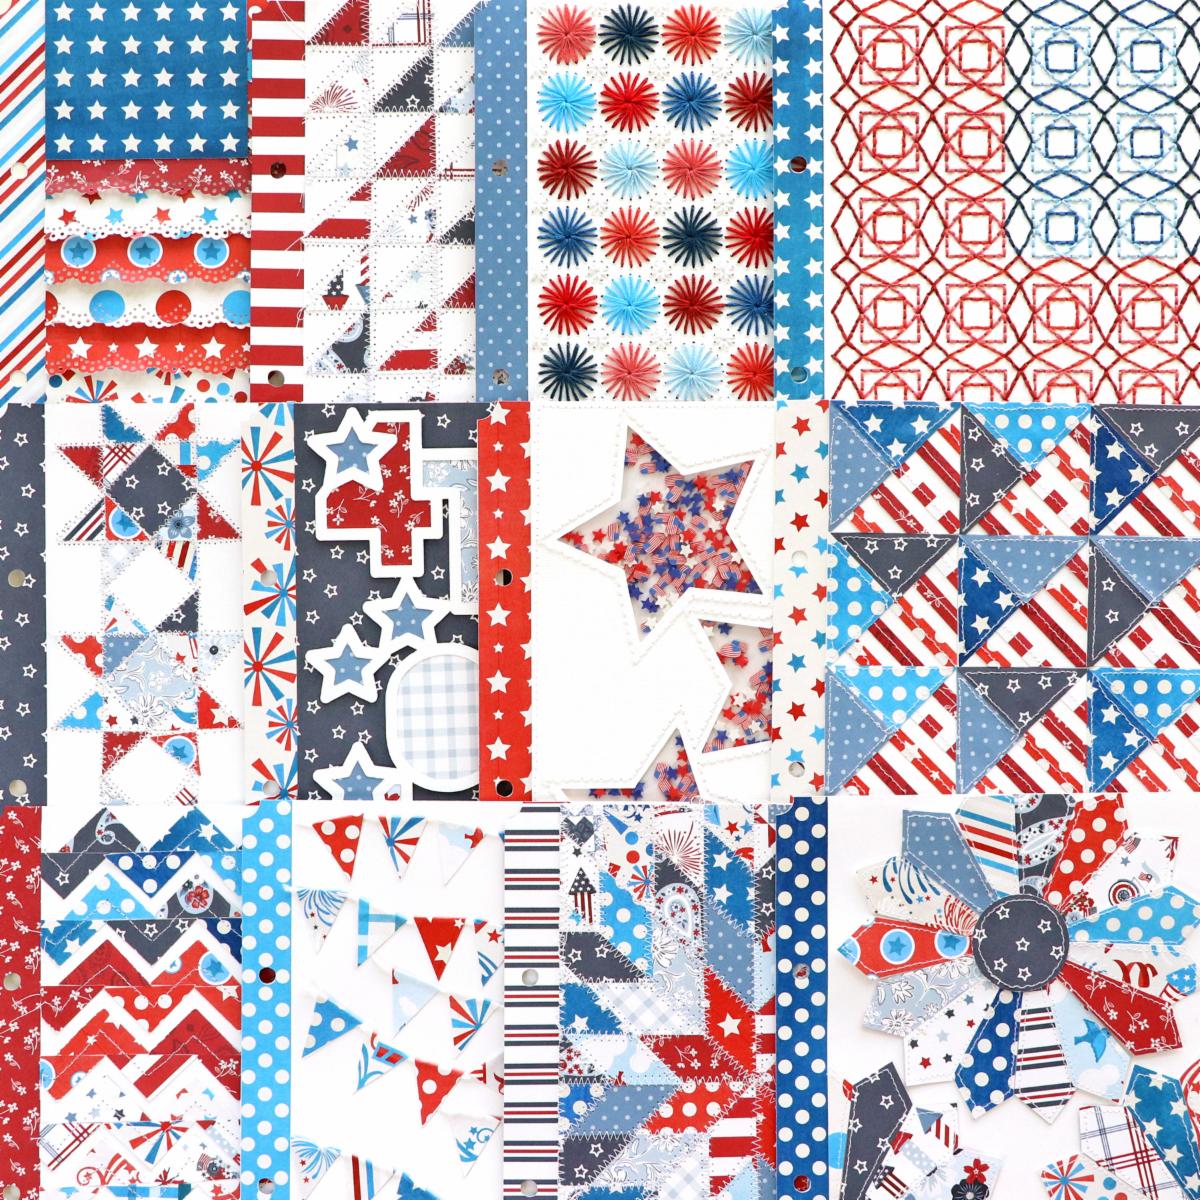
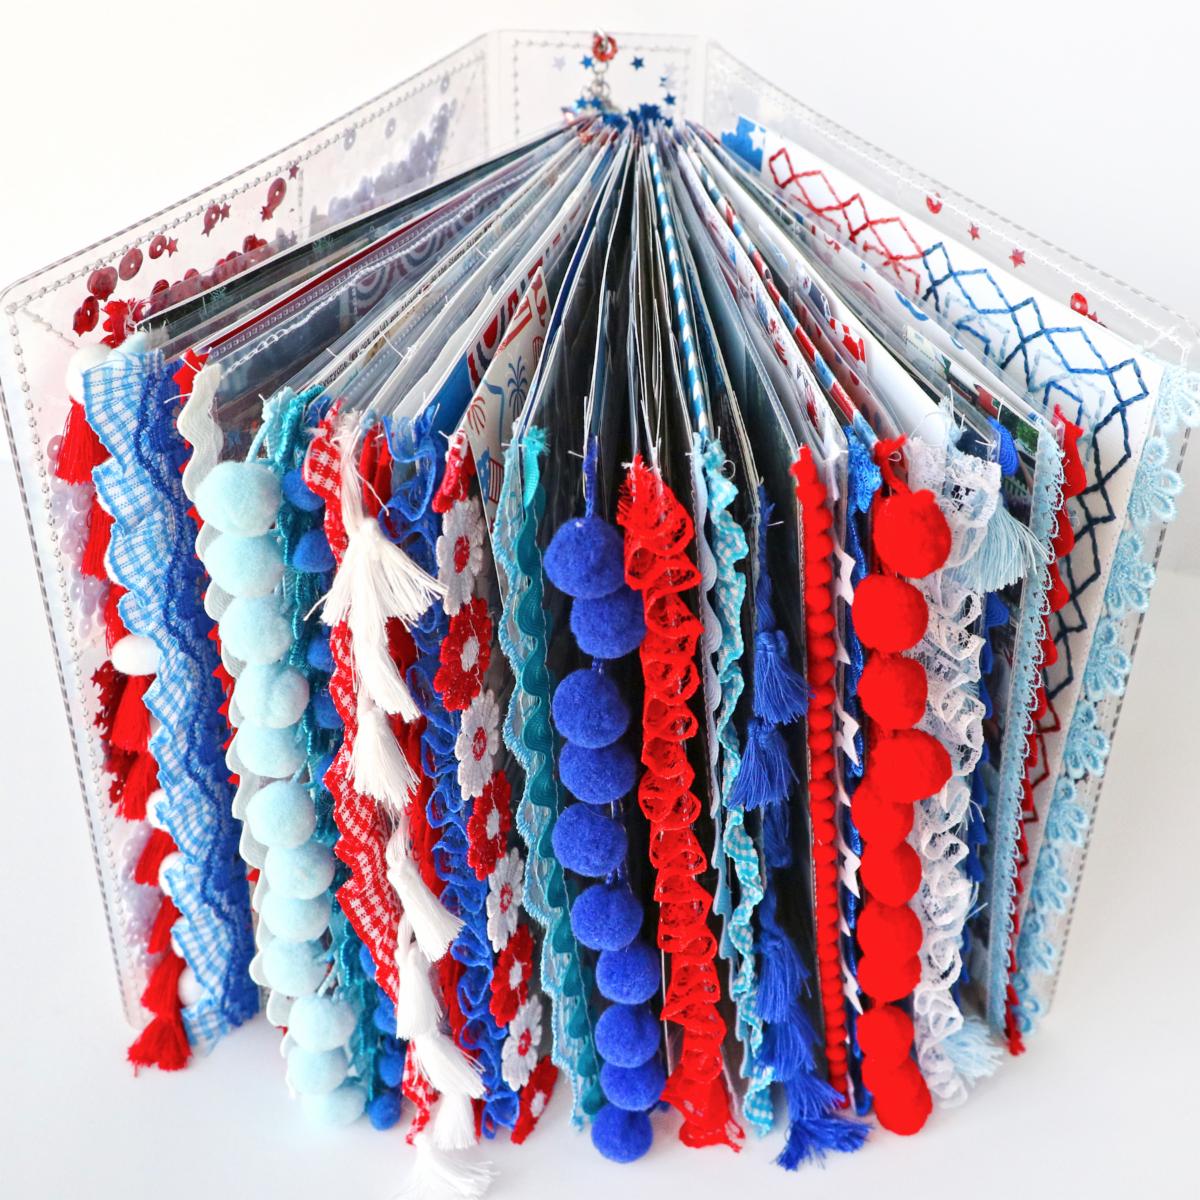
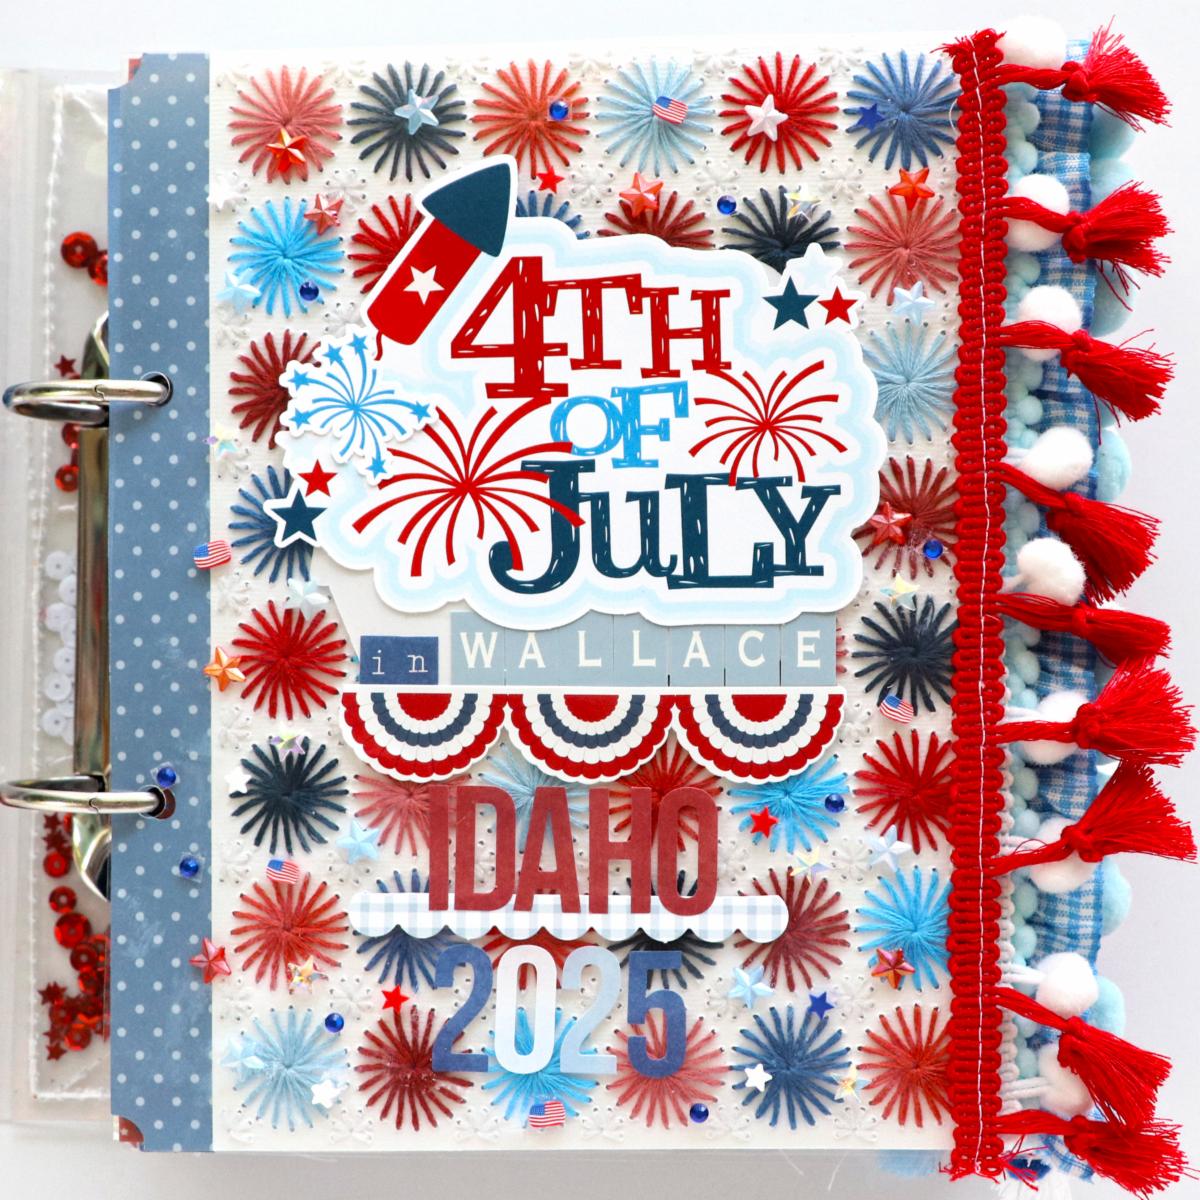
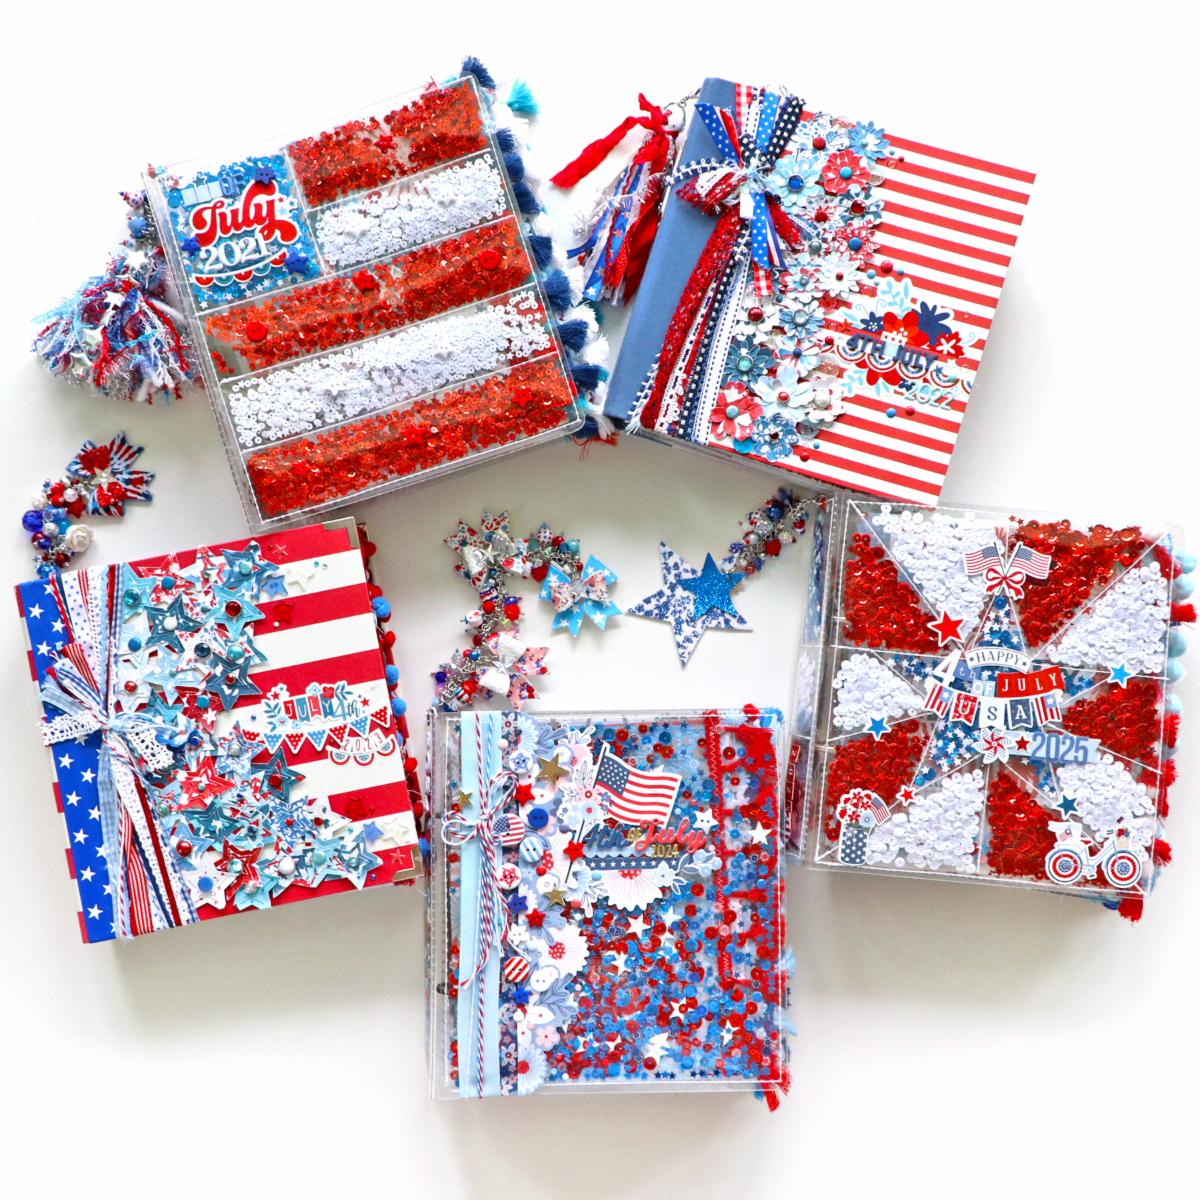
SOLD OUT!! THANK YOU SO MUCH!!! You can purchase virtual access to the class HERE!
I am looking forward to my next kit & class, butterfly-themed! I will have another 4th of July kit & class next year!


Hello and happy Friday! I'm so excited to release my
4th of July Kit & Class!
4TH OF JULY KIT & CLASS

I love the 4th of July! Family + food + fireworks = FUN!! 2025 was the 5th year in a row that my entire family gathered together in the historic town of Wallace, Idaho to celebrate and I love documenting our memories in a 6x8” scrapbook! Check out all of my previous 4th of July scrapbooks in a YouTube playlist HERE. We’re going back to Wallace this year so I will have another

4th of July kit & class next year, woohoo!

The live virtual class will take place Saturday July 18th from 9am-12pm Mountain Time. During class I will show you how to decorate the cover, attach the charm, and teach you the techniques for starting the foundation pages.


🇺🇸 🇺🇸 🇺🇸 🇺🇸 🇺🇸 


PLEASE NOTE: The page protectors included in the kit DO NOT FIT onto the binder rings as is, we wrap the page protector edges with washi tape and use a template to make the holes. I wanted larger binder rings to fit more pages but couldn’t find pocket page protectors to fit so we make them fit - where there’s a will there’s a way!


🇺🇸 🇺🇸 🇺🇸 🇺🇸 🇺🇸 


Gi DeMello is the maker of these amazing sequin albums! The size of this patriotic sequin album is approximately 8½ x 9” with a 2½” spine, 2” binder rings, and the pages are a mix of 13 foundation pages and 22 pocket pages. Each kit also includes a custom festive charm handmade by Emily Inspired Designs - each one is unique and amazing!

4TH OF JULY KIT & CLASS

This year's 4th of July scrapbook features 35 spreads, 181 photos of various sizes to showcase all your patriotic memories, and techniques include hand stitching, interactive photo flips, backing a cut file, a star sequin shaker page, and so much more! - all finished off with decorative ribbons & trims edging the pages for the ultimate festive look & feel! PLEASE NOTE: a cutting machine is NOT required since templates are included in your kit, however a machine does come in very handy to create the pages for stitching.

4TH OF JULY KIT & CLASS

After purchasing, my host site called Ecwid will email you the class PDF that contains a list of additional craft supplies to have on hand, written instructions, photos, and the live class YouTube video tutorial link on the first page. The class will be recorded so you can can go at your own pace and watch/re-watch whenever you have time.

4TH OF JULY KIT & CLASS

BONUS FREEBIE!! As a thank you, once you purchase this new 4th of July Kit & Class, I'll include the PDF download for my 4th of July class from last year valued at $30 and includes links to the templates, cut files, and videos!

4TH OF JULY KIT & CLASS

Let me know if you have any questions, thank you so much, and have a happy scrappy day!

Cake Coffee and Convo Layout by Antonia Sherlock


Thursday, June 25, 2026

Hello friends! Antonia Sherlock here and today I’m sharing a quick and simple layout I created with Paige's Crafted Moments collection.
Once again, I wanted the beautiful patterned papers take center page. I started with the Create Your Way Paper and I ended up using both sides on my layout! I cut a strip of the city scene and fussy cut around the top. I added this onto white cardstock, leaving some white space at the top. I used the other side of the patterned paper to cover the rest of the cardstock - this pretty ditsy floral pattern is one of my favorites in this collection. I cut two border strips with an edge punch and added these to the top and bottom of the floral paper. I added my photo to the top and a row of embellishments to the bottom borders, using Cardstock Stickers and Ephemera Die Cuts. I also tucked a few embellishment pieces under my photo including one of the Floral Die Cuts and more Cardstock Stickers. I used the Mini Puffy Alpha Stickers to add my title - these navy alphas are really growing on me! As a finishing touch, I added Metallic Enamel Dots. I love how easily this layout came together!
SUPPLIES: Patterned papers, die cuts, stickers, enamel dots: CRAFTED MOMENTS
Paige Taylor Evans © // Quinn Creatives DESIGN