You Are the Best Layout by Missy Whidden


Monday, February 28, 2022

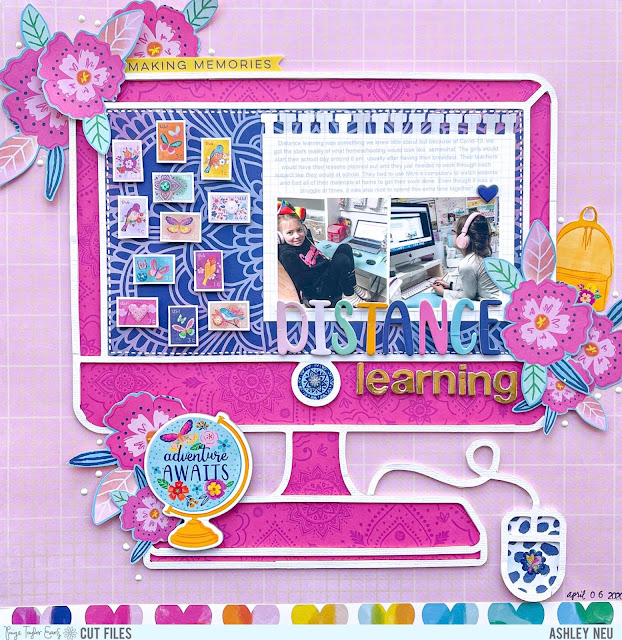
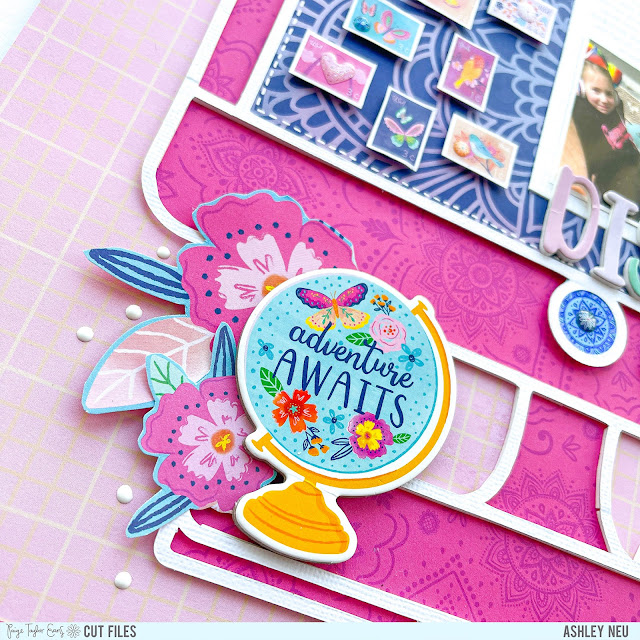
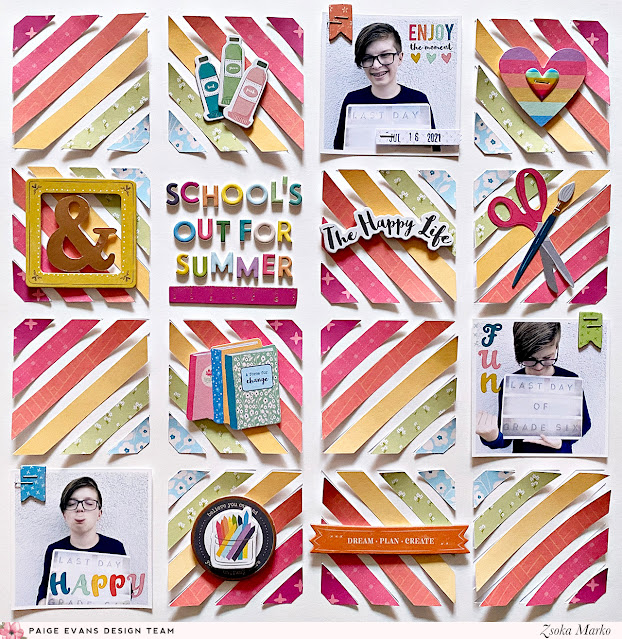
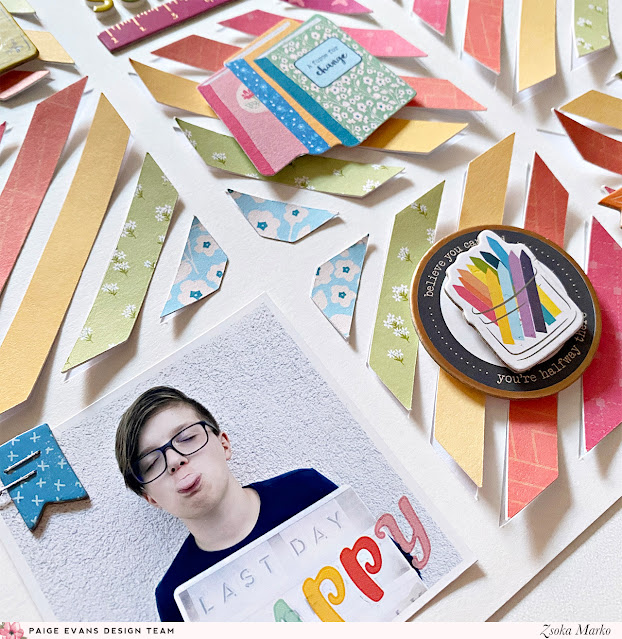
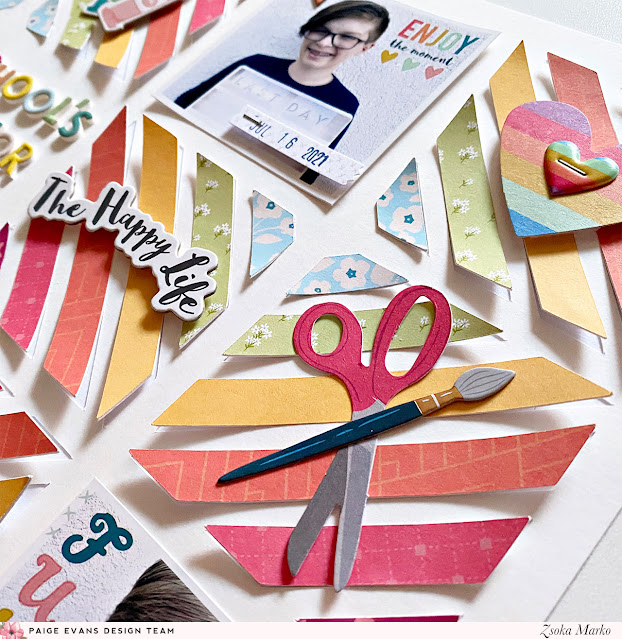
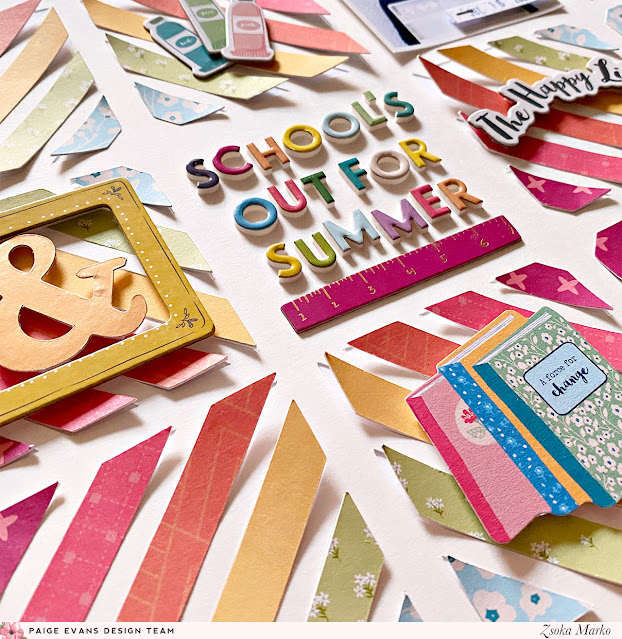
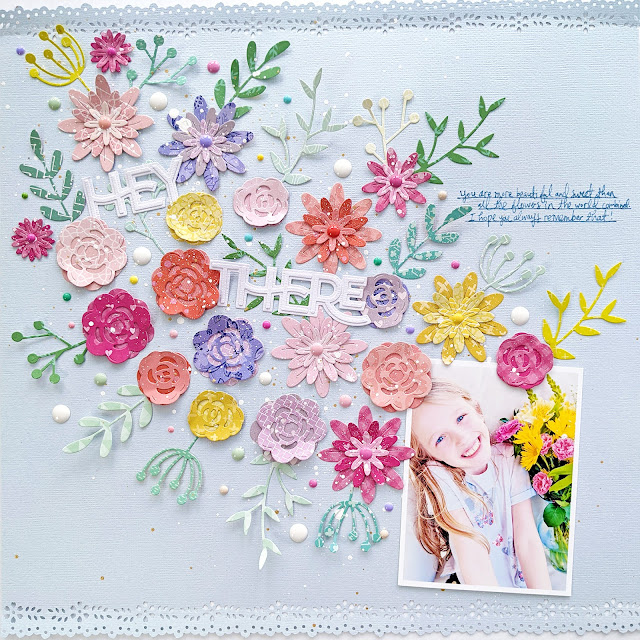
Hey friends! Missy Whidden here with a new throwback layout featuring Paige’s older Whimsical collection. I haven’t used it in years so it felt good to dig it out of the archives and play around with all of these bright colors! I felt like fussy cutting, so I did just that and cut lots of hexagons from Paper 5. As soon as I saw Paper 8 I knew it had to use it for the background. That gorgeous purple ombre was so perfect and it looked so good with all of the rainbow colors. I decided how I wanted the hexagons laid out and then I came in with some white gesso down on the lighter part of the background to prep it for paints. I left the darker purple part alone and splattered it with white acrylic paint and Gold Glitter Spray. On the bottom I mixed pink, purple, and orange Shimmerz Paints.

Here is a process video:
I used a brush to help spread around the paint and let it dry. Once I glued down the hexagons, I machine stitched through them all with gold metallic thread. I love that extra touch of detail. I embellished around the hexagons with various flowers from the Chipboard Stickers, Cardstock Stickers, Die Cuts, and Rub-Ons. I added in blue thread under the orange flower. I used some of the small Mini Foam Thickers for the title.

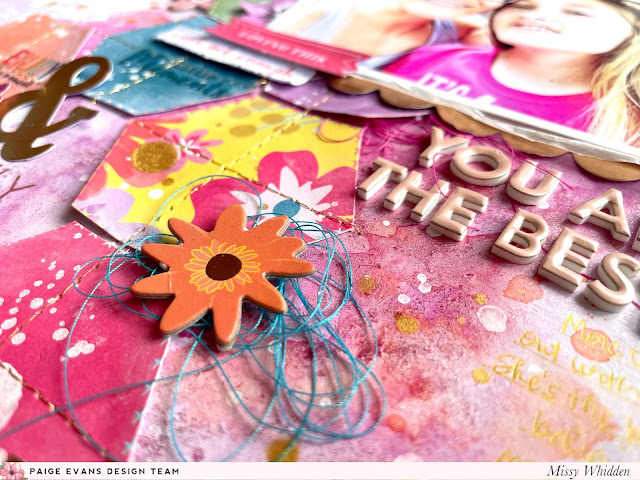
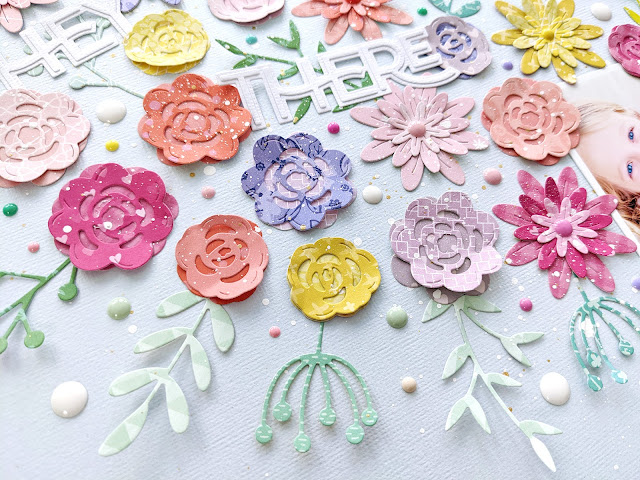
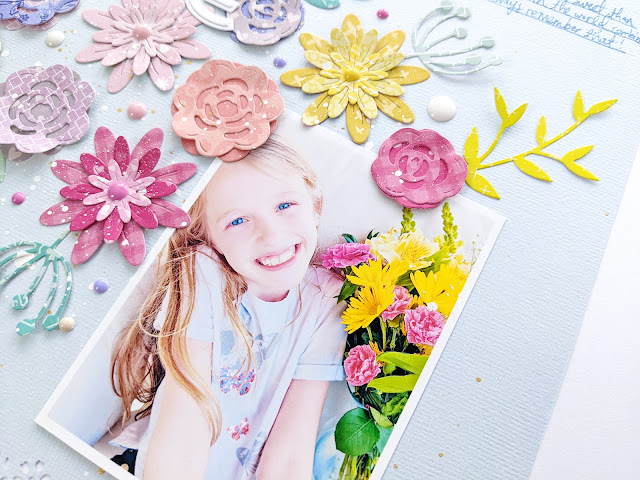
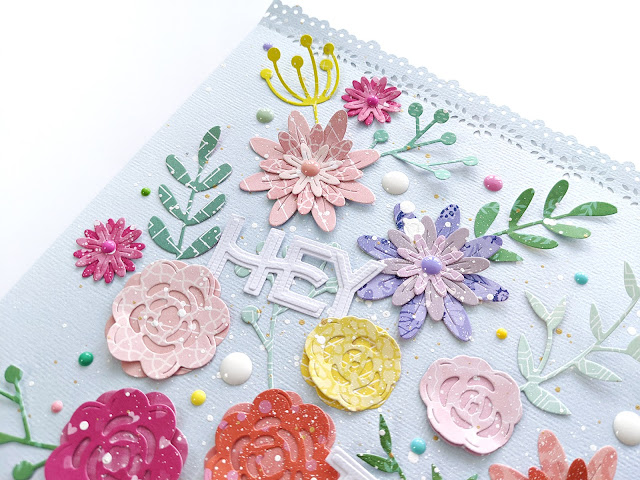
I hadn’t use Rub-Ons in forever and I forgot how fun they are! I love how this metallic ampersand piece looked here so I used it for an added pop of gold. Some of the flowers I popped up with adhesive foam and you can see here how that layered look really makes everything jump off the page. I added a gold scallop sticker from the Cardstock Stickers under the photo, fussy cut a small sentiment from the 6x6 Paper Pad, and topped it with a Die Cut Ephemera piece for a few smaller titles.

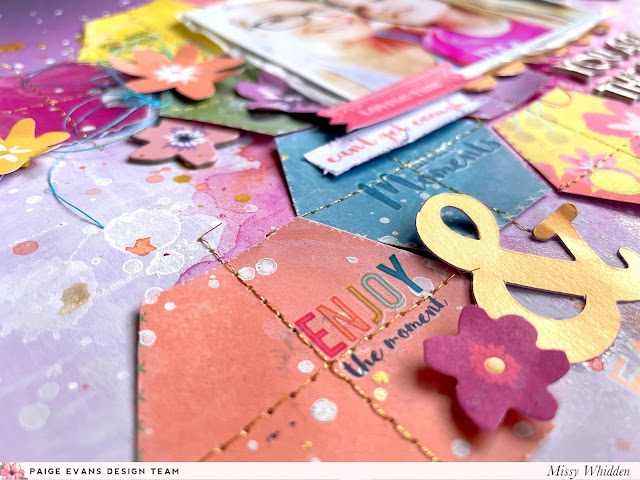
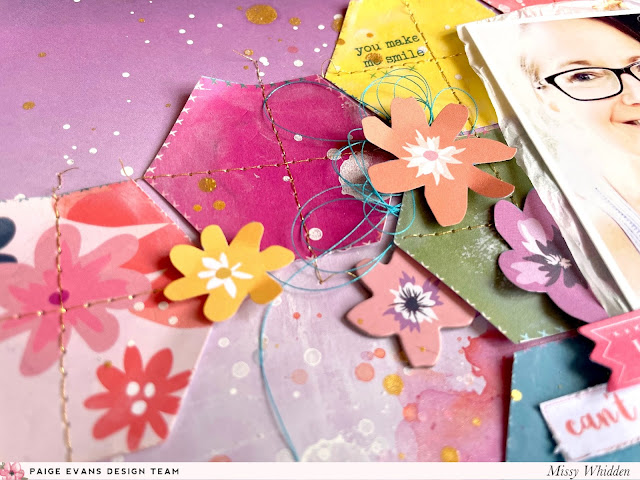
I fussy cut most of these flowers from Paper 14 and scattered them in various places. I wanted to mix and match the colors so placed them in opposite color areas. I added more blue thread here for more texture. I also smudged white gesso over the hexagons to give them a bit of a faded effect.

I hope this inspires you to visit your shelves and pull out an older release that you love! I had so much fun revisiting this beauty of a collection and it made me fall in love with purple all over again! Thanks for stopping by and have a great day!


SUPPLIES: Patterned papers, stickers, Mini Foam Thickers, die cuts, embellishments: Whimsicalgessowhite acrylic paint
Blog: littlenuggetcreations.blogspot.com // Instagram: @missywhidden // Pinterest: @missywhidden
Facebook: missy.whidden // YouTube: Missy Whidden

Summer MemoryDex Mini Album by Paige Evans


Sunday, February 27, 2022

 Yesterday I taught a Summer MemoryDex Mini Album Virtual Class and it's available online HERE!

This Summer MemoryDex Mini Album does use a cut file provided as a free download in the PDF for those with an electronic cutting machine. If you don't have a machine, I have the MemoryDex Box & Cards Cut File available to purchase as a pre-cut file in my shop HERE. Also please note that additional supplies are needed to complete the box such as a paper straw and adhesives.

I used a mix of older collections to create this project, namely supplies from Pink Paislee, Heidi Swapp, and Dear Lizzy.

This Summer MemoryDex Mini Album features pockets, flip-ups, lots of interactive elements, and machine stitching. All of the stitching is optional, but I do love adding machine stitching to my personal projects so I am excited to show you how I create the entire MemoryDex!

A PDF with a list of supplies, photo sizes, instructions, templates, and the link to the YouTube video will be emailed within 24 hours of purchasing.

Fronts of all the cards:
Backs of all the cards:

Here are pictures of all the cards in this Summer MemoryDex Mini Album. Let me know if you have any questions about anything!

I hope you are inspired to check out my Summer MemoryDex Mini Album Virtual Class!

Distance Learning Layout by Ashley Neu


Saturday, February 26, 2022

Hello all! Ashley Neu here sharing a new layout for Paige’s cut file team! For this layout, I used the Zoom Call Cut File paired with past collection, Go the Scenic Route.

I decided to omit the zoom call words on the cut file and create my design inside of the computer. I used foam adhesive to add dimension when I backed the cut file with patterned paper. I also used the stamps from a patterned paper to create the icons on the desktop and a notebook punch to add interest to the paper that holds my photos and journaling. After creating my title with Thickers, I added some flowers, enamel dotsthe cute yellow backpack, and that adorable floral globe.

SUPPLIES: Patterned papers, stickers, embellishments: GO THE SCENIC ROUTEenamel dots; Cut file: Zoom Call by Paige Evans

A Splendid Weekend Scrapbook Event!


Friday, February 25, 2022

Join me, Paige Evans, and Andrea Lake for two full days of in-person scrapping, learning, and crafting during a Splendid Weekend!
Plus two special bonus mini classes by Jessica Upton of Color Cast Designs and Jana Eubank with Simple Stories!

Plus goodie bags! Pop-up shopping! Fun with friends! We will use my new Splendid collection (kit value of over $120) to create 4 layouts and 2 mini albums and additional projects in the bonus classes. Every person gets half of a 6 foot table to spread out and craft the days away.


Dates: Saturday July 23rd & Sunday July 24th 2022 // 9am-9pm Mountain Time on both days


Location: Delta Hotel by Marriott // 10 E 120th Ave, Northglenn, CO 80233
**If you are traveling from out of town and want to stay at the hotel, discounted room rates are available which you can book directly through THIS LINK. Or you can email Andrea (andrea.lake@marriott.com or andrea.marvilla@gmail.com) or call her directly at the hotel: 720-221-2745 and she will assist you in making the reservation.


Saturday July 23rd 2022
9am-10am: Meet'N'Greet & Early Bird Shopping
10am-1pm: Paige's Layouts Class
1pm-2pm: Lunch Break
2pm-5pm: Andrea's Mini Album Class
5pm-6pm: Dinner Break
6pm-7:30pm: Bonus Mini Class by Jana Eubank with Simple Stories
7:30-9:00pm: Splendid Crop


Sunday July 24th 2022
9am-10am: Chat, Pictures, Shopping
10am-1pm: Paige's Mini Album Class
1pm-2pm: Lunch Break
2pm-5pm: Andrea's Layouts Class
5pm-6pm - Dinner Break
6pm-7:30pm: Bonus Mini Class by Jessica Upton of Color Cast Designs
7:30-9:00pm: Splendid Crop


Price: $300.00


A PDF of photos and instructions as well as things to do nearby, great food to eat, and more info will be sent to you no later than a month before the event. We can't wait to see you in-person and have a Splendid Weekend together! Limited spots available! Welcome to Colorado!

Heart Squash Mini Album by Andrea Lake


Thursday, February 24, 2022

Hi everyone! Andrea Lake here today with a new project featuring Paige's Cut Files!

February is all about love. I used Paige's Heart Squash Mini Album to keep two of my favorite photos from my wedding day along with some journaling.

I arranged my patterned papers in rainbow order and used different embellishments to decorate each section tone-on-tone.

SUPPLIES: Bungalow LaneWondersGo the Scenic RouteTruly Grateful; Cut file: Heart Squash Mini Album by Paige Evans

School's Out for Summer Layout by Zsoka Marko


Tuesday, February 22, 2022

 Hey there lovelies, Zsoka Marko stopping by to share a new layout with you today that I made for the Paige Evans Design Team, using her past Whimsical collection. I chose Paige's Diagonal Stripes Background Cut File. In Silhouette Studio I deleted some parts of the cut file where I was planning to add my 3 photos and title, then I sent the design through my Cameo. Also in Studio I colored all the pieces to see how the pattern I imagined would look like and once I was happy with the design I grouped the colors together and cut them out of various patterned papers to create a rainbow color scheme.

I then backed each colorful paper with the white fall out pieces that I had left from the cut file. I originally wanted to add foam tape to all these shapes, but then I liked the way it looked without. I added a dab of glue in the middle of the shapes and bent up their ends to create dimension.

I went through all the embellishments in the Whimsical collection and pulled out all that had some kind of relation to school or happiness. I adhered these down in the middle of some of the squares using foam tape.

I glued down my title in one of the empty spots. I added some colorful rub ons to all my photos. I love the rub ons in the collection, they are just so perfect even after all these years! I'd love rub ons in every collection, ha! I stamped my date onto a cardstock sticker strip and attached it to one of the photos. I didn't write journaling because I think the pictures speak for themselves.

That's it for today guys! I hope I could inspire you in one way or another. Thank you so much for stopping by and have an amazing day!


SUPPLIES: Patterned papers, Thickers, stickers, die cuts, rub ons, embellishments: Whimsical Digital Collection
Blog: apocketfullofscrap.blogspot.com // Instagram: @zsoka_marko // Facebook: Zsoka Marko // YouTube: Zsoka Marko

Hey There Layout by Paige Evans


Monday, February 21, 2022

 When I had some free time a couple weeks ago I had so much fun playing with Metal Dies by A Pocket Full of Happiness! For this layout I used the Spring Floral Die Set and Hey There Die Set.

To begin, I grabbed a pile of my favorite colors of patterned papers from a plethora of my signature scrapbook collections. Maybe one of these years we'll make a full collection with these custom colors :) I spent some time die cutting the flowers and leaves with the Spring Floral Die Set from these chosen patterned papers and glued the layers together where applicable. I also die cut the Hey There title from white cardstock and glued a couple of the layers together.
Once everything was die cut, I grabbed a piece of light blue textured cardstock and arranged the flowers and leaves across the background. I splashed watered down white acrylic paint and gold paint on top of everything and let it dry.
I tucked a photo of Jane into the mix on the bottom right corner. I've actually scrapbooked this same photo a few times before - it's one of my favorites with the beautiful & colorful flowers so I'm totally okay scrapping it again :)
I added the title on top and then embellished with a bunch of enamel dots in between the flowers and leaves. Next I wrote journaling on the top right. To finish, I used a decorative floral border punch across the top and bottom edges to add interest and then called the layout done!
SUPPLIES: Patterned papers: various Paige Evans collections; Metal dies: Spring Floral Die Set and Hey There Die Set by A Pocket Full of Happinessenamel dotswhite acrylic paintgold paintwhite cardstock; Border punch: EK Success

Snowflakes Layout by Lisa Fonseca


Saturday, February 19, 2022

 Hi everyone, Lisa Fonseca here today with a new layout featuring Paige's Cut FilesFor this layout I used the Snowflakes Border Cut File and pieces from Bungalow Lane!

I cut out the Snowflakes Border Cut File three times, twice from white cardstock and once from a light blue patterned paper from Bungalow Lane. I cut out individual snowflakes from one of the white pieces and painted them with watercolors. Then I layered everything starting with blue, then white, and the watercolor snowflakes on top. To finish I added tangled thread, hearts and stars Cardstock StickersBird Paper Clips, and a Heart Charm to make everything look super cute.

SUPPLIES: Patterned papers, stickers, charm, bird paper clips, embellishments: BUNGALOW LANEwhite cardstock; Cut file: Snowflakes Border by Paige Evans

Heart Bouquet Cards by Paige Evans


Friday, February 18, 2022

 I had a bit of free time last week so I created a pair of cards with the Heart Bouquet Die Set which is another fun collaboration with A Pocket Full of Happiness!

I cut the bouquets from white cardstock then painted over the inner heart pieces with Pastel Dreams watercolors. Once the hearts dried, I splashed watered down white acrylic paint and gold paint on top before gluing them back inside the bouquet using only a line of glue down the back centers to create dimension and shadows. I embellished minimally with a few enamel dots to finish!
Zsoka also created a pair with the same Heart Bouquet Die Set paired with Bungalow Lane:
The plan is to have these dies and my other collaboration dies in my shop in a few weeks so stay tuned!

Bungalow Lane Mini Album & Storage Box by Amber Mitchell


Thursday, February 17, 2022

Hello crafty friends! Amber Mitchell here on Paige's blog today to share with you how I created this super cute mini album and storage box combo using the Bungalow Lane collection.

Bungalow Lane is one of my all-time favorite ones to craft with. I love all of the colors, the patterns, and the florals. I just can't get enough of it! This means my stash is getting a bit low. So, from here on out, I'm using my leftover bits and pieces to make smaller projects. This storage box/tiny mini album combo was perfect for this!

To create the mini album for this project, I used three pieces of medium weight chipboard. The cover pieces measured 2.5 x 2.5 inches, while the spine measured 1 x 2.5 inches. This mini is super tiny but can hold a ton of 2 x 2-inch photos. I wrapped and lined my chipboard using paper from the 12x12 Paper Pad. I then attached white elastic thread to the spine; this will act as the binding for the album. For a bit of extra fun, I added beads, a Heart Charm, and a small charm to the center string.

To make the pages, I used the 2 x 2-inch swatches from Paper 20. I trimmed them into five pairs of two and folded them down the middle. I then slipped them into place on the elastic thread.

To create the storage box, I used the Floral Transparency. I love this paper so much! The gold foiling is just so pretty. I trimmed a sheet that measured 6 x 9.5 inches. On the 6-inch side I scored at 1.5 inches on both ends. On the 9.5-inch side I scored at 4 inches on both ends. To assemble the box, I scored on all the score lines, then turned the small squares in the middle of the template into tabs. I then used these tabs to adhere the box together. To create the lid for the box, I took a sheet of paper that measured 2 7/8 x 7 inches. On the 7-inch side I scored at 1.5 and 3 inches. I then adhered the 4-inch segment of this template to the inside of the back of the box and folded the lid closed. To create a closure I used velcro dots.

That's how quick and easy the base of this project is to make! Because it's such a small album, the process goes by fast, which means you can get to the fun part - embellishing - sooner. To embellish this project, I used some bits and pieces from the Floral Die Cuts and Layered Stickers. I machine stitched along all of the flowers and leaves for more texture. The final touches were Bird Paper Clips that I added to the album itself.

Here is a photo of all of the mini albums I've made with Bungalow Lane so far:

Thank you so much for stopping by today! I'll see you next time with another fun project!


SUPPLIES: Patterned papers, stickers, die cuts, bird paper clips, charm, embellishments: BUNGALOW LANE

Location: California, USA / Blog: Happy Crafty Studio / Instagram: @bambidearr / YouTube: bambidearr / Pinterest: bambidearr

Paige Taylor Evans © // Quinn Creatives DESIGN