Mermaid Life Layout by Valerie Bisson


Monday, July 31, 2023

Hi friends! Valerie Bisson here and I’m happy to share a new layout with you featuring two cut files: the Waves Background from the 20 Summer Cut Files and Mermaid Lifepaired with the Blooming Wild collection!

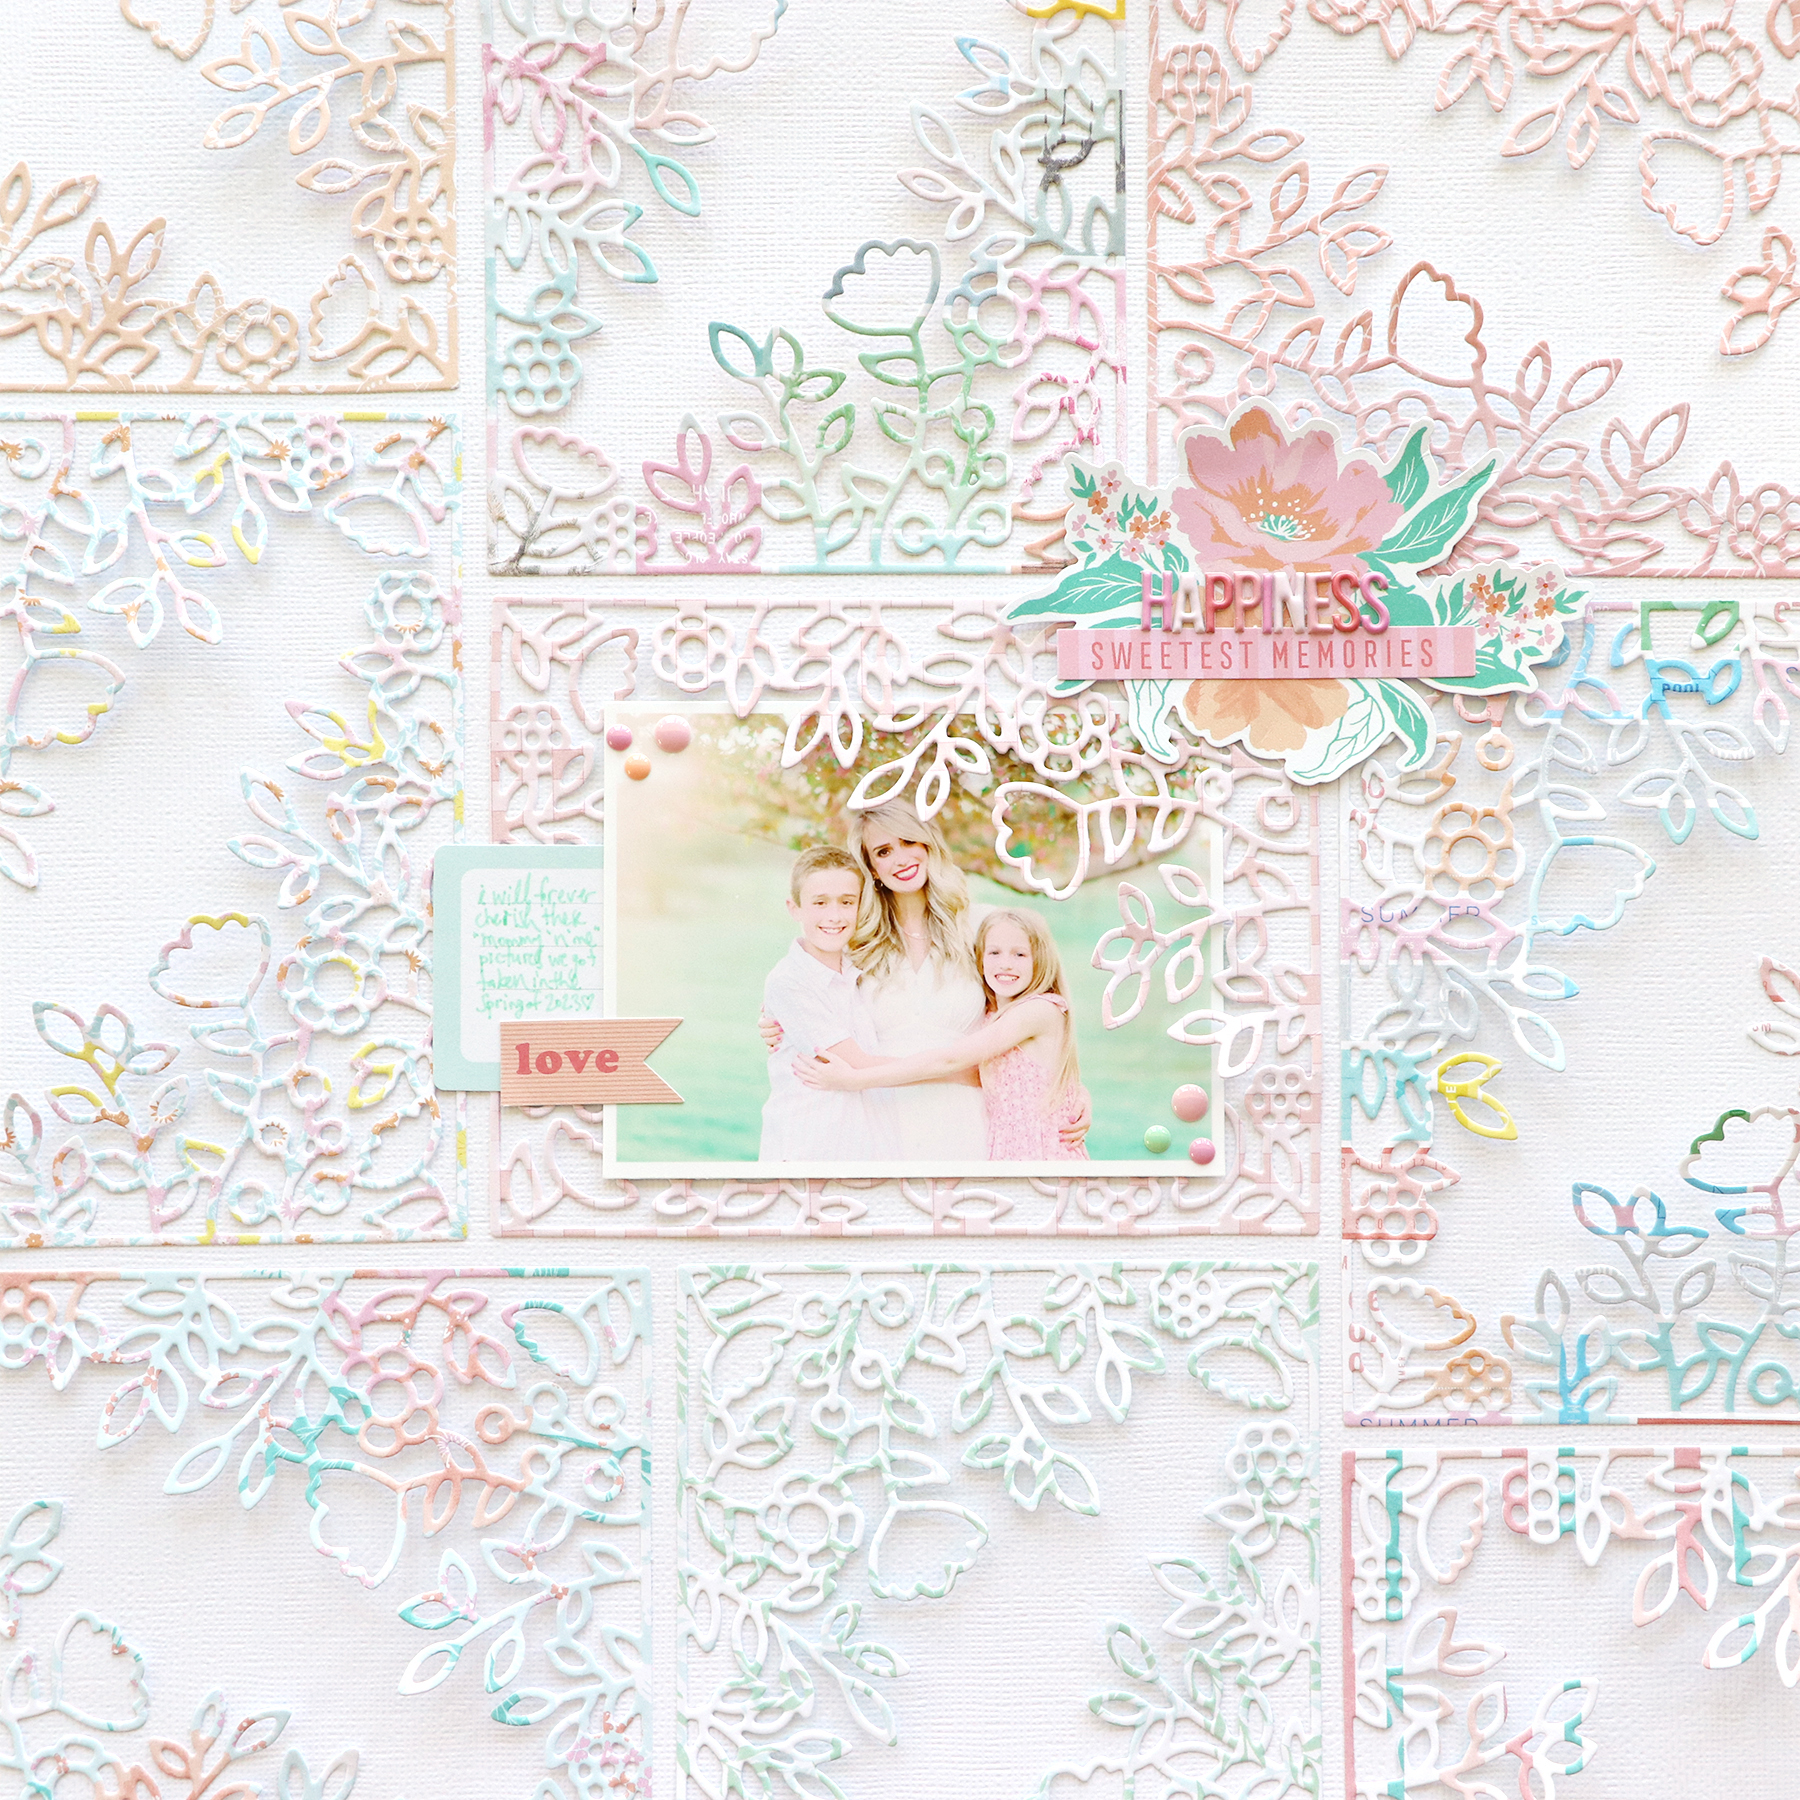
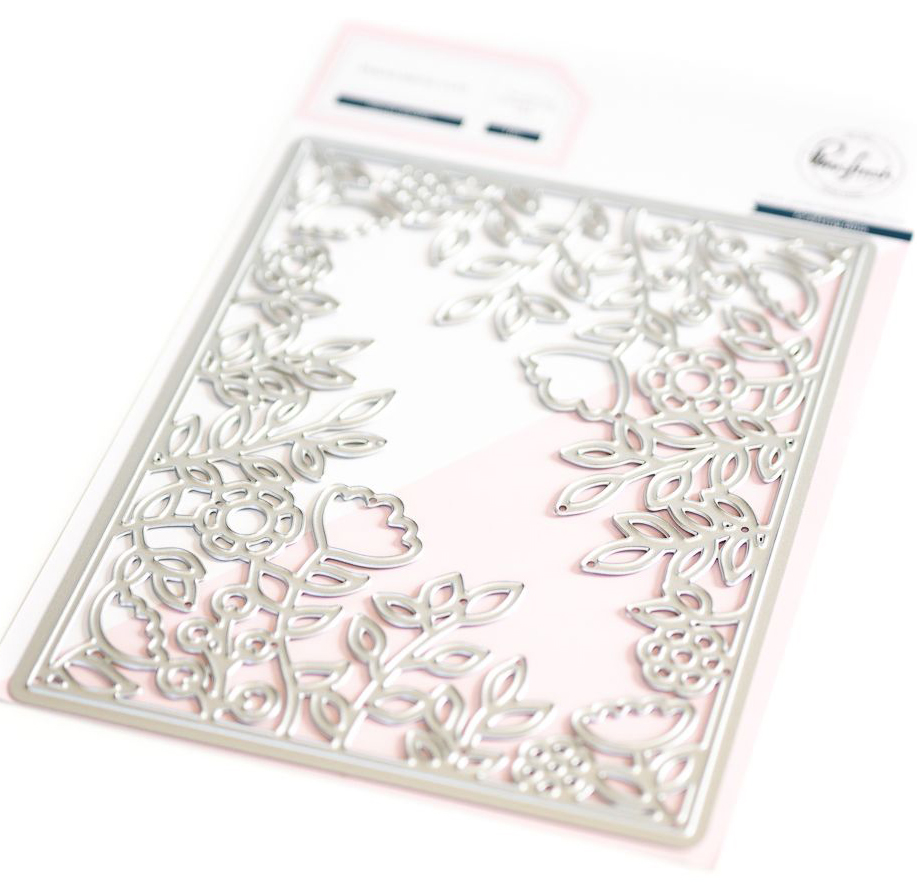
The Waves Background and Mermaid Life cut files were just perfect for the underwater photo of my daughter swimming and enjoying her mermaid life. I started with white cardstock for the cut files. After cutting the Waves Background I peeled the outline off the mat and left all the inside pieces of the waves on the mat so I could paint them using my favorite Kuretake watercolors. Doing it this way keeps all the pieces nice and flat while painting them and also for them to dry. I also cut a solid backing piece for the waves to make it easy for the next step: peel off the wave pieces one by one and add to the cut file outline, like putting a puzzle together. You can lift up some of the edges for added texture. Then adhere on top of Paper 14. Next I used pieces of patterned paper from Blooming Wild for backing the Mermaid Life cut file and a scrap of red paper for the hair from Go the Scenic Route. For variation with my cut files I added a shadow layer behind the mermaid and popped up the letters with dimensional adhesive. Just a few pieces from the Cardstock Stickers, Sticker Book, Journaling Spots, a Chipboard Sticker, and a Mini Flower Puffy Sticker for embellishment complete my layout!

Thanks so much for stopping by! I hope you are inspired to try out the Waves Background from the 20 Summer Cut Files as well as the Mermaid Life cut file, paired with the Blooming Wild!

SUPPLIES: Patterned papers, stickers, die cuts, embellishments: BLOOMING WILD; white cardstock; Cut files: Waves Background from the 20 Summer Cut Files and Mermaid Life by Paige Evans

Instagram // Facebook // Pinterest

Stay Cool (Layered Flowers) Layout by Paige Evans


Sunday, July 30, 2023

I taught a Virtual Layouts Class last week and here is one of the pages we made featuring layered die cut flowers! The class is available online HERE. I used the Stardust collection by Jen Hadfield to create these layered flowers and documented Jane in her super cool pink shades and beanie.
It's no secret that I love flowers so anytime I can include a lot of them on one page I'm a happy gal :) I pre-cut dozens of flowers from a rainbow striped paper in the Stardust collection, gave them a bit of texture by creasing all the petals and leaves, and then layered them all up to make the flowers.
Upon purchase of the Virtual Layouts Class a PDF will be emailed with the link to the YouTube video on the first page, a list of supplies to buy or gather from your stash, photo sizes, instructions, any homework needed to be completed before the class, and templates to download/print/cut. The class is saved for rewatching at your convenience.
Let me know if you have any questions about anything, always happy to help!
I hope you are inspired to check out my Virtual Layouts Class featuring layered die cut flowers!

Disneyland Paris Hot Air Balloon Mini Album by Paige Evans


Saturday, July 29, 2023

On Wednesday I taught a Hot Air Balloon Mini Album Class and it's available online HERE!
I used the Stardust collection by Jen Hadfield to create this unique & fun dimensional mini album!
From handmade banners and a paper woven basket to a rainbow topper & layers galore, this album is sure to make you smile :) 
I did add machine stitching to the edges of my pages, but that step is optional. I just LOVE adding stitching for texture!
I filled my Hot Air Balloon Mini Album with pictures from when I took Fox & Jane by myself to Disneyland Paris while Chris went to a work conference in southern Germany. The colors and many sentiments throughout the Stardust are perfect for matching Disneyland Paris!
This album now has a permanent spot atop my IKEA Kallax unit so I get to see it often and remember the good times we had!
I didn't put anything inside the basket, but you totally could fill it with little goodies or ephemera from whatever you're documenting!
Because of this style of binding, you could add lots more pages! Or less, whatever you prefer :)
Here are pictures of the 8 spreads in my Hot Air Balloon Mini Album! Let me know if you have any questions about anything!
Upon purchase of this Hot Air Balloon Mini Album Class a PDF will be emailed with the link to the YouTube video on the first page, a list of supplies to buy or gather from your stash, photo sizes, instructions, any homework needed to be completed before the class, and templates to download/print/cut.
The class can be watched whenever you have time - it was recorded so you can watch as often as you like!
I love seeing how you take these ideas and make them your own! Change the collection, change the sizes, add more pages, less pages - make it YOU! I love making mini albums and hope to inspire you to try making them too!
Be sure to check out my Hot Air Balloon Mini Album Class using the Stardust collection by Jen Hadfield! Have a happy scrappy day!

Hello There Cutie Layout By Phil Donahue


Friday, July 28, 2023

Hello scrappy friends! Phil Donahue here happy to be back on Paige's blog with a cheerful floral layout featuring the Tile Background cut file along with elements from Blooming Wild!

The B-side of Paper 18 inspired the majority of the color scheme for this layout. The teals, yellows and pinks from the pattern helped me navigate which scraps worked best with the photo and cut file. I backed the beautiful Tile Background cut file with some colorful scraps from the 12x12 Paper Pad. After backing, I added adhesive foam to the back and layered it on top the base page which is the tone-on-tone geometric B-side of Paper 14. After placing the photos at the lower right corner I added a title from the cut apart Paper 22 on the upper left corner to balance the layout. I embellished both areas with clusters of embellishments which mirrored the colors and ephemera in each. For these embellishment clusters I used a mix of items from the Puffy Phrase Stickers, Cardstock Stickers and Die Cut packs. Lastly, I added fussy cut butterflies from Paper 16 in a diagonal formation starting at the title and ending at the photos bridging the two clusters together beautifully! Final touches were pale blue thread clusters placed under areas of embellishment to add more texture and interest to the page!

I hope you found some inspiration in this sweet and simple floral layout and decide to try the Tile Background cut file and Blooming Wild collection! Thanks for stopping by!
SUPPLIES: Patterned papers, stickers, die cuts, embellishments: BLOOMING WILD; white cardstock; Cut file: Tile Background by Paige Evans

Pinkfresh Studio July 2023 Stamp, Die, and Stencil Release


Thursday, July 27, 2023

Hello and welcome to the July 2023 Pinkfresh Studio Blog Hop!
You may have arrived here from Lea Lawson's blog and next is Susi Becerra Jimenez.
BLOG HOP LINK LIST
This hop is exciting because I have another fun collaboration with Pinkfresh Studio - I designed this Secret Garden Die!
For this layout I used my Secret Garden Die along with the lovely Sunshine On My Mind collection designed by Cassidy Demkov.
I cut a Secret Garden frame from 9 patterned papers using a mix of 12x12 papers and patterns from the 6x6 paper pad. Then I arranged the frames onto a white cardstock background, carefully glued them in place, and trimmed off the excess.
I added a photo in the middle and then embellished minimally with a flower die cut topped with mini alphabet stickers and a sentiment sticker on the top right corner of the photo. I tucked a journaling spot die cut under the left edge of the photo and trimmed off the word "love" from a sentiment sticker. To finish, I placed two clusters of three enamel dots on opposite corners of the photo in some white space so as not to cover anything important. Easy, breezy, beautiful!
I hope you're inspired to pick up my Secret Garden Die, grab the beautiful Sunshine On My Mind collection, then continue along on the hop to see all the other stunning projects created with the July release products!
GIVEAWAYS
- Pinkfresh Studio will be giving away the full release on the Pinkfresh blog & YouTube channel.
- Pinkfresh Studio will be giving away a total of 10 $25 gift cards along the hop. The winners will be picked from the comments.
- Pinkfresh Studio will pick the winners & post them on August 4th, 2023 on their GIVEAWAY PAGE.
Winners must check that page & claim their prize within 2 weeks.
*******
Thanks for stopping by! 
Next on the hop: Susi Becerra Jimenez

Ring Security Detail Layout by Noelle Culp


Hi crafty friends! Noelle Culp here today with a new layout featuring using Paige's Jewel Circle Cut File and Blooming Wild!
My boys were the "ring security detail" (ring bearers) in my niece's wedding recently and of course I was going to scrap this. I chose the Jewel Circle Cut File and backed it with the blue flower Paper 13. I then created a quick background by splashing blue paint across it and then stitched the cut file down using my sewing machine with white thread. I fussy cut the flowers from Paper 2 and glued them down on the left side. I splashed a bit of white acrylic paint on top. I then added my photo backed by a yellow Journaling Spot and added a few sentiments on my photo as well as around the flowers from the Sticker Book. For my title, I couldn't find anything that I really wanted, so I ended up making my own foam letters on my Silhouette with white foam and silver sparkle cardstock. To finish I added a few clear jewels around the page.
I love how this page turned out! I hope it inspires you to try Paige's Jewel Circle Cut File and Blooming Wild!
SUPPLIES: Patterned papers, die cuts, stickers, embellishments: BLOOMING WILD; white cardstock; Cut file: Jewel Circle by Paige Evans

Fun Scrap Friends Layout by Lisa Fonseca


Wednesday, July 26, 2023

Hey scrappy friends! Lisa Fonseca back with a fun layout using Paige's Blooming Wild collection and Flower Background Cut File!

I backed the Flower Background Cut File using four solid colored papers in the 12x12 Paper Pad: purple, red, yellow and pink. I adhered the backing pieces, putting glue only on the centers of the flowers and adhering them slightly crooked, so that some of the borders would peek out from the sides of the cut file. I then used Paper 21 to have a lot of different colors and patterns and cut out the leaves that I placed on top of the cut file. I used the amazing Chipboard Alphabet Outline for my title and added a few mini letter stickers from the Sticker Book and a word from the Puffy Phrase Stickers. I put a bit of tangled thread on each of the flower centers and added a holographic dot on top.

I LOVE LOVE LOVE this page and hope you do too! Be sure to check out Paige's Blooming Wild collection and Flower Background Cut File!
SUPPLIES: Patterned papers, stickers, embellishments: BLOOMING WILD; Cut file: Flower Background by Paige Evans

4th of July 2023 Album by Paige Evans


Tuesday, July 25, 2023

I am delighted to share my completed 4th of July scrapbook album for 2023! I had so much fun making one for 2022, I decided to create another for this year :)
Here is a walk-and-talk through of the album:
The idea for these scrapbooks all started with cute charms from Emily Inspired Designs! She released a bunch of patriotic tassels in the summer of 2021 and I grabbed 6 of them. I used 3 last year and 2 this year so I have 1 left for next year!
We wanted a repeat of our last two 4th of July holidays spent with my entire family in the cute & quaint town of Wallace, ID. About a month before our trip I pulled out my box of 4th of July supplies and purchased more to replenish my stash. I can't resist red, white & blue collections!
Then I began working on foundation pages for this album. I shared a lot of the process in my instastories and saved them to a HIGHLIGHT.
Affiliate linked to supplies I used:
ALBUM & PAGE PROTECTORS
PAPER COLLECTIONS
EMBELLISHMENTS
Charms & Tassels by Emily Inspired Designs
star punches, flower punches, square punches, hexagon punches, etc.
I also used ribbons, sequins, enamel dots, and brads from my stash.
With all the supplies in hand I got started! I used a red striped 6x8 SNAP album by Simple Stories to hold all our memories.
I tied a bundle of ribbons around the front cover and then made a bunch of layered stars with punches. To add sparkle & shine I attached a specialty jewel, pearl, or glitter brad through the center of each star. I've had these brads since the days I worked in-house at American Crafts way back in 2008! I gave life to the stars by creasing at every point and then hot glued them onto the left side of the cover. I embellished with stickers, buttons, and enamel dots.
To decorate the spine, I trimmed a piece of floral paper to fit the width, folded it in half to make it more sturdy, then tucked it into the plate. I used the red foil Mini Thickers from my new Sugarplum Wishes collection to make the year 2023. I clip the charm onto the top of the spine as a cute dangle.
Once the cover was complete, I made 9 foundation pages. Techniques range from paper piecing & backing a cut file to hand stitching, punching & more!
In almost all the patriotic paper collections I purchased there are cut-apart papers perfect for pocket scrapping. I cut apart all those papers into the individual cards, grabbed a wide variety of 6x8 Page Protectors, and then figured out the placement of most of the cards and my foundation pages. At this point, all I had to do was wait for our vacation and take lots of photos!
Just like last year, I sent an email to all my family and asked them if they would help me out and wear only red/white/blue clothes. And most of them did :)
We flew to Spokane, WA on Saturday July 1st and returned on Wednesday July 5th. I took over 700 photos then narrowed it down to 182 which I cropped and edited. I printed almost all the pictures at 4x6", 3x4", and 2x2" from the super speedy printing service by Walgreens. I printed 9 favorites to 6x8" at home on my Canon Pro-100 printer to back the 9 foundation pages,
Once I had my pictures in hand and trimmed down to size, all I had to do was insert them into the pocket pages which meant moving some cards I'd already slipped in elsewhere and adding a few more pocket page protectors, and attached the 6x8 photos onto the backs of the 9 foundation pages.
I had a few other assignments to complete first so this project was on standby, and then on Saturday July 22nd I spent 12 hours, from 8am-8pm, finishing the album. All in that day I typed/printed/trimmed/glued journaling strips throughout as well as wrote journaling here and there. Then I worked on each page one at a time from beginning to end adding stickers, die cuts, ribbon trims, patterned paper page turners, and more embellishments until the album was finished. Ta-da!!
Here are pictures of all the spreads - please let me know if you have any questions about anything, I'm happy to answer!
I backed my 4th of July cut file cut from white cardstock with my favorite papers from the Made in the USA collection by Miss Kate and then made the year with white Alphabet Soup Stickers by Doodlebug and the location with Red Foil Mini Foam Thickers
This blue polka dot paper page was included in the Navy 6x8 Album I used last year. I clustered stickers from the Made in the USA collection by Miss Kate on the top right corner and stitched white puff ball ribbon on the edge.
Layered die cuts on the top left adorn the left page and on the right I slipped cards and a photo into the pockets then embellished with stickers, typed journaling, a tab, and more.
I think my favorite 4th of July embellishment is banners!!
Sometimes the cards are just so pretty they become the embellishments themselves! Just pop a few stickers on top and call it good!
For this paper-pieced foundation page I made mini diagonal flags with paper scraps and a square punch to make the triangles. Stitching with a sewing machine really adds to the quilt-like vibe.
A photo of all 7 cousins in their new jammies from Grandma absolutely must be the first large photo included in this album!
The pocket page protector on the right is a new style from Scrapbook.com that opens out! See the next pic.
Love having interactive elements like this in my albums.
For this foundation page I designed a cut file so the holes are perfectly spaced to then hand stitch stars/fireworks in shades of red, white, and blue!
The Sail Away collection by Miss Kate is water themed and also includes lots of red/white/blue elements so of course I grabbed it and then it was perfect to use for photos at the river.
A star paper clip peeks out at the top right.
For this paper-pieced foundation page I used a 3/4" square punch to make a whole bunch of patterned paper squares and then arranged them onto a white cardstock page following a quilt design from Pinterest. I zigzag stitched between every square to really drive home the quilt theme.
Zip-lining was sooooooo fun! Definitely deserves a full-page pic.
Cascade stickers down the center seam!
For this foundation page I used a layered flower punch and a mix of Miss Kate collections to create a flower garden. All the flowers are topped with a tiny jewel.
Back the flower garden with a big picture of flowers :)
For the page protector on the right, I cut off the line of 2x2" pockets to leave two 4x4" pockets. I love the mix of styles and sizes of all the pages!
Here is another quilt-inspired foundation page made with a square punch and the Sweet Freedom by Pink Paislee.
THE WALLACE POOL WAS OPEN!!! Our very first time visiting it in all 12 years my parents have had a place in Wallace! The stars finally aligned! AND IT WAS SOOOO FUN!!!
Sequin pages are always a favorite.
The American Summer collection by Miss Kate has patriotic undertones as well as yellows and greens which are perfect for picnic, flower, and outdoor pics.
This foundation page was made with a lace scalloped border punch and layered papers.
This might be my favorite foundation page of them all :) I blogged about it separately HERE.
The large photo looks like a full 6x8 but it's actually cut in half to fit into the two 6x4 pockets.
I have a step-by-step photo tutorial showing how to make these dimensional stars in my Make Your Memory Book!
Time for fireworks! I love the little smoke bomb stickers.
Stickers, stickers, and more stickers!! I want to use them alllll!
I created a new Star Confetti cut file and backed it with a fireworks paper.
A small caption with a pennant sticker and a "Made in the USA" sticker finish up this album!
Oh my goodness I had SO.MUCH.FUN making this album! From beginning to end and every moment between this album filled and continues to fill me with joy! I love being able to relive our family vacations through scrapbooks.
I hope you are inspired to make a whole 6x8 album too! Whether documenting the 4th of July or any other holiday, pre-planning pages and using pocket page protectors helps make an album come together quickly & easily.
This is now the 5th traditional 6x8 pocket page scrapbook I've made! The first was my December Daily 2016 album. Then I made an album about Disneyland. My December Daily 2021 was a 6x8 hybrid. My first 4th of July album and now this 4th of July album!
Let me know if you have any questions about anything, always happy to help!
Thanks for stopping by, have a great day, and see you again soon!
Paige Taylor Evans © // Quinn Creatives DESIGN