
There are a whole lotta pictures in this post! What can I say, I started playing with the new Turn the Page Project Life Kit (with SQAURE CORNERS!!) and couldn't stop! We recently went to Disneyland and the pastel colors and happy sentiments in this kit go hand-in-hand. Usually when you think of Disneyland products your mind goes to red and black and yellow Mickey colors right? But I hope I can show you that the Turn the Page Project Life Kit matches just as well - especially with the tea cups and birdies - scroll on! :)
Here is a look at the Turn the Page Project Life Kit and a real-time walk through of the entire completed album:
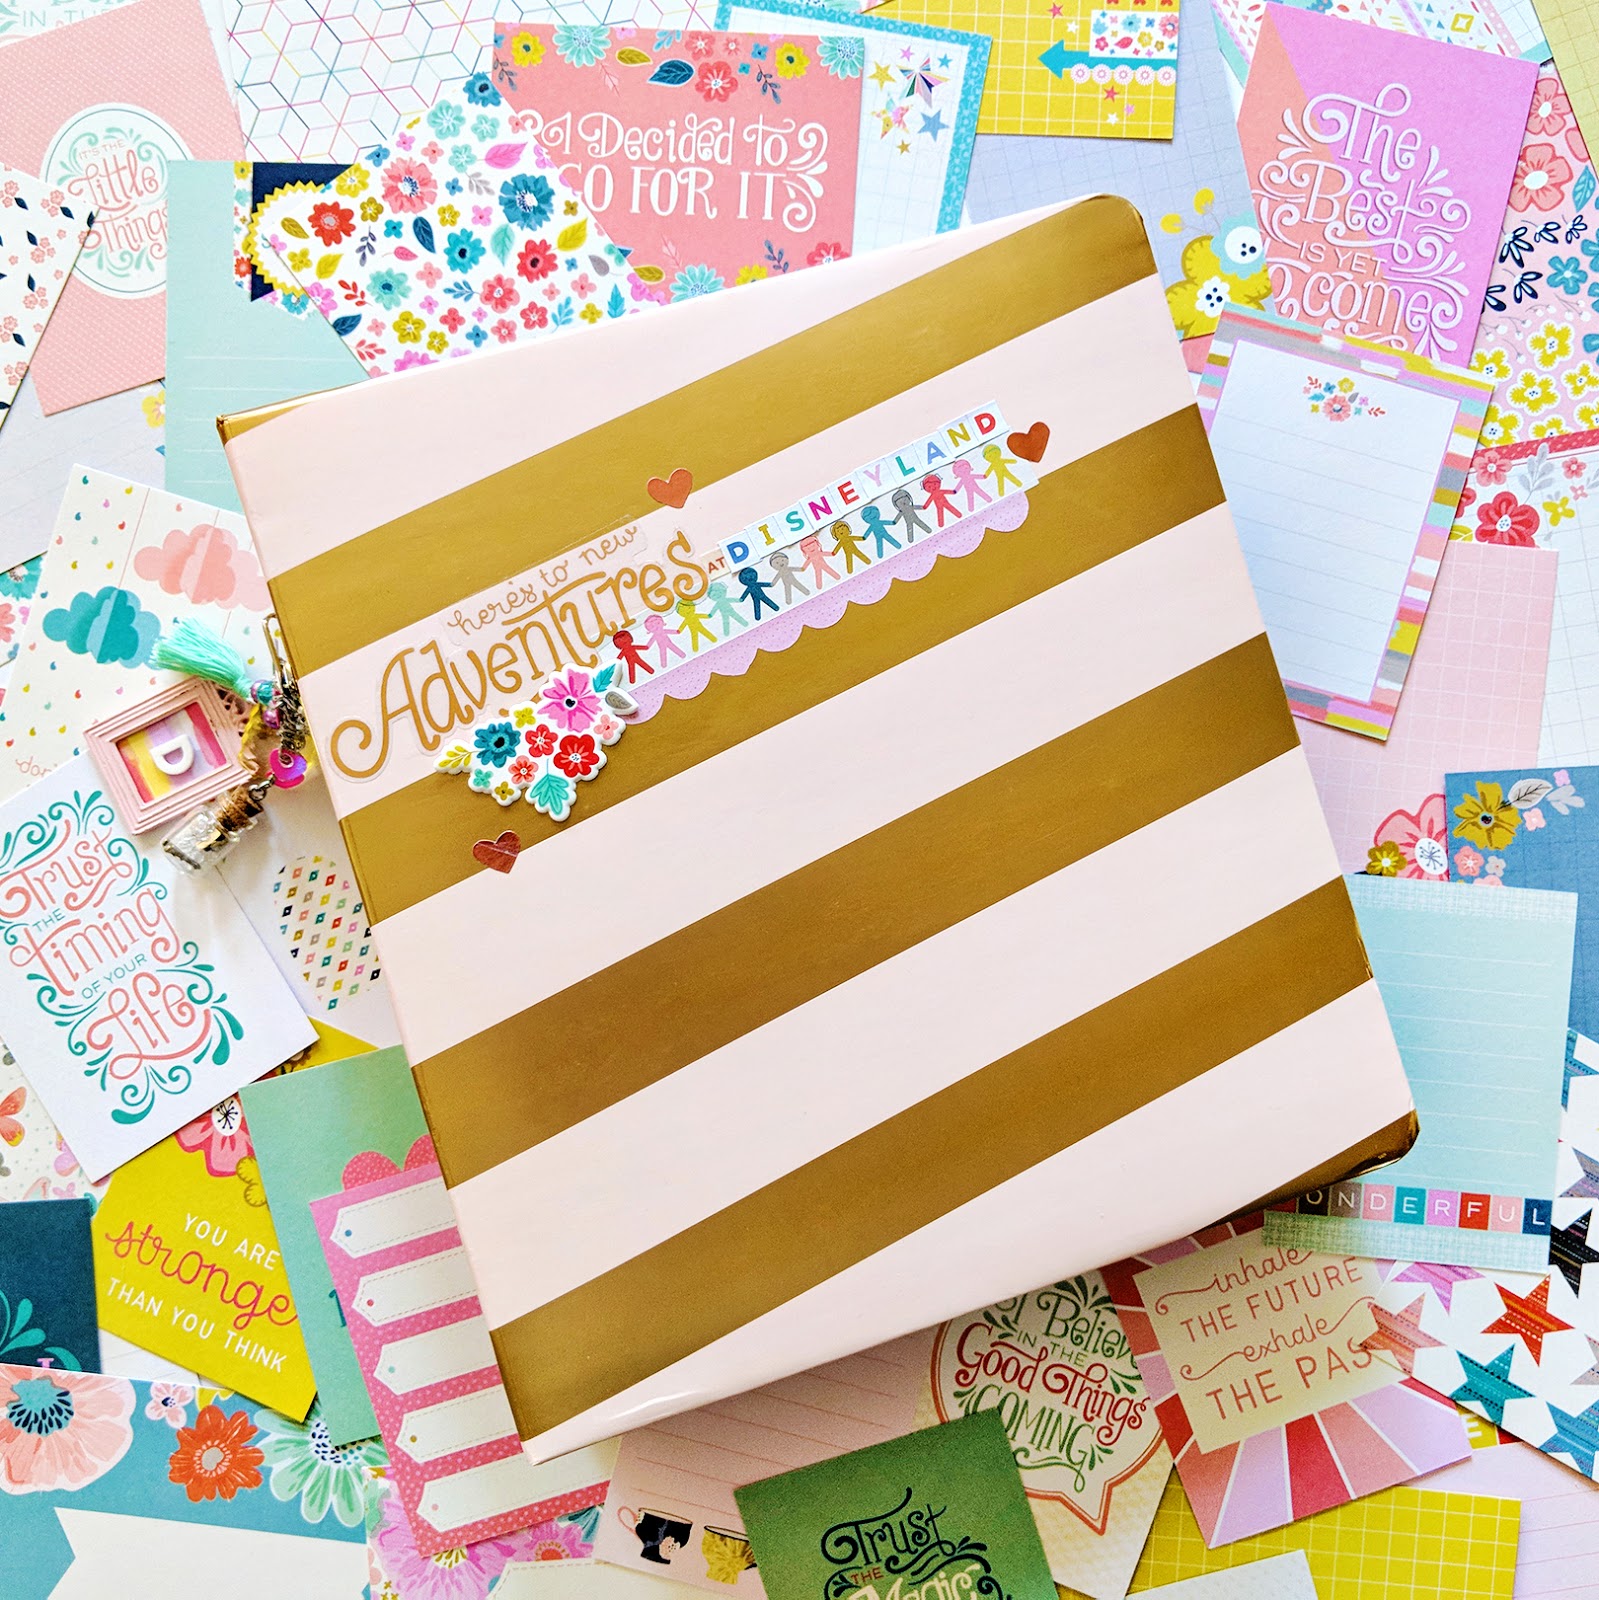
I asked Emily from Emily Inspired Designs to create a travel-themed charm which I've held onto since Christmas, waiting for the perfect scrapbook. Since it has a tea cup charm on it, a bottle with a camera charm, a "pack your bags" charm, heart sequins, jewels, a cute frame, and lots of other details that match the colors and theme of Disneyland, I thought it would be a great time to use it! For the label on the spine I googled "Disneyland logo" and loved this vintage one so I printed it out on photo paper and tucked it into place.

My goal was to use one of every card, front and back sides, and I almost achieved my goal! There were some 4x6 vertical cards that I couldn't incorporate so I used a lot of those ones to fussy-cut images, punch 2" squares for pockets, to back cut files, etc. The album is a blush pink and gold striped 6x8" Handbook from Studio Calico that I've had for years. I used a mix of page protectors and even custom made one of my own using a Fuse tool.
To decorate the cover I added a gold foil "here's to new Adventures" sticker from the Turn the Page Sticker Book and "DISNEYLAND" mini alpha letter stickers from the 30-page Paige Evans #StickerBook. I added a strip of chain people Washi Tape along with a scalloped border sticker from the 30-page Paige Evans #StickerBook below. A flower Puffy Sticker and a trio of gold hearts also from the #StickerBook completes the cover. Okay, let's look through page-by-page!
To decorate the cover I added a gold foil "here's to new Adventures" sticker from the Turn the Page Sticker Book and "DISNEYLAND" mini alpha letter stickers from the 30-page Paige Evans #StickerBook. I added a strip of chain people Washi Tape along with a scalloped border sticker from the 30-page Paige Evans #StickerBook below. A flower Puffy Sticker and a trio of gold hearts also from the #StickerBook completes the cover. Okay, let's look through page-by-page!

To make a big impact upon first opening the book I used a full 6x8" photo. I print my large photos at home on a Canon Pro-100 printer - the rest I got printed at Costco. I fussy cut some clouds from an extra card, adhered them with foam squares, and then hand stitched with matching thread so they "dangle" from the sky. I also fussy cut the sentiment from a 4x6" card and notched the ends. The cloud colors perfectly matched our clothes and the sentiment is so perfect for Disneyland!
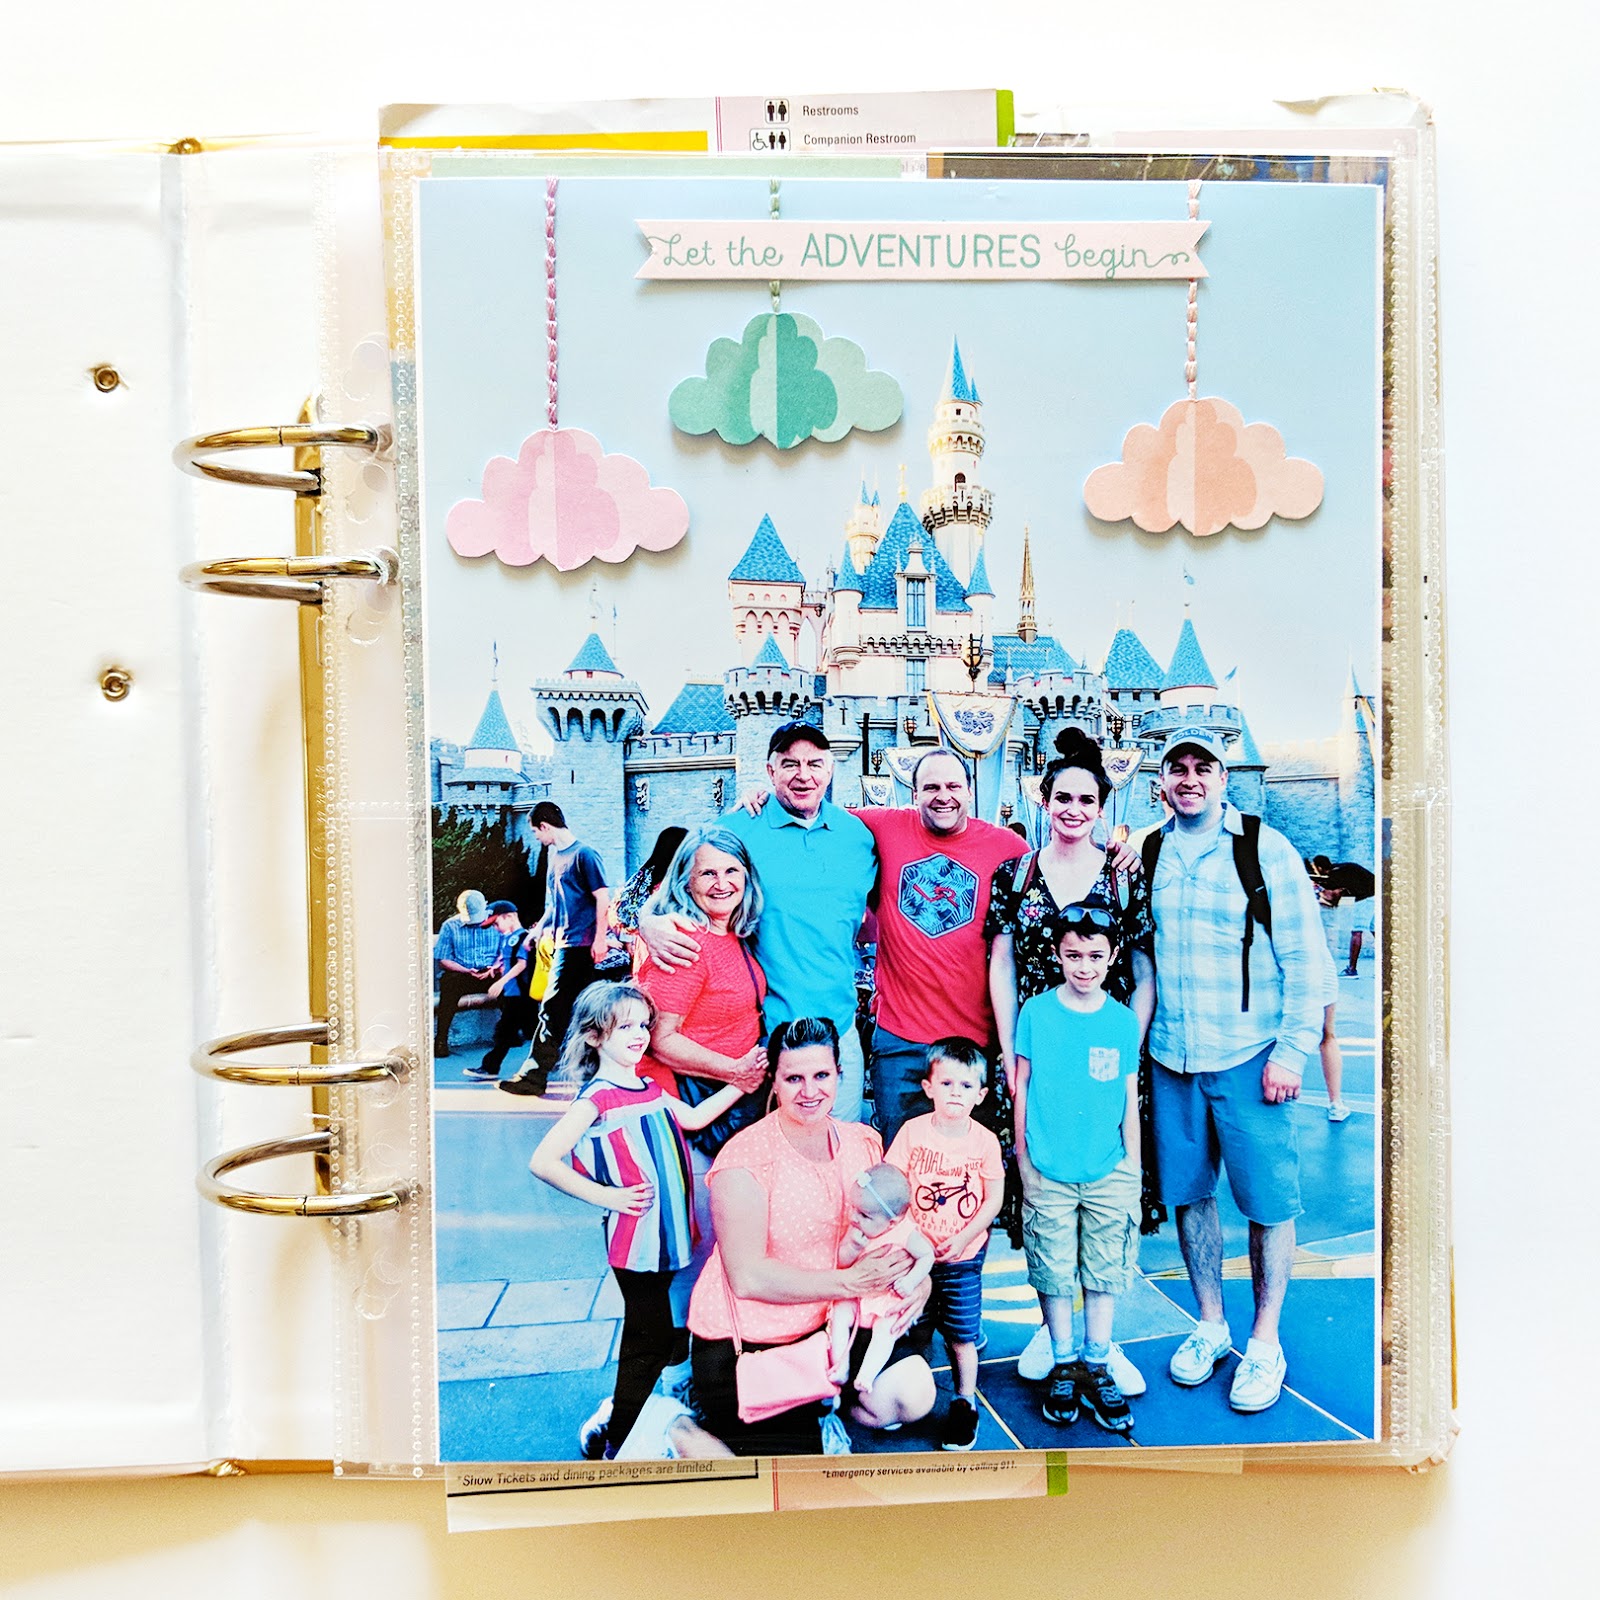
I try to incorporate my cut files into projects so I used the 8.5x11 Clouds Background (shrunk down to 6x8"), cut it from white cardstock using a Silhouette Cameo 3, and backed it with extra cards. You can also find this cut file for free in my Happy Scrappy Place Facebook Group! On the right side I tucked a card into the top left pocket (I love how the word "Magic" is in there because Disneyland is truly magical!) and added photos in the others. For the most part this album is chronological so these pictures are from the night we arrived.

In our hotel room there was a paper pad so I tore off one page, printed journaling on it, angled the top corners into a tag shape, punched a hole in the top, and then reinforced the hole with the WeR Reinforcer Hole Punch. The tag tucks into the pocket between the photos - I love adding interactive elements!

On the left side I added a photo and two cards with hand written journaling using a precision pen. Another 6x8" photo adorns the right on which I added fussy cut butterflies from an extra card at the top then hand stitched a trail to connect them.

Here's a closer look at the butterflies - by only attaching them in the middles the wings bend up and create dimension.

The phrase is usually "best day ever" but since we were there three days I changed it to "best days ever"! Plus I liked how there were four letters in each line. I machine stitched them in place. I often get asked if my sewing machine has any issues going through chipboard and the answer is nope! On the right side I added the actual map that we used so it's wrinkled and marked up and worn from love.

I punched a tab from an extra card, added "MAP" stickers on it, then stitched it to the edge of the map. I had to refold the map to fit in the album this way and then to attach it I folded a piece of cardstock in half, adhered the map in the fold, punched holes, and added it right in.

Here I added a bird Ephemera Die Cut over the bird printed on the card - it's the same bird design only larger and I used foam squares for dimension. On the bottom left card I partially cut around the flowers and leaves and bent up the edges for dimension.

I varied how I included journaling throughout the album - some was hand written, typed on a Typecast Typewriter, or printed using the font called Remington Noiseless. I added hand stitching details to the bottom left card, fussy-cut-and-adhered-over-the-original-shape-with-3D-adhesive on the top right, and machine stitched a row of sequins to the bottom right card.


Alls I did here was journal on a couple cards and embellished the flowers with a few tiny flower Puffy Stickers. I trimmed down a 6x8" pocket page protector to a 1x3 grid and added 2" square photos and ticket stubs.

Here is the backside of that mini page.

I googled "hitchhiking ghosts", found an image I liked, placed it in a new Adobe Illustrator document, decreased the opacity so it was light gray, then printed it out on vellum. You can find this ghost printable for free along with a few other elements I designed for this album by clicking HERE. I like how it's see-through, very ghostlike, which is perfect for the...

Haunted Mansion! Definitely needs a full 6x8" photo for this favorite ride of ours.

I'm a sucker for flowers so of course I needed a picture in front of these pretty pink ones. To embellish I fussy cut a bunch of flowers from a card, adhered them lightly in place, and then stitched a French knot through each one for added texture and detail. On the right I added a sentiment card, typed journaling on another card, and slipped in a 4x6" photo.

Close up of the flowers.

On the 4x6" card below the two photos I stitched a heart border sticker under hand written journaling. On the right I filled in the 2" square pockets with photos and cards trimmed into 2" squares. I stamped journaling lines using the Oh My Heart Acrylic Stamp on some of the squares to making it easier to write straight. To finish I cut apart a paper chain people Puffy Sticker and adorned the remaining paper squares with them.

On the backside of the 6x8" pocket page I added six 2" square photos and in the other 6 spots I covered paper scraps with Ribbon pieces. To keep them in place and help the edges from fraying I machine stitched around the ribbon squares. See if you can find the caption that reads "Jane gave it a thumbs down." Poor girl. We found out she hates roller coasters.

By punching holes you can add almost anything to your book. We found this coaster in our hotel room so I added it here.

On the back of the coaster I trimmed extra cards into strips and journaled above them. On the right side 6x8" full photo I added decorative machine stitching to the top left corner and adhered a fussy cut flower with foam squares.

Had to include this epic Splash Mountain photo lol! On the right side, the image on the bottom left card is the exact same as one of the Turn the Page Pennant Paper Clips so I made some slits and slipped it through. Also, remind me to never ride in the front of Splash Mountain again... I got SOAKED!

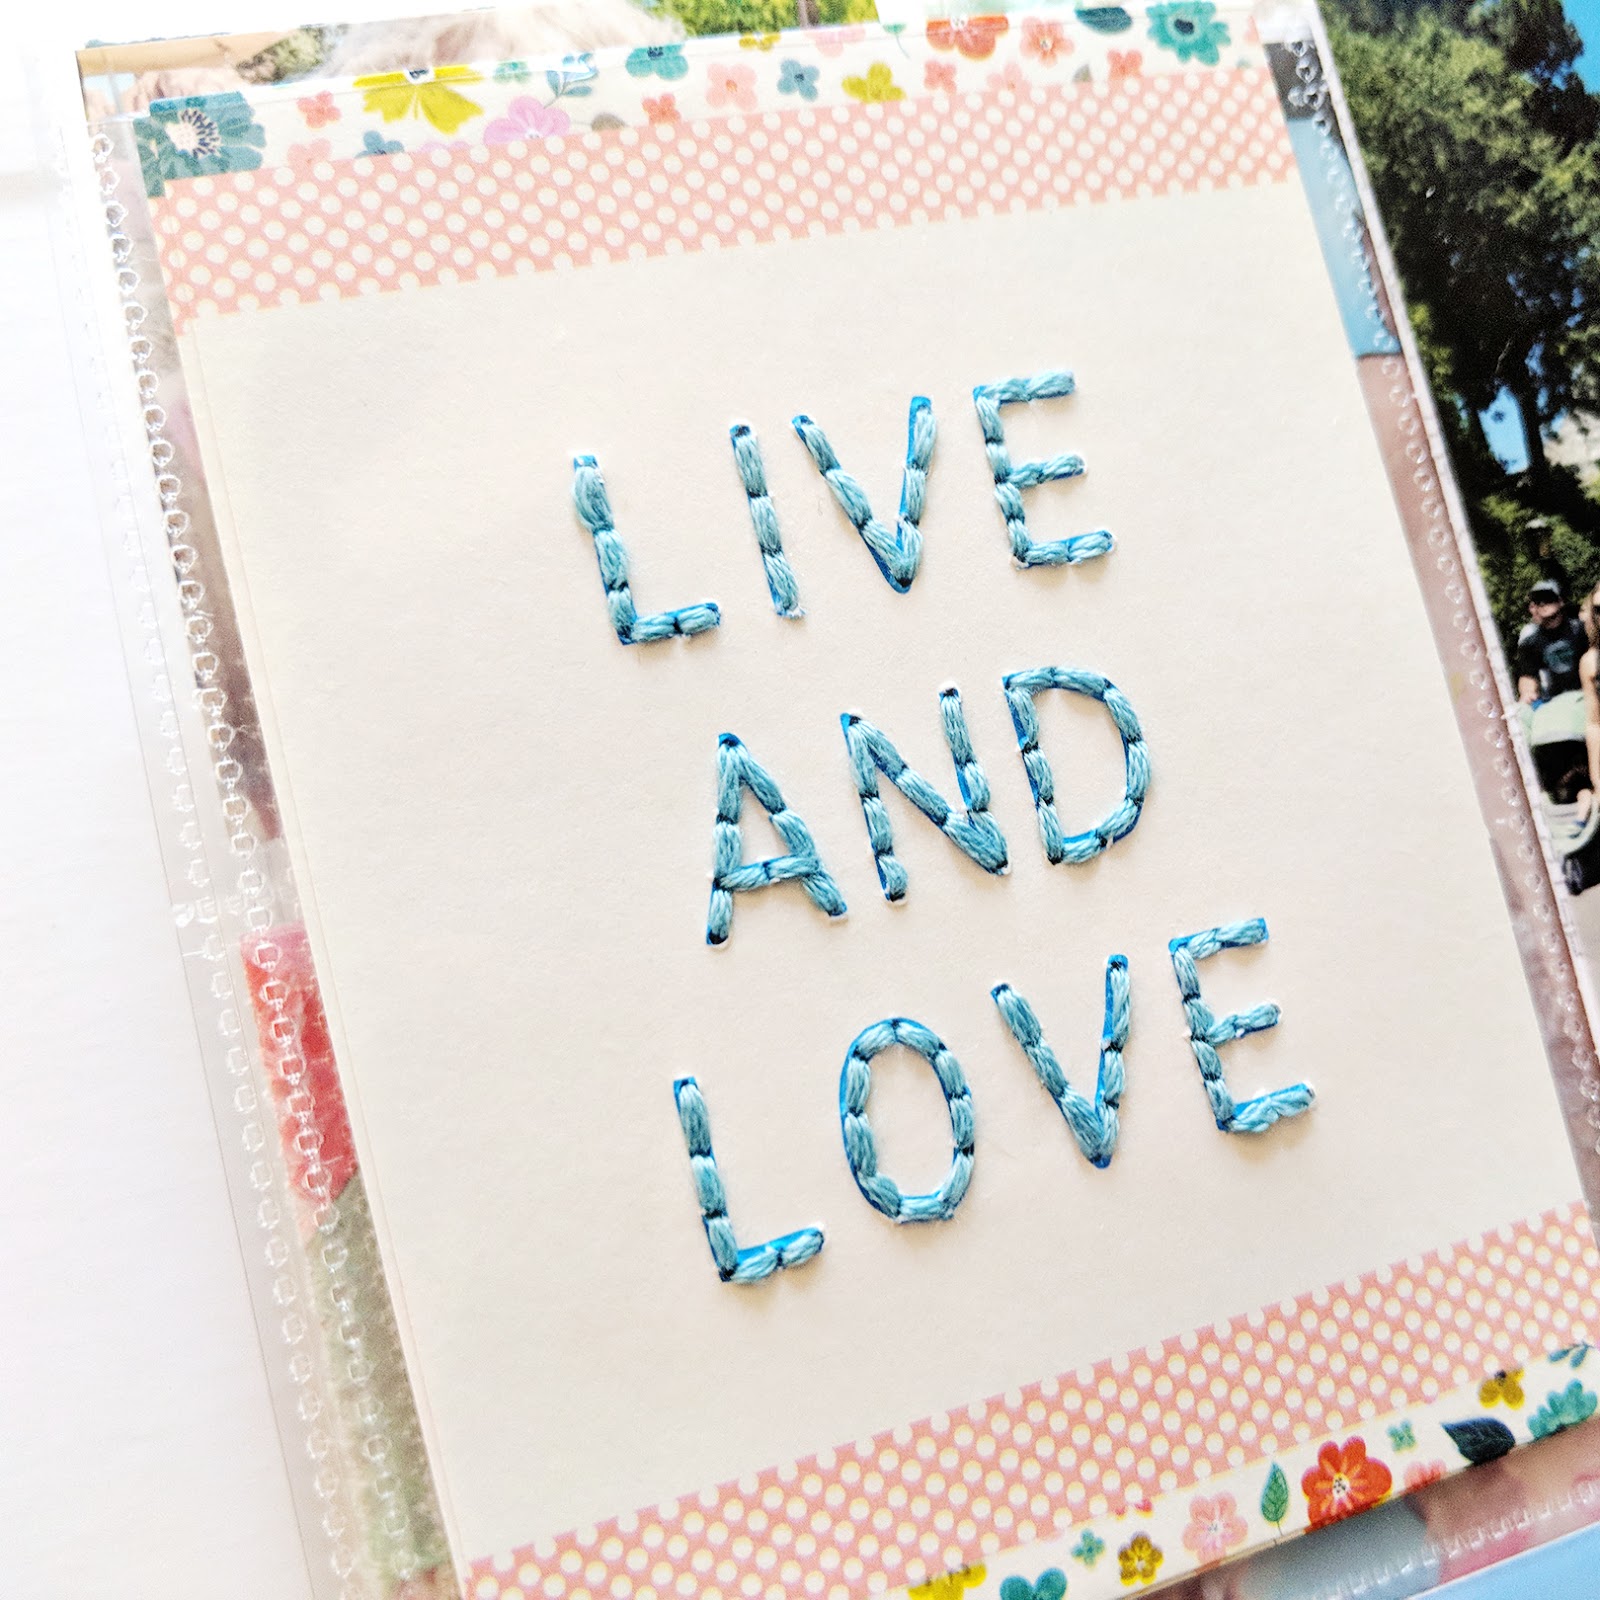
I hand stitched through the "LIVE AND LOVE" card and placed a sequin at the front of each journaling line. The chartreuse yellow of the card perfectly matches Peter Pan's shirt. So many things throughout Disneyland are matchy matchy with the Turn the Page Project Life Kit!

Detail of the hand stitched sentiment.
A ginormous toad hopped across the path. Had to be documented. It looks small in the photo but it was the size of a salad plate! The right side is all about the Enchanted Tiki Room so how perfect is the "A LITTLE BIRDIE TOLD ME" card for this attraction? Because the birds talk during the show! Ha!

I added #allthebirds to this floral card.

Image-over-image on the top left card, hand stitched "x"s on the top right card, added tiny flower puffy stickers to the bottom left card, and the bottom right card is as is. I trimmed down a 6x8" pocket page into one row and added a cute quad of photos from when Landon grabbed Fox's hand all by himself, no prompting from us.

On the back I filled the pockets with Turn the Page Sequins, machine stitched them closed, and then placed "BUDS" Thickers on top. The right page is a 4x6" photo and a card with more puffy people, journaling, and mini alpha stickers from the #StickerBook, the same ones as I used on the cover and throughout the album.

This spread marks the beginning of Day 2! I wanted something special for a divider so I found a castle/Mickey head cut file on etsy, cut it from smooth white cardstock, attached it to a piece of transparency, and then embellished with star Chipboard Stickers. On the left side I embellished a 4x6" card with a piece of scalloped Washi Tape strip and scalloped border machine stitching. I added a butterfly border Chipboard Sticker in the empty space of the photo.

A closer look at this page divider.

This pocket page was actually the very first page I made for this album. I love all the different colors and patterns in this kit so I punched 2" squares from the extra cards (there are four of each 3x4" card so I knew I would have leftovers to use for things just like this). I added a heart sticker on every square for interest.

I trimmed a 6x8" photo into 2" squares and pieced it back together in the other side of the 6x8" pocket page. We celebrated our 11th anniversary while at Disneyland so I needed some extra lovey dovey things here. I hand stitched through the "HAPPY DAYS" sentiment, hand stitched around the heart, and tied in a Heart Charm from my Oh My Heart collection.

Closer look at the dangling heart charm and hand stitching.


On the darker cards I used a white Sharpie paint pen. I know the bottom card is vertical instead of horizontal, but hey, why not?! I love the flowers and sentiments so it had to be used. I had a few more photos from the Dumbo ride I wanted to include so I trimmed a pocket page down to fit the extra pics and added a tab to the right side to make turning it easier.

Here is another one of my cut files called Wonky Hearts Background 8.5x11 which I sized down to 6x8". I backed the cut file with the colored wedges paper from Turn the Page Paper 03 - also available at JoAnn stores if you've got one nearby.

After trimming an extra floral card into two 2" squares, I trimmed those squares in half diagonally and used them as photo corners on this full 6x8" photo. Then I machine stitched around the edges for texture. All the tea cups that are seen throughout the Turn the Page collection and the Project Life cards are PERFECT for the tea cups ride! Ah so fun!

I fussy cut the same banner to adhere on top of the right card using 3d squares and I covered the coffee cup on the left card with a floral Chipboard Sticker. Also, Jane's pose. She's a hoot. I included the Disney's California Adventure map here using the same technique as before.

It's fun to have the actual maps we used preserved forevermore!

This is a very simple page - a photo, a card, and a 4x6" card with typed journaling. Done and done!

I forgot to take photos while we were on a couple rides and I still wanted to remember that we went on them so I had a lot of journaling to write on this card. The pink edges of the card match well with the pastel pinks inside the Toy Story Midway Mania building and it brings out the pinks in the cool Radiator Springs rock.

Simply HAD to enlarge this sweet photo of Jane and then I added a puffy "Believe in You" sticker on top. On the right - this is a custom made pocket that I created with a plain 6x8" page protector and the Fuse tool. We went and saw the Frozen show and it was EPIC. I didn't take any pictures inside but since it was one of my favorite things we did I wanted to visually remember it so I googled images and printed them at home.

On the back of the Frozen images I trimmed down journaling cards to fit in the custom-sized pockets and embellished with butterfly and flower Chipboard Stickers. I had this cute quad of Fox photos I needed to include so I trimmed down another 6x8" pocket page to just four sections and slid the photos inside.

On the back side I printed journaling into 2" squares then stamped stars with yellow ink using the Turn the Page Layerable Stamp Set. These two postcards were in our hotel room so I asked Fox and Jane to color them and then on the backside...

I asked them to write their favorite ride, their full name, and to design a stamp. Too cute.

This was a fun divider page to make! It marks the beginning of Day 3. I googled "Mickey head icon" and found one I liked. I printed it out on plain printer paper and then washi taped it to a piece of transparency. I used a paper piercer to poke holes about 1/4" apart all around the Mickey head and then removed the template. Then I used white embroidery thread to stitch around the head and then stitched criss cross & back and forth, string art style. Since the transparency is see through there is thread on both sides. The heart is fussy cut from a card and I used the same mini alpha stickers as before.

This next page is super simple: two photos, two cards, and on the top right card I added a bit of a scalloped border punched from an extra card and machine stitched it in place.

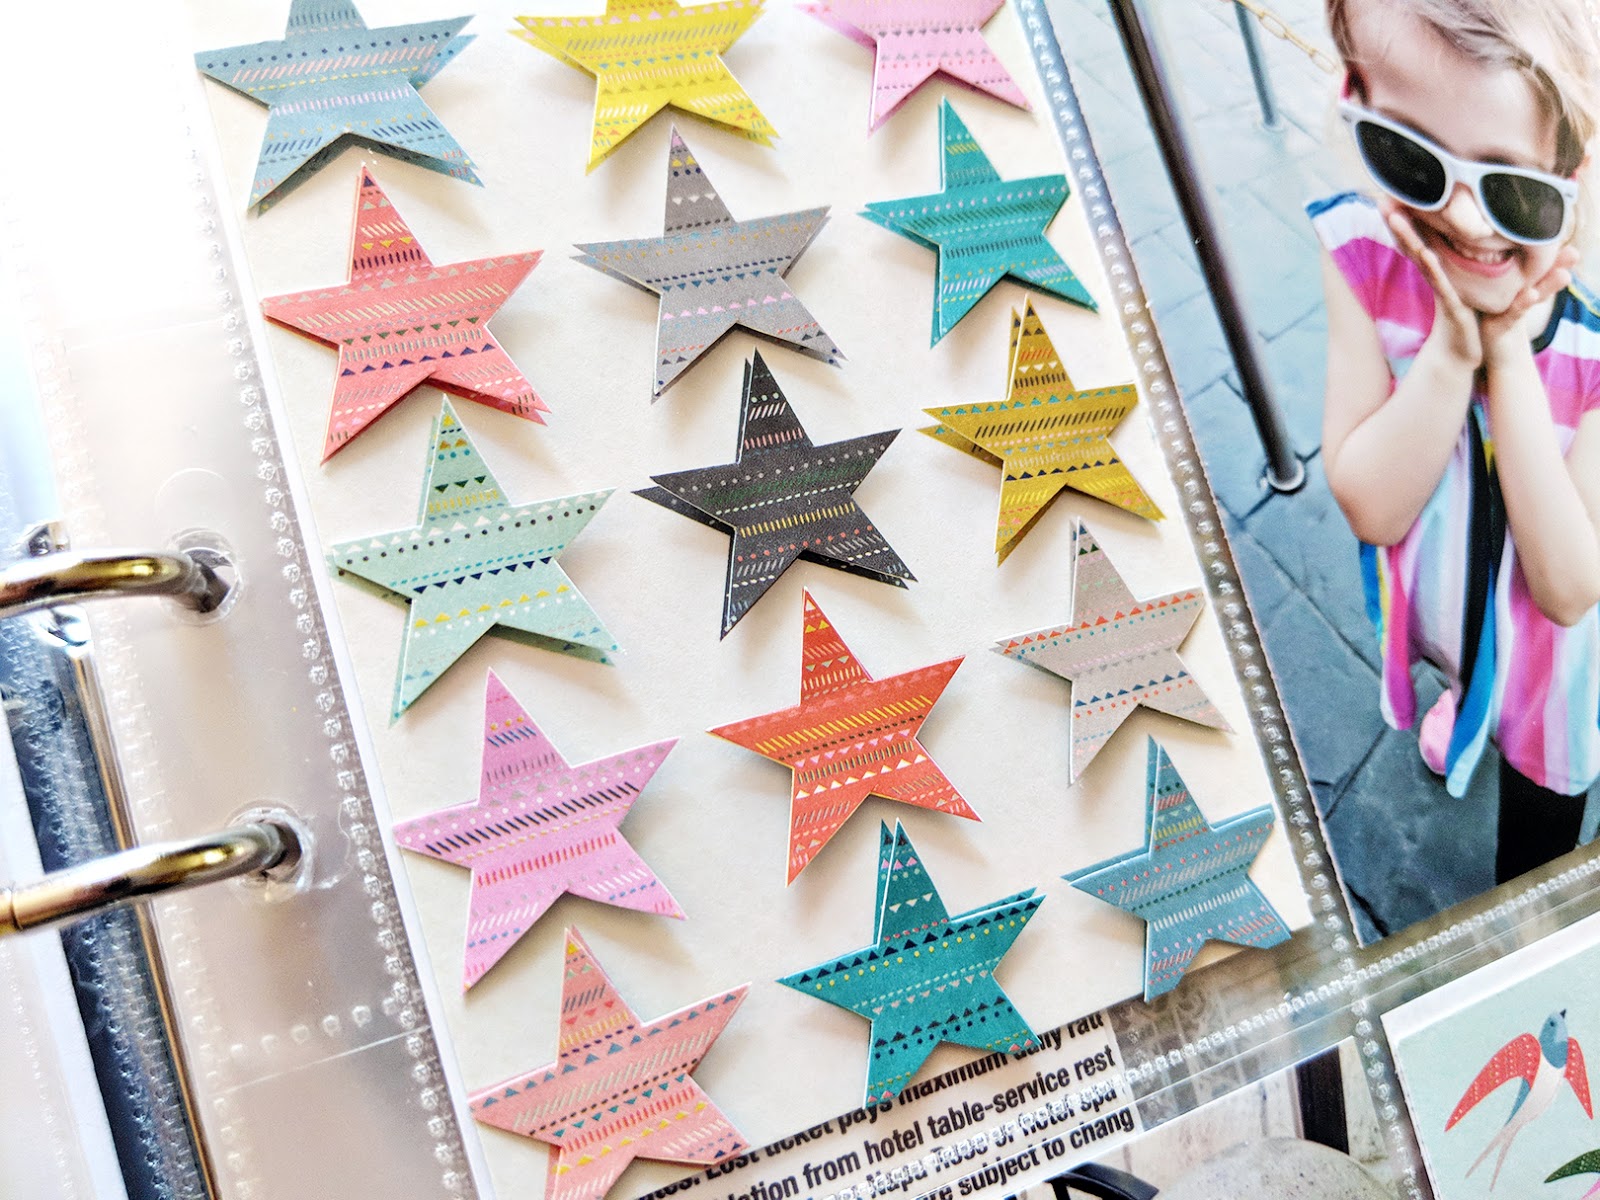
I stapled a lot of stars from the Chipboard Stickers to the star card and fussy cut a lot of butterflies to adhere on the same butterflies card. The other two cards have journaling typed with the Typecast Typewriter.

Star details.

Butterfly details.

Another simple page - I may or may not have been running out of steam at this point lol. I fussy cut flowers to adhere on the same flowers card and punched a small bit of a scalloped border on the bottom left card. The right side is all photos and the only thing extra I did was add a heart puffy sticker at the top right.

Two photos, hand stitching, and journaling on a same sized oval piece finish off the left side and on the right I trimmed down another 6x8" pocket page into a 2x3 grid filled with photos and journaling all about the Storybook Boats ride.

A dark blue floral card matches the dark blues inside Space Mountain. This also called for the white Sharpie pen. I added three tiny blue flower puffy stickers to embellish the photo of me about to ride the ride.

I stapled one of our tickets onto the outside of the pocket so it can be flipped up and then added typed journaling to the floral card. On the right side I trimmed a pocket page in half so there were only two sections and place a photo in the top and a typed journaling card in the bottom.

Almost done! On the back I added a photo at the top and a hand written journaling card at the bottom. I may go back in on some of these cards and add hand stitching or sequins. I created this "FUN AT DISNEYLAND" cut file (click HERE to grab it for free!) and then backed the letters with leftover cards - because yes, even at the end of the album I still had lots of leftovers, even after using multiples of almost all of the cards! Total value pack for sure :)

The very last page is a 6x8" pocket page filled with photos that I couldn't fit in their proper places in the timeline but still wanted to include. I added a simple star sticker on this side.

And a heart sticker on this side. The last pocket includes a typed sentiment - Until next time!

And that my friends is the completed Disneyland Album!

I hope you are inspired to pick up the Turn the Page Project Life Kit either online or at your local JoAnn store! These cards are so versatile and fit many many themes and subjects and celebrations.

Be sure to go to my instagram tomorrow and enter the giveaway for a chance to win a kit!

SUPPLIES: Turn the Page Project Life Kit; TURN THE PAGE: Paper 03, Layerable Stamp Set, Sequins, Ribbon, Ephemera Die Cuts, Pennant Paper Clips, Washi Tape Book, Thickers, Chipboard Stickers, Puffy Stickers, Sticker Book, Sequins; Reinforcer Hole Punch; OH MY HEART: Heart Charm, Acrylic Stamps; precision pen; Fuse; white cardstock; Typecast Typewriter; Font: Remington Noiseless; Cut files: 8.5x11 Clouds Background, Wonky Hearts Background 8.5x11, and Fun at Disneyland by Paige Evans, Disney Castle/Mickey Head by kateandjake; Die cut machine: Silhouette Cameo 3; Album charm: Emily Inspired Designs


Oh my I had to pin nearly every photo, it's so lovely!
ReplyDeleteThis is ABSOLUTELY AMAZING! I am LOVING the colors, all the stitching, how you added the map, and the kids postcards about their fave rides!!! SO GORGEOUS!!!!!!!!!!!!!!
ReplyDeleteYour album is truly AMAZING! I just don't see how you can finish an album so quickly ... it takes me forever! This album is a work of art, for sure!
ReplyDeleteI am really in love with this album!!! And that page with Mickey silouette is amazing! WOW
ReplyDeleteHow do you adhere your white cut files (like the castle and the "Fun at Disney Land" papers to the transparency sheet? I love the look!
ReplyDeleteI used spray adhesive :)
Delete