
Bea Valint is sharing her newest design team layout today - it's all kinds of pretty and makes me smile!
Hello ladies! If you are like me, you have a big box next to your desk full of teeny tiny paper pieces from your previous projects. Today I'll show you a fun and easy way to create a layout using your stash - you only need Paige’s Feathers cut file and a Silhouette Cameo!
 I started by cutting some feathers from white cardstock and some more from patterned paper using only the feather outline. To add more dimension, I cut fringes on both sides of the feathers. I backed the white feathers with patterned paper then I bent up the edges and adhered them in three rows to a white cardstock background.
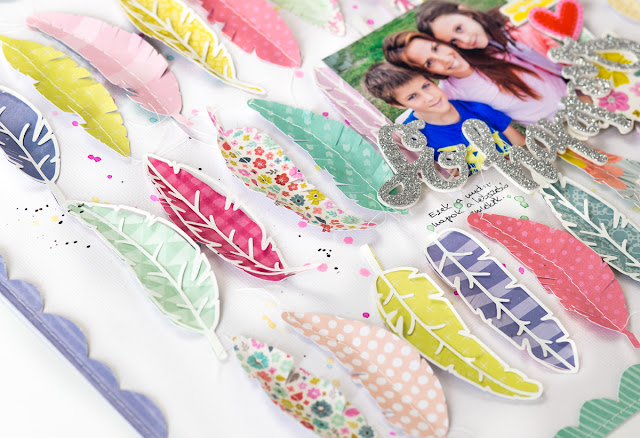
I arranged my photo on the right side and added the title using Glittered Foam Thickers from Fancy Free. This colorful page needs only a few embellishments: I placed some Chipboard Stickers next to the photo.
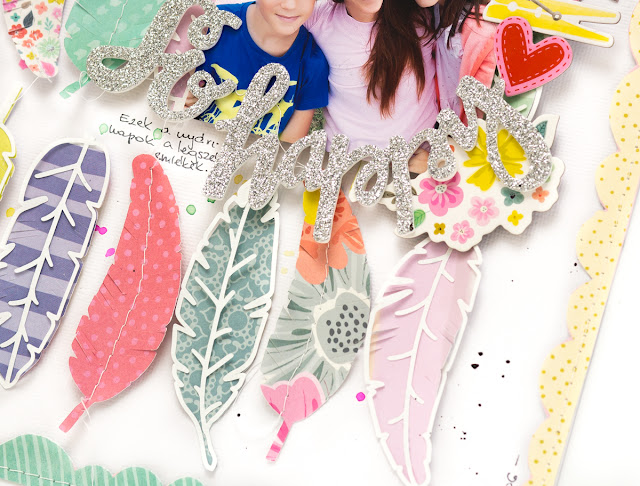
I then added a fun frame by fussy cutting four scalloped borders from Oh My Heart Paper 17 and stitched them to the edges. To finish the layout I dropped watercolors around and wrote my journaling under the photo. This layout was so much fun to create, thanks for stopping by!
SUPPLIES: TURN THE PAGE: 12x12 Paper Pad, Puffy Stickers, Chipboard Stickers; OH MY HEART: Paper 17, 12x12 Paper Pad; Cut file: Feathers by Paige Evans; Die cut machine: Silhouette Cameo 3; white cardstock

Blog: myshinystudio.blogspot.com / Instagram: @beavalint / Pinterest: @valint7 /
Facebook: myshinystudio / YouTube: Bea Valint


This is GORGEOUS! LOVING those feathers!!!!!!!!!!
ReplyDelete