Angel Wings Layout by Lorilei Murphy


Wednesday, February 28, 2018

Here is one of those layouts that I literally gasped out loud when I saw in my inbox! Lorilei Murphy has done it again!
Recently Paige asked her design team if there is anything we would like to see made into a cut file and I put wings on the list! I have been wanting to make a page with this idea for awhile and Pick-Me-Up is the perfect collection to make use of the pretty Angel Wings cut file.
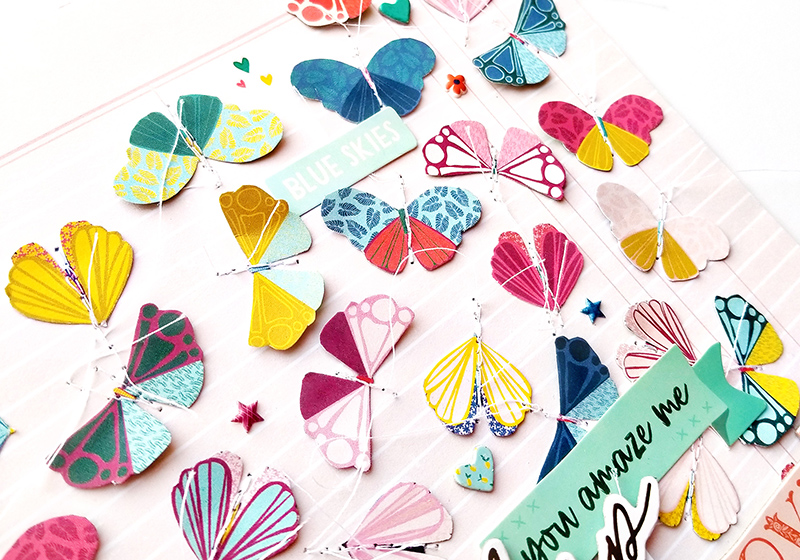
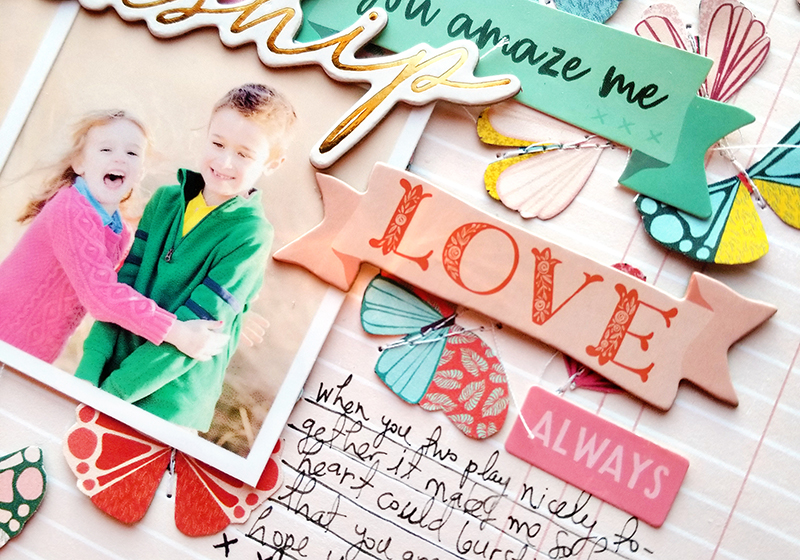
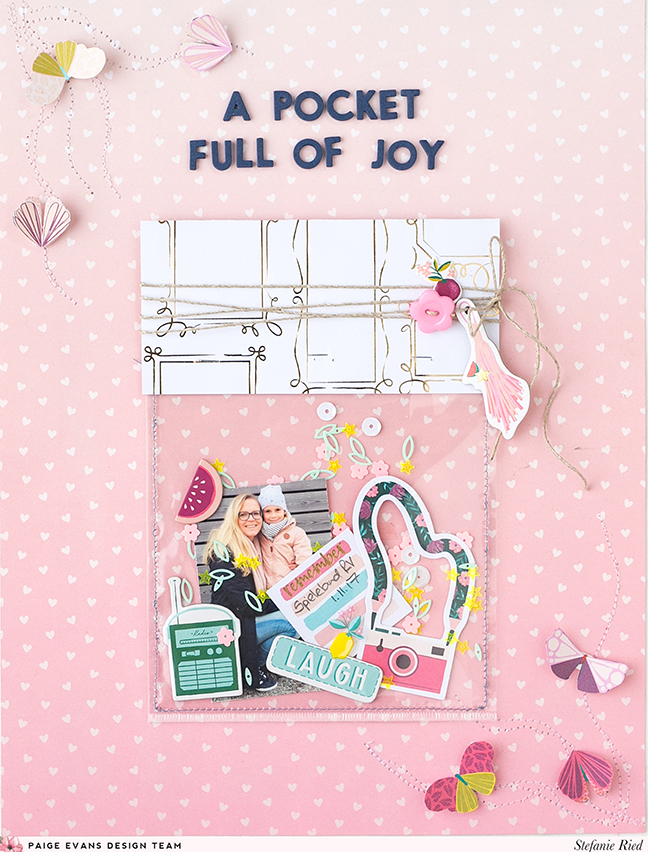
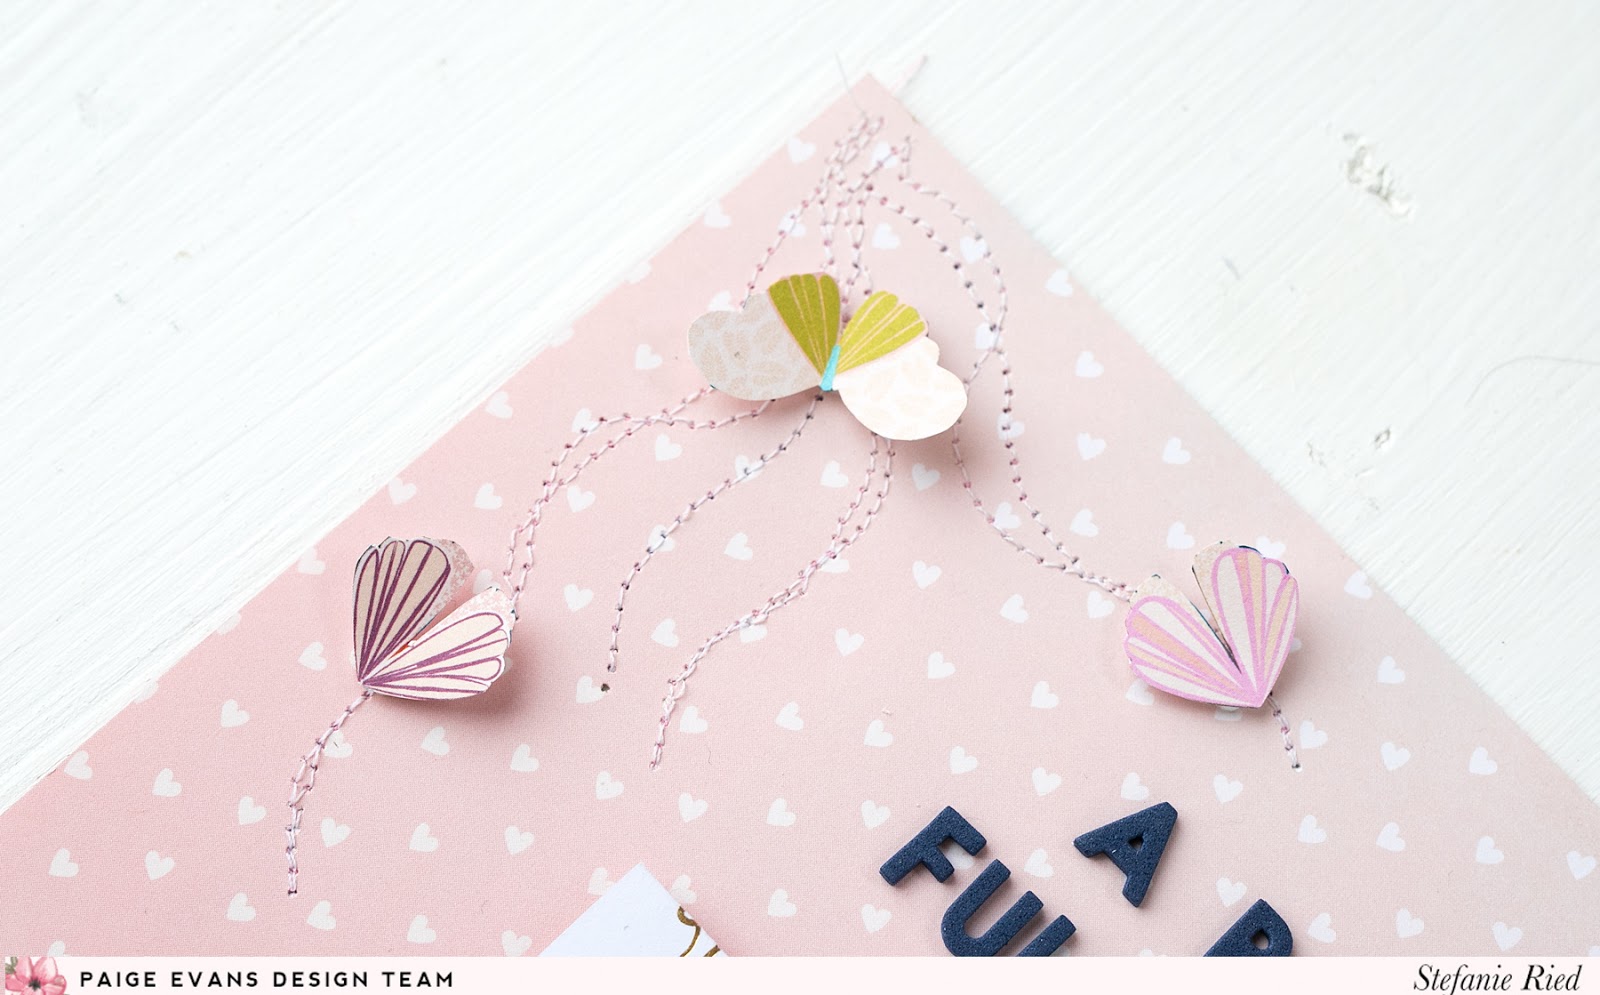
I started out by typing my journaling on Paper 20 (the Typecast Typewriter fits 12x12 layouts!). Then I mixed Golden White Fluid paint with Prima Heavy Gesso (1:1) and scraped it on with an angled palette knife, a few splatters of Heidi Swapp Gold Color Shine, and Shimmerz Pop Art Pink Vibez. The typed journaling adds a soft layer underneath. Then I decided to fussy cut my photo and by a happy accident it turned out to be a pale pink that matched Pick-Me-Up perfectly!  I add the wings to the back of my photo and then adhered my “paper doll” Grandma to a painted tag. I cut flower shapes from Paper 16Paper 23, the 6x6 Paper Padwhite cardstock, and tracing paper. I layered those together and added bits from the Haberdashery Multi-Pack to the middles of the flowers and also scattered the pretty pink sequins around the page. Two cute little buttons from the Rub-Ons finished off the tag!

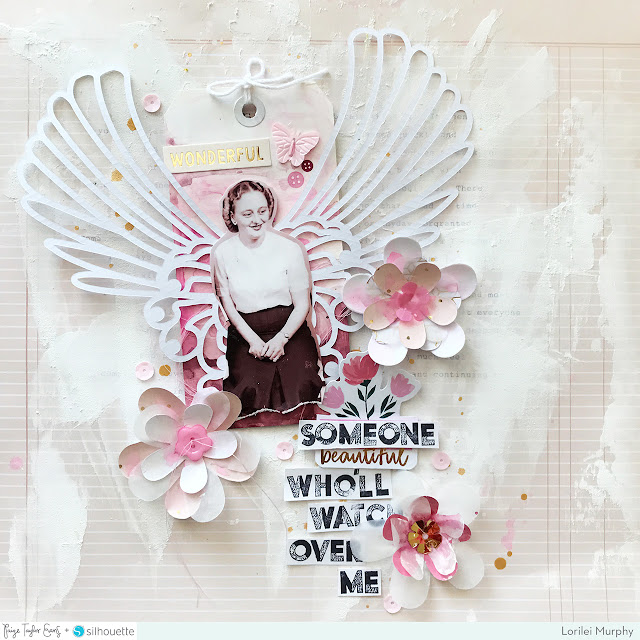
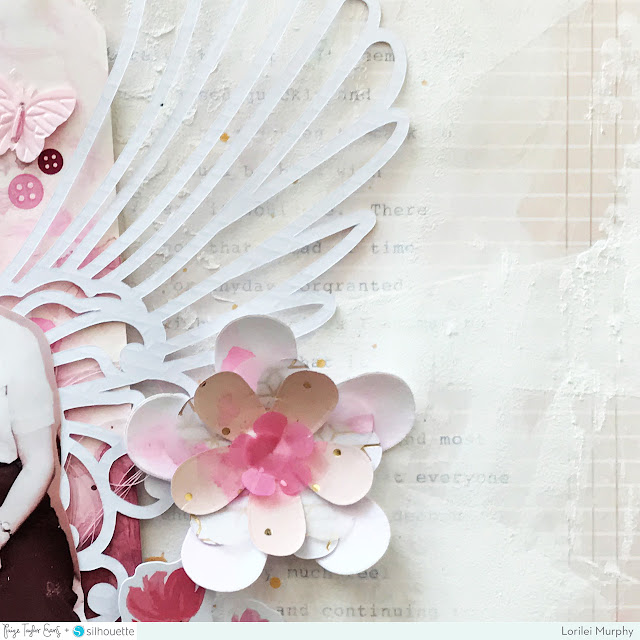
I have been so excited to use the Alphabet Stamps and I stamped out my title onto white cardstock and added it under the tag. I used a sweet die cut from the Ephemera Die Cuts to pretty up my title.

I say this most every time, but I love how my page turned out! My Grandma means everything to me and making this page about her let me feel like we were together for awhile!

Blog: roseyposeystudio.com / Instagram: @roseyposey_studio / Pinterest: @roseyposeygirl /
Facebook: 
Rosey Posey Studio / YouTube: Lorilei Murphy
So soft and pretty with such a touching message!

Pick-Me-Up Boxes


Tuesday, February 27, 2018

I have just six boxes of my entire PICK-ME-UP collection for sale! (Includes everything except the 12x12 paper pad). A lot of pieces are sold out on scrapbook.com and Paper Issues and other online sites so this is an easy and convenient way to get everything all in one place! :)
Your PICK-ME-UP goodie box includes:
- 24 doubled sided patterned papers
The cost is $80 plus $16 USPS Priority shipping - USA only. Send me an email at paigetaylorevans at gmail dot com or leave a comment below to get the hook ups! :)

Bright Sunshiny Day Layout by Missy Whidden


How distinctly "Missy Whidden" is this layout by Missy Whidden? She has a style of her own and I love love love it!
Hey friends! Missy here, and my layout today features a lot of the Pick-Me-Up Washi Tape Book. I used Paige's Bright Star cut file and enlarged it. I cut it from white cardstock using my Silhouette Cameo and then traced it onto some scrap cardstock. I cut that shape out, layered on strips of the Washi Tape, and then I trimmed it up and attached it to the star cut out. The Washi Tape is awesome because it’s full of colors and patterns and there are even spots with gold foil. Once I got the star finished, I machine stitched through some of the strips and around the perimeter with gold thread. I decided to make my own mixed media background on white cardstock and I did that with clear gesso and several colors of Distress Oxide. I tried to match the colors in the Washi Tape and really make it stand out. I wanted to tuck my photo under the “bright” on the cut file and to make the title stand out I colored it with Distress Oxide as well.
Here you can see the detail of the Washi Tape and how well all the colors work together.  I decided to add some of the moths from Pick-Me-Up Paper 14, so I fussy cut several of those and scattered them around the page. I added some adhesive foam behind the big star to add dimension and some colored thread peeking out from underneath for the perfect finishing touch to the background.

I also added in a few of the Pick-Me-Up Chipboard Stickers and Rub-Ons. I used a larger chipboard moth on the right side and a phrase Sticker here above the photo. There are a few spots around the page where I added some Rub-Ons. Here you can see the subtle star cluster I added above the photo.

I played off the word “bright” for my title. It’s very textured because at first I colored it pink. It blended in too much and didn’t stand out, so instead of throwing it away and starting over, I covered it with white gesso to make it white again. I went back over it with a yellow Distress Oxide and love how it turned out. Big difference! I completed the title with some of the Pick-Me-Up Mini Thickers and Chipboard Thickers. There’s also another Rub-On peeking out down there!

I hope this inspires you to create something fun with the Pick-Me-Up Washi Tape Book!  There are so many possibilities with it! And don’t forget to check out Paige’s awesome cut files in the Silhouette Store! Have a great day!

SUPPLIES: PICK-ME-UPPaper 146x6 Paper PadWashi Tape BookChipboard StickersStickersRub-OnsMini ThickersChipboard Thickers; Cut file: Bright Star by Paige Evanswhite cardstockSilhouette CameoDistress Oxide
Blog: littlenuggetcreations.blogspot.com  Instagram: @missywhidden  Pinterest: @missywhidden
Facebook: missy.whidden  YouTube: Missy Whidden
That mixed media background is something else! I could learn a thing or two from Missy's artsy ways!

You Are My Sunshine Layout by Zsoka Marko


Monday, February 26, 2018

Here is a new layout by design team member Zsoka Marko featuring my Umbrella cut file then embellished with Pick-Me-Up!
Hey there crafty friends, it's Zsoka Marko and I'm popping in today with a new layout!
I've chosen the Umbrella cut file for my page because I've had some photos of my kiddo in a raincoat on my desk for ages and thought this file would fit perfectly! I've paired it with the beautiful new Pick-Me-Up collection - it's so versatile and the theme can be used for so many things!
I decided to cut several Umbrellas from white cardstock in different sizes for my background using my Silhouette Cameo, sort of creating my own patterned paper. I wasn't quite sure how I was going to back them at this point, I just started with a floral paper, then a scrap piece of yellow and then it occurred to me, it would look nice in some rainbow colors! So that's what I did and I loved it so much that I backed all the other umbrellas the same way too. 
I arranged the backed umbrellas on my background paper the way I planned it in Silhouette Studio previously, then glued them down. I didn't use foam adhesive because they had a natural curve that I wanted to keep, I only used glue on the middle sections.
I layered some tissue paper behind my photo and tucked some labels in there too. I went through all embellishments in this collection and picked out everything that could possibly work. I probably ended up using most of them! I selected some Chipboard Stickers phrases, Ephemera Die CutsStickersPuffy StickersRub-Ons, and I also cut some phrases out of the 2x2 Paper Pads.
Aaaand the coolest thing - I even found two little umbrella buttons in the Haberdashery Multi-Pack, ha! It was meant to be!
For my title I went with the navy foam Mini Thickers because the title I chose was quite long. I wrote my journaling, stamped my date, and was done! I hope you like this page as much as I do! I just love rainbow colors, they make me smile. Add to that this sweet photo and I'm all happy! I hope it has the same effect on you guys!

Blog: apocketfullofscrap.blogspot.com / Instagram: @zsokamarko / Facebook: Zsoka Marko / YouTube: Zsoka Marko
My heart sings for rainbow colors so this layout is extra super duper special!

Friendship Layout


Sunday, February 25, 2018

This layout called Friendship was actually the very very first page I made using Pick-Me-Up and it was for the Scrapbook & Cards Today Magazine blog!
There are a few patterned papers in Pick-Me-Up that are perfect for fussy cutting and since I enjoy that technique and process, I sat down with a pair of fine-tipped scissors, put on my favorite movie, and got to work cutting out all the moths from Paper 14.
Then I needed to choose a background paper - I sifted through a few different peachy pink papers and ultimately decided on the ledger paper from the B-side of Paper 20. It took me awhile to figure out the exact placement of where I wanted the moths as you can see in the process video below, but hey, sometimes it takes a few tries to get it right!
I adhered the moths in place and then machine stitched through them so they’re there for good, they’re not going anywhere! I added a pair of sweet photos of my cute kiddos off-center and embellished with lots of little phrase and shape StickersPuffy Stickers, and tiny Chipboard Stickers.
For the title, I used one of the Chipboard Stickers that says “Friendship” and journaled on the right edge with a precision pen. To finish I had fun applying a few Rub-Ons around the layout in empty spots and below the journaling.
To see how this layout came together, watch the start-to-finish process video below!


Thank you so much for stopping by! Hope you are inspired to pick up my Pick-Me-Up collection! :)

Happy Birthday Layout by Heather Shank


Saturday, February 24, 2018

Heather Shank is so amazing at combining lots of different cut files to create a dynamic, interesting, and layered layout!!

Hey everybody! Heather here! I love to challenge myself to use collections for different themes and this time I used the Turn the Page collection for a birthday page of my nephew's first birthday!
Cut files are usually my starting point. I took the Cupcake cut file and duplicated it two times to nest together on each side of my layout because I wanted the Happy Birthday Banner cut file to hang in between them. I decided to back the cupcakes and banner (both cut from white cardstock using my Silhouette Cameo) with different patterned papers from Turn the PagePaper 04Paper 09Paper 12Paper 16Paper 17Paper 20, and Paper 23. I also thought it would be fun to bring in some more color to the background by using Paper 19 and hand cutting some scalloped edges to go behind the cut files. 
To finish off my page I used Ephemera Die Cuts and Wood Veneer then added some hand stitching for texture. I hope you enjoyed reading about my process and have found some inspiration!
SUPPLIES: TURN THE PAGEPaper 04Paper 09Paper 12Paper 16Paper 17Paper 19Paper 20Paper 23Ephemera Die CutsWood VeneerSilhouette Cameo; Cut files: CupcakeHappy Birthday Bannerwhite cardstock
Instagram: @crafts_by_heathers | Facebook: Heather Wilson Shank
There are so many details on this layout! I feel like I could stare at it for hours and still find something new!

A Pocket Full of Joy Layout by Stefanie Ried


Friday, February 23, 2018

How cute and original is this "pocket" page by Design Team member Stefanie Ried?!
The idea for this layout came spontaneously! My daughter was sick and I took the materials from my scrapbook room to the kitchen - I brought stickers, a photo, and die cuts in a small pocket. And when everything was on the table in front of me and I saw the bag on the paper, the idea came to me for the layout!
For the pocket, I used the packaging from the Chipboard Stickers which I cut to a smaller size with the trimmer. To see the transparent bag better, I sewed around it with dark thread.

Then I glued the photo and the small embellishments with glue dots inside the bag. Then I added the stickers in and finally the Sequins from Turn the Page.

At the top I attached a strip of patterned paper and wrapped around string along with a button from the Haberdashery Multi-Pack

The navy blue Mini Thickers fit perfectly for the title. At the corners I sewed a few lines with my sewing machine, cut out some moths from Paper 14, and glued them on.

Thanks for stopping by!
Blog: steffiried.blogspot.com / Instagram: @steffiried / Pinterest: @steffiried / Facebook: stefanie.ried.96 YouTube: Steffi Ried
A pocket full of joy is right! I love how this layout came together so serendipitously!

Amazing Love Layout


Thursday, February 22, 2018

I have a new layout to share for the Kerri Bradford Design Team featuring one of the images in her Just My Type set paired with my Pick-Me-Up collection!
I started by die cutting the title from the Just My Type set using my Silhouette Cameo 3 and the B-side of Paper 20 which is a very light blush pink ledger paper - usually I cut everything from white cardstock so this was a slight change of pace :) Then I went through all of the 6x6 Paper Pads from my collections (Fancy Free, Take Me Away 6x6 Paper Pad, Oh My Heart 6x6 Paper Pad, Turn the Page 6x6 Paper Pad, and Pick-Me-Up 6x6 Paper Pad) and pulled out all of the pink patterned papers. I ungrouped the title, offset each letter, then die cut the inside of each letter for backing the title from the pink papers.
I spent some time adding dimensional adhesive to the back of the cut file to get some shadows and then placed the papers. I placed the title at a slight angle on Paper 24 and then printed an oversized photo of me and Chris to tuck under the left side at the same angle. At first I thought I'd use a black & white photo, I even printed it out, but I printed the colored photo too and what can I say, I'm all about the COLORS! Give me all the colors, always :)
Since there are a few colors on my dress in the photo, I pulled in a few more colors in the form of flowers from the Ephemera Die Cuts and tucked six of them under and around the title. I also added a "wonderful" Ephemera Die Cut between the words. Below the photo I added typed/printed/trimmed journaling strips. That's about it!
Be sure to check out all of the amazing products Kerri has to offer in her shop - she's always adding more amazing things!

Tallinn, Estonia Mini Album


Wednesday, February 21, 2018

I just finished up a MINI mini album - it's only 2x3"! I used the new & gorgeous Twilight collection by 1canoe2 with lots of beautiful pinks and blues and florals. I was searching through our travel photos trying to find pictures that would coordinate and noticed lots of pinks and blues in our day Tallinn, Estonia back in 2015 - it's never too late to document precious memories! So I narrowed down my favorite photos, printed them at 2x3", and got to work!


First, you can watch a short little flip through of the album to see how it looks in real life :)

I found the tutorial for making the base of this mini album by Eva Pizarro on the Pebbles blog - it only uses a half sheet of cardstock! I altered it a little bit - instead of gluing the entire pages back-to-back, I added adhesive around the edges only to turn them into pockets - I always need more room for photos and journaling so pockets are a great way to make more space.
I made the mini album base from white smooth cardstock and then wrapped it with a pretty floral paper from the 6x6 Paper Pad - I added machine stitching to the edges before adhering it in place and kept the thread ends long here and throughout the album. To help keep the album closed I added a Wooden Epoxy Button to the front and stitched ribbon to the back page to wrap around it. To make the title I typed "Tallinn, Estonia" on smooth white cardstock using my Typecast Typewriter and then trimmed it out, notched the ends, and tucked them under the button.
For consistency I decided to add a full photo to each spread and then adhered a coordinating piece of patterned paper on the opposite side. On this spread I added an Ephemera Die Cut stamp and "adventure" gold foil & pink heart Stickers backed with some messy white string. I trimmed the flag from the Paper Clip a little bit shorter and then clipped it at the top. On the right I wrapped the edge with Washi Tape, stamped the date of our visit using the Roller Stamp with black StazOn ink at the bottom, placed one of the epoxy centers from a Wooden Epoxy Button above, applied an "x" gold Rub-On above that, and then placed a gray "x" Sticker on the side. 
It only took a few minutes to place all the photos throughout and then pick papers - I used patterns from the 6x6 Paper Pad because they're smaller scale. At that point all I had to do was embellish - this mini album only took about 3 hours to make from start-to-finish! I couldn't believe it, I had budgeted in about 5 or 6 hours. But yay for fast projects! On the left side of this spread, I machine stitched messily on the patterned paper before adhering it in place and then added a floral Die Cut on top using dimensional adhesive. All I did on the right side photo was wrap it with Washi Tape - I love how this makes the edges look a bit cleaner and gives them more color and interest - win win win!
On this spread, I trimmed a piece of a floral Die Cut for the bottom left corner and added another epoxy center from a Wooden Epoxy Button on top. On the right page patterned paper, I created a cluster using a trimmed label Sticker, a stapled a yellow "x"Sticker, and an Ephemera Die Cut stamp. Then I stitched along the right edge of the label sticker before adhering the page in place. I fussy cut a moth from one of the 6x6 Papers and placed it below the hand written journaling. I should have let the ink dry, it's a bit smudged. I wrapped the edge with Washi Tape to finish this spread.
I had so many photos I wanted to include. I made a 2x3" collage of more favorites and adhered it to the right page. On the left patterned paper page (isn't that paper so pretty?!) I stamped a bunch of sentiments and borders using the Roller Stamp with black StazOn ink. Before I adhered the paper in place I stitched a gold foil heart Sticker above the stamping. Not seen below but on the next photo I once again wrapped the edge with Washi Tape.
On this spread I applied a gold foil sentiment Rub-On to the center of the pretty floral paper page, stitched a "today" Sticker above, and added a trimmed floral label Sticker below. On the right photo page I added a "favorite" Sticker at the top and stapled a gold foil heart Sticker next to it. Can you guess what I did next? I wrapped the edge with Washi Tape! Repeating design elements is key!
On the last spread all I did was stitch heart Ephemera Die Cuts and Stickers to a patterned paper then adhered it in place. On the right photo page you can see where I stitched the ribbon in place that keeps the album closed.
And then in all of the pockets I added more photos! There are five pockets in total - four of them hold back-to-back photos that I shaped into tags and added machine stitching around the edges. I also either stapled Washi Tape or tied thread through holes punched in the top to add more texture, color, and make it easier to pull the tags out of the pockets. I added a few Stickers and Rub-Ons to the white space of some of the photos and fussy cut a tiny "slow down" from a 6x6 Paper. These photo tags are slightly thinner than the pages - they're about 1.5" wide so they can tuck into the pockets easier.
I wrote journaling on a tag Die Cut with a .03 black precision pen and then applied gold foil border Rub-Ons and angled Washi Tape to the back. 
Detail of the tags.
That's about it! So easy, fast, and fun to make!
I hope you are inspired to check out the Twilight collection by 1canoe2, check out the mini album base how to by Eva Pizarro, and then report back here and share what you've made! :)
Paige Taylor Evans © // Quinn Creatives DESIGN