Bloom Street Turn Around Cards by Kelly Daye


Thursday, April 30, 2020

Hello friends, it’s Kelly Daye here and hooray, we’ve made it through April! Hopefully we’ll be seeing some happy turn around in our communities really soon. Today I’m sharing cards I designed with a turn around of sorts in mind. From left to right the cut files and papers I've used are: Circles Doily from Paper 03, Flower from Paper 14, and Globe (without the stand) from Paper 23. I resized the cut files to fit my card design. The finished cards measure 6x6”.
Each features a miniaturized Paige Evans cut file that’s been paper-backed with Bloom Street. I used both the 6x8 Paper Pad and 2x2 Paper Pads for the smaller prints and other bits leftover from previous projects. For a little glamor, I used silver metallic thread to sew on matching sequins from my stash.

When you minimize a cut file by this much, the lines tend to get quite thin. So I used the Offset Tool in Silhouette Studio to make the lines thicker. Simply offset the original cut file to 0.055, then drag away the offset and erase the original. Ta-da, the lines are now thicker.

The Globe was decorated with a pretty little sticker that says, "the earth laughs in flowers" from the 4-Page Sticker Book. The other two cards have iridescent foil greetings from the Cardstock Stickers. Just dust the back of any sticker with baby powder to change it from a sticker to something you can pop up with foam dots.

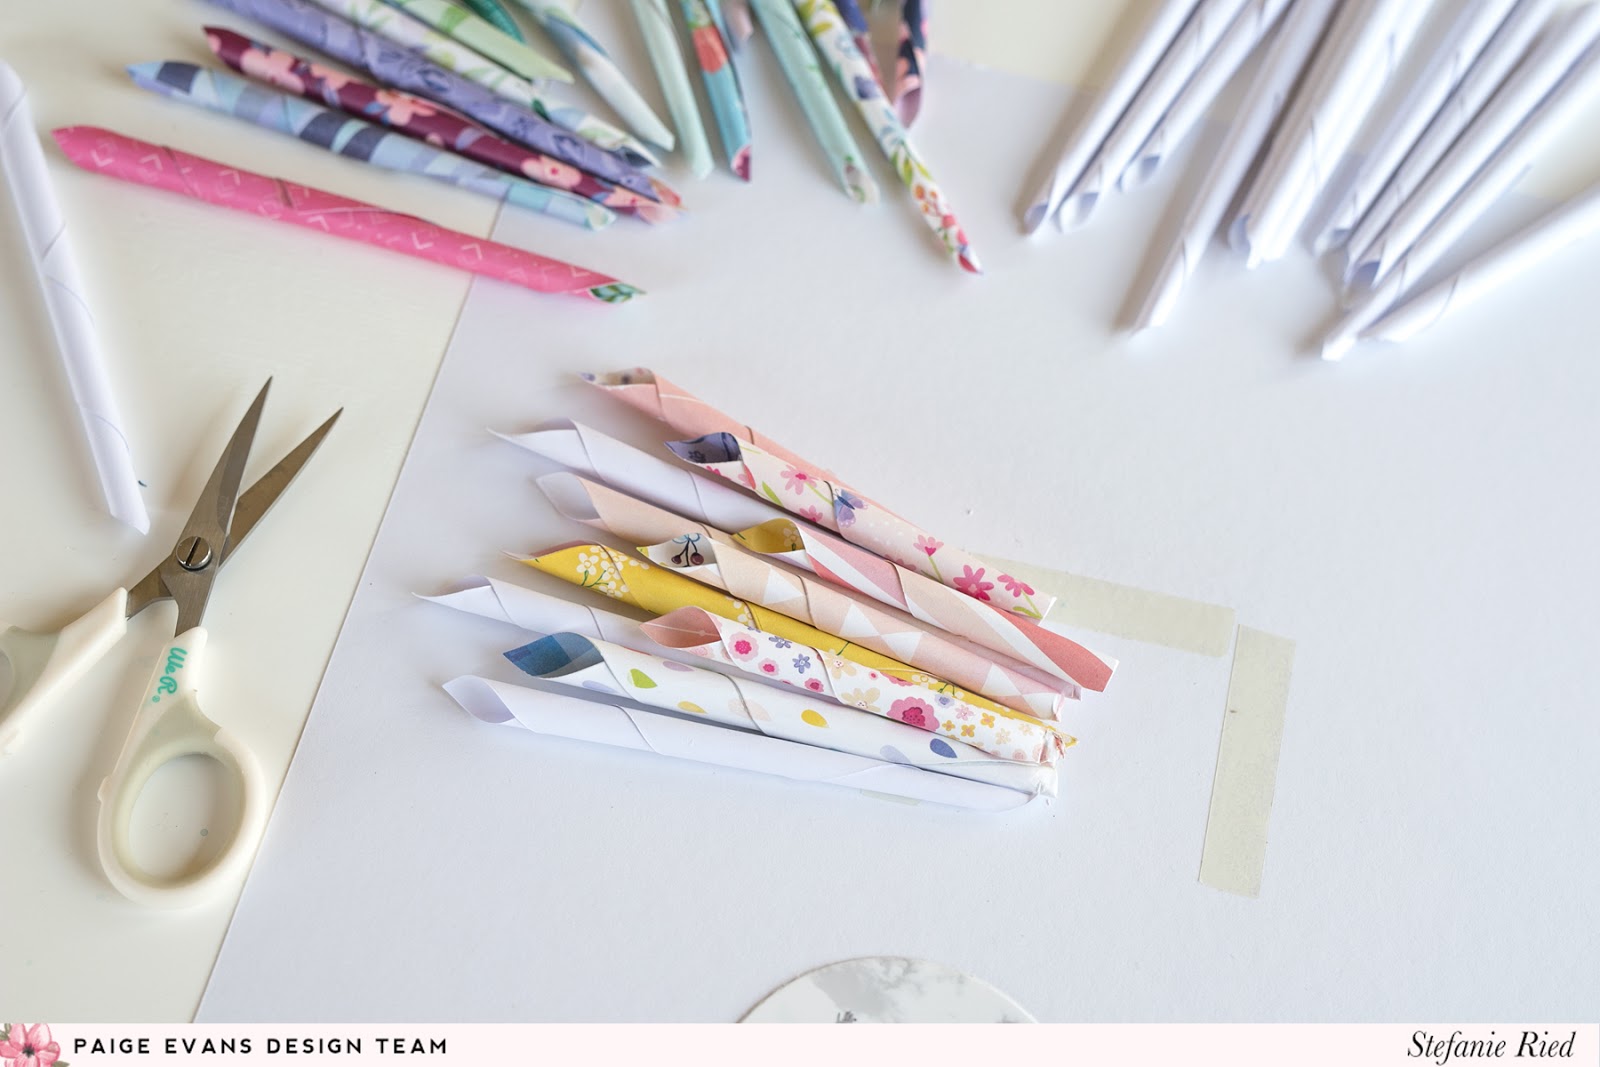
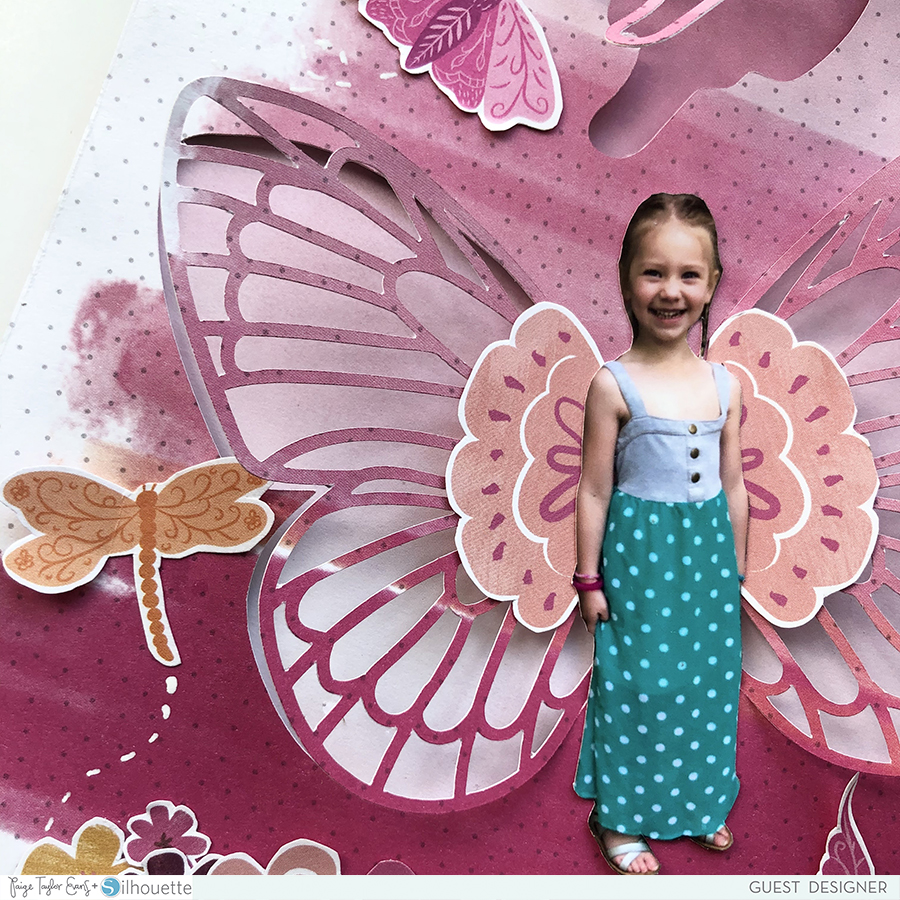
I made a cut file for the card base in Silhouette Studio and it’s available for free at my website. Once assembled, a Butterfly Sticker flutters around the card.

The tab attached to each butterfly is made from Washi Tape and allows you to pull the butterfly around the card. There’s a short tutorial on my YouTube channel if you’d like to make one for a friend.

Until next time, stay well dears!

SUPPLIES: Patterned papers, stickers, die cuts, embellishments; BLOOM STREETwhite cardstock; Die cut machine: Silhouette Cameo; Cut file:s Circles DoilyFlower, and Globe by Paige Evans
Location: Edmonton, Canada / Blog: Kelly Made It / Instagram: @kellymadeit / Facebook: Petals Daye / Pinterest: Kelly Made It

Fresh Start Layout by Stefanie Ried


Wednesday, April 29, 2020

Hello everyone! Stefanie Ried here with a new Bloom Street layout that was inspired by two layouts - one from Ulli and Paige's rolled paper "S" is for Summer layout from last year.

I love rainbows and rolling paper is a fantastic technique!
For my rays I wanted them to be pointed at the top, so I die cut out all the diamonds from the beautiful Bloom Street papers as well as white cardstock.

Then I attached double-sided tape to the edge and rolled it up with a thin brush. Since a brush usually gets a little bit wider, the rolls open up too. This is a nice effect.

After rolling the papers I arranged them on the layout in a sunburst pattern.

Thanks for looking! See you next time!

SUPPLIES: Patterned papers, stickers, embellishments: BLOOM STREETwhite cardstock; Printer: Canon Pro-100; Photo paper: Canon
Blog: steffiried.blogspot.com / Instagram: @steffiried / Pinterest: @steffiried / Facebook: stefanie.ried.96 YouTube: Steffi Ried

Heart Mini Album & Storage Box by Amber Mitchell


Tuesday, April 28, 2020

Hey crafty friends! Amber Mitchell here on Paige’s blog today to share a super cute mini album I created using two of Paige’s cut files and the Pick-Me-Up collection! The Heart Mini Mini Album cut file made the perfect base for this album which focuses on all things happy, while the Heart Favor Box cut file made for the perfect way to safely store it!

I started this project by cutting the Heart Mini Mini Album cut file first. I used the digital version of the Pick-Me-Up collection and printed my own paper on 8.5 x 11" cardstock. Due to this, I had to slightly size the album down a bit until it fit perfectly within that margin.

Once my album base was cut, I moved on to cutting the small hearts that would mat each page. These came with the cut file so it made the process quick and easy! I cut these from various patterned papers from the digital Pick-Me-Up collection and used double-sided tape to adhere them into place.

It was then time for embellishments and photos! Since this album is teeny tiny, I needed some teeny tiny photos to match. I used the software that came with my printer to size my photos down to about ½ x ¾". Once printed, I cut them out by hand, leaving a small white border around them to help them pop off the page.

With the theme of this album being “happiness”, I selected photos of some of my favorite memories over recent years. I had quite a few to add so I doubled or even tripled them up on some of the pages in order to include them all.

Once my photos were adhered into place, I came in with the embellishments! I used some printed at home die cuts from the digital Pick-Me-Up collection that I sized down to fit perfectly on each page.

I also used some of the Chipboard Stickers to add dimension and texture. By using some thin foam tape I was able to add dimension throughout the rest of the album as well; doing this prevents the album from lying flat but it sure does look extra cute and chunky!

With the album done, I moved on to creating a storage box for it. Since this album is so chunky, I wanted to create a safe place to store it so that it’s less likely to fall apart over time.

The Heart Favor Box cut file was perfect for this! Not only is it adorable, it also matches the heart theme of the mini album perfectly! I sized the cut file up a bit before cutting it so that my chunky album would fit nice and neatly inside. Then, once assembled, I decorated it with the same items I used for the album itself.

And that is this super cute mini album/storage set project done!

Thanks so much for stopping by the blog today! Take care and I’ll see you next time for another fun project!

SUPPLIES: Patterned papers, stickers, die cuts, embellishments: PICK-ME-UP; Die cut machine: Cricut; Cut files: Heart Mini Mini Album and Heart Favor Box by Paige Evans
Location: California, USA / Blog: Happy Crafty Studio / Instagram: @bambismail / YouTube: bambidearr / Pinterest: bambidearr

Guest Designer | Ashley Neu


Monday, April 27, 2020

Hello, everyone! My name is Ashley Neu and I am Paige’s guest designer for the month of April! I feel so honored and blessed to have this opportunity to share my love of scrapbooking and cut files! You can find me on YouTube, Instagram, and Facebook. Let’s get into the fun of creating, shall we?
For the first layout, I used Paige’s Horizon collection and her Quilt Background cut file. I absolutely adore geometric shapes on layouts so I knew I wanted to make a heart inside of the quilt pattern.
After cutting the cut file from white cardstock, I traced out the heart on the rainbow starburst Paper 03. After adhering the cut file to the framed background paper, I matted my photo on papers from the 6x8 Paper Pad and attached it to the layout. I arranged Floral Die Cuts next to the photo and at the corner of the heart. Lastly, I selected some alpha stickers that matched some of the patterned papers and created my title. I just love gold on a layout! I finished the layout with some white gel pen along the edges of the layout.

For the second layout, I used the Envelope Flowers cut file paired with Paige’s Truly Grateful collection. I backed the cut file with patterned papers and used some vellum on the “inside” of the envelope.
After backing the photo with patterned papers, I placed it on top of the cut file and marked where I wanted to cut an opening. Using a craft knife, I cut along the envelope's edges and then slid the photo inside. I watered down white acrylic paint to splatter the background for added interest. Using foam adhesive, I popped the cut file up on the background paper and then added the title using Cardstock Stickers as well as some sparkly green Thickers! Finishing off the layout, I used embellishments including Ephemera Die CutsCardstock Stickers, and Puffy Stickers.

The last layout I’m sharing with you today uses the Cut and Fold Butterflies Galore cut file and an array of Paige’s collections. The cut file was cut on an Oh My Heart patterned paper and then adhered using foam adhesive to another Oh My Heart paper.
I fussy cut my two photos so that I could make them appear as two butterflies on the layout! I used fussy cut flowers to add interest to their wings. Next, I used fussy cut butterflies (from the Horizon collection) and flowers (Truly Grateful collection) to decorate the layout. I created butterfly trails with a white pen. Lastly, I created a simple title using a gold “hello” sticker and some cute, white letter stickers.
Thank you so much for taking some time to check out what I’ve created for you all! I hope you enjoyed them and found some inspiration! Have a fabulous day!

SUPPLIES: Cut files: Quilt BackgroundEnvelope Flowers, and Cut and Fold Butterflies Galore by Paige Evans; Die Cut Machine: Silhouette Cameo; Scrapbook collections: TRULY GRATEFULHORIZON, and OH MY HEART

Fresh Easter Eggs Layout


Sunday, April 26, 2020

Hi friends! I have a new layout & process video to share with you today using my Bloom Street collection and Easter Egg cut file!
 Watch this process video first if you are a more visual person to see how it came together from start-to-finish:
I started by applying white gesso onto white cardstock to prep it for watercolors. Then I die cut my Easter Egg cut file from it and carefully peeled it off the mat. I watercolored over the flowers and leaves using my favorite sets: Pastel Dreams and Tropicals. I sped up the drying time with a hair dryer so I could continue on :)
For the background I chose the blue-green B-side of Paper 10 which when turned upside down resembles the sky and grass - perfect! I added little dabs of liquid glue onto the backside of the cut file and pressed it onto the page. I wanted the edges of the cut file to lift and bend off the background so that's why I didn't adhere it down 100%.
 I found the photo I wanted to use from last Easter and added it to the bottom right side. To balance the photo, I created the title on the top left corner using a mix of Puffy Vinyl Stickers (Fresh), the mini alphas from the 4-Page Sticker Book (Easter), and Floral Foam Thickers (Eggs).  I framed the title with colorful leaves from the Puffy Vinyl Stickers and the Floral Die Cuts.
I wanted to "ground" the egg so I trimmed two wavy strips from another piece of Paper 10 as well as a piece of white cardstock and fringed them with scissors. I adhered them to the bottom edge of the page. 
Helpful tip: There was a distracting hot pink polka dot bag in the photo, so I covered the majority of it up with a purple Layered Butterfly Sticker. Below the photo I added a cluster of tiny creatures stickers from the 4-Page Sticker Book.
 I wrote my journaling with a white paint pen around the curve of the egg and then added a trio of Floral Die Cuts on the bottom left corner. To finish, I balanced the white pen on the top right by drawing stems and leaves below the flowers on the bottom left.
 I hope you are inspired to scrap your Easter memories with my Bloom Street collection and Easter Egg cut file!
SUPPLIES: Patterned papers, stickers, Thickers, die cuts, embellishments: BLOOM STREETwhite cardstockgesso; Cut file: Easter Egg by Paige Evans; Watercolors: Pastel Dreams and Tropicals; Printer: Canon Pro-100Canon photo paper

Beautiful Sweet Kind Friends Layout


Saturday, April 25, 2020

 I used my Bloom Street collection to create this page. I started with the purple floral B-side of Paper 03 for my background and used a toothbrush to splash, spritz, and drop watered down white acrylic paint across the background.
 I printed a large photo of me, Vicki, and Shimelle on my Canon Pro-100 printer with Canon photo paper and trimmed it into a circle. I placed the photo on the lower left side of the background and glued it in place.
 Then I took a new package of Floral Die Cuts and framed them all around the photo. I pushed them around until I liked the placement and used dimensional foam squares to adhere them in place to create dimension and shadows. To make the title I used a combination of Puffy Vinyl StickersPuffy Word StickersFloral Foam Thickers, and a "beautiful" fussy cut from Paper 04. The floral ampersand is fussy cut from one of the 2x2 Paper Pads. And the teal piece is a sticker strip from the last page of the 4-Page Sticker Book.
 I hope this page inspires you to pick up the Spring 2020 issue of Scrapbook & Cards Today Magazine and my Bloom Street collection!
 SUPPLIES: Patterned paper, die cuts, stickers, Thickers, embellishments: BLOOM STREETwhite acrylic paint; Printer: Canon Pro-100; Canon photo paper

Circles Layout by Zsoka Marko


Friday, April 24, 2020

Hi there friends, Zsoka Marko stopping by to share a new layout with you today that I've created for the Paige Evans Design Team with the Bloom Street collection! Everybody has go-to layouts, right? This is one of mine. I've been making these circle layouts for like 5 years and I never seem to get tired of them. I probably make one with every scrapbook collection I work with. I find it to be a great and easy way to add lots of colors and patterns to a page.
This time I decided to add a lof of the different papers a bit differently. Instead of cutting circles from various patterned papers, I now have multiple designs on each circle. To avoid a big mess, I kept all the circles uniform.

I started out by cutting paper strips from different patterned papers. I glued these on a heavyweight cardstock, then die cut circles from it. You could totally use your Cameo (or any other electric die cutting machine for that matter) for this but for me this was quicker since my manual die cutting machine and dies are right where I craft (my Cameo is not). Plus, this way I had more control over which colors I had in my circles.

I added some decorative stitching for more texture and interest (and also because I really don't trust any glue to keep things in place for good haha). I then decided on a background paper, the diagonal rainbow stripe B-side of Paper 20, and adhered my circles to it as well as some photos, which I also cropped into circles. I kept embellishing to a minimum, only added a few heart Puffy Vinyl Stickers and words, plus a few Cardstock Stickers and Ephemera Die Cuts. I used a stapler and some stitching to keep the puffy stickers in place (again, I don't trust glue LOL). To finish off my page, I wrote my journaling and stamped the date.

That's it! Simple but fun. What is your go-to design on your scrapbook pages? I'd love to hear!

SUPPLIES: Patterned papers, die cuts, stickers, embellishments: BLOOM STREETwhite cardstock
Blog: apocketfullofscrap.blogspot.com // Instagram: @zsoka_marko // Facebook: Zsoka Marko // YouTube: Zsoka Marko

Aloha Mini Album by Brianna Lepper


Thursday, April 23, 2020

Hi crafty friends! Brianna Lepper here and I'm so excited to finally be able to share this cute mini album with y'all! For this mini, I used Paige's Accordion Mini Album With Tags cut file along with her newest collection, Bloom Street.

When we first got sneaks of the collection, I immediately fell in love with the floral Specialty Transparency Paper and knew right away that I'd use it for a mini album cover. I created this mini album as a gift for my mom, documenting their visit to us while we were still living in Hawaii. So many great memories! So let's get started with a flip through first:

I went ahead and cut out the entire cut file using different patterned papers from the collection. Since I was using the Specialty Transparency Paper for the cover, I measured out the correct dimensions, cut it on my trimmer, and added the score lines. Paige has a tutorial on how to assemble this cut file on her YouTube channel that you can watch here. I then punched out a couple of holes in the transparency paper, added some eyelets, and attached one of the Tassels and one of the Flower Charms. Here are the papers I used for the base of my album: Paper 04Paper 05Paper 06Paper 09Paper 14, and Paper 23.

I used the Puffy Word Stickers to create my title and since the cut file already had this heart shape cut and ready, I made a sequin shaker using the sequins from the Mixed Embellishments. I finished it off with the cutest Layered Butterfly Sticker!

Before I assembled and adhered all of the pages together, I ran each one through my sewing machine.

I cut apart Paper 01 and tucked in a few bits into a pocket I created using some scraps of the papers I had from the base pages. To create some extra interest, I used a notebook punch from my stash and ran a scrap through it and put a photo on top of it. I also used the 4-Page Sticker Book to embellish the pages.

I love to incorporate interactive elements and took one of the cut apart pieces and tucked a photo underneath it. I adhered a piece of Washi Tape to the top of it to allow it to be flipped up.

Since I had so many photos to go in this album, I added some of them onto the tags and tied some ribbon from my stash onto each one. When I was adhering the whole album together, I only applied score tape adhesive to the bottom and sides of each page so that they could serve as pockets for the tags.

Another little flip out element on another page. So fun! I embellished using some of the Cardstock Stickers.

Here's the inside:

I've been wanting to use the Acrylic Stamps from the collection so I stamped a few of them using inks from my stash and then fussy cut them. I used them as additional embellishments throughout my project and love how they look!


I had a lot of extra photos that weren't going to fit onto the pages, so I decided to make a mini book and attached it to one of the pages. I added a butterfly Ephemera Die Cut and stitched through it.

Here's one of the pages from that mini book I created. I added a heart from the Puffy Vinyl Stickers and also added some gems from the Mixed Embellishments. I had so much fun creating and embellishing this mini album! I plan on giving it to my Mmm for Mother's Day and I hope she loves it!

 Thank you so much for stopping by today. I hope I've inspired you in some way and I also hope that you give this Accordion Mini Album With Tags cut file a try!

SUPPLIES: Patterned papers, floral transparency, tassel, charm, stamps, stickers, die cuts, jewels, washi tape, embellishments: BLOOM STREET; Die cut machine: Silhouette Cameo; Cut file: Accordion Mini Album With Tags by Paige Evans
Location: Louisiana, USA / Blog: I Love Paper Blog / Instagram: @briannalepper / Facebook: Brianna Nichole
YouTube: Brianna Lepper / Pinterest: Brianna Lepper
Paige Taylor Evans © // Quinn Creatives DESIGN