The One with the Ali Edwards JUST THANKFUL Layout


Saturday, November 29, 2014

I just finished my first layout as a member of the Ali Edwards Digital Creative Team! Every week new digital supplies are uploaded to the shop and we pick which one we want to feature. I chose the JUST THANKFUL brushes:
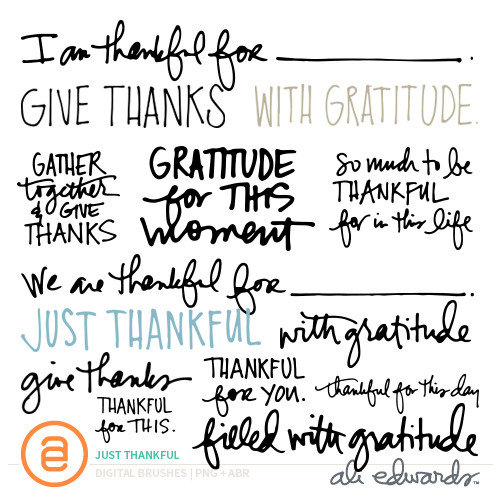
And since I'm not a digital scrapper, I turned some of the brushes into cut files and here's what I made:
 photo PEVANS_NOV12_THANKFUL.jpg
THANKFUL by Paige Evans

Description: I've been hoarding these papers by Ashley Goldberg that she designed for her Paint.Plan.Play class at Studio Calico and couldn't wait to use them. I'm excited to be on the Ali Edwards Digital Creative Team because other than the digital supplies we are supposed to feature, the other supplies are free reign! For American Crafts I can only use American Crafts supplies (sometimes I throw in sister brands: Pebbles, Crate Paper, Pink Paislee, Heidi Swapp, Bazzill Basics, Studio Calico, We R Memory Keepers, Imaginisce, am I missing any??), and for Studio Calico I can only use Studio Calico kits. Not that I feel limited AT ALL - I LOVE everything American Crafts makes and the kits by Studio Calico are the best :) But, I do have collections from other companies that I've purchased and now I'll have an excuse to use them! Like these papers!

Journaling says: We absolutely loved going to Disneyland Paris - so fancy schmancy! Fox + Jane loved it too and always ask to go back. Hopefully!

How to: Using Mister Huey's watercolors, paint swatches down the top of a white cardstock layout that match the patterned papers. Stamp patterns from the stamps by Ashley Goldberg for Paint.Plan.Play by Studio Calico over the dried watercoloring. Turn a few of the "JUST THANKFUL" digital brushes into cut files then die cut them from the patterned papers using a Silhouette CAMEO. Stitch the words over the watercoloring using white thread. Place skinny washi (by Ashley Goldberg for Paint.Plan.Play by Studio Calico) across the bottom and adhere three photos over it. Stamp dotted lines then write journaling with a black pen below the left photo. Add wood veneer pieces (by Ashley Goldberg for Paint.Plan.Play by Studio Calico) around the layout and stamp the date in black ink above the right photo.

Supplies: Thankful cut files: JUST THANKFUL brushes by Ali EdwardsCardstock, roller date stamppen, adhesive: American Crafts; Patterned papers, stamps, wood veneer, washi tape: Ashley Goldberg for Paint.Plan.Play by Studio Calico; Watercolors: Mister Huey's by Studio Calico; Ink: StazOn; Sewing machine: Brother; Thread: Coats & Clark; Die cut machine: Silhouette CAMEO
 photo PEVANS_NOV12_THANKFUL_DETAIL.jpg
Loving this new challenge of using digital elements in physical ways!

The One with Studio Calico PARK AVE Layouts!


Thursday, November 27, 2014

December 2014 Studio Calico kits called PARK AVE (including the main PARK AVE kit and add ons: RITZHELMSLEY, and WALDORF) are now available for subscribers at Studio Calico!

The colors in these kits are unbeatable. There. I said it. Here are the 4 layouts I created this month:
 photo IceCreamatVersaillesbyPaigeEvans-1.jpg
ICE CREAM AT VERSAILLES by Paige Evans

DESCRIPTION: Goodness knows I have a soft spot for cut files :) On this layout I turned a digital stamp brush (the Park Ave Project Life Extra-stamp-brush) into a cut file and die cut it from white cardstock with my Silhouette CAMEO:
JOURNALING SAYS: Ice cream at Versailles. Not really any journaling - a picture is worth a thousand words afterall!

HOW TO: Die cut the the Park Ave Project Life Extra-stamp-brush-turned-cut-file from white cardstock then back each word with a paper from the PARK AVE kit. Trim off the tearaway strip from a patterned paper and adhere it to the right edge. Use Mister Huey's watercolors to paint over the words. Place a photo on the middle right and embellish with transparency die cuts, chipboard triangles, and a badge - all from the PARK AVE kit. Tuck a printable label under the photo as well. Stick mini alphabet stickers below the photo and stamp the date in black ink to finish.

SUPPLIES: Scrapbook kit: PARK AVE by Studio CalicoWhite cardstockadhesiveroller date stamp: American Crafts; Ink: StazOn; Label printable: Hello Forever for Studio Calico; Watercolors: Mister Huey's by Studio Calico; Words cut file: Park Ave Project Life Extra Stamp Brush; Die cut machine: Silhouette CAMEO

*********************************************************************************

 photo Thanksgiving2013byPaigeEvans.jpg
THANKSGIVING 2013 by Paige Evans

DESCRIPTION: I know, I know, I KNOW, I do this every month :) With my Silhouette CAMEO I die cut the heart diamond I designed exclusively for Studio Calico for December from white cardstock and backed them with patterned papers in the PARK AVE kit.

JOURNALING SAYS: We spent Thanksgiving at the church with friends and had fun!

HOW TO: Die cut three heart diamonds from white cardstock using a Silhouette CAMEO and back each heart with patterned papers in the PARK AVE kit. Adhere the hearts on a grey cardstock background. Place a photo in the center of each heart and embellish with a chipboard diamond and round printable sentiment or labelStamp the date in black ink on a label tucked under the bottom heart and add another label topped with a tab transparency die cut. Add mini alphabet/number stickers above the bottom heart and write journaling with a white pen next to it.

SUPPLIES: Scrapbook kit: PARK AVE by Studio CalicoGrey cardstockadhesiveroller date stamp: American Crafts; White pen: Uniball Signo; Ink: StazOn; Printables: Hello Forever for Studio Calico and In a Creative Bubble for Studio Calico; Label printables: Hello Forever for Studio Calico; Heart diamond cut file: Paige Evans for Studio Calico; Die cut machine: Silhouette CAMEO

*********************************************************************************

 photo LoveYoubyPaigeEvans.jpg
LOVE YOU by Paige Evans

DESCRIPTION: Oh how I love patterned paper. And quilts. So I combined the two to create this background using papers from the PARK AVERITZ, and HELMSLEY kits.

JOURNALING SAYS: Oh you know, just riding a camel at the entrance to Adventureland at Disneyland Paris! So cute!

HOW TO: Trim patterned papers into triangles and adhere them, four together, in a 3 x 3 grid across a robin's egg blue cardstock background. Machine stitch a spiral on three of the squares. Attach a photo to the center using a paperclip. Journal on a sticker and tuck it under a Thickers title below the photo. Embellish with the Heidi Swapp September skies die cuts in the HELMSLEY add on as well as other small doodads from the kits, using a color-on-color effect. Stamp the date in black ink on a label tucked under the top right square.

SUPPLIES: Scrapbook kits: PARK AVERITZ, and HELMSLEY by Studio CalicoCardstockadhesivepenroller date stamp: American Crafts; Ink: StazOn; Sewing machine: Brother; Thread: Coats & Clark

*********************************************************************************

 photo 1stPonytailbyPaigeEvans-1.jpg
1ST PONYTAIL by Paige Evans

DESCRIPTION: Once you use one of the Printed Flowers and Leaves from the Open Book line by Maggie Holmes for Crate Paper found in the RITZ add on, you just have to use them ALL :)

JOURNALING SAYS: You don't even know how happy it makes me to finally be able to pull your hair back into a little ponytail!

HOW TO: On a vanilla cardstock background, adhere flower and leaf die cuts in a wreath and use dimensional adhesive on some of the pieces. Embellish with a few pink sequins and tiny aqua star stickers also from the RITZ add on. Place a photo inside the wreath, slip on a camera paperclip from the RITZ add on, and add a word die cut below (from the September Skies by Heidi Swapp die cuts in the HELMSLEY add on). Stick mini aqua alphabet stickers below the word die cut to create the title. Journal next to the photo and stamp the date in black ink below to finish.

SUPPLIES: Scrapbook kits: RITZ  and HELMSLEY by Studio CalicoVanilla cardstockadhesivepenroller date stamp: American Crafts; Ink: StazOn

*********************************************************************************

And that, my dear friends,  completes 12 rounds of kits and the end of the 2013-2014 Creative Team! I'm on pins and needles waiting to find out if I'll be back next month! Cross your fingers and toes for me!

Studio Calico offers three types of monthly kits - Scrapbook, Card, & Project Life® - as well as add on kits and shop items to complement them. A new kit is revealed on the 27th of each month (at noon EST if you're a subscriber, at midnight EST if you aren't). For more information (or to start your own subscription!), visit StudioCalico.com!

The One with Studio Calico PARK AVE Sneaks!


Wednesday, November 26, 2014

December 2014 Studio Calico kits called PARK AVE (including the main PARK AVE kit and add ons: RITZ, HELMSLEY, and WALDORF) are almost here - woohoo! Like many people have voiced, purple is not my most favorite color in the entire world, BUT I do have a lot of pictures of Jane wearing purple so I need purpley supplies! This month Studio Calico knocked it out of the park with their color palette which includes a few awesome shades of purple. Check it out:
So here are sneaks of the four layouts I made. I wish I had time to make more, I was super inspired and could have kept going, but I have a LOT of assignments and tasks to complete this month!

ICE CREAM AT VERSAILLES - For my first PARK AVE main kit only layout I used my Silhouette CAMEO and the Park Ave Project Life Extra-stamp-brush-turned-cut-file and watercolored over most of the words.
 photo IceCreamatVersaillesDetailbyPaigeEvans-1.jpg

******************************************************************************

THANKSGIVING 2013 - My other PARK AVE main kit only layout also was made with the help of my Silhouette CAMEO. I backed the diamond heart shape I designed exclusively for Studio Calico for December with patterned papers. You know the drill, I use this technique ALL.THE.TIME :)
 photo Thanksgiving2013DetailbyPaigeEvans.jpg

******************************************************************************


LOVE YOU - On this layout I created a paper-pieced quilt-like background using favorite patterned papers from all of the kits (PARK AVERITZHELMSLEY, and WALDORF) and then embellished with the Heidi Swapp September skies die cuts in the HELMSLEY add on.
 photo LoveYouDetailbyPaigeEvans.jpg

******************************************************************************


1ST PONYTAIL - For this last layout I used almost the entire package of Printed Flowers and Leaves from the Open Book line by Maggie Holmes for Crate Paper to make a wreath. These are found in the RITZ add on.
 photo 1stPonytailDetailbyPaigeEvans-1.jpg

******************************************************************************


I'll post my layouts in full at noon EST tomorrow!

Studio Calico offers three types of monthly kits - Scrapbook, Card, & Project Life® - as well as add on kits and shop items to complement them. A new kit is revealed on the 27th of each month (at noon EST if you're a subscriber, at midnight EST if you aren't). For more information (or to start your own subscription!), visit StudioCalico.com!

The One with Taking the Car to Hohenfels


Tuesday, November 25, 2014

Remember when we got in a car wreck on our Croatian Vacation back in May? We're still dealing with car repairs, over 6 months later. Sigh. Since it's an American specs car the German repair shop doesn't have the right tools to reset the computer and what not. I don't speak car :)
So we've been in touch with USAA and they told us to take our car to a shop by the Army base in Hohenfels - an hour away. Off we went! It was a super beautiful morning. And then we couldn't see 20 feet in front of us! The weather here is so strange sometimes.
 And then it was a beautiful day again :)
 While Chris was trying to find the right people to talk to at the shop I wandered around with the kids and soaked in the beautiful Bavarian air.
 Everywhere looks straight out of a painting.
 Flowerpot.
 These two hammed it up for the camera. Gosh I love them. Most of the time ;)
 Typical Bavarian "gasthaus" or "inn".
 In the US you can't drive 10 miles without finding a McDonald's or whole slew of fast food chains. Here it's just little village after little village. No McDonald's or Taco Bells in sight. 
 Fall is in full swing.
 We drove right through Amberg and recalled our day trip there. 
 Another picturesque town. Just another day in the life!
As for the car - they have to order more parts and it'll be a while longer. I'll be so glad when we finally have a perfectly working car again!

The One with the American Crafts THANKSGIVING Layout


Monday, November 24, 2014

I have a layout up on the American Crafts blog today for Thanksgiving Week!
 photo Thxgiving2013byPaigeEvans.jpg
THXGIVING 2013 by Paige Evans

Description: I've had photos of our last Thanksgiving for, well, a whole year now! For some reason I always scrap the holidays a year later... Anyway, I wanted to put lots of pics from our day on one layout and thought backing mini photos with leaves in a grid format would do the trick.

How to: Die cut leaves using a Silhouette CAMEO from a bunch of Amy Tangerine Stitched papers as well as a few gold papers from the Jen Hadfield Home + Made collection by Pebbles. Stitch on each leaf to add details. Adhere the leaves in a 4 x 4 grid on a vanilla cardstock background and place photos on top. Place a Thickers title between the two bottom rows of leaves. Embellish with stickers, enamel dots, puffy stickers, die cuts, and more, until the layout looks complete! I forgot to write journaling but in this instance the pictures tell the story, hopefully :) 

Supplies: Cardstock, patterned paper, die cuts, stickers, Thickers, enamel dots, adhesive: American Crafts; Sewing machine: Brother; Thread: Coats & Clark; Die cut machine: Silhouette CAMEO; Leaf die cuts: Silhouette Online Store
 photo Thxgiving2013DetailbyPaigeEvans.jpg
Happy Monday :)

The One with the 2000th Blog Post Giveaway!


Friday, November 21, 2014

 photo 2000thgiveawayblog.jpg
Dearly beloved, we are gathered here today to celebrate the 2000th post on this here blog. My first post was on April 9th 2008, over 6.5 years ago. I've blogged nearly every day since then. I love blogging :)

For this special occasion I'm giving away 10 books that I made, that I affectionately call "PaigeBooks"! Each book is unique and beautiful and handmade from scratch by yours truly. It would mean the world to me if all ya'll (whether I know you or not, I promise I don't bite :) would take a gander, pick your top three favorites, and talk to me in a comment on this post for a chance to win one!

Just a wee bit about these books as a whole: They're all coptic bindings so you can see the thread and how they're sewn together on the spine. It's my favorite style of binding, no glue is involved (unless you need it for the cover material), it looks neat, the books lay flat so you can easily write or make art in them, and the cover possibilities are endless because if you can drill holes through it, it can be used as a cover. Most of the pages are made with printer paper, cardstock, and/or scrapbooking papers. Let's begin the show and tell!

1) ANTHRO COASTERS BOOK
Size: 4 x 4"
Unique features: I bought these coasters from Anthropologie specifically to make a book. That was about four years ago. Finally found a good excuse to use them! The white printer paper pages are wrapped with decorative scrapbooking pages that match the colors of the coasters and it's stitched together with lime green floss. I also rounded all the corners of the pages to match the rounded coaster corners.
 photo DSC_0165.jpg
 photo 2000thPostGiveaway1a.jpg

*********************************************************************************

2) ROUNDED BOOK
Size: 4.75 x 6"
Unique features: The rounded edge makes this book special! I made a rounded book very similar to this for my 1000th post giveaway and thought I'd give it another go this time. The pages are made from an eclectic mix of media - felt, glitter paper, cardstock, vellum, printer paper, etc. This would make a great wedding sign-in book, baby shower book, baby book, journal, art book, smash book, etc.
 photo DSC_0180.jpg
 photo 2000thPostGiveaway2a.jpg

*********************************************************************************

3) FLORAL FABRIC BOOK
Size: 4 x 6"
Unique features: The covers are made from one of Fox and Jane's old board books that got destroyed but I rescued the nice and thick pages to use for PaigeBooks. I have a bunch of floral fabrics so I chose a couple I liked and wrapped them around the covers. That makes it sound so easy, but really a lot of measuring and glue is involved! I used two colors of baker's twine to sew - pink for the first half and blue for the second half. Note to self: Don't put the binding holes closer than 3/4" apart. It was super hard to sew this binding, I nearly lost my religion haha. Just kidding. But it was definitely the hardest book to make. Good thing it's pretty :) The pages are made entirely of printer paper so the possibilities for book uses are endless.
 photo DSC_0197.jpg
 photo 2000thPostGiveaway3a.jpg

*********************************************************************************

4) WOOD WITH "OPEN" KNOB BOOK
Size: 5 x 7"
Unique features: The covers are made from my favorite material: wood. The pages are printer paper wrapped with scrapbook patterned papers from the Soho Garden collection by American Crafts. The sewing a little unique in the design and they're placed closer together than "usual" for my books. For a final bit of funky flair I attached a knob to the front for easy opening! The rainbow colors of this book make me happy.
 photo DSC_0230.jpg
 photo 2000thPostGiveaway5a.jpg

*********************************************************************************

5) VINTAGE GERMAN CHARM BOOK
Size: 5.5 x 8.5"
Unique features: On Wednesday I drove 20 minutes to an antique shop in Weiden and found piles and piles of books. A few caught my eye for the purpose of reconstructing into books - this one made the cut! I did a little googling for the title and it translates to "Home in the Forest". I love the watercolor images on the covers and how German the scenes are. Reminds me of our home here. The pages are blank printer paper. As a fun touch I strung bits and baubles of this and that into the spine. Definitely one of my favorites!
 photo DSC_0247.jpg
 photo 2000thPostGiveaway6a.jpg

*********************************************************************************

6) LICENSE PLATE BOOK
Size: 6 x 6"
Unique features: The covers are made of a license plate! From our old car no less. I love skiing, I love Utah, therefore this book is awesome :) I used a friend's pair of metal clippers to trim the plate in half and then an awl and hammer to make the holes. Had to pull out all the industrial tools for this one! The pages are made from grid paper so it'd be good for math and sketches and stuff like that. Be careful when handling - I tried to sand down the edges but they're still a bit sharp!
 photo DSC_0291.jpg
 photo 2000thPostGiveaway9a.jpg

*********************************************************************************

7) LITTLE BLACK BOOK
Size: 6 x 6"
Unique features: I wrapped boards with houndstooth fabric and the pages are made from black cardstock - fun for white markers and other specialty pens meant for dark paper. Then I went the Victoria's Secret route and opted for hot pink thread for the binding. And some bling, woot woot! Perfect for a tween girl or teenager or bachelorette party.
 photo DSC_0307.jpg
 photo 2000thPostGiveaway10a.jpg

*********************************************************************************

8) WHITEWASHED WOOD BOOK
Size: 5 x 7"
Unique features: I love these natural holes in the wood covers which I then whitewhashed with paint. The printer paper pages are wrapped with an assortment of Dear Lizzy patterned papers. I used THREE colors of thread to stitch the binding! Never done that before!
 photo DSC_0260.jpg
 photo 2000thPostGiveaway7a.jpg

*********************************************************************************

9) CASSETTE BOOK
Size: 2.5 x 4"
Unique features: Cassettes? What are cassettes? Haha. What a different world we live in than just 20 years ago. Hey, there are holes already in 'em so they make perfect book covers! I got these cassettes from Desert Industries like a decade ago. I have a whole bin full of miscellaneous items I want to turn into books. For a touch of sparkle and shine I stitched the book together with gold thread. The pages are made from lined paper so you can write straight in it.
 photo DSC_0278.jpg
 photo 2000thPostGiveaway8a.jpg

*********************************************************************************

10) PLEXIGLAS SASSAFRAS BOOK
Size: 5 x 6.75"
Unique features: Saved my favorite for last :) This book has covers made from Plexiglas - a fun material because it's see-through! All of the pages are made from Sassafras Lass patterned papers (I wish they were still around - their patterns are so unique!) and another special feature is each page has a decorative edge. I stitched the book together with yarn so it's thicker. I just love the patterns and colors of this book. Not ideal for writing in but perfect for pictures and ephemera and such.
 photo DSC_0210.jpg
 photo 2000thPostGiveaway4a.jpg

WANT ONE?
To enter to win one of these PaigeBooks, leave a comment on this post by Monday December 1st 2014 and tell me two things: 1) Which three books are your top favorite so if you win I can make sure to send you one you love, and 2) Tell me how you know me! That's my favorite thing - to find out where the people who read this blog came from. Easy as pie! I'll post the 10 randomly selected winners on Monday December 1st.

THANK YOU THANK YOU for your readership and helping me reach 2000 blog posts!
Paige Taylor Evans © // Quinn Creatives DESIGN