
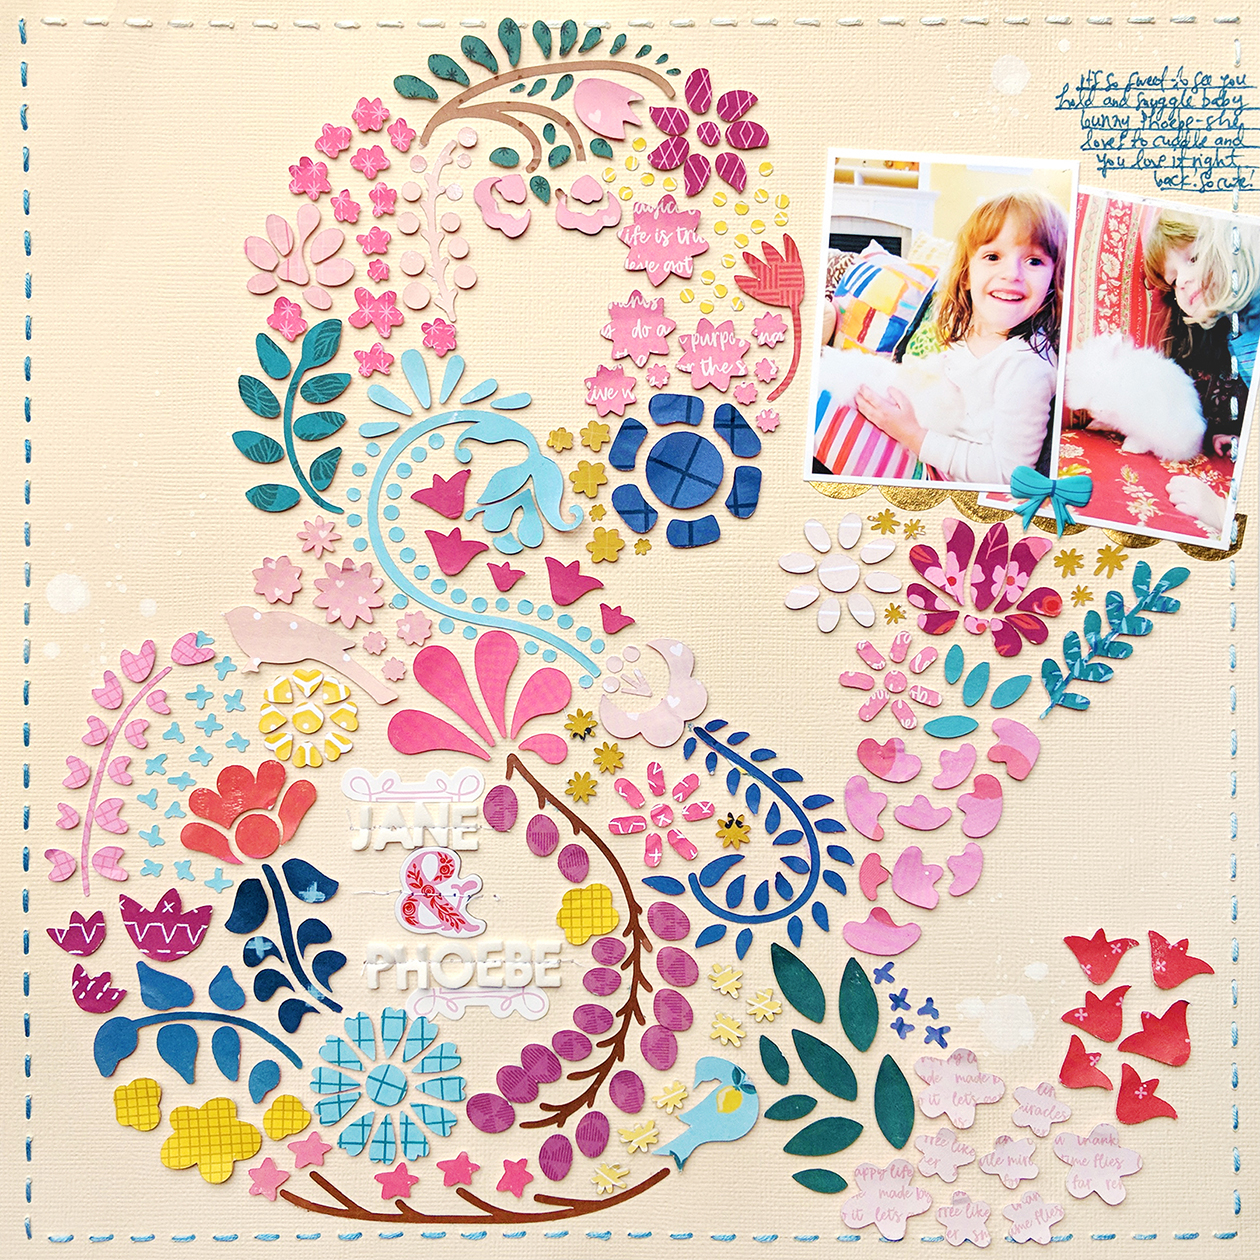
I have a new just-for-fun layout and process video to share with you today! I designed this Flower Ampersand cut file on Monday and couldn't wait to use it with my Pick-Me-Up collection :)
First, you can see exactly how this a little more complicated than usual layout came together:
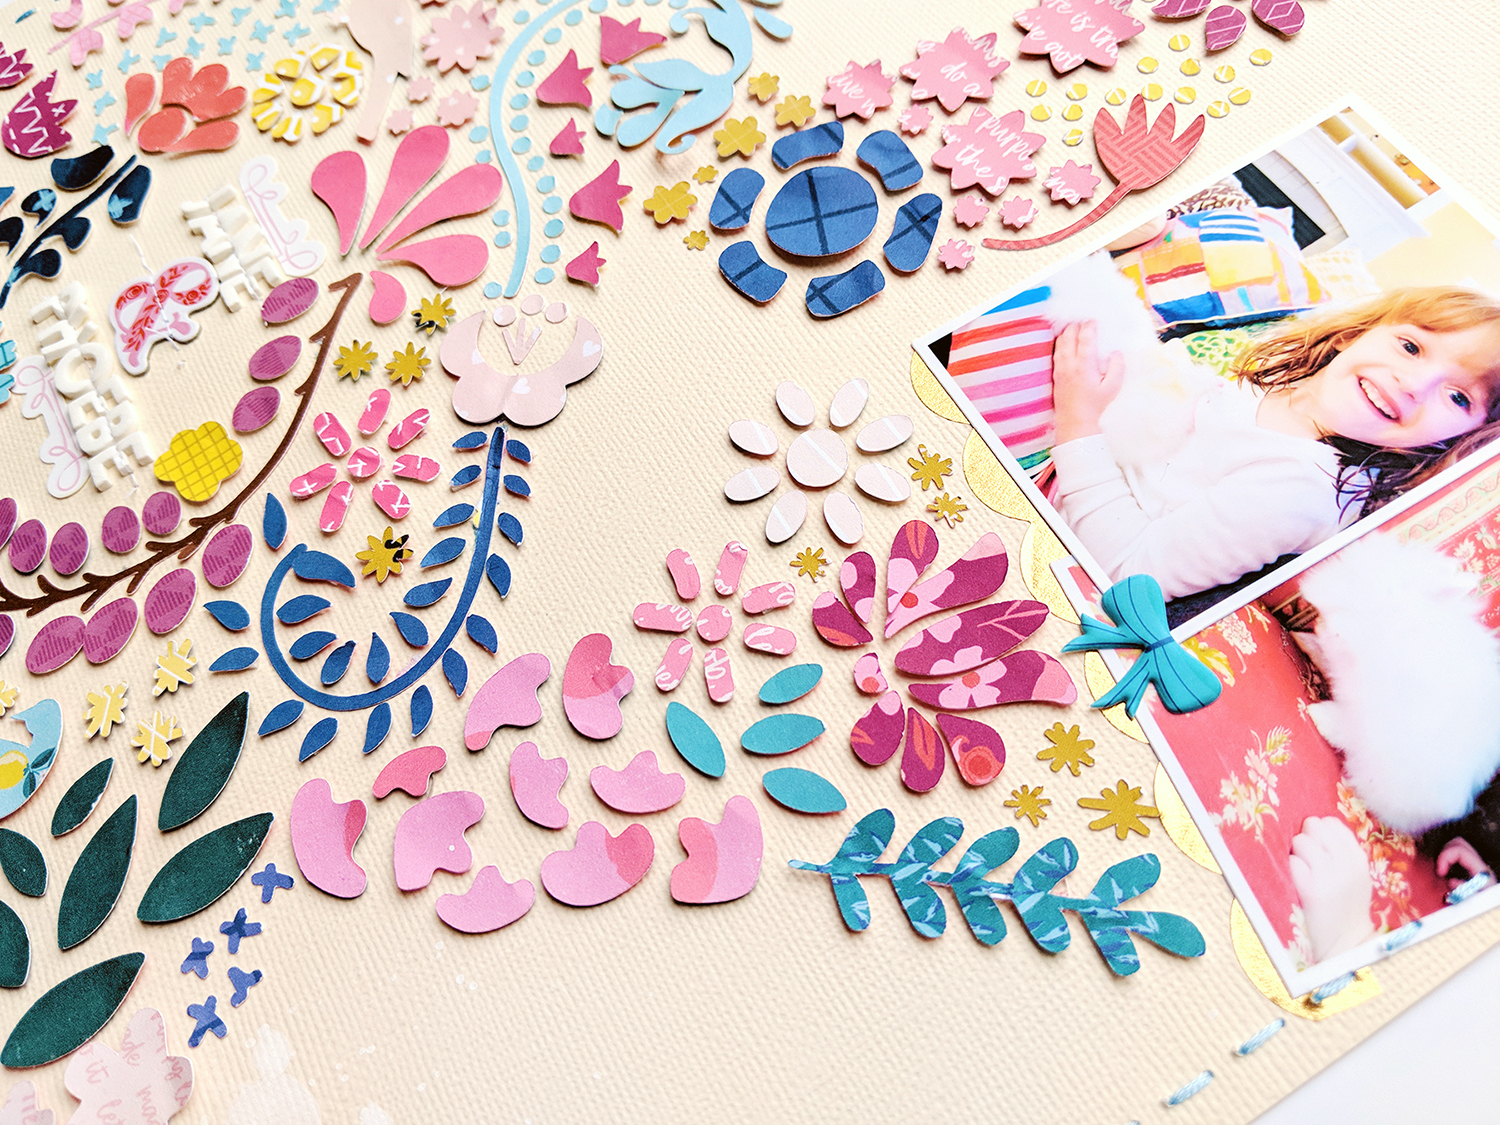
Basically, I die cut the Flower Ampersand using my Silhouette Cameo 3 from the B-side of Paper 01 thinking I was going to back it with colorful patterned papers. But the yellow was already too busy. Smudge it with white paint to dull it down? Nah. Cut it again from white cardstock and back it? Nah, I've done too many white background layouts recently. Instead, I decided to use the already cut background as a template to put all the little flower pieces back in place and wanted to cut them from all the pretty pink, purple, yellow, blue and green papers in Pick-Me-Up. Was it time consuming to cut and place each and every single little piece? Yes. Even more so by using dimensional adhesive! Was it worth it? Absolutely! I love a good art project :)

I used the grid in Studio with the grid on the sticky mat to trim 2" square patterned papers and put the flower groups into the 2" squares in Studio. This would be a great layout to use Paper 10 since it's made up of 2" squares. And I did use Paper 10, but only the solid colors. Once everything was cut out I glued things in place - the bigger pieces with foam squares and the teeny tiny pieces with liquid glue. Then I removed the paper I was using as a template to reveal the colorful, pieced together background.
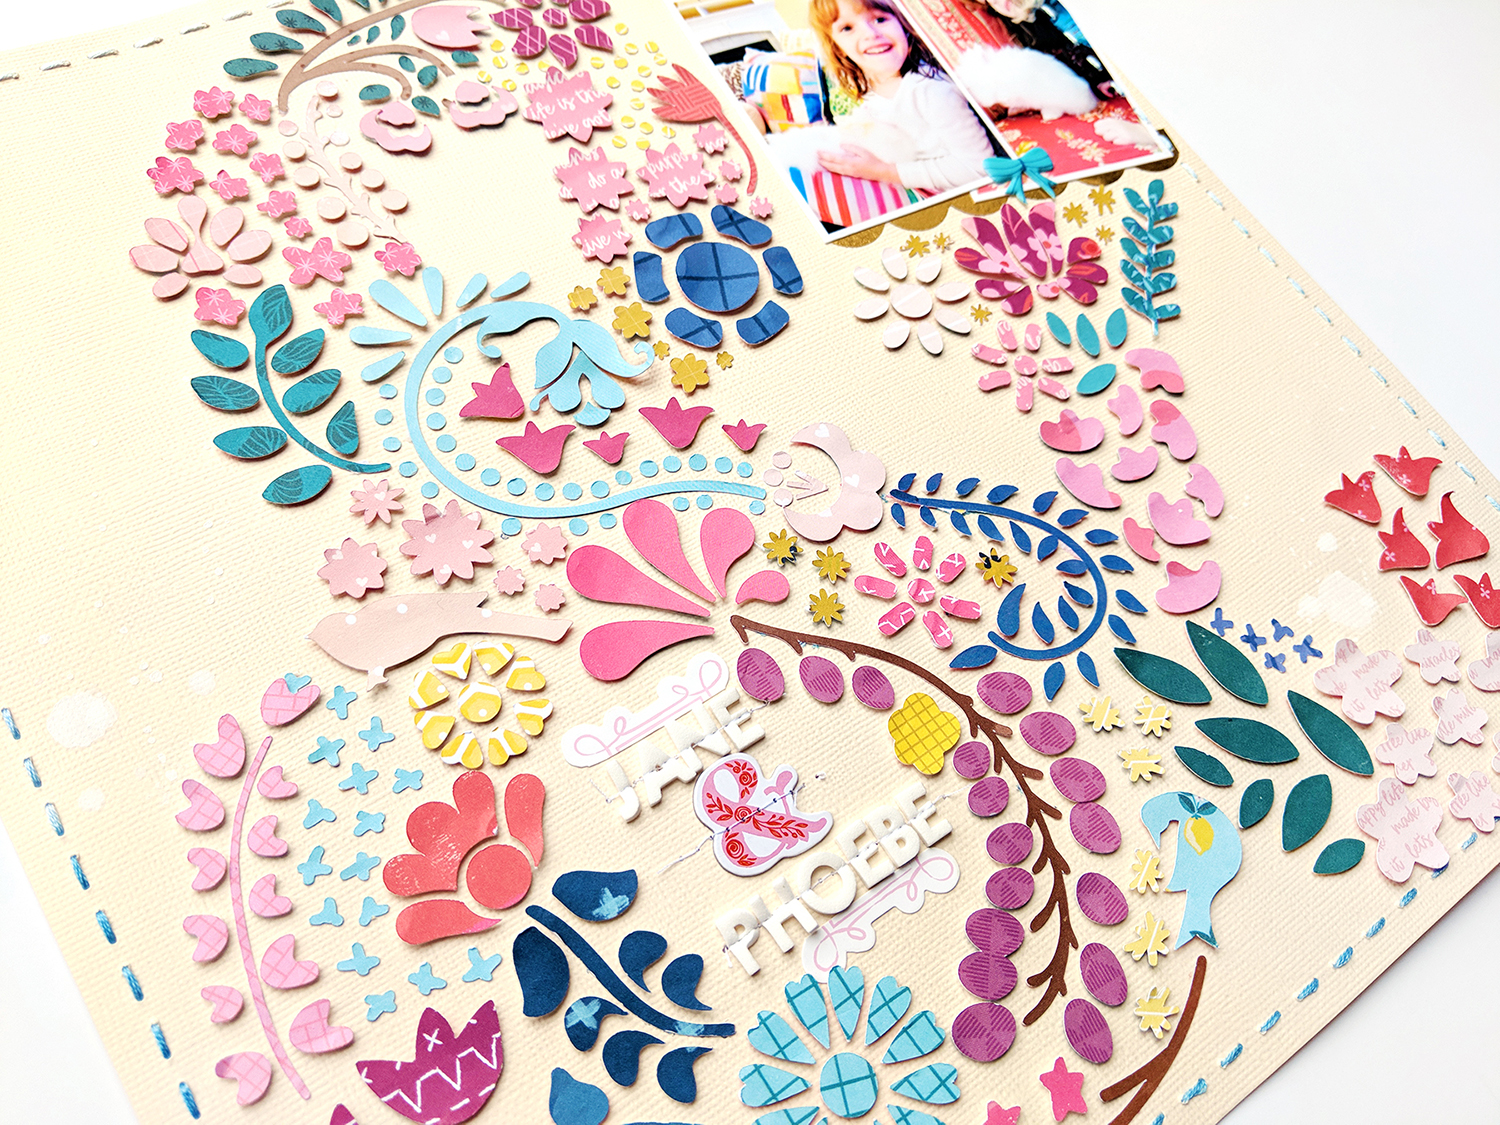
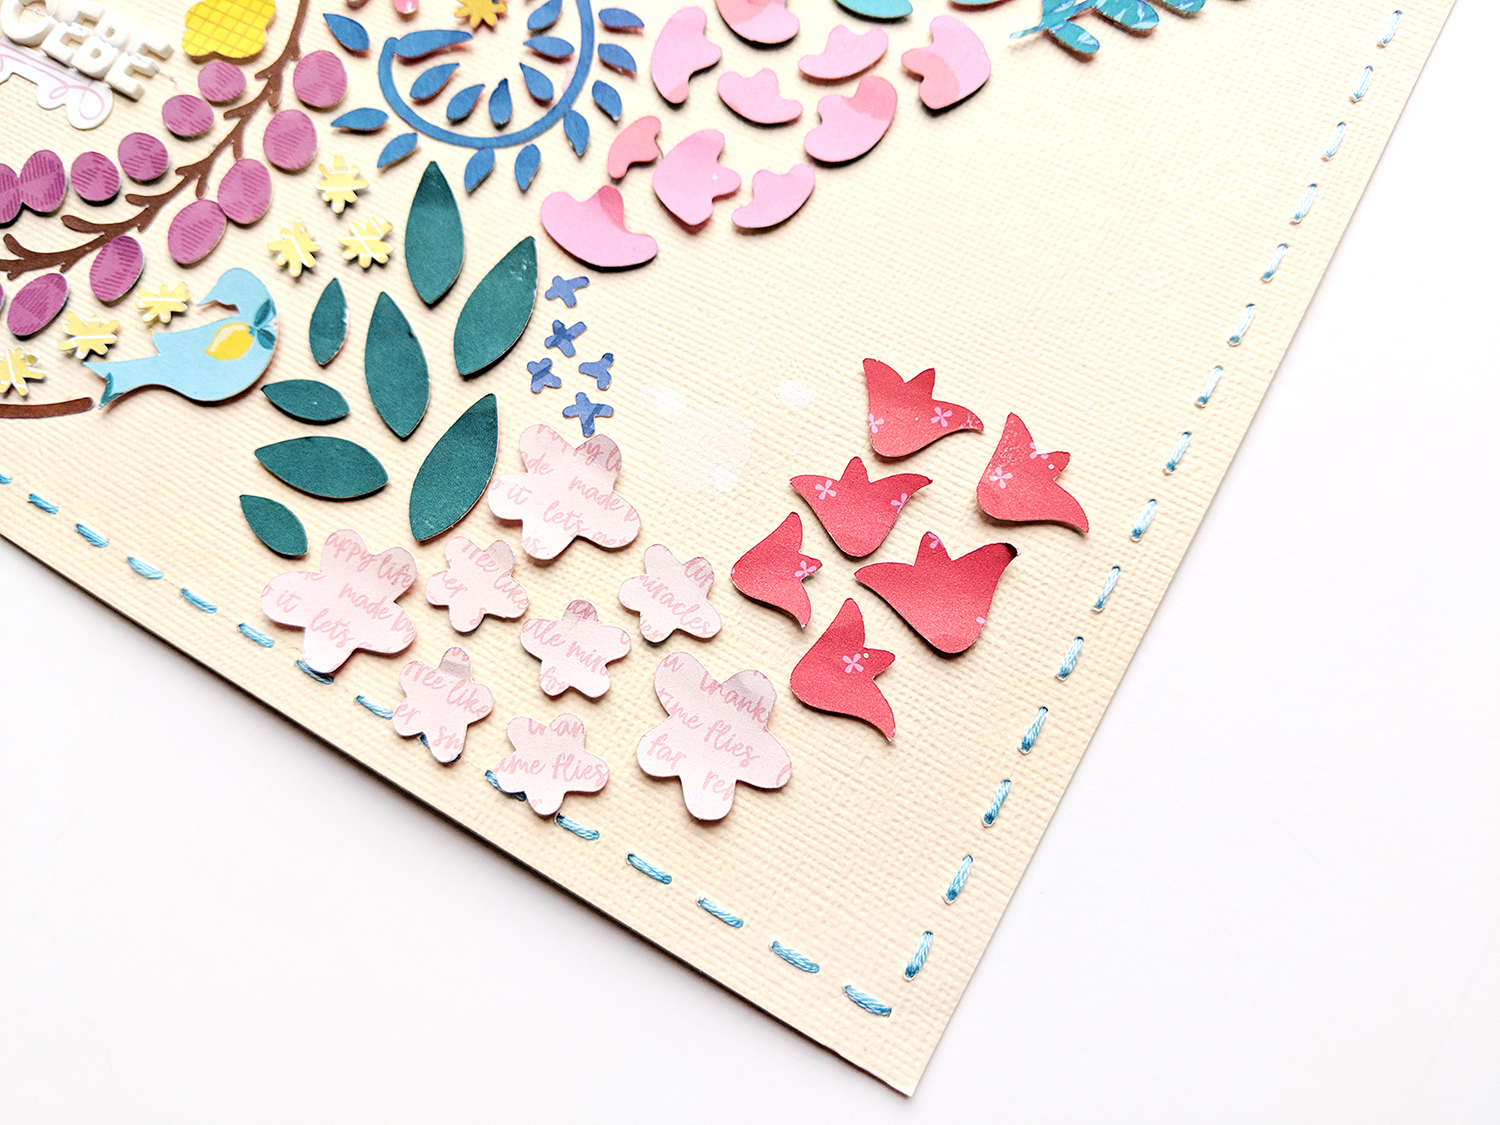
Even though there was a lot going on already, the layout didn't feel finished. After I added the title (made with Chipboard Thickers & Mini Thickers then framed with a trimmed Sticker) and a pair of photos of Jane with little bunny Phoebe, I machined stitched over the title, splashed white acrylic paint around in three places to make a visual triangle, and then hand stitched around the border using variegated blue thread. I stitched over-under-over-under to leave white space between the stitches similar to the white space between all the flower and petal pieces. Only a couple other products were used: a bow Puffy Sticker overlapping the photos and gold scalloped Washi Tape underneath the photos. I wrote my journaling with a dark blue pen above the pictures and the layout was finished!
I hope you are inspired to check out the Flower Ampersand cut file as well as my Pick-Me-Up collection :)
SUPPLIES: PICK-ME-UP: Paper 01, Paper 02, Paper 03, Paper 04, Paper 06, Paper 07, Paper 10, Paper 12, Paper 13, Paper 14, Paper 15, Paper 16, Paper 17, Paper 18, Paper 20, Paper 21, Paper 23, Paper 24, Mini Thickers, Chipboard Thickers, Puffy Stickers, Stickers; Cut file: Flower Ampersand by Paige Evans; Silhouette Cameo 3
SUPPLIES: PICK-ME-UP: Paper 01, Paper 02, Paper 03, Paper 04, Paper 06, Paper 07, Paper 10, Paper 12, Paper 13, Paper 14, Paper 15, Paper 16, Paper 17, Paper 18, Paper 20, Paper 21, Paper 23, Paper 24, Mini Thickers, Chipboard Thickers, Puffy Stickers, Stickers; Cut file: Flower Ampersand by Paige Evans; Silhouette Cameo 3


There you go again, AMAZING me!!!!! This is STUNNING!! I am loving those bold colors and those sweet photos!!!!!!
ReplyDeleteSuch a lot of detailed work here but so worth the EFFORT! A great design with a combination of techniques!
ReplyDeleteAbsolutely fantan-tabulous-tastic!!!! Looooove it! TFS :-)
ReplyDeleteThis is so gorgeous! I'm excited to try out this cut file. Can you explain what you mean by dimensional adhesive? I tried googling it but couldn't figure it out. I usually use foam squares to add dimension, but I was figuring you meant something else and I wanted to give it a try. Thanks for all the inspiration!! :)
ReplyDeleteThank you!! Yes I just mean foam squares :) :)
DeleteThank you so much! I love all of your cut files and designs. I am so happy that I'm able to use them even though I own a Cricut. Can't wait to try this one out!
Delete