
Hello friends! Phil Donahue here back on Paige's blog with a layout featuring her Petals Background from the 19 Spring Cut Files!

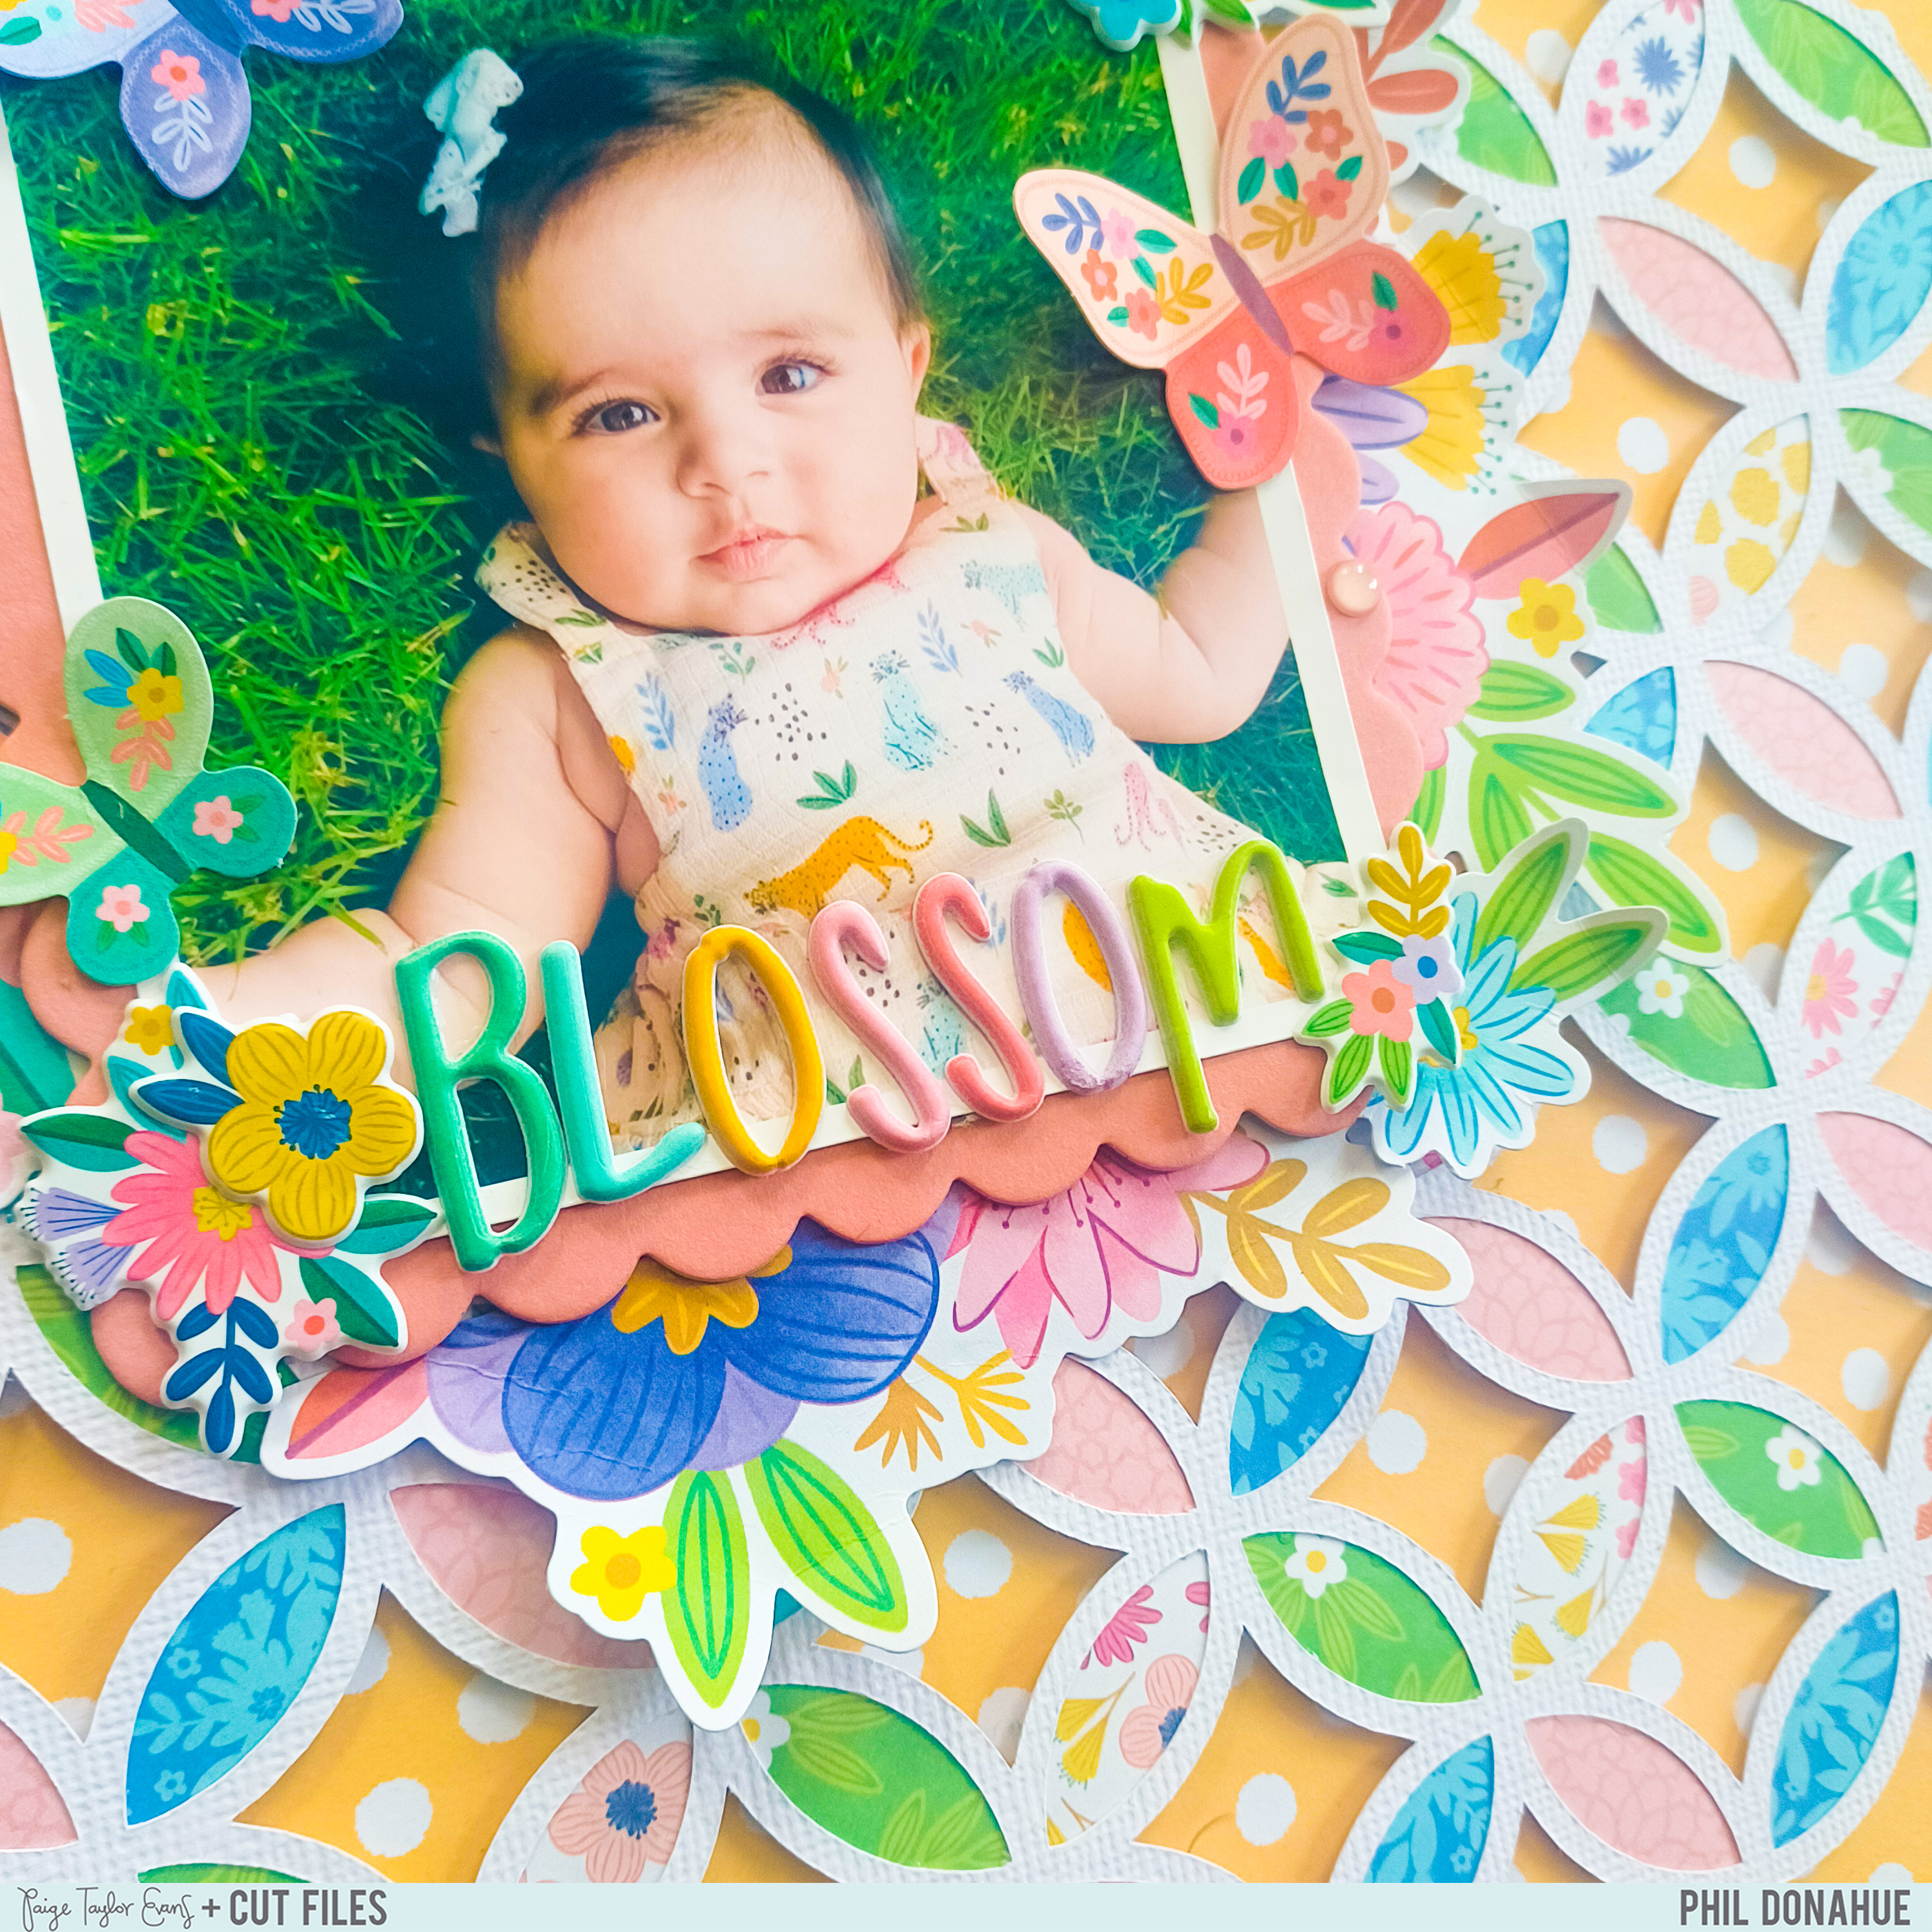
This layout features a photo of my friend Paige's baby Emery. I've been planning to gift a layout of Emery to frame and hang in her nursery for a while now and this Spring Bundle was the perfect companion to the cutest photo of her laughing in the grass. I decided to use the Petals Background because her dress has colors which coordinate perfectly with Blooming Wild and I knew I'd be able to feature many of the patterned papers. I also wanted to experiment with the contour and off-set tools in Cricut Design Space and the repeating shape leant itself perfectly to this technique.
To start, I added the Petals Background cut file to my canvas on design space and resized it to 10x10" knowing I wanted three layers of patterned paper behind it. I cut the file from white cardstock and set it aside. Back in DS, I selected the background and used the contour tool to remove all shapes leaving just one petal. Afterwards, I used the off-set tool to expand the shape by .06" which would fit perfectly behind the cut file, allowing space for adhesive. Then, after doing some math (ugh math!), I knew I needed to cut thirty-six petals to back each of the four patterned papers I wanted to feature - one for each corner of the geometric flower. I copied the off-set shape thirty-six times and used the weld tool to make them all one unit, which would cut on one pass. I cut out each from Paper 23, Paper 11, Paper 5, and Paper 8 - mostly from the 12x12 Paper Pad - and backed the cut file in a repeating pattern. While the technical portion of the backing took a bit of time and effort the physical part was super fast versus fussy cutting each tiny shape. I'd recommend trying the tech-technique at least once to find out if you prefer it over hand-cutting each shape!
I chose Paper 4 as the base because I love the deep green and all the tiny flowers reflect the colors in the collection and photo perfectly! Then I cut the lighter green side of Paper 15 into an 11.5" square and the yellow polka dot Paper 15 from Garden Shoppe into an 11" square, then layered and adhered them onto the deep green base paper to create concentric frames of patterned paper. I added adhesive foam squares to the back of the cut file and placed it in the center. I took inspiration from Paige's layouts and added the square photo directly in the center, framing it with a scalloped pink chipboard piece from my stash. I used Floral Die Cuts and Mini Flower Puffy Stickers to add embellishments around the photo and added a title from the Puffy Phrase Stickers on the photo. A few dusty pink enamel dots complete the page!
I hope you found some inspiration in this layout and decide to try out one of Paige's amazing Spring bundles!
SUPPLIES: Patterned papers, stickers, die cuts, embellishments: BLOOMING WILD; white cardstock; Cut file: Petals Background from the 19 Spring Cut Files by Paige Evans


Thanks Phil. I am going to give this a try using one of Paige's Road Trip cut files. Fingers crossed.
ReplyDeleteU got this! At the end of the day it's paper! <3
Delete