
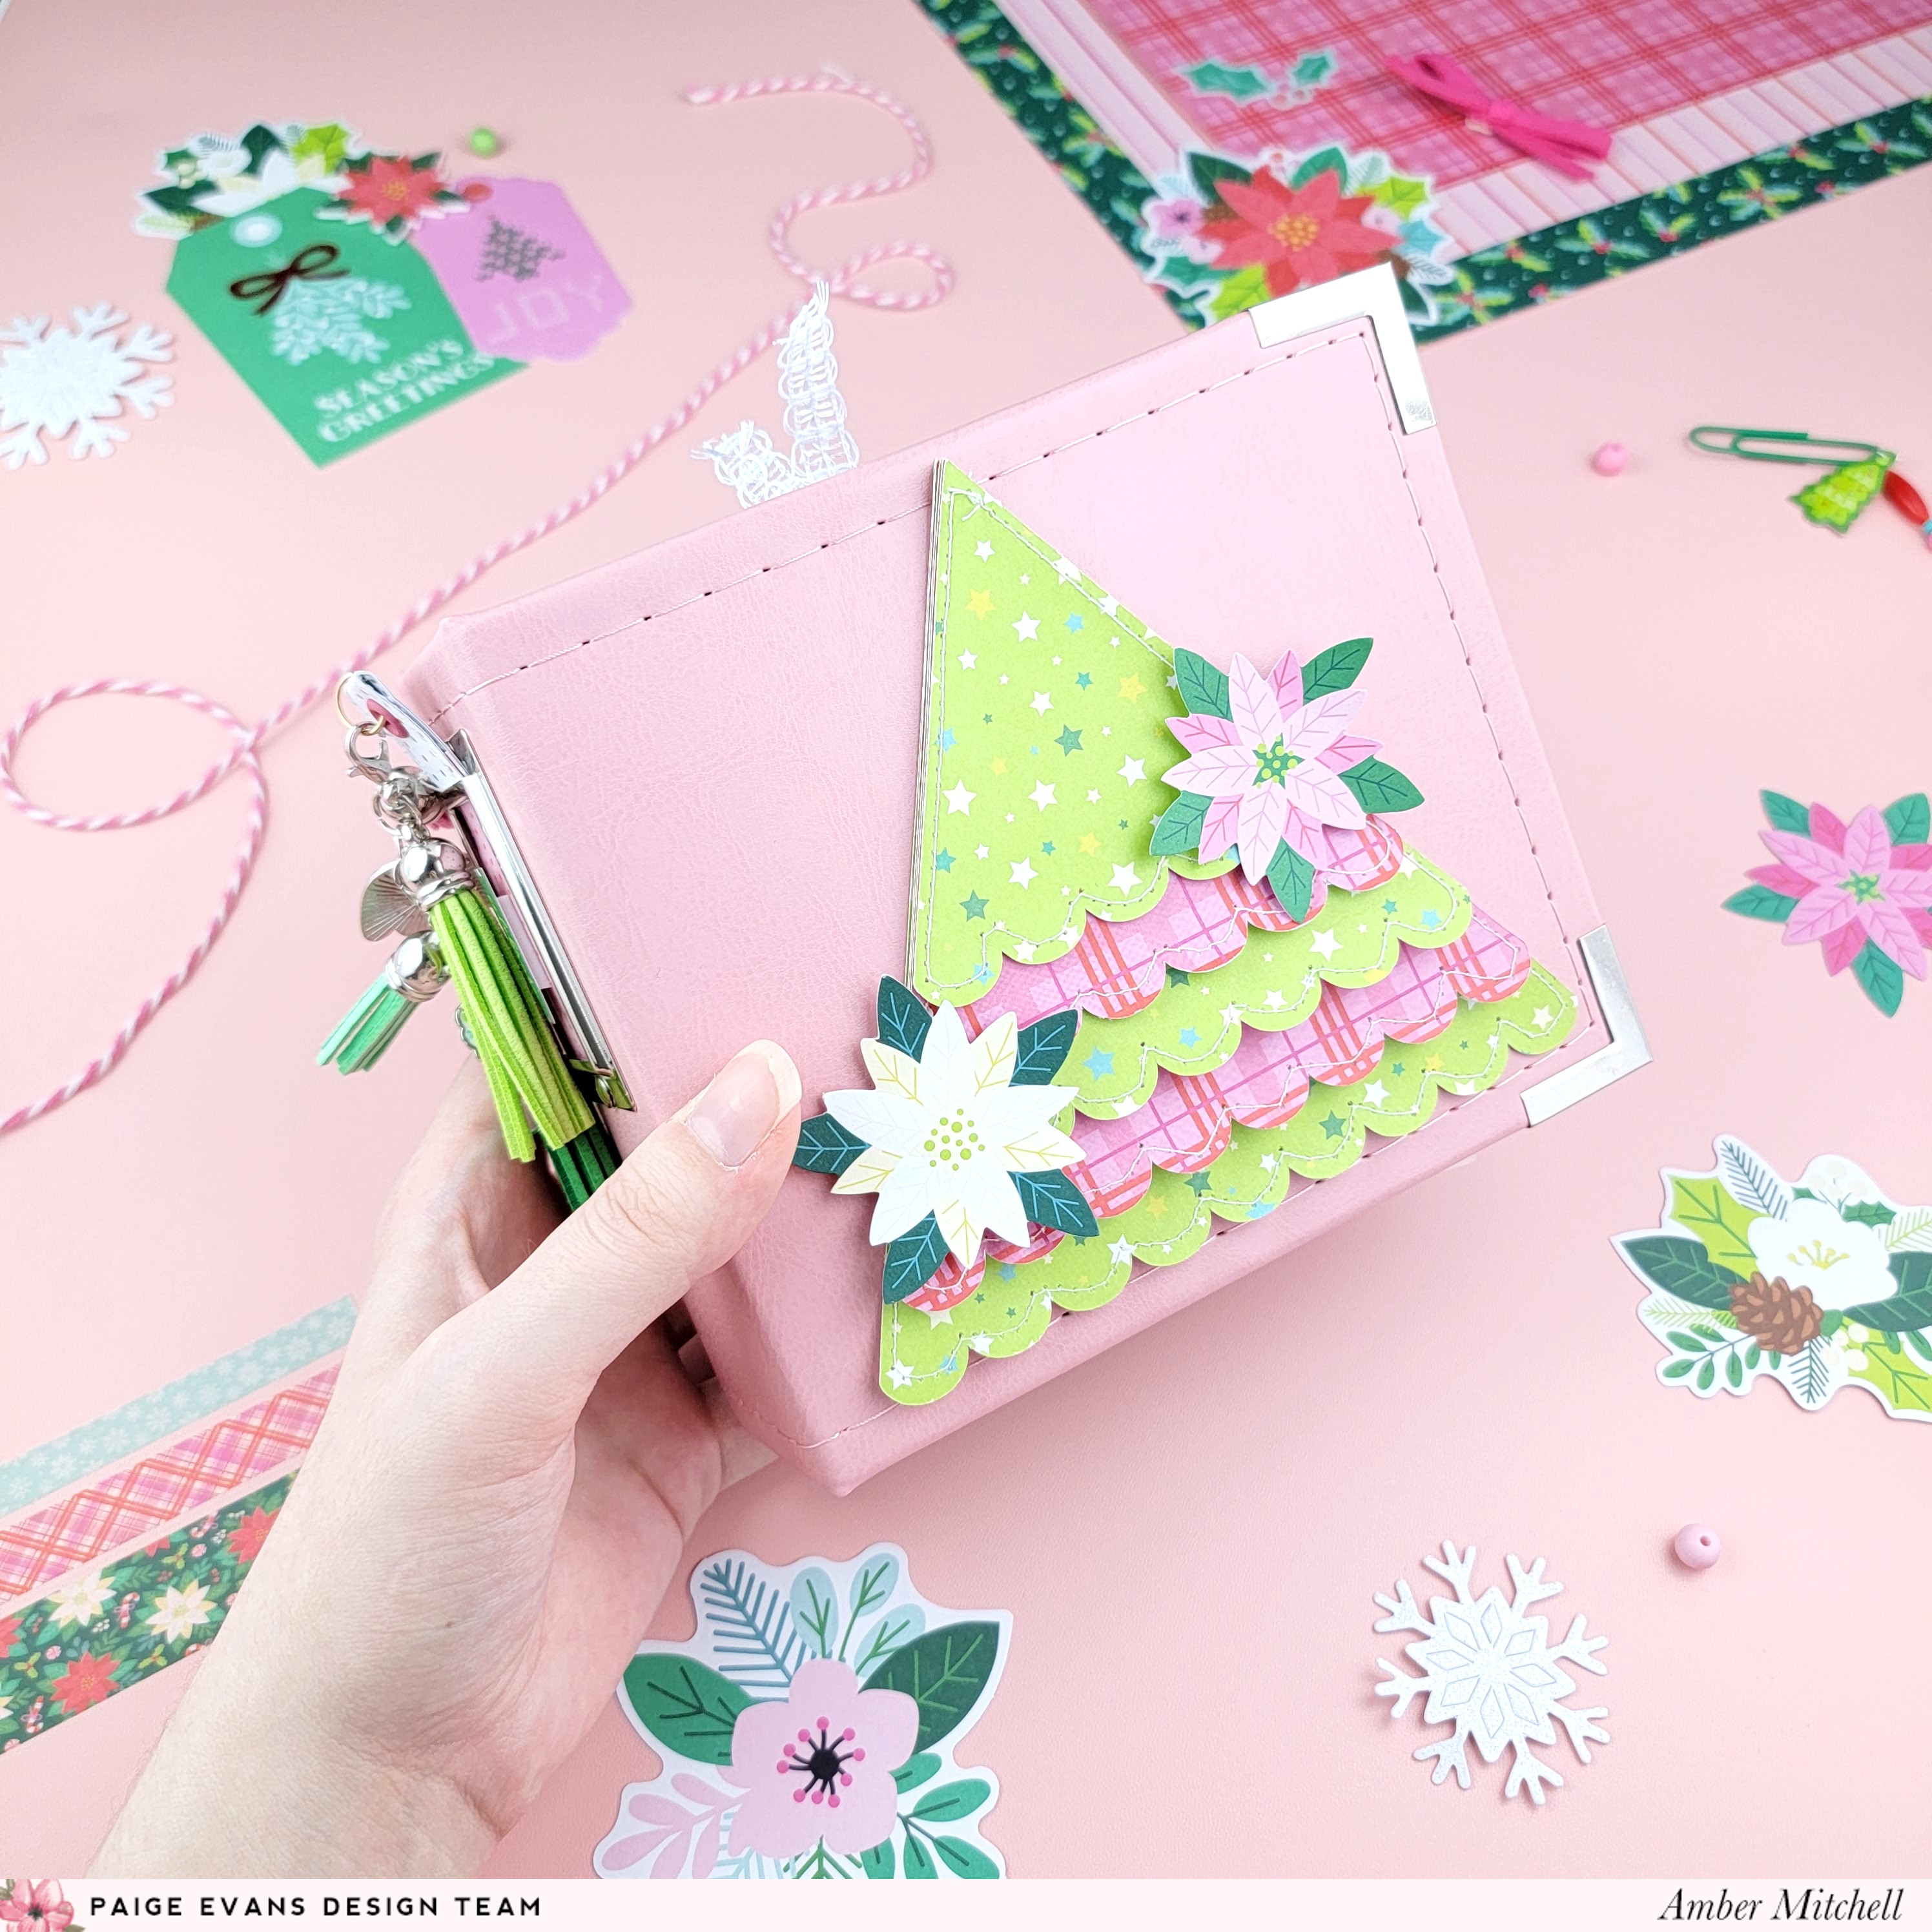
For the base of this album, I used a pink 4x4 Mini Album. The light pink shade of this album matched the soft pastels in this collection perfectly! I decorated the cover of the album using a Layered Christmas Tree cut file from the 25 Christmas Cut Files by Paige. This cut file was originally designed to be used as a mini album, so I removed the holes at the top of the trees using my Cricut software and then cut the layers on two, alternating patterned papers from the 12x12 Paper Pad. I then layered the pieces and adhered the entire structure to the front cover. To finish off this Christmas tree, I added two flowers from the Floral & Snowflake Die Cuts. For the label on the spine, I created an insert by trimming a piece off of one of the cards in the Boxed Cards set. I then created a tab at the top using some scrap paper that I folded over and machine stitched into place. I then used a Crop-A-Dile to add an eyelet that I attached some of the Tassels to.

This album turned out to be much chunkier than I had originally planned! I just love adding dimension where and when I can and sometimes that gets the better of me! On the bright-side though, that means that this album has a ton of room for photos and journaling and all types of documenting!

To create the title page, I used a clear 4x4 photo sleeve. I added a white photo mat to it then used the Thickers to spell out “CHRISTMAS” staggered down the page. I used some stickers from the Sticker Book and Foam Stickers to brighten up the page and added a tab to the outermost edge. For extra flair, I added one of the Paper Clips to the top.

I love adding half circle pages to most of the projects that I make these days. They are just so simple to make and bring a lot of character to any project. I made two of these pages for this album. Each one has two photo mats - one on the front, and one on the back. I used the Mini Thickers to add titles to the inner tabs of each page and added extra embellishments in the empty spaces.

Another fun technique I included in this album are tuck in pages. I used a small white coin envelope from my stash, matted it with patterned papers from the 6x8 Paper Pad, and then punched holes along the inner edge to add it to the album. I then added a tag from Paper 1 to the pocket. I also created a different pocket page using a card from the Boxed Cards. I first trimmed the card so that it would be the same size as the other pages, and then, using a 2-inch circle punch, created a divot on the edge. I then added a tag from the Ephemera Die Cuts to the inside of it. This is a great way to add more space for extra photos and hidden journaling spots!

For some added fun, I included a couple of interactive pages. The first is a shaker pocket that I created using a 4x4 Photo Sleeve. I added the sequins from the Acrylic Sweaters & Sequins set to it, along with a few wood veneer Christmas trees from my stash, and then machine stitched along of the edges to seal it closed.


For documenting those larger, more memorable moments, I included a couple of pages with larger photos. One features a large border frame around it with a bow Ephemera Die Cut on top to make it look like a present box. I also included a few empty photo sleeves in the back of the album in case I need extra space once I start documenting the holiday season!


Also, to break up some of the pages, I included a few decorative pages. I created one by trimming down a 4x4 piece from the Floral Transparency sheet. I love the accents of foiling on this!


Thanks so much for stopping by my post today, I’ll see you next time with another fun project!

SUPPLIES: Patterned papers, stickers, Thickers, die cuts, paper clips, tassels, embellishments: SUGARPLUM WISHES; 4x4 Mini Album; 4x4 Photo Sleeves; Cut file: Layered Christmas Tree by Paige Evans

Location: California, USA / Blog: Happy Crafty Studio / Instagram: @bambidearr / YouTube: bambidearr / Pinterest: bambidearr


Post a Comment