Story Time Layout by Bea Valint


Saturday, June 30, 2018

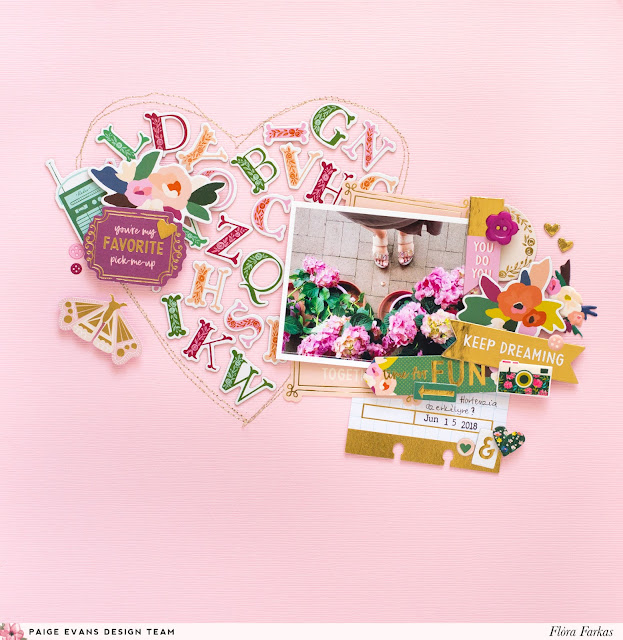
I want to take a second to say how much of a joy it has been to have Bea Valint on my design team for the past year! She is talented beyond measure, a true joy to work with, and a fantastic designer. She will be missed and we wish her all of the best in life and her scrappy endeavors! Here is Bea's last design team member layout, and it's a stunner of course!
Hello ladies! I’m so excited to be back with a new layout using Paige's Bend Up Butterfly cut file! This type of cut file is something that I always wanted to try out. I love the elegant and airy look of the bent wings and how the colors pop out underneath.
I used white cardstock as my base and cut only the upper half of the design using my Silhouette Cameo 3. I bent up the wings and backed the butterflies with several patterned papers from Turn the PageOh My HeartTake Me Away, and Fancy Free.

I placed the photo at the center, layered patterned papers behind it, and adhered Washi Tape to both sides. To create the Story Time title I mixed and matched Thickers from Paige’s collections.

I've had the bunny ephemera piece and the snail sticker waiting for me to use in my stash for a while. They are from the Turn the Page collection and I’m so happy they found a home on this page. They look darling here and are perfect for the topic of story telling!

To finish my layout I added journaling and dropped black paint around the edges. I hope you like my layout inspiration! Thank you for stopping by! It has been so great being on this team!

SUPPLIES: TURN THE PAGE: Patterned Papers, Chipboard StickersPuffy StickersEphemera Die CutsWashi Tape BookOH MY HEART: Patterned Papers, ThickersTAKE ME AWAY: Patterned Papers, ThickersWood Veneer ShapesFANCY FREE: Patterned Papers, Thickers; white cardstock; Cut file: Bend Up Butterflies by Paige Evans; Die cut machine: Silhouette Cameo 3

Blog: myshinystudio.blogspot.com / Instagram: @beavalint / Pinterest: @valint7 /
Facebook: myshinystudio / YouTube: Bea Valint

10th Anniversary Layout for SCT Magazine


Friday, June 29, 2018

The Summer 2018 issue - which also happens to be the 50th issue! Huge congrats! - of Scrapbook & Cards Today Magazine is out on the shelves now and I have two layouts inside. Here is the first, a page dedicated to our 10th anniversary.
First up is a process video so you can learn how to make this layout from start-to-finish:

I started by trimming two sheets of Pick-Me-Up Paper 10 into 1" columns and then rolled each strip up into a tube, secured with super sticky double-sided tape. This process took a long time and, not gonna lie, my fingers were numb by the time I made the 100+ tubes. It's all worth it in the end!
I cut out a heart from white cardstock using my Silhouette Cameo 3, cut out the inside section with a craft knife, and placed the tubes around the edges. Once in awhile I turned the heart over and trimmed off the excess with sharp scissors. It was a little difficult to go around the curves, I really had to sandwich the tubes in there, but with a bit of force it worked. I promise this layout is fun to make though lol! I backed the finished heart with Paper 09 and adhered the entire piece onto Paper 16
To make the title I used a mix of the Pick-Me-Up Thickers - white foam Mini Thickers & the Chipboard Thickers as well as adding the year with number Stickers. I found a few floral embellishments in the Ephemera Die Cuts and Chipboard Stickers to tuck around the edges and then machine stitched twice around the heart for added texture and to secure everything in place.
I placed our photo on the left side of the heart, trying not to cover too much of the rolled paper tubes - don't want to hide all that hard work! :) I placed several sentiment paper Stickers and Chipboard Stickers along the left edge of the picture and wrote journaling on a Journaling Spot which I tucked under the left side of the heart. There is a bit of washi tape tucked under the edge as well which you can see how I did that in the process video above.
Even though this layout took a long time to make, I really love the results - it was worth it for such a special occasion! 10 years of marriage!
Be sure to visit the Scrapbook & Cards Today Magazine website and download the Summer 2018 issue for free! How awesome is that?!

Happy Cards by Stefanie Ried


I know that whenever I give my design team members a challenge they will be up for the task and create something amazing! This is the first time I've asked Stefanie Ried to make cards and OF COURSE, they are beautiful. Who wouldn't love to receive a handmade card by Steffi?!
For my assignment I created two cards with embellishments from the Pick-Me-Up collection. And it was not so easy for me. Yes, really :) I rarely make cards so it was a challenge. Especially how do I start?! Mini albums? That's not so hard for me. I design many small pages there. So to begin I used white cards as I often use in my layouts. This makes the colors of the embellishments stand out the most.
The cards are 4x6". I have used a favorite technique on the first card: with my sewing machine I drove a few times along the border. Then I decorated with StickersPuffy StickersChipboard Stickers, etc. In the middle I created a sentiment with the white foam Mini Thickers.

Since I already had the Mini Thickers in my hand, I created the background on the second card with them. Then I added just a few Ephemera Die Cuts and the card was done!

I hope you are inspired to try creating something out of your comfort zone! Thank you for stopping by!

Blog: steffiried.blogspot.com / Instagram: @steffiried / Pinterest: @steffiried / Facebook: stefanie.ried.96 YouTube: Steffi Ried

Summer School Layout by Audrey Yeager


Wednesday, June 27, 2018

Audrey Yeager always thinks outside of the box when it comes to cut files! Here is her latest awe inspiring design team layout!
Hi friends! Today I am using the Alphabet Background cut file for this "Summer School" page.

It seems that even when my kids are out of school for the summer, they still like to pretend they are in it! Of course my older child is always the teacher! I used Pick-Me-Up Paper 05 to cut my letters from and glued it to a white cardstock background. I fussy cut parts of it out, and there was a "C" and a "K" right next to each other which happen to be my kids' initials! So I placed them on the left of my photo.
My photo is matted with a 6x6 paper from Pick-Me-Up and embellished with chipboard and stickers from that collections as well. I also used some puffy stickers from the Fancy Free collection.

Finally, to add a bit of movement, I added some fussy cut and die cut paper airplanes fromTurn the Page Paper 22. The title is made with the Pick-Me-Up foam Mini Thickers and the whole thing is finished with some mist splatters and hidden journaling on the "Notes" card.

Thanks so much for stopping by today!

SUPPLIES: PICK-ME-UPPaper 05Paper 136x6 Paper PadChipboard StickersStickersMini ThickersTURN THE PAGEPaper 13Paper 22Journaling SpotsFANCY FREE: Puffy Stickers; white cardstock; Cut file: Alphabet Background by Paige Evans; Die cut machine: Silhouette Cameo
Blog: audreysreflection.blogspot.com / Instagram: @audreykit1 / Pinterest: @audreykit /
Facebook: Audrey L. Yeager  / YouTube: Audrey Yeager

Hey Girl, Hey Sugar Layout for JOANN


Tuesday, June 26, 2018

This blog post is sponsored by JOANN.
I'm so excited to share my next layout made with supplies that I found at JOANN stores!
There is a large selection of open stock patterned papers and I found several from my Fancy Free, Take Me Away, and Oh My Heart collections. Of course I'm always drawn to flowers so that's where this layout started. I fussy cut all of the flowers and leaves, large and small, from the Oh My Heart Paper 06 open stock paper.
I added hand stitching details to all of the larger flowers and leaves. I simply poked holes along the designs already printed on the flowers and then chose colors of embroidery thread to match. I used a backstitch and all six strands of thread. It took about 3 hours to add all of the hand stitching if you're curious :)
With the flowers finished I began working on the background. I splashed white acrylic paint and watercolors over the periwinkle Oh My Heart Paper 15 open stock paper and let it dry. The paint warped the paper a bit so I ran it two times through a Heidi Swapp Minc machine to flatten it.
I tore off the top half of the floral Fancy Free Paper 02 open stock paper and applied all of the embroidered flowers to it using super sticky double-sided tape. Next I tore a piece of the rainbow striped Take Me Away Paper 04 open stock paper and tucked it underneath - I adhered the entire block to the top of the periwinkle paper. Then came the photo which I tucked underneath the paper layers and scattered more fussy cut flowers around. For the title I used two sentiment stickers from the Paige Evans 30-Page #StickerBook. The finishing step was the journaling which I wrote on the right edge.
 I hope you are inspired to check out the open stock papers at your local JOANN store and see if you can add hand stitching details to fussy cut images for extra pizzaz! Thanks for joining me today! I'll be back next month with another layout for JOANN :)

SUPPLIES: Oh My Heart Paper 06 and Paper 15 open stock papers; Take Me Away Paper 04 open stock paper; Fancy Free Paper 02 open stock paper; Paige Evans 30-Page #StickerBook; white acrylic paint; watercolors; embroidery threads; journaling pen; Heidi Swapp Minc machine

Alphabet Heart Layout by Flóra Farkas


The products Flóra Farkas used on her newest design team layout perfectly match the photo she chose! It's so sweet & lovely!
It’s Flóra here with my latest scrapbook layout created with the Pick-Me-Up collection. The starting point of my layout was a photo and its special color palette. Love the warm peach-pink-deep purple colors with green.
I chose a light pink textured cardstock for my background. I decided to create a background element from the Chipboard Thickers. I gathered the matching pieces and adhered them in a heart shape. Lately, I love playing with alpha stickers and using them as embellishments. I really love the messy look that I can create with the pell-mell placed alphas. I added stitching around the heart for contrast and so the heart shape is more clear and pops out.

I adhered my photo with foam tape and created a lovely cluster on the right. I used green, pinkish and golden elements from the Chipboard StickersPuffy StickersEphemera Die CutsStickersRub-Ons, and Journaling Spots. I carefully planned the whole cluster and built up the layers. This is one of my favorite parts of scrapbooking.

This color combo is so gorgeous. I would never have picked it myself but the photo made me try something new. I hope you like my new page and will inspire you to use your alpha stickers in an unusual way. Thanks for stopping by!

SUPPLIES: PICK-ME-UPChipboard StickersPuffy StickersEphemera Die CutsStickersRub-OnsJournaling Spots
Blog: pinkandpapergift.blogspot.com Instagram: @floramfarkas Pinterest: @floramfarkas
Facebook: pinkandpapergift YouTube: Flora Monika Farkas

Rainbow Layout by Lorilei Murphy


Monday, June 25, 2018

I love a good rainbow and this layout by design team member Lorilei Murphy is just the ticket to bring a smile to our faces!
Is there anything happier than rainbows? Well maybe puppies! I really can't say how the idea for this page popped into my head, but something about Paige's Rainbow cut file made me think of a set of photos I had taken of Hannah when she was little, so I went with it!
I cut the rainbow from white cardstock using my Silhouette Cameo 3 and I made sure to keep all the bits that come with the rainbow organized so I could use the fill-in cuts that Paige provides. I used watercolors and painted each strip for the rainbow before adhering them to the main rainbow cut file.

I printed my photo on letter size photo paper and then trimmed around Hannah. I popped the photo and the rainbow up on pop dots and foam tape for added dimension and shadows. I find when I make a white page, the shadows add so much to give it some pop!

I painted a piece of white cardstock with Vicki Boutin Iridescent Glaze and punched stars from it. I scattered them above and below the rainbow and added some little sequins I found in my stash. The white Mini Thickers from Pick-Me-Up made the perfect, sweet title!

SUPPLIES: PICK-ME-UPMini Thickers; Cut file: Rainbow by Paige Evans; Die cut machine: Silhouette Cameowhite cardstockwatercolorssequinsVICKI BOUTINIridescent Glaze
Blog: roseyposeystudio.com / Instagram: @roseyposey_studio / Pinterest: @roseyposeygirl /
Facebook: 
Rosey Posey Studio / YouTube: Lorilei Murphy

Darling, You're Beautiful Layout for June Hip Kit Club


Sunday, June 24, 2018

Here is my second guest designer layout for the June Hip Kit Club!
Check out the process video so you can see how this layout came to be:

I started by trimming patterned paper strips to 1", 1.25", 1.5", 1.75", and 2" x 3" and then folded the strips in half. I also trimmed cardstock strips and made folded pieces of the floral transparency paper. This is a great technique to use up scraps! To make the paper strips stay folded permanently I machine stitched along the top edge of each one using white thread.
Next I grabbed my chosen background paper from the kit - a light pink plaid, and started placing the paper pieces to find an arrangement I liked. I decided to have more of them at the top and layer them down towards the bottom. I took a picture with my phone and then referred back to the photo to adhere everything in place. I used a bone folder and scraped it down the page to flatten the folds a bit more.
Then I added a pair of photos of cute Jane at the bottom and tucked in embellishments under and around and by the paper strips and the photos. I placed the periwinkle "darling, you're beautiful" sentiment at the top and mirrored it with a "beautiful" puffy sticker at the bottom. I wrote my journaling with a black pen to finish it up!
I hope you have found a technique to inspire you and will check out the incredible Hip Kit Club! They provide so much inspiration every month from the design team members in a wide array of styles so you're sure to find something that clicks with you!
SUPPLIES: June Hip Kit Club kits; Sewing machine: Brother; Thread: Coats & Clark

Mixed Media Cards by Zsoka Marko


Saturday, June 23, 2018

Can you believe Zsoka watercolored these butterflies to look like the ones from Turn the Page?! Check it out along with a second card featuring mixed media and my cut files!

Hey there crafty friends, Zsoka here, sharing a couple of cards I've created for the Paige Evans + Silhouette Design Team! I'm rarely in the mood to do mixed media but I felt like that's the only thing I haven't done on cards for this DT! So I thought I'd do something different now. I chose two cut files to work with, the Butterfly Background cut file and the Cross Stitch Heart cut file. I created two 5x5" squares in Silhouette Studio so I knew how big my designs should be. Then I cut both of them from white cardstock using a Silhouette Cameo.
Now if I'm honest, it would have been simpler to use a pencil and the sketch function of the Cameo, but I have no idea where my pencil holder is... so I went this way. I used the white cardstock cut out as a stencil and simply drew in the butterflies with a pencil. Next, I painted the butterflies with the gorgeous new Pinkfresh Studio liquid watercolors. I tried to match the colors to the Turn the Page collection.
Once done, I added a light grey water color wash around the butterflies for contrast as well as some black dots. I created a 5.25x5.25" top folding card base, attached a pink patterned paper in the same size, then glued my watercolored panel on top. 
To finish off this card, I added a few butterflies I fussy cut from Paper 04 in the collection and a sentiment I cut out from an Ephemera Die Cut.
Oh, there was another reason why I decided to go with mixed media! I just remembered now ha! I bought some storage for my wall and rearranged my RASKOG, which had most of my paints and mixed media supplies in it. While reorganizing everything I started feeling guilty for having sooo much stuff I don't use... Hence, mixed media projects ha! 

For my second card I chose Shimmerz Dazzlerz to use with my stencil. I love this color and I had the same in Texturez which I had to throw away because it completely dried out. I was happy this one was still OK! I found a patterned paper in the Turn the Page collection that was pretty much the same color, so I decided to go for a tone-on-tone look.
Again, I made a 5.25x5.25" top folding card base, adhered a slightly smaller light pink patterned paper on top, then added my mint panel. 
I created two clusters of flowers for which I used some die cut pieces as well as some I fussy cut from Paper 15. I glued them down in layers, adding foam adhesive here and there to create dimension. For my sentiment I took apart one of the Pennant Paper Clips and used the sentiment from that.
That's it! I hope I could inspire you to not shy away from mixed media on cards! Thanks for stopping by today! Have a wonderful day!


Blog: apocketfullofscrap.blogspot.com / Instagram: @zsokamarko / Facebook: Zsoka Marko / YouTube: Zsoka Marko

This Sweet Girl Layout by Missy Whidden


Friday, June 22, 2018

When I opened up this email by design team member Missy Whidden my jaw immediately dropped to the floor! IT'S GORGEOUS!!!
Hey, friends! Missy here, and I based this layout around these gorgeous flowers. I used Paige’s new Layered Flower cut file, and it’s just amazing. I used a ton of patterned papers from Pick-Me-UpOh My Heart, and Fancy Free to create them. It’s super easy and fun because you simply choose all the papers you want, cut each flower separately, and then layer them all together. Bending up the edges creates some incredible dimension. I just love how they turned out! I tucked a cute photo in the middle of the flowers and added some mixed media to the rest of the page. I used the Pick-Me-Up Mini Thickers for my title, and I used Distress Oxides inks to add some color to the bottom of the letters.
These really are easy to put together. I added some matching buttons to the centers and they were complete. I sorted through all the Pick-Me-Up embellishments and used color coordinating bits and pieces from the Haberdashery Multi-PackChipboard StickersStickers, and Rub-Ons. I love the tone-on-tone look against the mixed media.

To add color to the background, I first added gesso.  I used Distress Oxides inks  and simply rubbed the ink pad on the paper in a downward motion. I used a few different blues, pinks, and yellows and then spritzed it with water. I held the cardstock up to let all the color drip down the page. It turned out so cool!

Here you can see the beautiful colors and how all the small embellishments match so perfectly.  I even cut a piece of the Cut Apart Vellum Paper to use on the blue section.

You simply must check out this Layered Flower cut file! It made this layout come together really fast and I love that it allowed me to use so many patterned papers together. I hope this has given you some fun ideas to try on your next layout! Thanks for stopping by!

SUPPLIES: PICK-ME-UPPaper 01Paper 04Paper 05Paper 07Paper 08Paper 13Paper 14Paper 15Paper 17Paper 18Paper 23Chipboard StickersStickersRub-OnsMini ThickersCut Apart Vellum PaperHaberdashery Multi-PackOH MY HEART: 12x12 Paper Pad, Paper 02Paper 05Paper 09Paper 15Paper 22Paper 24FANCY FREE: 12x12 Paper Pad; Cut file: Layered Flower by Paige Evans; Die cut machine: Silhouette CameoinksgessoHeidi Swapp Gold Color Shine
Blog: littlenuggetcreations.blogspot.com  Instagram: @missywhidden  Pinterest: @missywhidden
Facebook: missy.whidden  YouTube: Missy Whidden
Paige Taylor Evans © // Quinn Creatives DESIGN