Soaking Up Life Layout by Julie Taylor


Thursday, January 31, 2019

Hi friends, Julie Taylor back with you again today sharing a new layout using the Whimsical collection and Paige's Umbrella cut file.
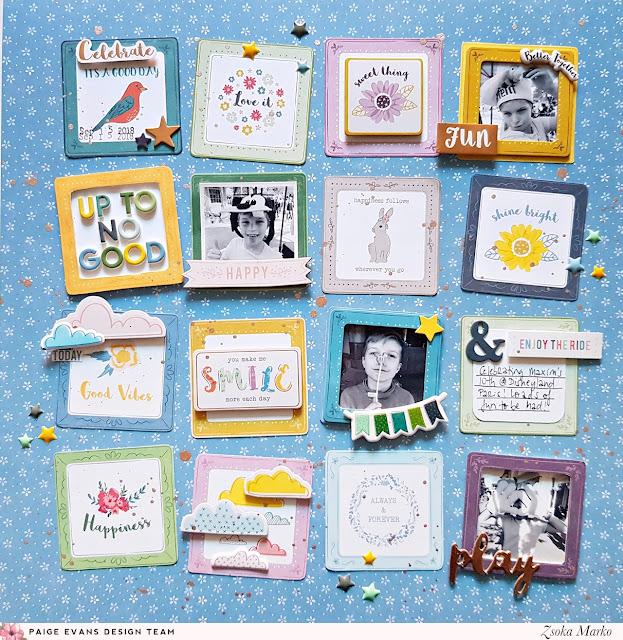
I first added a sun ray and storm clouds to my background with inks and then stitched some details to emphasize this, adding clouds fussy cut from Paper 15 and cloud Chipboard Stickers.

I cut my umbrella from white cardstock and backed it with paper from the 6x6 Paper Pad, again adding stitching to highlight the cut file. I added the umbrella with foam tape and put my photo cluster under it to the right, layering with frames cut from Paper 07 and a banner from Paper 08 as well as one of the gorgeous Tassel Paper Clips.

The quote on the left is one I found on Pinterest and I spelled it out using a bit of stamping and the fabulous Foam Mini Thickers. I finished my layout with a Sticker from the Pick-Me-Up collection and a couple Enamel Hearts.

Thanks for looking today, until next time!

Instagram: @julie9699 / Facebook: Julie Taylor

Moment Layout by Stefanie Ried


Wednesday, January 30, 2019

Hello, its me, Stefanie Ried and I want to share with you my next layout! For this page I wanted to try another color combo so I searched for some inspiration and found so many spring colors. Perfect for this page :) I used a lot of yellow, peach, light blue, and green. I like it. So fresh!
I am always surprised by the endless possibilities offered by the great collections. For the layout I used the Whimsical 12x12 Paper Pad and punched out circles in different sizes.

With a light blue ink pad I colored the white cardstock background and after that I have punched out a larger circle then backed it with yellow paper. Then with many yellow stickers, die cuts, and enamel shapes I filled it in. I placed a small rosette at the bottom of the layout and added my photo.

Thanks for stopping by and have a nice day!

Blog: steffiried.blogspot.com / Instagram: @steffiried / Pinterest: @steffiried / Facebook: stefanie.ried.96 YouTube: Steffi Ried

XOXO Layout by Lady Nany


Saturday, January 26, 2019

Hi everyone, it's Lady Nany here with a new layout using the Whimsical collection and Paige's XOXO cut file that I found ideal to remember my stay in Chile with my boyfriend at the beginning of the year. My idea for this page is inspired by love. I decided to also use the Wonky Heart Background in the form of stencil, cutting it from white cardstock with my Silhouette Curio.
For the background I chose the hearts paper with gold details from the 12x12 Paper Pad and I covered it with white gesso using the stencil all over the surface. Once dry, I colored with watercolors in pink tones, staining and spreading drops on the area where I would put the XOXO file I cut from Paper 17. I backed the flowered areas with white cardstock to highlight them and created depth using foam tape.
For the photographs I made a composition of frames with vellum paper and cut outs from Paper 07 before sticking it between the letters of the file with foam tape to also give them some volume. For decoration I combined flowers and hearts from the Sticker BookChipboard Stickers, and Ephemera Die Cuts, ending with the title combined with Foam Mini Thickers. I drew a few crosses at the edge of the file with a black pen and I wrote the date and journaling. And that's all friends!
I hope you find inspiration in this project to create your own designs. A little secret that helps me a lot is to go to Paige's Silhouette gallery and visualize the cuts to develop ideas. Thank you very much for visiting, see you next time!

SUPPLIES: WHIMSICALPaper 07Paper 1712x12 Paper PadStickersChipboard StickersFoam Mini ThickersEphemera Die Cutswhite cardstockgesso; Watercolors: Prima - Pastel Dreams; Cut files: XOXO and Wonky Heart Background by Paige Evans; Die cut machine: Silhouette Curio
Blog: Lady Nany Art / Instagram: @ladynanyart / Facebook: Lady Nany Art / YouTube: Lady Nany Art

Up To No Good Layout by Zsoka Marko


Friday, January 25, 2019

Hello crafty friends, Zsoka Marko stopping by today to share a new layout I've created for the Paige Evans Design Team! A couple of months ago I fussy cut all papers from the Whimsical collection that could be fussy cut and Paper 13 with all these cute frames was one of them. I generally don't like linear layouts but I do make a couple of grid layouts every year anyway. I wanted to create a boy(ish) page for my layout so I didn't use the pink frames, only the greens, yellows, blues, and purples.
I glued down all my chosen squares at a different angle so they don't look so uniform. I printed four tiny photos of my kiddo clowning around in Disneyland. On some of them I added another frame - I found one in the Chipboard Stickers, one in the Stickers, and the third one I fussy cut from one of the  patterned paper frames I had left. I also fussy cut the frame for the square I used for my title and popped it up for some dimension.
Then I went through all the embellishments in the Whimsical collection and picked out the ones that I thought could work. I made it my mission not to use flowers on this layout haha! It's difficult when there are so many gorgeous flowers in the collection! Obviously some of the squares do have floral images but that's OK. I just didn't want to add any other floral embellishments.
I tried to find something to decorate most frames with, whether it be Chipboard StickersStickersEnamel Shapes, or Puffy Stickers. I love the mix of textures all these embellishments add to my page. I cut a piece of white cardstock for my journaling and glued it on top of one of the squares. I stamped the date and added some rose gold ink splatters and called it done!
That's it for today! Hope you like this layout even though it's not pink, nor does it have lots of flowers hehe! Thanks for stopping by today! Have a lovely day!

Blog: apocketfullofscrap.blogspot.com / Instagram: @zsokamarko / Facebook: Zsoka Marko / YouTube: Zsoka Marko

You're My Love Layout by Cristina Sales


Thursday, January 24, 2019

Hi ladies Cristina Sales here today! Here is my first project made this year for Paige’s cut file design team. If any of you know me a little bit, you know how much I love flowers and creating watercolor backgrounds. So today I'm sharing with you a layout made with watercolors a wonderful Flower Group cut file by Paige!
I really love the 12x12 Paper Pad with foil elements so I chose a gorgeous pattern to use underneath the flower I cut with my Silhouette Cameo. When I saw this colorful striped paper I immediately thought of creating this kind of watercolor background by following each color in passing from one to another. I used the Prima - Pastel Dreams watercolors and spread them on a white cardstock background using a piece of recovery acetate and the packaging technique.
Some months ago I decided to find a little kitty to enlarge my family and when I finally found this wad of red fur that had been abandoned it was love at first sight for both of us. Each day he shows me his love and I love his sweet eyes. When the cardstock was dry I started to add my decorations. I used a doily lace paper and Whimsical embellishments like StickersChipboard StickersFoam Mini ThickersPuffy Stickers, and Butterfly Charms. To complete my composition I added some drops of gold shine and tangled gold thread.
I really love this page and the colors underneath the patterned paper. It’s really easy to do and so fun to play with so I hope to have inspired you to make your own and please share it with us in Paige's Happy Scrappy Place Facebook group!
Thanks for stopping by and see you in my next post!

Blog: Scrap and So On / Instagram: @cristina__sales / YouTube: Cristina Sales
Facebook Page: Scrap and So On / Facebook: Cristina Sales

XOXO Layout by Missy Whidden


Tuesday, January 22, 2019

Hey, friends! Missy Whidden here with a new layout featuring the Whimsical collection. Are you ever inspired by cut files? As soon as I saw Paige’s XOXO cut file, I knew right away how I would use it as a design on a layout. I cut it pretty big from Paper 17. I love that beautiful pink ombre. This cut file creates the perfect little spots to tuck in a few photos. I used two horizontal black & white photos since I wanted to add in lots of bright colors with some florals. I didn’t use any blue flowers, so I made that my main color on my mixed media background. It creates a great contrast.
I fussy cut the large orange flower clusters from Paper 03. The smaller purple ones are from Paper 14. Aren’t these the most beautiful tropical colors? I just love them together. On the background, I began with some clear gesso over the white cardstock. I then used a brayer to smudge down some light blue acrylic paint as a base layer of color. I used a few aqua spray inks over it to create some different shades. I also added yellow, gold, blue, and green splatters. I used one small Puffy Sticker here under the photo.
I used several of the Chipboard Stickers. I added in orange and yellow flowers and some leaves as well as the title. I love how this “The Happy Life” piece curves at the top of the big O. It was made for that area!
There were a few Rub-Ons that coordinated with my tropical vibe. I used this “Good Vibes” piece up at the top. The flowers were a wonderful match. These Rub-Ons go on so smoothly, even over gesso.
I hope this inspires you to begin a layout with a large cut file like this! It’s fun to use the cut file to help dictate where to place your photos and embellishments. It’s kind of like putting a puzzle together… plugging in just the right pieces in the right places! 
Thanks so much for stopping by!

SUPPLIES: WHIMSICALPaper 03Paper 14Paper 17Chipboard StickersRub-OnsPuffy Stickersgessoinkswhite cardstock; Cut file: XOXO by Paige Evans; Die cut machine: Silhouette Cameo
Blog: littlenuggetcreations.blogspot.com  Instagram: @missywhidden  Pinterest: @missywhidden
Facebook: missy.whidden  YouTube: Missy Whidden

Good Vibes Only Layout by Kim Jeffress


Monday, January 21, 2019

Welcome back to Paige’s blog! It’s Kim Jeffress here with a new layout using Paige’s fun Good Vibes Only cut file. I wanted to create a dramatic effect with the cut file so I cut it almost full size using some of Heidi Swapp’s Minc Toner Sheets. Once cut I ran it through my Minc using the gorgeous new Cheetah Minc foil. I then popped it up with pop dots and adhered it to the bottom area of my layout for some depth and dimension. Doesn’t it make a bold impact!?
I then went ahead and added some of the Heidi Swapp Ephemera in and around the cut file. I grabbed the Whimsical Foam Mini Thickers and added them in a semi circle around the sticker to create my subtitle. I love all the bright fun colors!
I then adhered that cute little yellow Butterfly Charm to complete my layout. I added hidden journaling on a tag and tucked it behind my photo. I added tape under the photo to keep the tag from slipping down under the photo.
It’s always fun way to create a layout with a large title. It sets the scene and makes a big bold impact! Be sure to check out the Good Vibes Only cut file and if this doesn’t suit the theme of your layout Paige has lots of other large titles that could work for you! Until next time!

SUPPLIES: WHIMSICALFoam Mini ThickersButterfly Charms; Die cut machine: Silhouette Cameo; Cut file: Good Vibes Only by Paige Evans
Blog: Glass Half Full / Instagram: @kimjeffress / Pinterest: @kimjeffress / Facebook: Kim Jeffress Designs / YouTube: Kim Jeffress

Pretty Love Great Layout by Stefanie Ried


Wednesday, January 16, 2019

Hello and welcome to another layout from me, Stefanie Ried! This layout is all about pennants. When I cleaned up my scrap room before Christmas, the Pennant Paper Clips from the Turn the Page collection fell into my hands. Do you remember them? I love them and wanted to create my own with Whimsical.
To make the nine paper clips I removed a few tassels from the Whimsical Tassel Paper Clips and glued them to my gold paper clips. Then I used papers from the 6x6 Paper Pad to make pennants - they are perfect for smaller motifs and have gold accents to match the gold paper clips.
I printed the photos in a small format and attached them to the paper clip. I sewed a border around the layout with my machine. Next I cut little slits in the paper with a knife and tucked the paper clips into the slits. I added foam squares under the pennants for dimension.
Thank you for stopping by and see you next time!

Blog: steffiried.blogspot.com / Instagram: @steffiried / Pinterest: @steffiried / Facebook: stefanie.ried.96 YouTube: Steffi Ried
Paige Taylor Evans © // Quinn Creatives DESIGN