
Hey everyone! My name is Niki Rowland and I’m thrilled to be here as Paige's cut file Guest Designer for April. I live in the UK and you can find me on Instagram as @nikiclairecreates and on YouTube as Niki Rowland. I have three projects to share today, two layouts and a mini album, and there is a process video for each one. I have used Paige's Go the Scenic Route collection for them all.
For my first layout I have used the Snow Cute cut file cut from white cardstock and I cut it again from the Go the Scenic Route blue paper, but the outline only, so I could backfill the snowflake. I added my photo to the O in 'Snow'. I then pierced holes and stitched around all the letters. I love how stitching on cut files looks.

I then cut the Snow Cute cut file three more times but much smaller. I also cut the outline only out of white loads of times, all in different sizes. I stuck these new white cut files all over a sheet of white cardstock to create a background with texture and interest. I trimmed it down and added a green border to my layout. I added the cut file raised on foam pads and then started embellishing. I picked out the green and blue tones from the embellishments. I have Chipboard hearts and frames, Ephemera Die Cuts, labels, and Puffy Stickers. I created two clusters on the layout with these layered embellishments, twiddles of thread, and I also added label stickers. I finished off with Enamel Dots and a few pretty sequins.
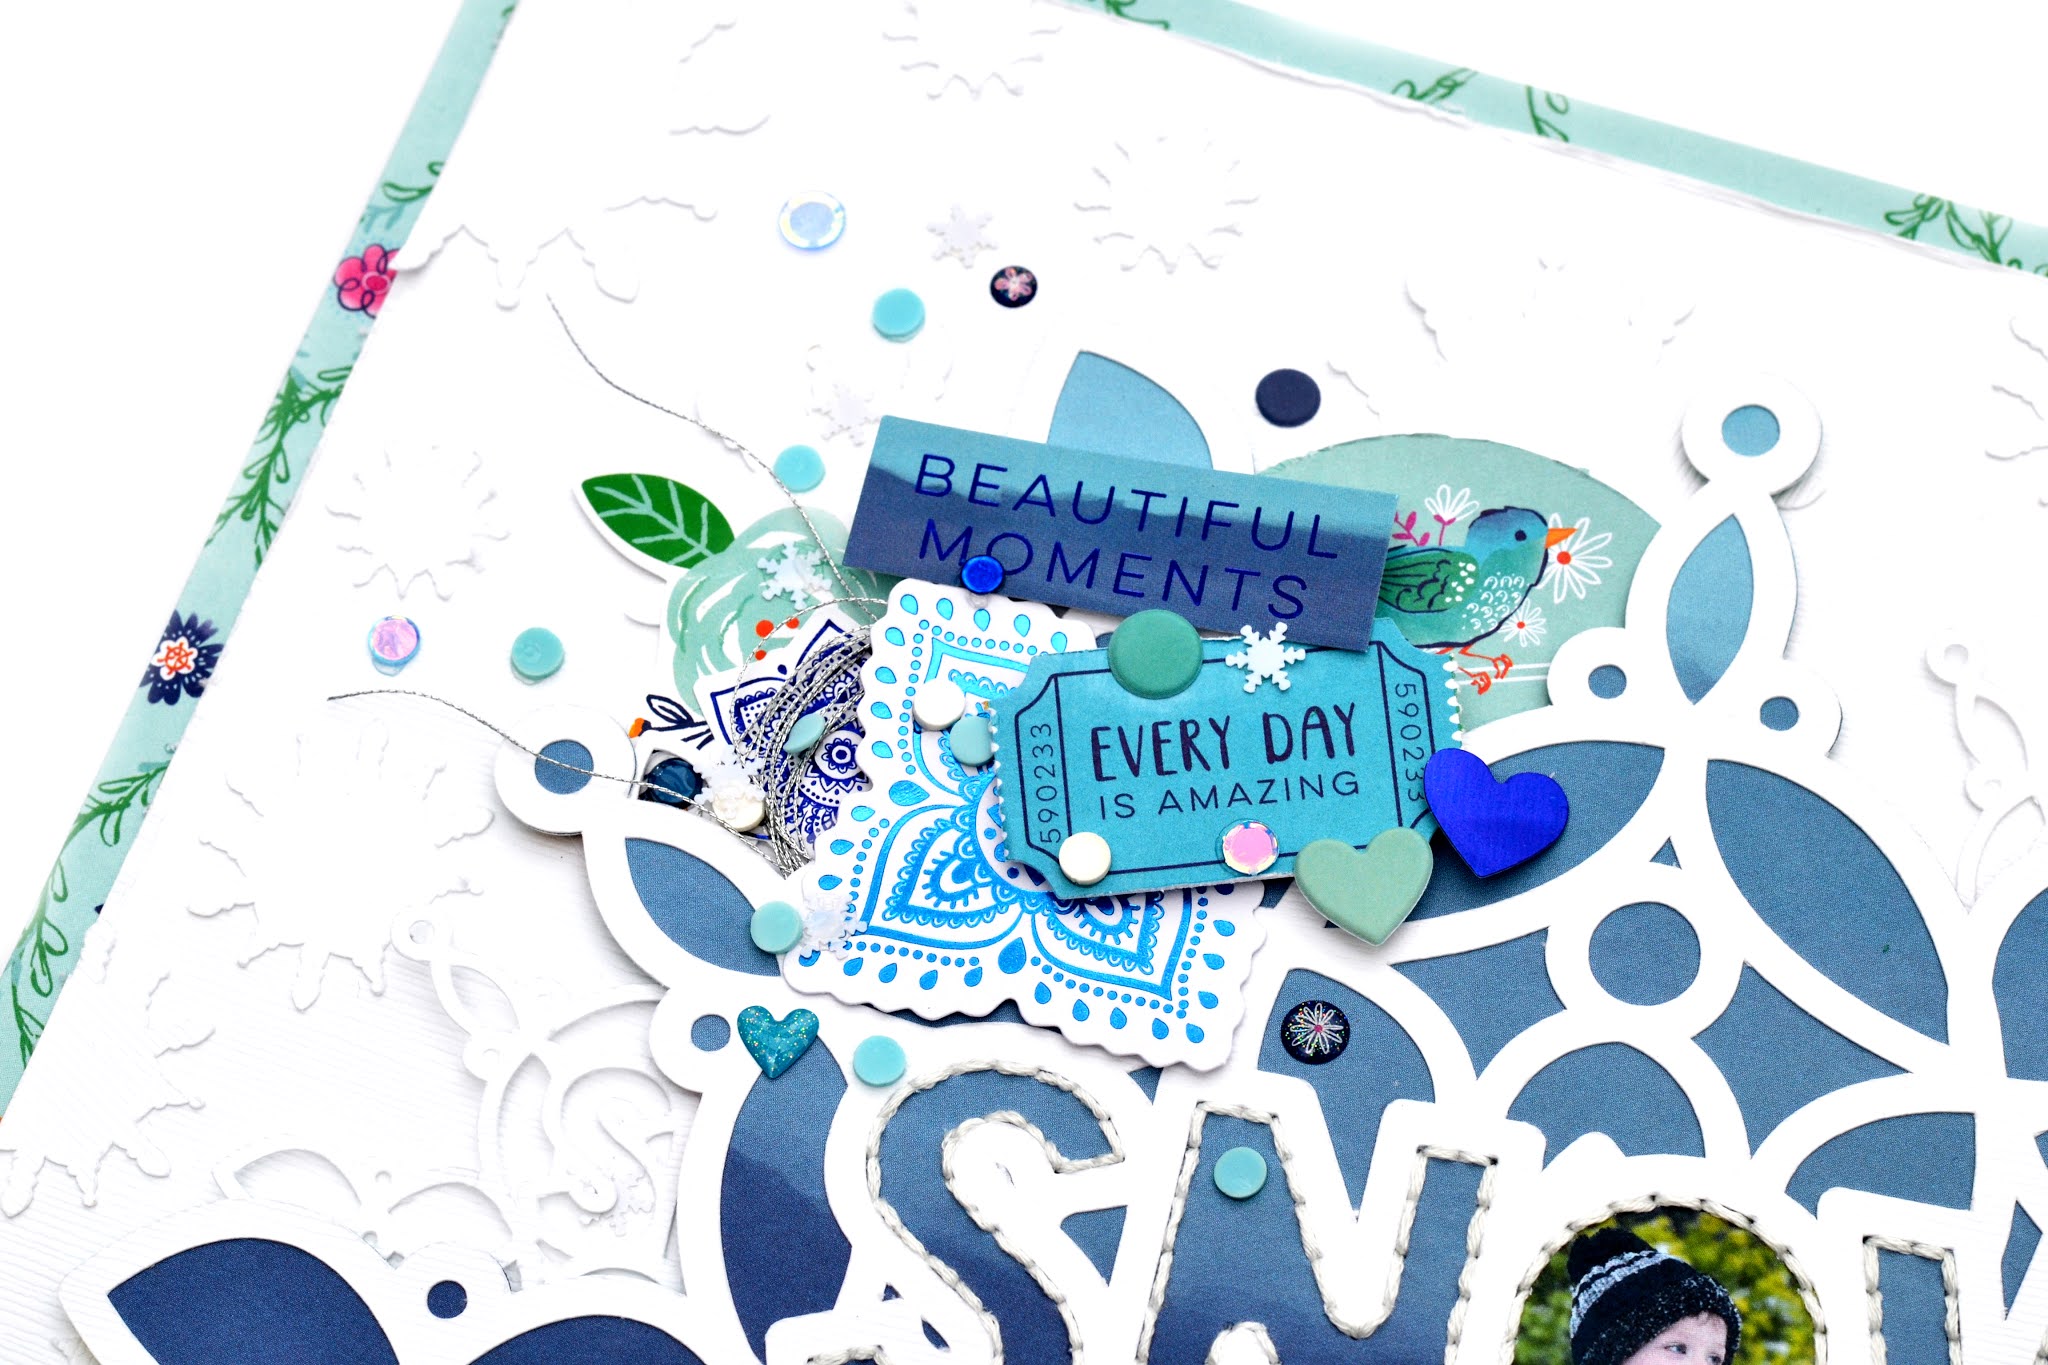
I love how this layout turned out just using the blues and greens from the Go the Scenic Route collection and the Snow Cute cut file! Here is the link to the process video: https://youtu.be/4IiQweqlSKg
For my second layout I have used the Homeschool cut file. I cut the cut file from white cardstock and backed it with white vellum. I then placed it on the most colourful patterned paper fromGo the Scenic Route I had! I LOVE this paper, it reminds me of swatches of water colour paint. I splattered it with white acrylic paint first (including getting it all over my dress!) and then layered the cut file on top together with two photos.

These photos are of my boys doing homeschool lessons, even though my two-year-old doesn't actually have to go to school, he absolutely had to get involved in an art lesson! I added clusters of embellishments around the photos and around the right side of the cut file. I've used Go the Scenic Route Chipboard Stickers, Cardstock Stickers, Puffy Stickers, and Ephemera Die Cuts, as well as some fussy cut flowers from another sheet of paper. I finished off with label stickers and the word 'chaos' that I added using Foam Thickers. I love how bright this layout turned out!

Here is the link to the process video if you would like to watch along: https://youtu.be/_AvoqoDdhvA
And finally, here is a mini album! I have used the Suitcase Mini Album cut file for the mini album itself and also used more cut files inside the album: Cactus, Cactus in a Teacup, Map, Geotag Heart, and Adventure.


I re-sized the cut file - this was a little tricky as this made the cut file wider than 12" and I can't cut any wider than that on my machine. So I cut it into pieces with the knife tool and created separate pieces with overlaps so that I could piece it together. I did this with the main part of the mini album and the concertina middle piece too, as this was also longer than 12".


I re-sized all the pieces together and cut the base out of white cardstock and the layers from Go the Scenic Route patterned papers. Assembling the mini album was super easy. The layers are sized perfectly so you literally just stick them on. I sewed down the pockets with my sewing machine.


I decorated and embellished the album with more patterned papers, fussy cut flowers, Chipboard Stickers, Cardstock Stickers, Puffy Stickers, Ephemera Die Cuts, and Enamel Dots. I used the Foam Thickers inside the album and added machine stitching to the suitcase straps and handles.


I created little pockets and photo books and flip ups inside the album as well as turning the three motifs on the fold out insert into shaker pockets with coordinating sequins.


I cut the other cut files listed above from white cardstock, but teeny tiny! I added these throughout the mini album.

This video shows you how I assembled the album and the insert, it then goes to a flip-through of my completed album, complete with around 40 photos! I really hope you enjoy seeing my completed album. I absolutely love it. Here is the link to the video: https://youtu.be/A37fC7HBFa4
Thank you so much for taking the time to look at my projects. Happy scrapping!
SUPPLIES: Patterned papers, stickers, die cuts, Thickers, enamel dots, embellishments: GO THE SCENIC ROUTE; white acrylic paint; white cardstock; Cut files: Snow Cute, Homeschool, Suitcase Mini Album, Cactus, Cactus in a Teacup, Map, Geotag Heart, and Adventure by Paige Evans


Congratulations on your guest spot Niki. Each project is a joy but I'm smitten with your mini album. So many beautiful details !
ReplyDelete