
Hi crafty friends! Amber Mitchell here on Paige's blog today to share with you a Christmas mini album that I created using the super fun and festive Sugarplum Wishes collection! This is the second project I've made using Sugarplum Wishes and I had such a blast that I've already moved on to making a third project! The colors in this collection are so vibrant and the corresponding patterns are so fun - I just can't get enough of it!
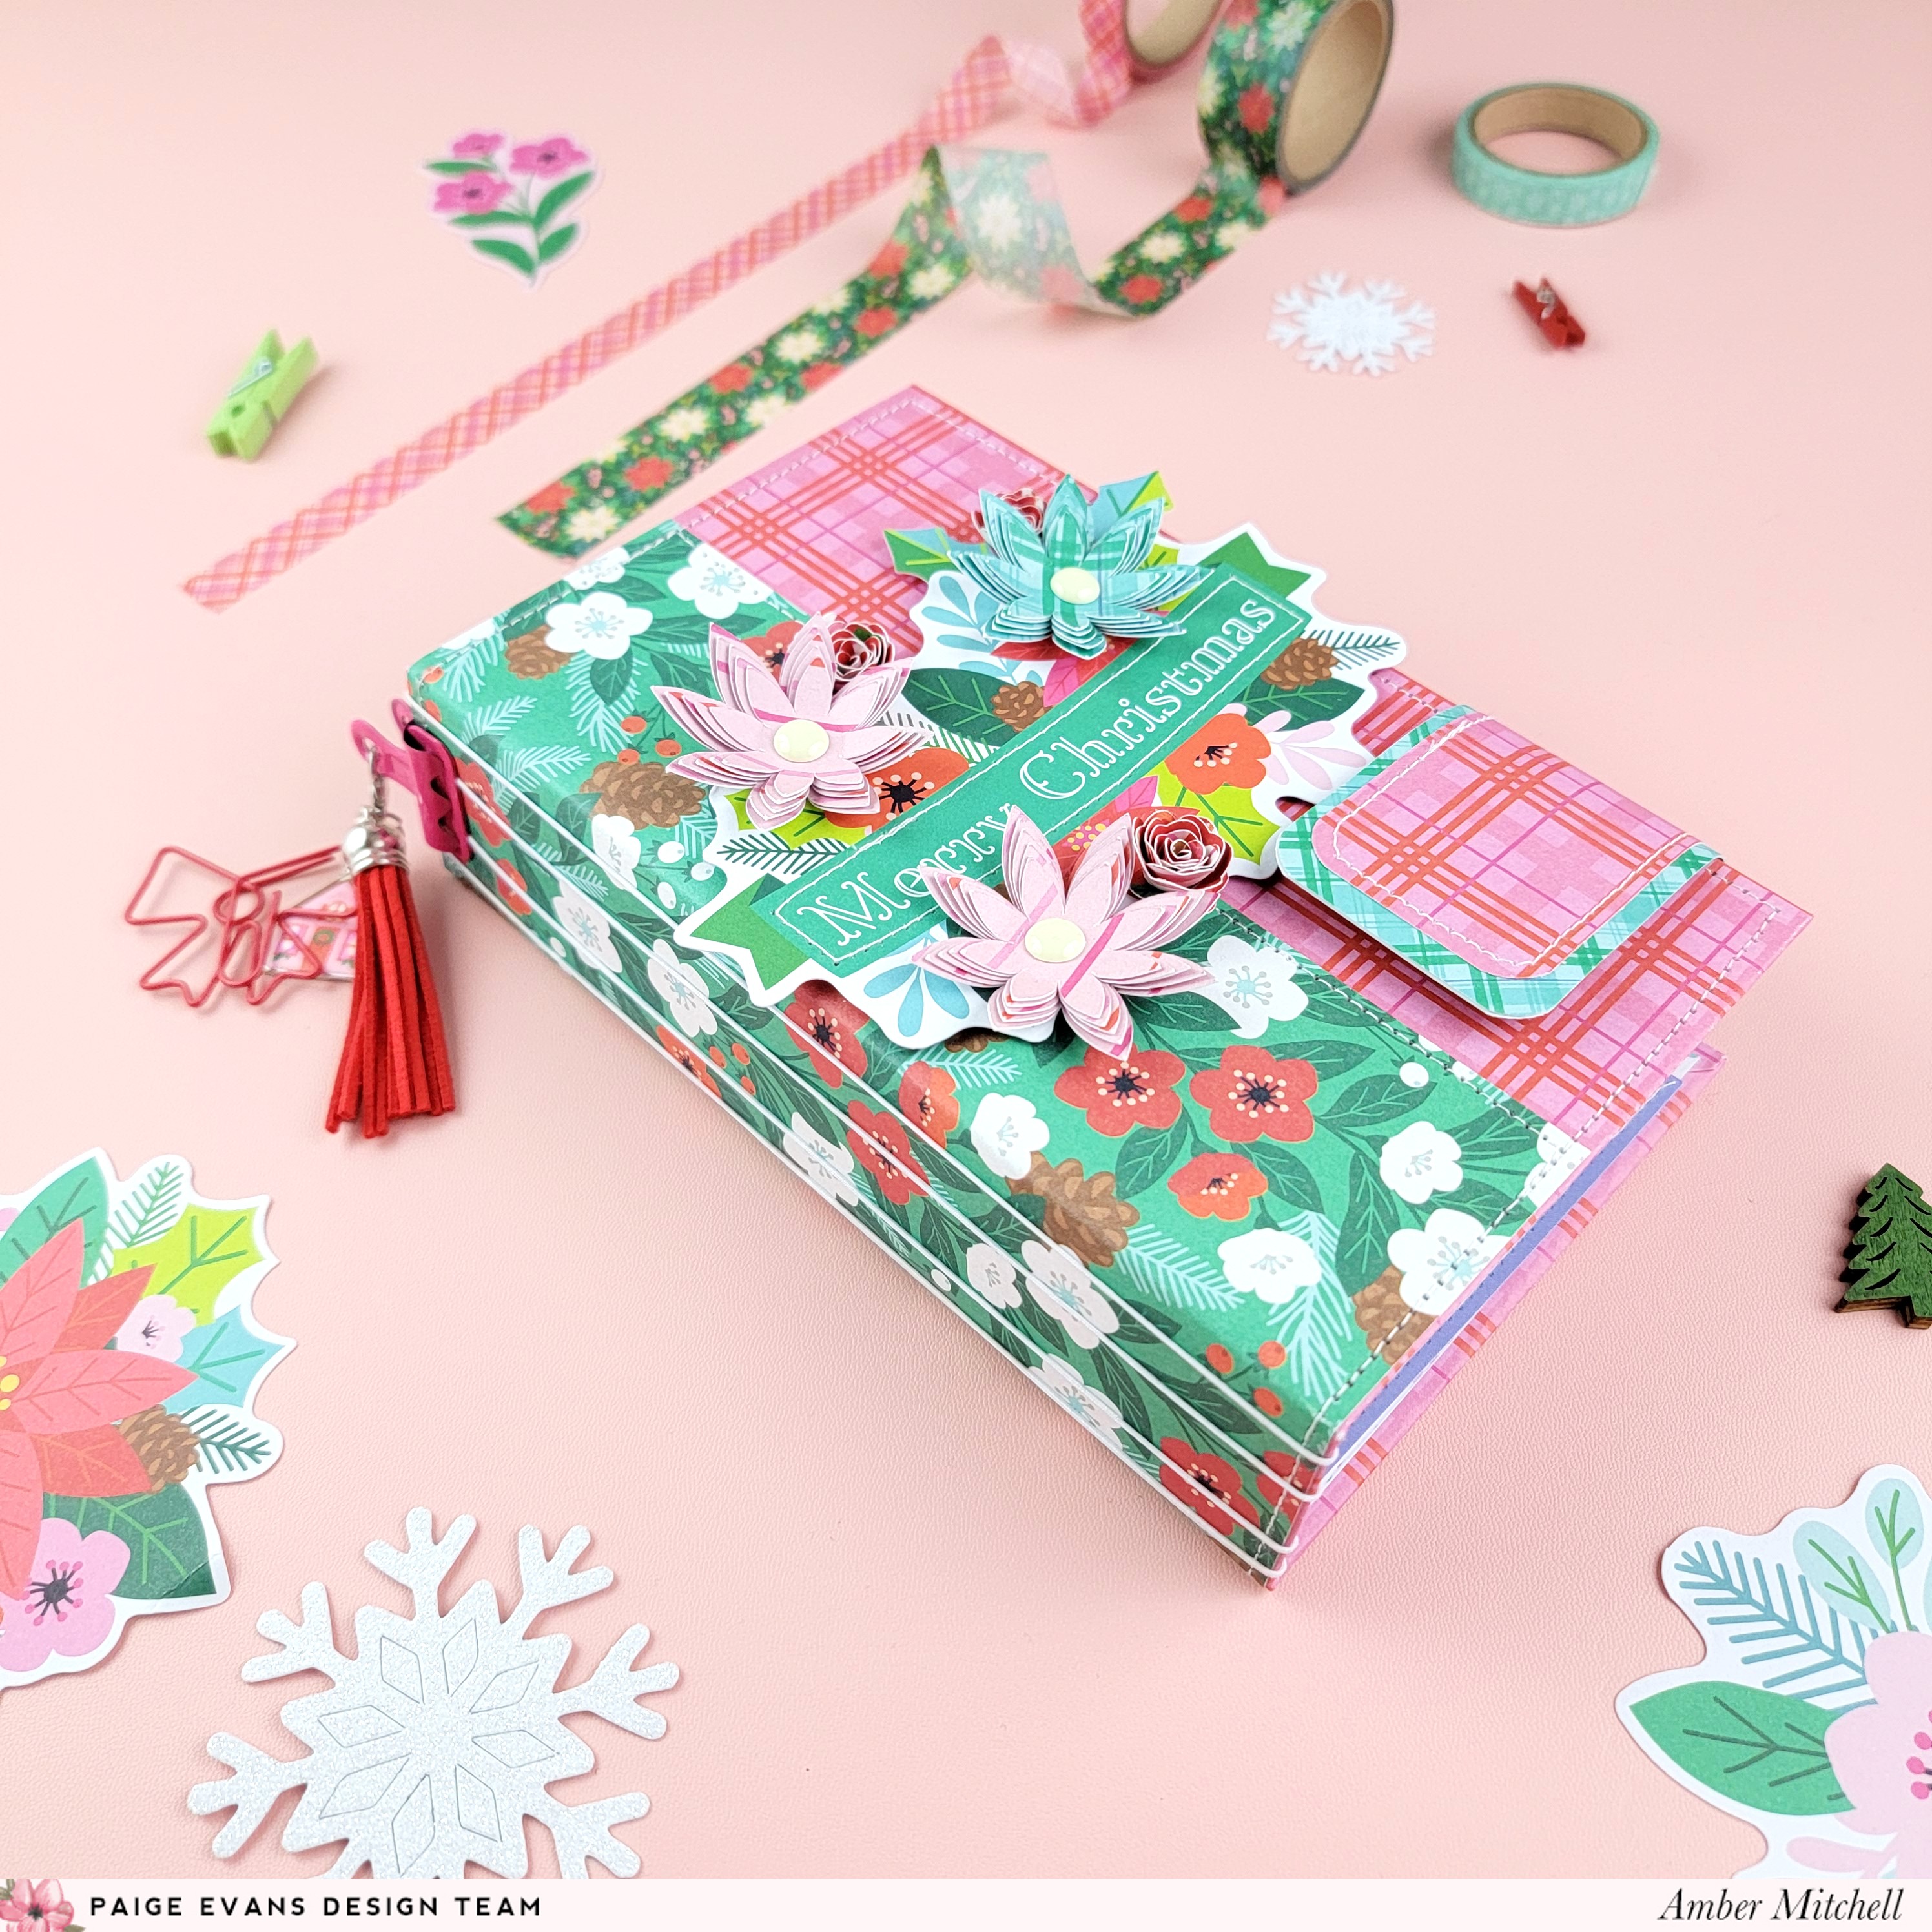
The base of this album is an easy one to put together: I used three pieces of medium weight chipboard, some elastic thread, and a bunch of fun patterned papers from the 12x12 Paper Pad. The covers of this album measure 4.25 x 7 inches while the spine measures 1.5 x 7 inches. I laid these pieces out on the back of a bright pink plaid paper and wrapped them using double-sided tape.
To decorate the spine (and a bit of both covers), I also added a smaller sheet of a floral paper to the middle of the wrapped pieces. I love the contrast between these two papers and how the brightness of the pink makes the soft hues of the green and white pop! I machine stitched around the edges of the base as well as along the inner edges of that smaller spine paper to secure everything into place. This also adds fun texture to the project. I used a white paper with small, colorful polka dots to the line the inside of my album.

To bind the album I used white elastic thread and tied four threads of it around the spine, securing them with a double knot. If you don't have elastic thread on hand you can always use twine or string of a different sort; these would work just as well!
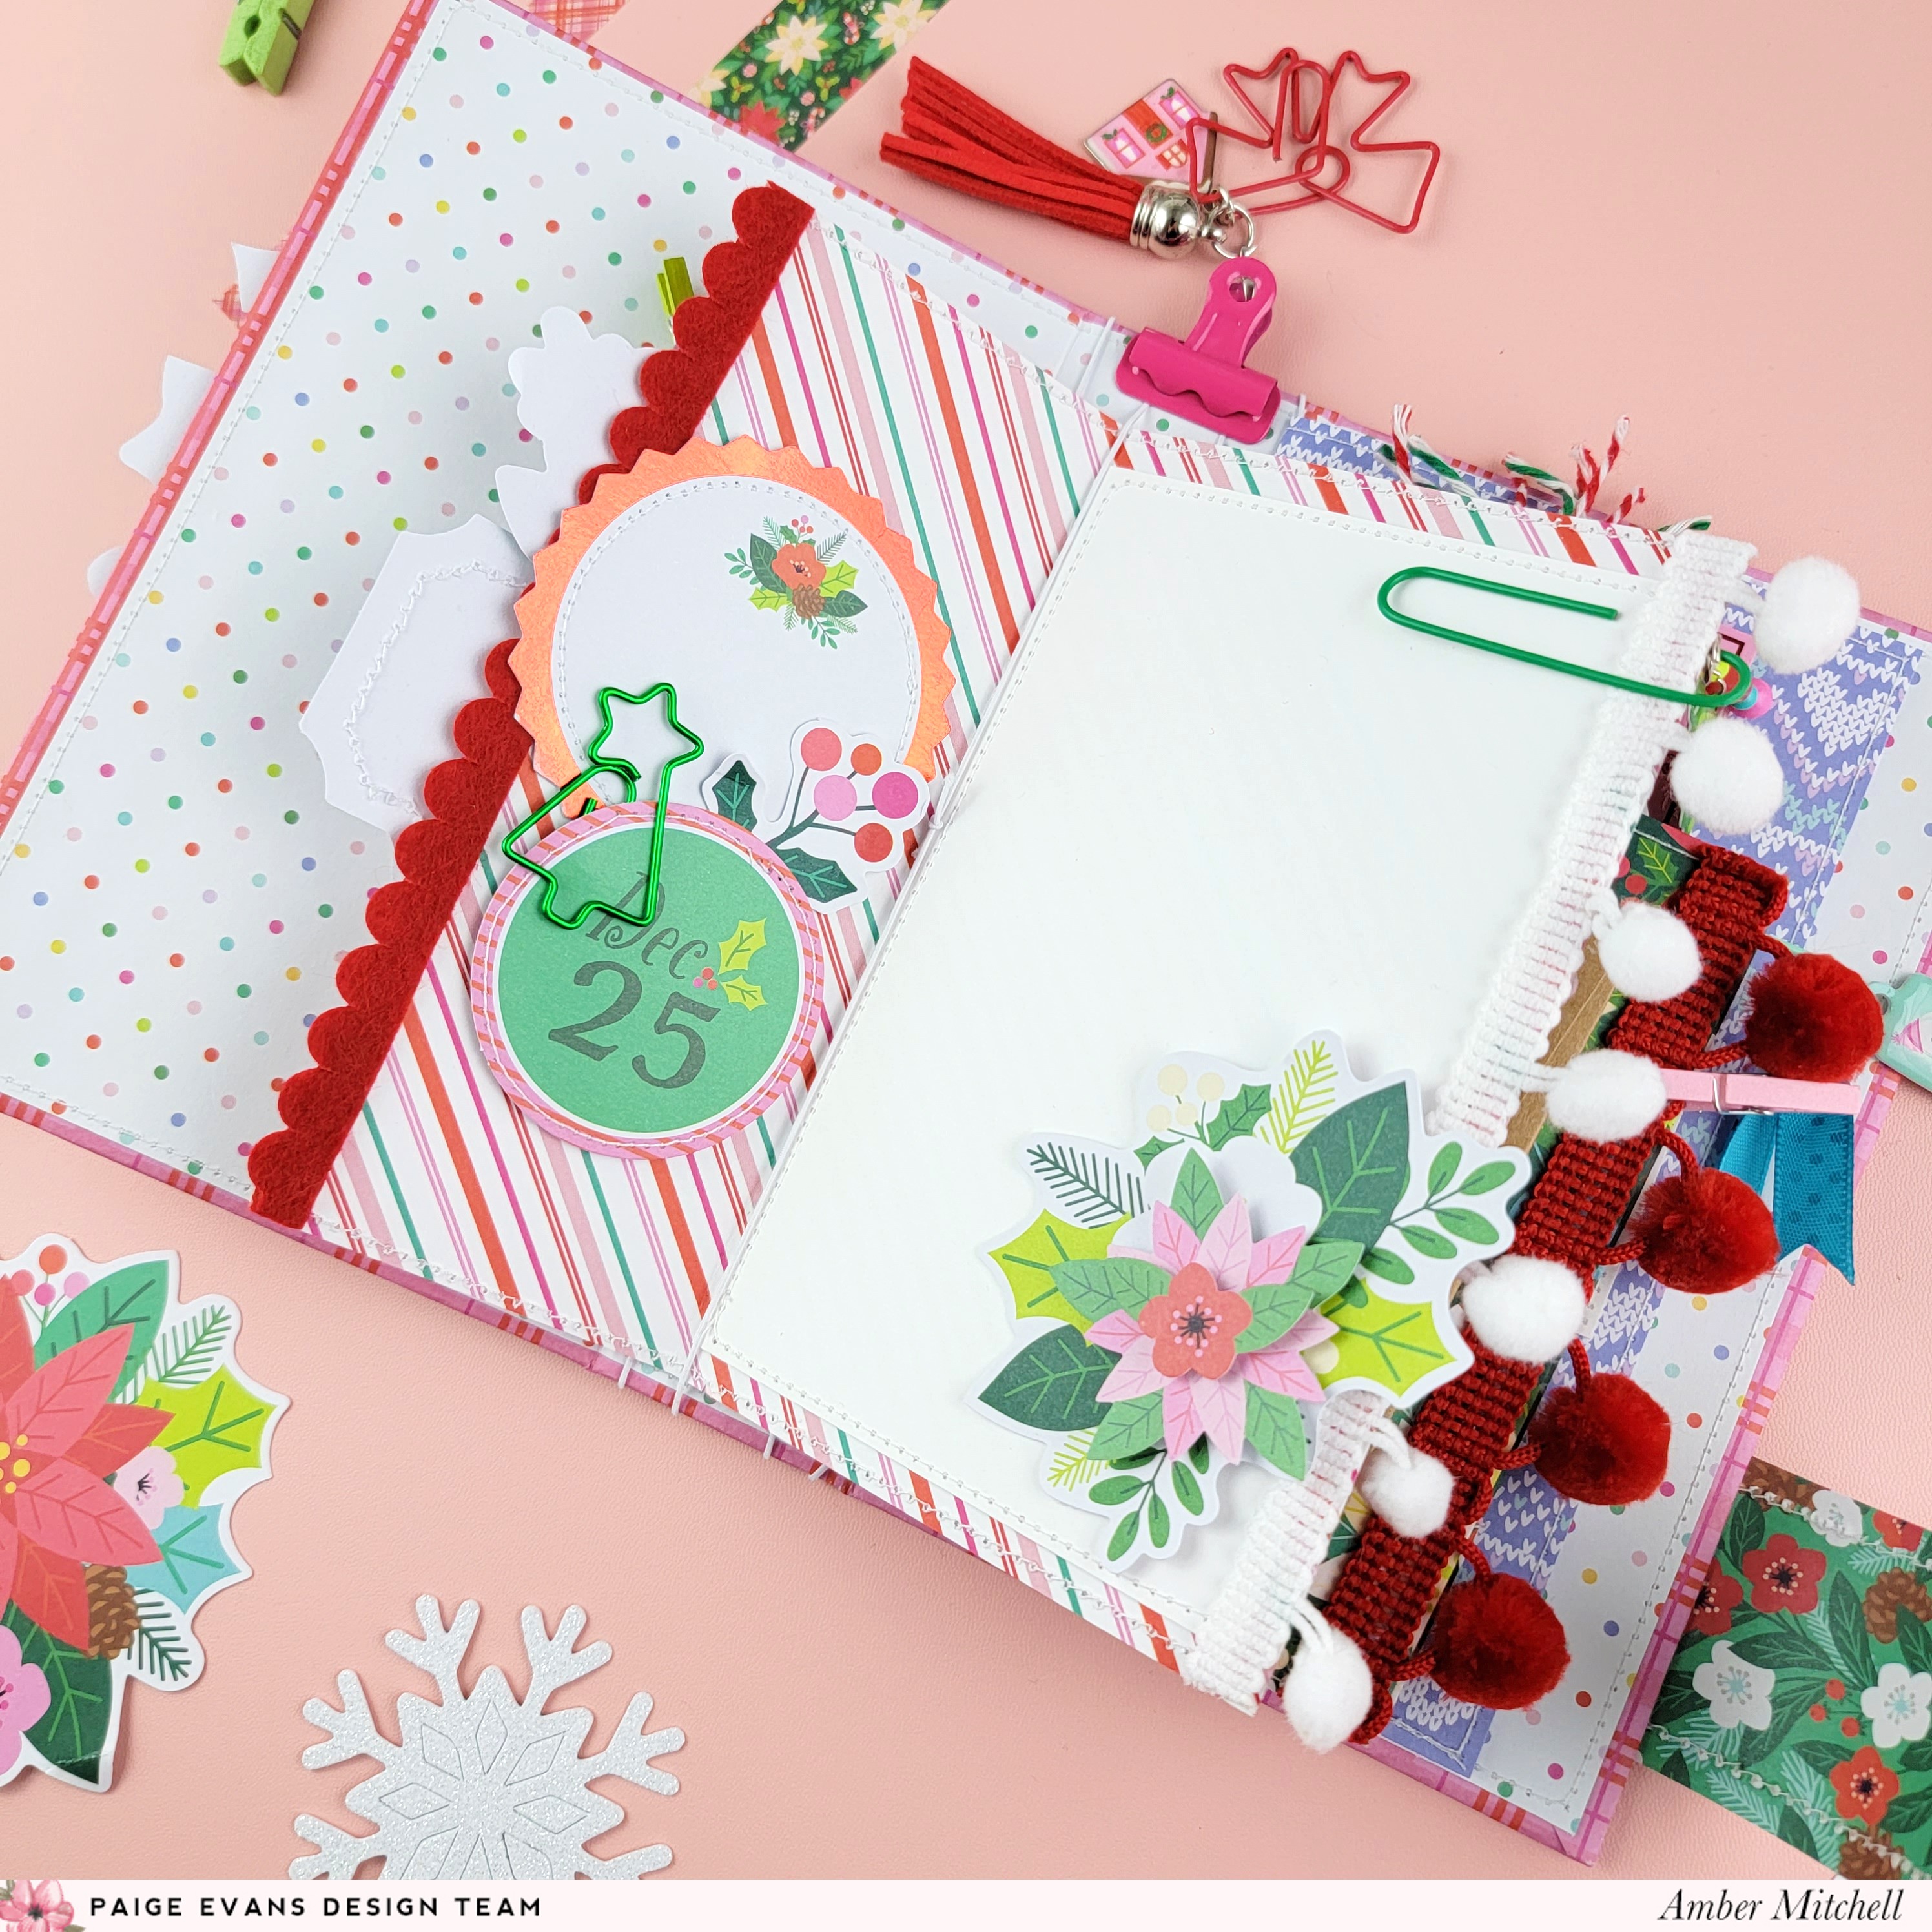
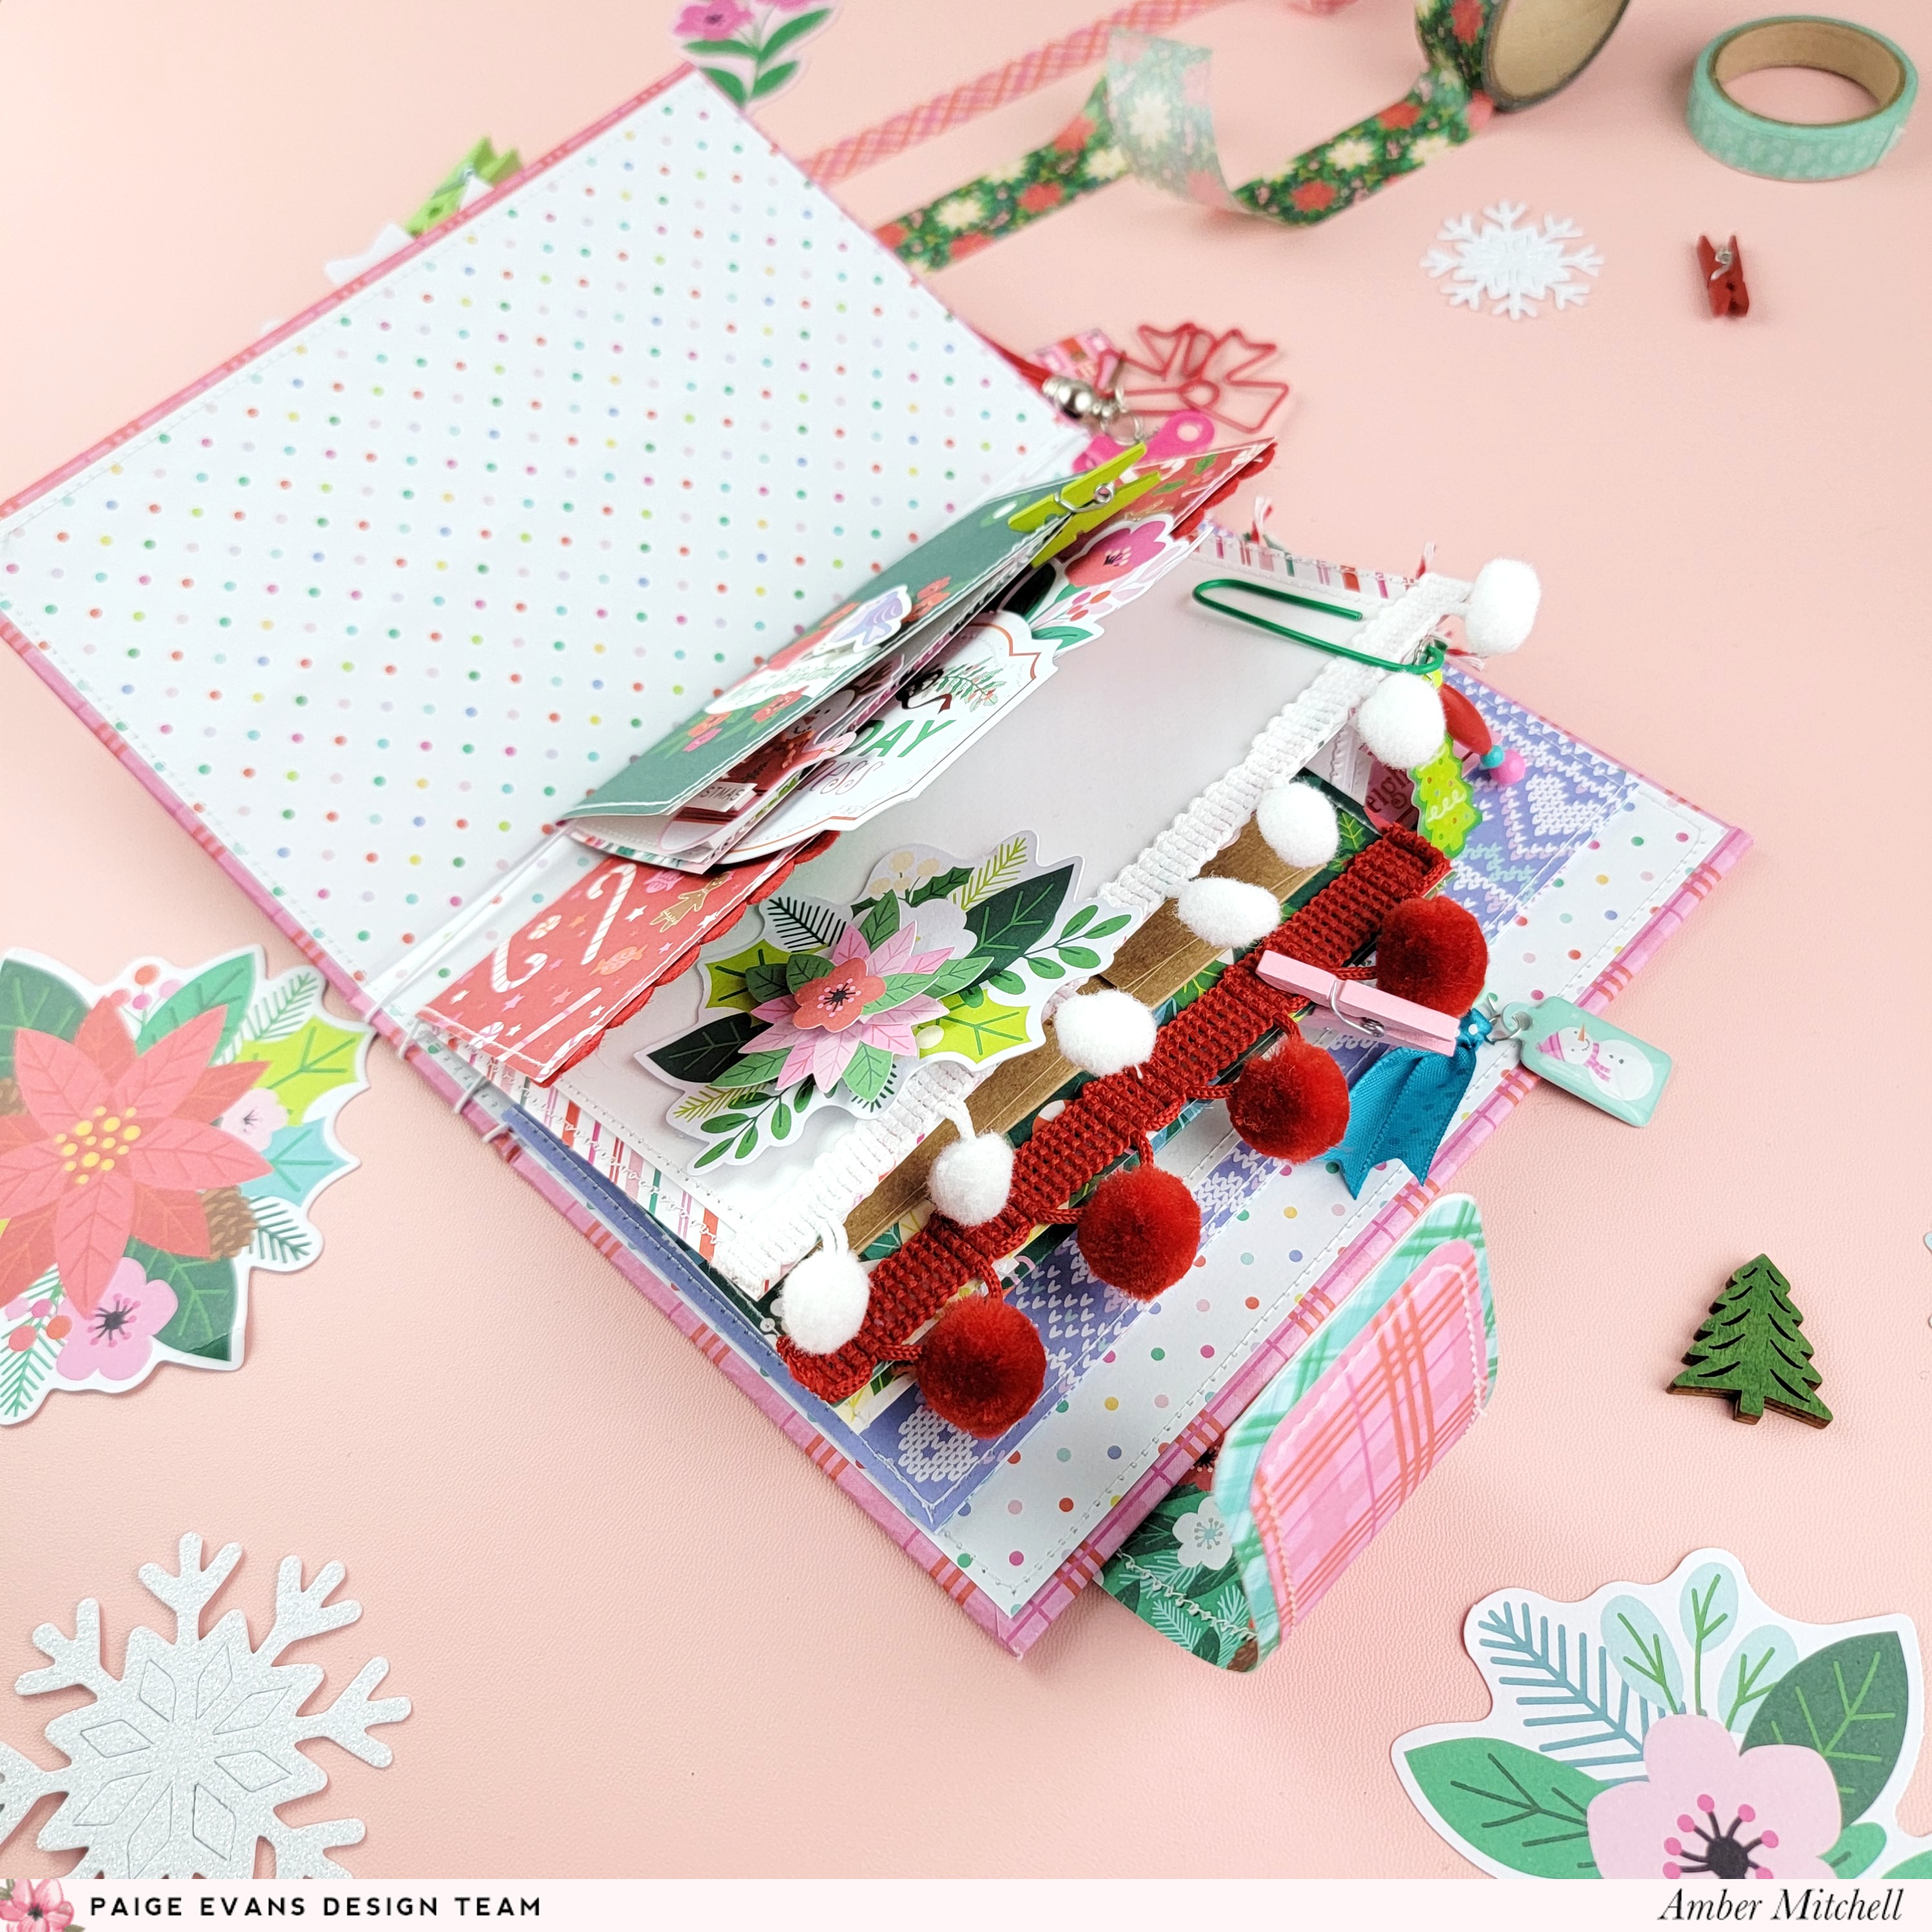
The pages of this album were created using papers of various sizes and shapes. The first page was made from folding a set of two tag cut-aparts in half. The second page was created using a 6.25 x 6.5-inch sheet of paper that I trimmed from Paper 7. I scored this sheet on the 6.5-inch side at 2.5 inches - this created a layered page. I created the third page using a 4 x12-inch trimmed sheet from Paper 2. I scored this on the 12-inch side at 4 and 8 inches which created a page with two fold-out panels. The fourth page was made from Paper 9 - I used a trimmed down sheet that measured 6.75 x 8 inches that I folded in half along the 8-inch side. Once the pages were created, I added them to the spine by slipping them up and under the elastic thread.
To finish off the base of this project I added a closure using a 1.75-inch layered strip of paper that I created from scrap paper and a velcro dot. I adhered one end of the strip to the lower edge of my back cover and then wrapped it around to the front cover. I added the velcro dot to the underside of the paper strip and glued it into place. If you don't have velcro on hand some corresponding-colored twine would also work well to keep this album closed!

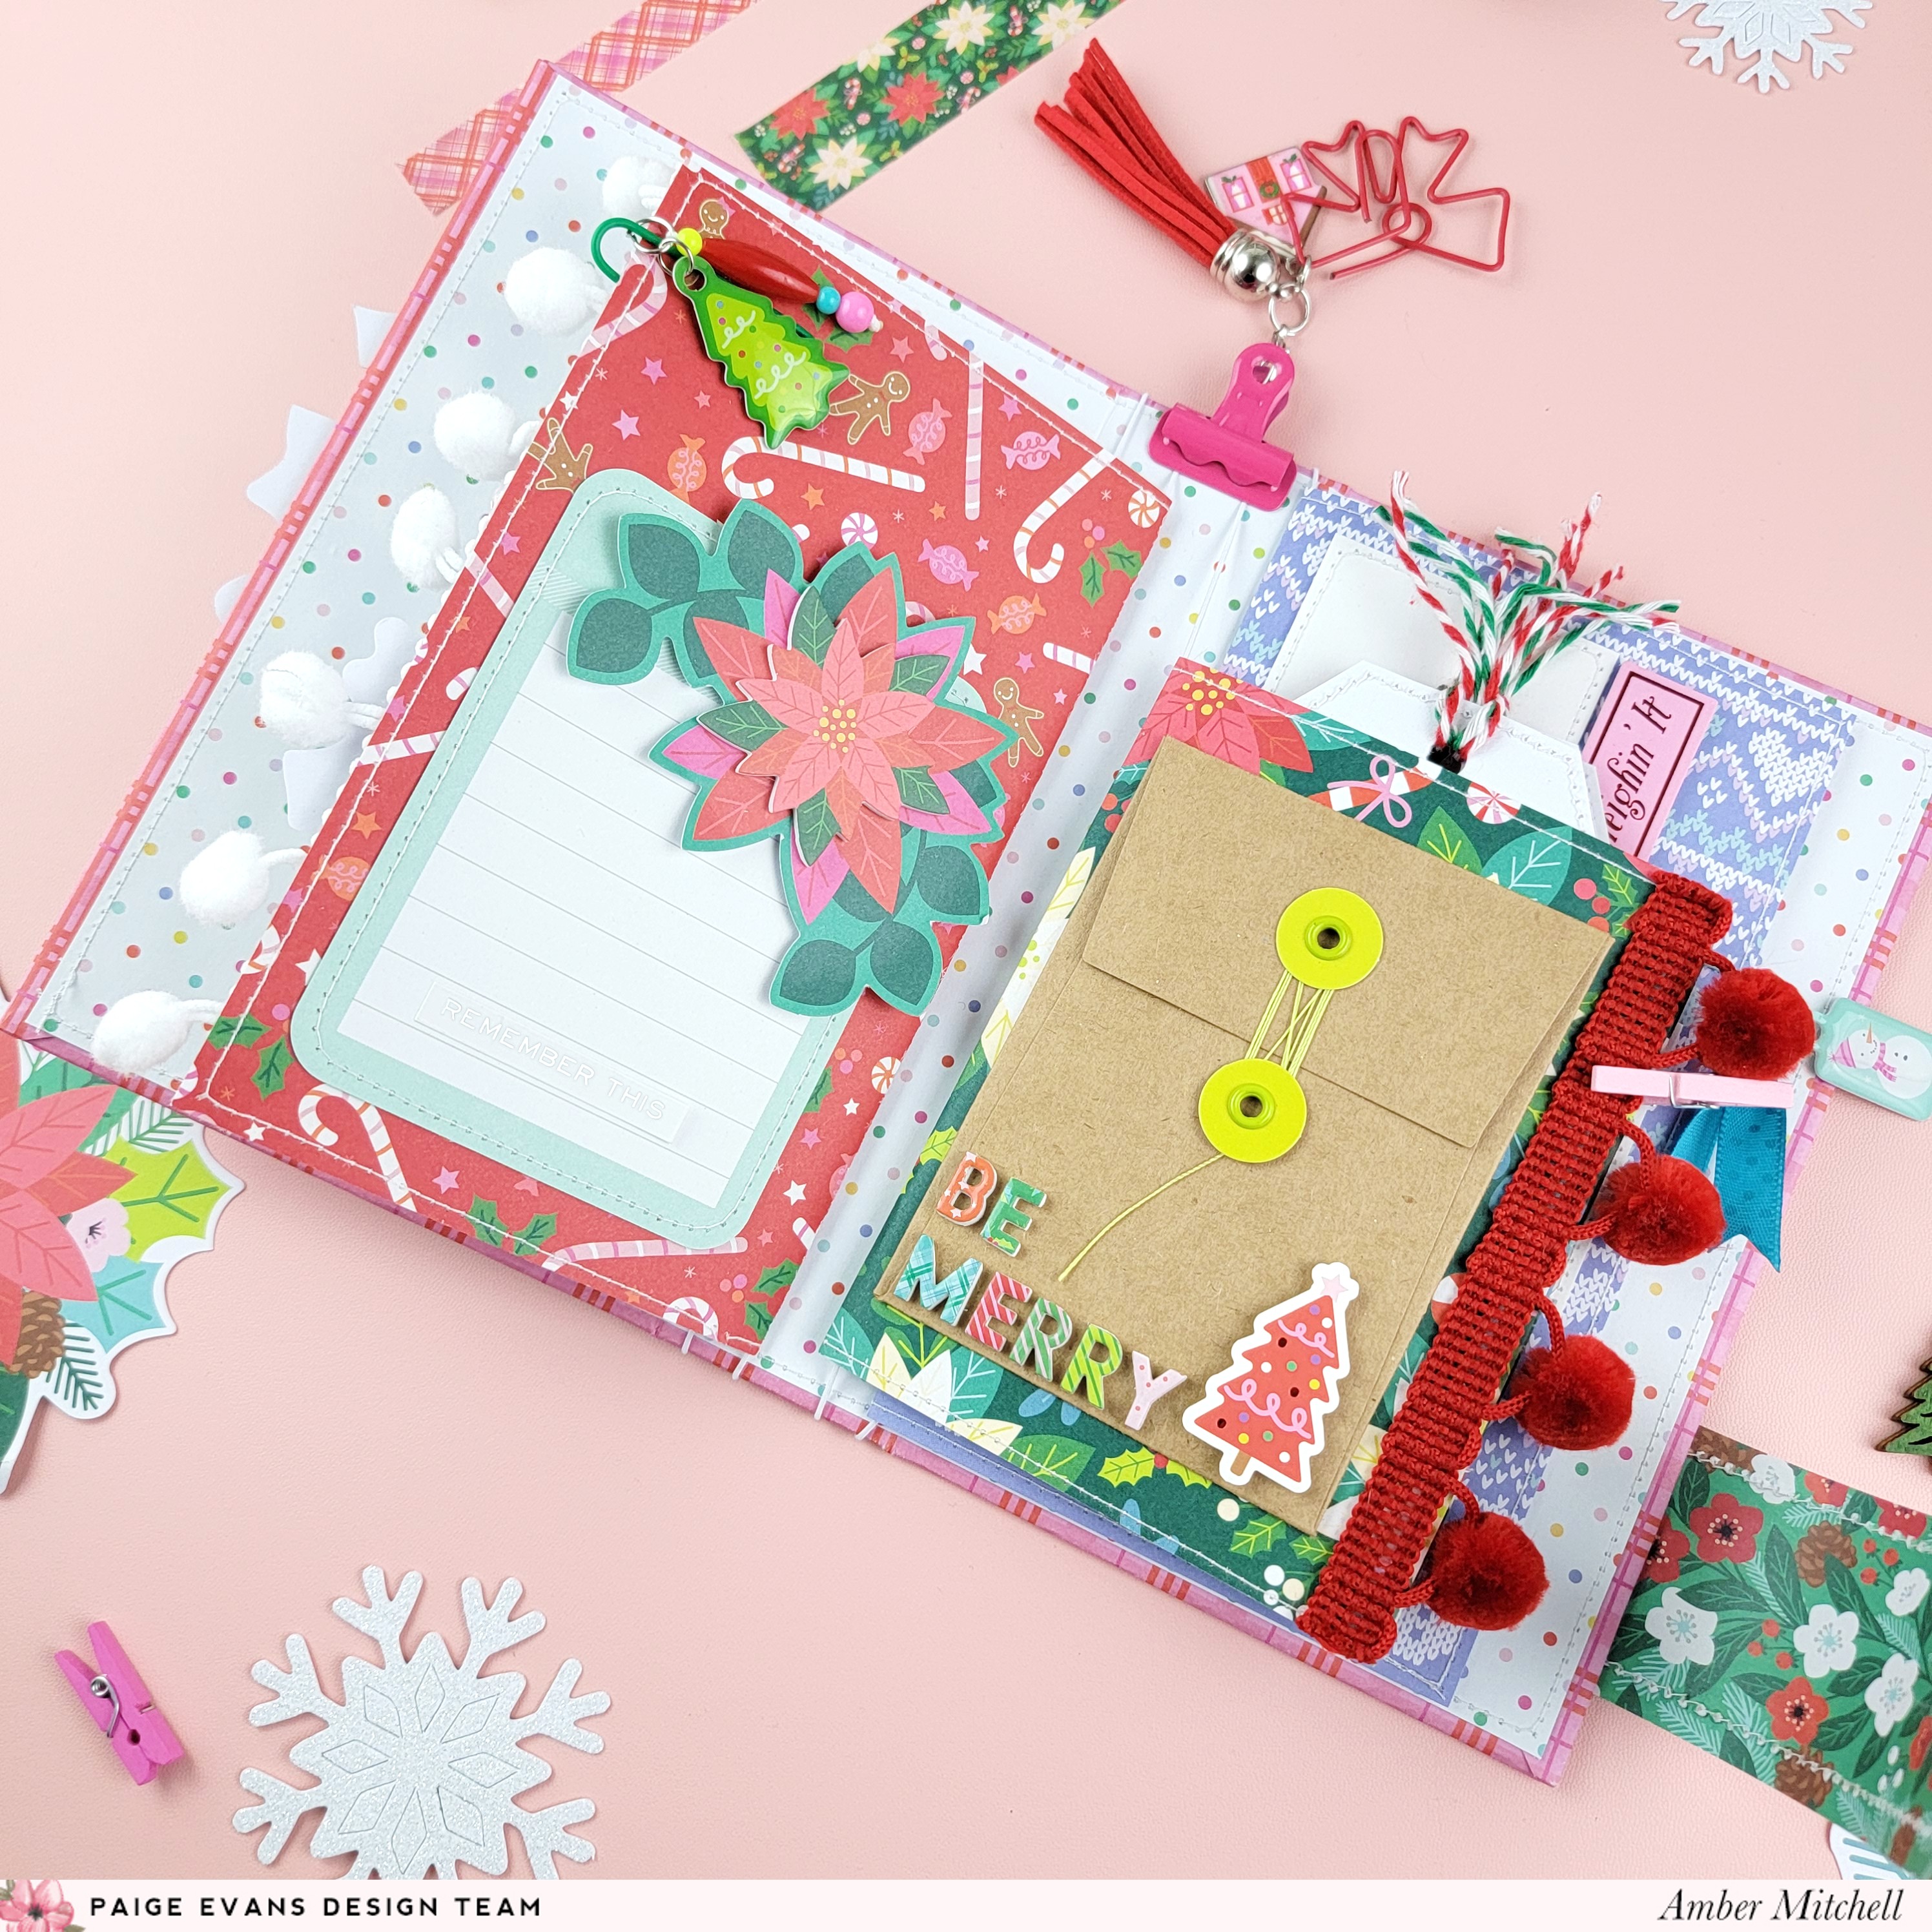
With the entirety of the base done and with the pages added, I moved onto embellishing which is always my favorite part! First I added several photo mats throughout the album using white 65lb weight cardstock. I cut these mats down to size to fit on the pages that I wanted to add them to. I even added smaller photo mats to the inside of the tag pages I included. When adhering the photo mats to the third page, I only added adhesive to the outer edges which created pockets under each of these photo spaces. I added three tags from Paper 1 to these pockets. I turned the fourth page into a journal by adding a few sheets of bullet dot paper to the inside of it. To the cover of this journal, I added some smaller photo mats to utilize as much space as I could. To fill in some of the larger pages, I used some plain(ish) journaling cards from my stash to create spaces for documenting memories. I used a mix of embellishments from the collection to decorate all of the extra spaces and bare pages.

On the front cover I added a large sentiment die cut from the Floral & Snowflake Die Cuts. This was a cute and easy way to add a title to the album. To add more texture to the front cover I added some paper flowers that I created using Paige's Layered Flowers and Leaves cut files as well as her Rolled Flowers cut files. Throughout the rest of the album I used Floral & Snowflake Die Cuts and pieces from the Cardstock Stickers, Sticker Book, Foam Stickers, and Ephemera Die Cuts to decorate around the photo mats and journaling cards. I used the Mini Puffy Stickers to create a "be merry" title on a coin envelope that I added to the album. I also added a couple of the Paper Clips to some pages just for more detailing. Some finishing touches to this album were some pom pom trims that I hot glued to two of my pages and a bulldog clip that I added to the spine which I attached one of the Tassels to.

This Sugarplum Wishes album turned out so cute and I can't wait to create with this collection again! Thanks so much for stopping by my post today! I'll see you next time with another fun project!
SUPPLIES: Patterned paper, embellishments, die cuts, stickers, embellishments; SUGARPLUM WISHES; Cut files: Layered Flowers and Leaves & Rolled Flowers by Paige Evans

Location: California, USA / Blog: Happy Crafty Studio / Instagram: @bambidearr / YouTube: bambidearr / Pinterest: bambidearr


Post a Comment