
Hey there! I have a new tag flip mini album to share with you today, including a start-to-finish process video, featuring the Tag Punch Board by WeR and my new Go the Scenic Route collection!

Check out how to create this tag flip book in this video:
I began by trimming 8 floral papers found in Go the Scenic Route (Paper 2, Paper 9, Paper 12, Paper 14, Paper 16, Paper 18, Paper 23, and Paper 24) into different sizes of rectangles ranging from 3x5" to 2 1/4x3" and everything between!

Using the Tag Punch Board I angled the top edges of each rectangle to complete the tag shape and then used the included punch piece to make a hole through the tops. For added interest I used a hole punch to make the hole bigger and then used the Hole Reinforcer Punch to make a little ring punched from the colorful blocks B-side of Paper 21 to adhere around the holes - not only does this help reinforce the hole to withstand wear-and-tear, it also adds a fun pop of color to each tag!
To add extra texture I used a sewing machine and white thread with a basic running stitch and stitched around all of the edges of each tag. Then I switched the thread and bobbin to a silver thread and added zig zag stitching to a lot of the edges. I left the thread ends long for whimsy.

Time for embellishing! I didn't add any photos to this tag flip book, but I did add lots of positive affirmations and sentiments so that it brings a smile to my face as I turn through all of the tags. I used Chipboard Stickers, Floral Die Cuts, Puffy Phrase Thickers, Enamel Dots, Ephemera Die Cuts, and Flag Paperclips to embellish each of the tags as shown in the photos above and below.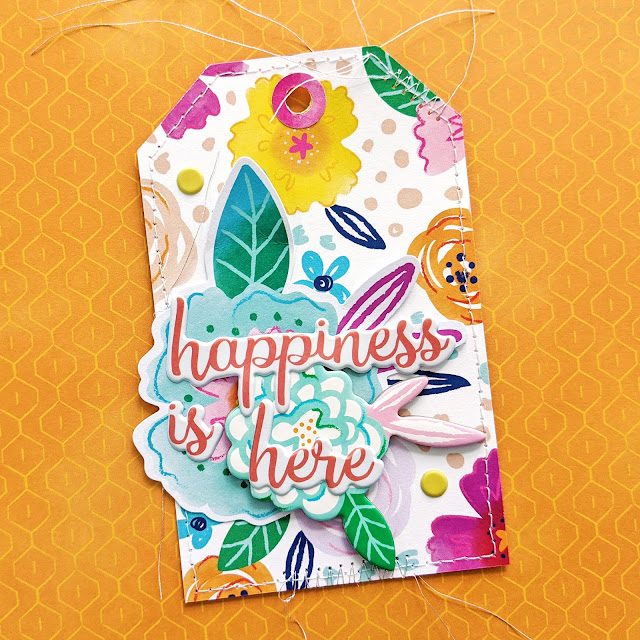


 I hope you are inspired to pick up the Tag Punch Board and my Go the Scenic Route collection so you can quickly and easily create your own tags and mini flip book! Thanks for stopping by today!
 SUPPLIES: Patterned papers, stickers, paperclips, die cuts, embellishments: GO THE SCENIC ROUTE; Tag Punch Board; Hole Reinforcer Punch; Sewing machine: Brother; Threads: Coats & Clark

Check out how to create this tag flip book in this video:
I began by trimming 8 floral papers found in Go the Scenic Route (Paper 2, Paper 9, Paper 12, Paper 14, Paper 16, Paper 18, Paper 23, and Paper 24) into different sizes of rectangles ranging from 3x5" to 2 1/4x3" and everything between!

Using the Tag Punch Board I angled the top edges of each rectangle to complete the tag shape and then used the included punch piece to make a hole through the tops. For added interest I used a hole punch to make the hole bigger and then used the Hole Reinforcer Punch to make a little ring punched from the colorful blocks B-side of Paper 21 to adhere around the holes - not only does this help reinforce the hole to withstand wear-and-tear, it also adds a fun pop of color to each tag!

To add extra texture I used a sewing machine and white thread with a basic running stitch and stitched around all of the edges of each tag. Then I switched the thread and bobbin to a silver thread and added zig zag stitching to a lot of the edges. I left the thread ends long for whimsy.

Time for embellishing! I didn't add any photos to this tag flip book, but I did add lots of positive affirmations and sentiments so that it brings a smile to my face as I turn through all of the tags. I used Chipboard Stickers, Floral Die Cuts, Puffy Phrase Thickers, Enamel Dots, Ephemera Die Cuts, and Flag Paperclips to embellish each of the tags as shown in the photos above and below.


So MUCH fun in such a little project!! I love love love the colors the stitching and all the goodies you packed in it!!!!!!
ReplyDeleteI've commented a couple of times on this super cute project but must add, the background painterly papers are amazing ! I'm also excited about the tiny prints! I love using those 🥰
ReplyDelete