Bright Sunshiny Day & Design Team Layouts for iNSD


Saturday, May 5, 2018

It's International Scrapbook Day! The best holiday there is! :) :) :) I asked my design teams to create projects featuring the Pick-Me-Up Cut Apart Vellum Paper and/or 2x2 Paper Pads. I played along with the challenge too! Here's what I made:
I cut apart the Vellum Paper into the individual sentiment blocks and figured out an arrangement I liked on a white cardstock background including a pair of 2x2" square photos. I adhered the pieces in place with temporary adhesive and then backstitched lines between each one to create a grid-based and textured background.
 I continued adding hand stitched details to each sentiment. At first I was just going to stitch through the stitching details printed on the vellum. But then I couldn't stop stitching! Eventually I stitched through almost every sentiment. With all that detail going on I didn't want to add too much else so I placed two trios of pink sequins from the Haberdashery Multi-Pack and journaled below the photos with a blue pen. For the finishing touch I trimmed the layout down 1/4" on all sides, roughed up the edges, and then adhered it onto the colorful Paper 05 to brighten up the edges of the layout.
 I had a lot of fun making this layout and tried to use the Cut Apart Vellum Paper in a unique way! I hope you're inspired to try the same! :)
SUPPLIES: PICK-ME-UP: Paper 05, Cut Apart Vellum Paper, Haberdashery Multi-Pack; white cardstock; Embroidery floss: DMC

Now feast your eyes upon all of these amazing layouts by my design team members made just for International Scrapbook Day!! Click on the designer's name to go to their instagram and make sure you're following them because they're top notch! I love how each designer used the vellum and/or 2x2 paper pads in a fun and unique way!!

DANCING WITH THE STARS by Missy Whidden


MINI ALBUM by Lisa Fonseca


YOU MAKE ME FEEL HAPPY by Lorilei Murphy


FLORAL CARDS by Zsoka Marko

FOLLOW YOUR HEART by Elodie Lusseau

THIS RIGHT HERE by Audrey Yeager


TINY CARDS by Heather Shank


GOOD KITTY by Jen Schow

YOU ARE BEAUTIFUL by Enza Gudor


HELLO SUMMER 2018 by Steffi Ried

VELLUM CARDS by Flóra Farkas


SOAKING UP LIFE by Elsie Robinson

HAPPY INTERNATIONAL SCRAPBOOK DAY 2018!

1st Easter Mini Album by Heather Shank


Friday, May 4, 2018

How CUTE is this mini album by design team member Heather Shank all about this past Easter?! I can't even handle how cute it is!

Hello there! I'm excited to share my mini album made with the Pick-Me-Up collection and the Easter Egg Set cut files (set 1, set 2, and set 3).
I have so many cute photos of my granddaughter from Easter so I thought I would make a cute mini dedicated to her first Easter. 
I started by choosing white cardstock for the Easter egg cut files and backed each one with different papers from the 6x6 Paper Pad.
I embellished my pages mostly using Chipboard Stickers, Ephemera Die Cuts, and sequins from the Haberdashery Multi-Pack. 
To finish off my mini album sometimes simple is the best! Adding vellum  is one of my favorite things to do for the covers of mini albums, so I cut the same size egg from the beautiful Floral Transparency Paper and added my title with the Mini Thickers.
Thank you for stopping by, I hope you like my mini album made with the Pick-Me-Up collection, I can't wait to share more with you!
SUPPLIES: PICK-ME-UP: 6x6 Paper Pad, Mini Thickers, Chipboard Stickers, Ephemera Die Cuts, Stickers, Haberdashery Multi-Pack; Cut files: Easter Eggs Set 1, Easter Eggs Set 2, and Easter Eggs Set 3 by Paige Evans; Die cut machine: Silhouette Cameo; white cardstock
Instagram: @crafts_by_heathers | Facebook: Heather Wilson Shank

Floral Frames Layout by Flóra Farkas


Layers, colors, and flowers oh my! I love this soft and pretty layout by designer Flóra Farkas!
Hi ladies! I promised to show you my other page I created for the Crop Am Rhein 2018 event in Germany using Pick-Me-Up. This one is a girly scrapbook page with many flowers, soft colors, and butterflies.
I chose Paper 06 for the background. I cut apart Paper 19 and fussy cut lots of frames. I also cut out the half ones because they were usable for my design. After this, I fussy cut bigger and smaller floral elements from Paper 02.

Once all the cutting was done I arranged the flowers and frames in four clusters. I tried the keep a grid design but in a messy way. 

I backed three frames with photos of me and my mom. I highlighted these with foam tape so they really pop out. I decorated all the empty frames with Pick-Me-Up Stickers and Rub-Ons. I scattered many tiny details all around the page but kept a clean look.

I hope you like my new page created with the pretty Pick-Me-Up collection. I wish you a crafty weekend filled up with fun!

Happy Layout for iNSD at Scrapbook.com


Thursday, May 3, 2018

Here is a layout I made for International Scrapbook Day at Scrapbook.com featuring lots of papers and embellishments from my Pick-Me-Up collection with Pink Paislee for the Live Love Layout Challenge!
First I have a process video to show you exactly how this layout came together:

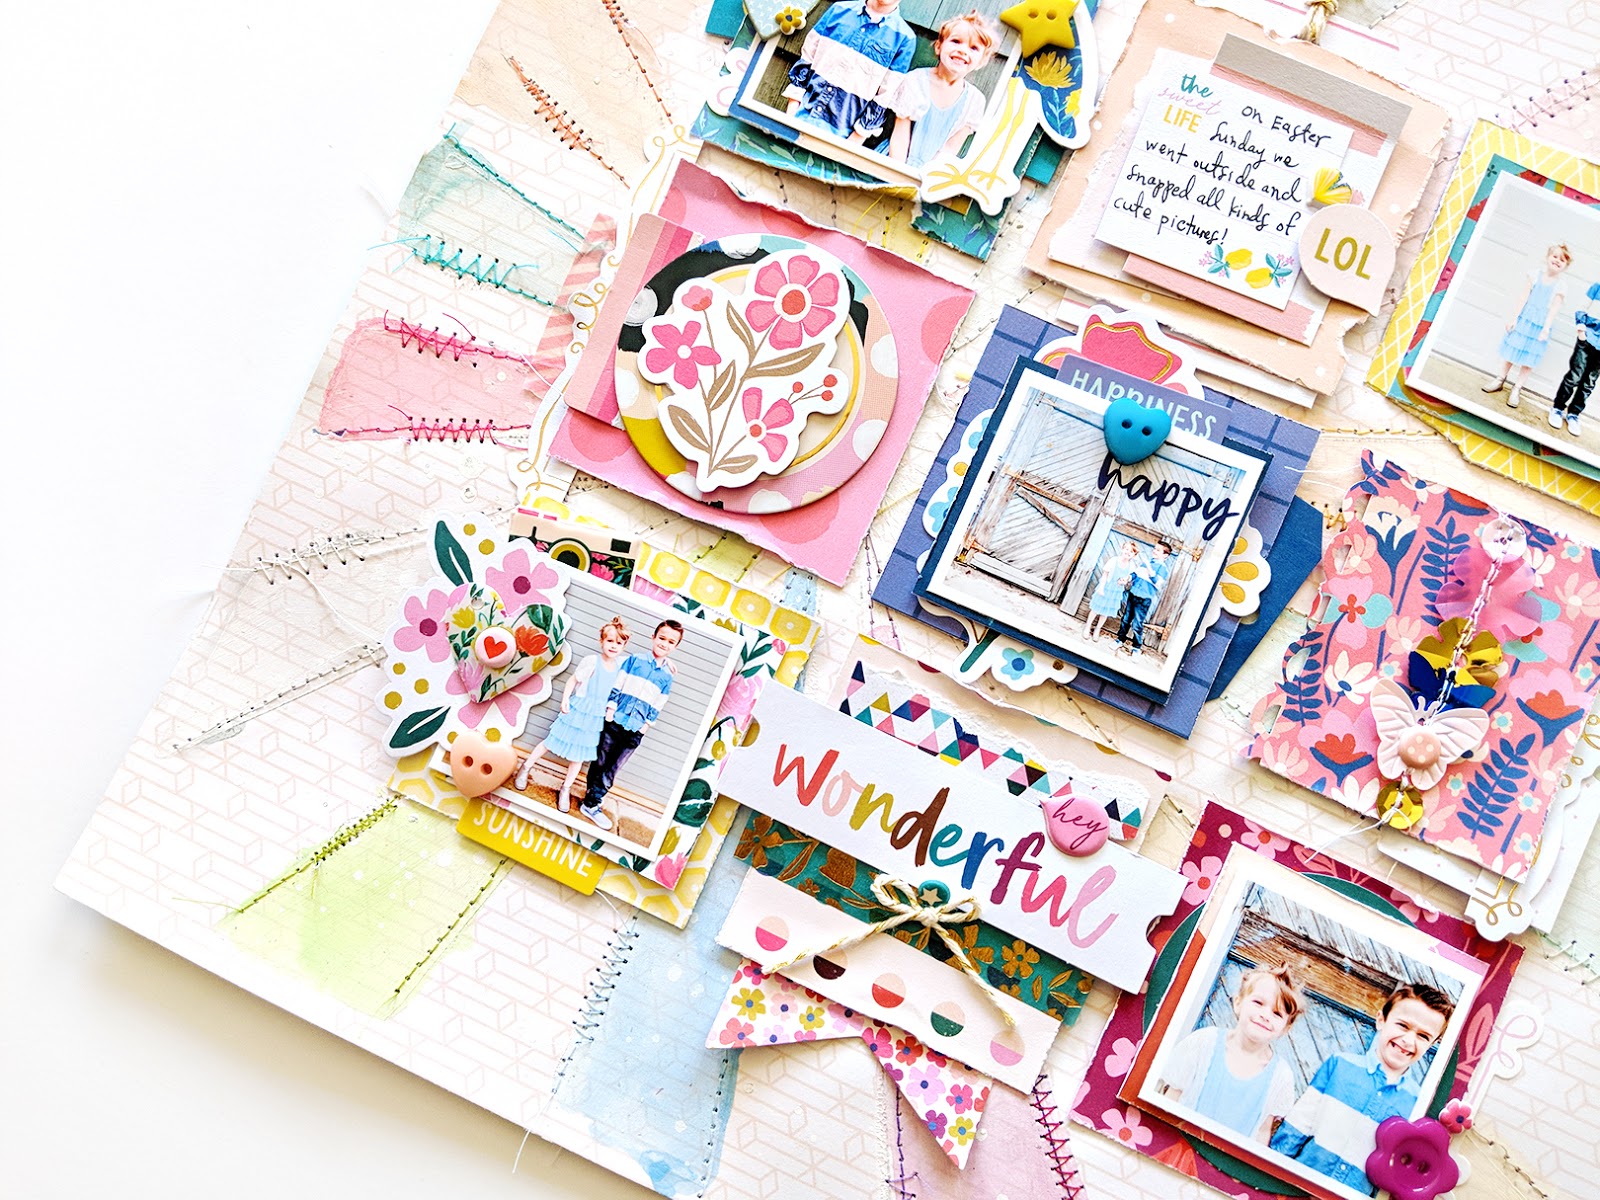
I started by die cutting my Sunburst Rays Background from white cardstock using a Silhouette Cameo 3 and then applying a thick layer of gesso through the rays onto the B-side of Paper 22. After removing the sunburst stencil and letting it dry, I put the stencil back on top and used watercolors to apply a different pastel color to each ray. I also splashed white acrylic paint on top. 
Once the background dried I ran it through my Heidi Swapp Minc to flatten it. Then I used a sewing machine and stitched through each sunburst ray edge, changing the color of thread to match the paint and using a straight stitch mixed with some zig zag stitches. I love the texture and pop of color this adds.

Next I trimmed nine 2.5" squares of patterned paper from Pick-Me-Up and arranged them in a 3x3 grid over the middle. I printed five 1.75" square photos and added them to five of the patterned paper squares. Let the embellishing begin!
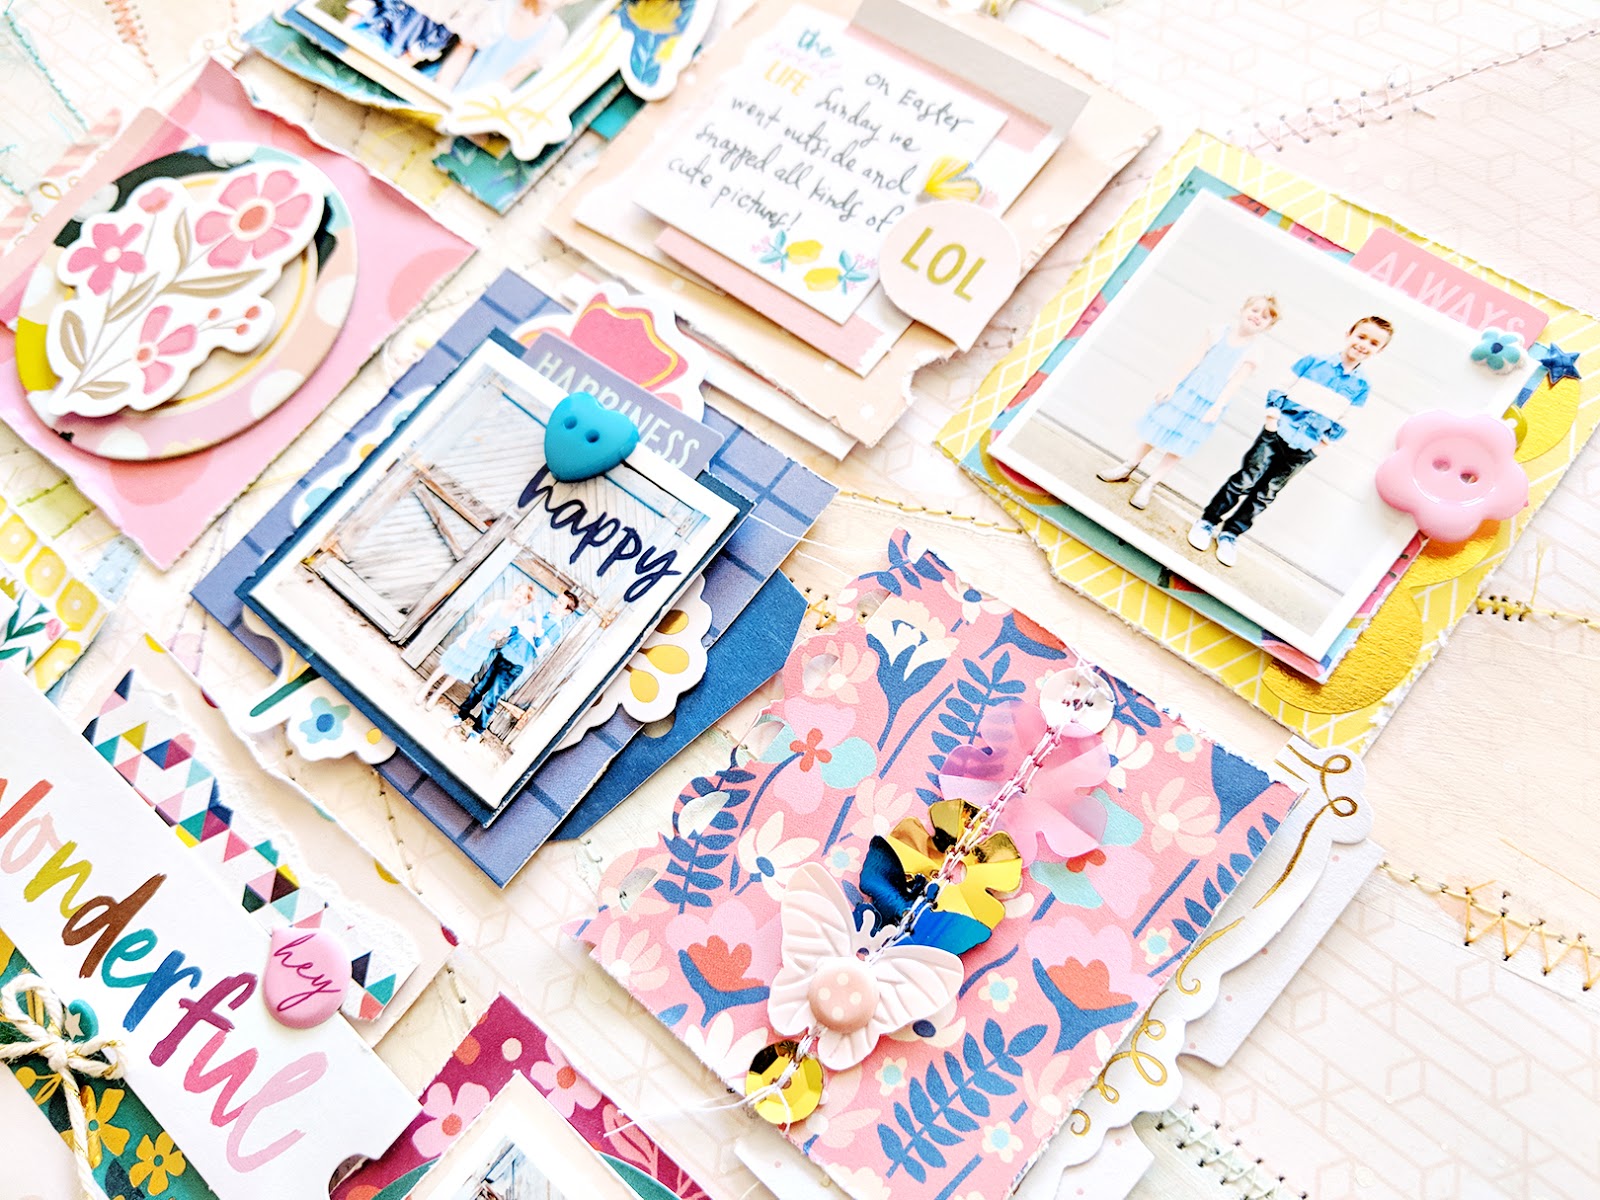
 I went through the patterned 2x2 Paper Pad and found one piece to layer under each photo. Then I just went to town adding bits and pieces from Pick-Me-Up to each section. It was hard to stop, I felt like I could keep adding embellishments forever! I used things from the Chipboard Stickers, Ephemera Die Cuts, Journaling Spots, Puffy Stickers, Stickers, Rub-Ons, Haberdashery Multi-Pack, and Washi Tape Book. My favorite section is probably the one you can see below with the row of stitched sequins.

Grid layouts are great for piling on the embellishments - the gap between each section provides ample breathing room and white space so the layout isn't overwhelmed with all the fun scrappy stuff. To finish I wrote journaling in the top center section, tied gold baker's twine through a tag at the top, and tied more baker's twine in a bow to go at the bottom.
And that's it! I always get asked how long my layouts take to make and the answer is... it varies! This one took about 3.5 hours from start to finish. I'm watching old seasons of The Bachelor/ette on Amazon while scrapping, if you're curious ;)
 There are three challenges going on over at Scrapbook.com for International Scrapbook Day! CLICK HERE for the details or click on the individual challenges below:
Live, Laugh, Layout Challenge (For you embellishment lovers!) 
The Crafter's Choice Challenge (For anyone and everyone!)
Die Cut Delight Challenge (For you die-cutters, of the digital and/or manual variety!)

50% Off My Cut Files Now Through May 7th for iNSD!


International Scrapbook Day is this Saturday and I'm kicking things off a little early by offering 50% off my Etsy shop cut files - choose from over 400 designs!
The discount is automatically applied to the final total at checkout, no need to enter a code. Most cut files include the PNG to trace, the SVG to work with any kind of die cutting machine, and the .DXF which is my favorite one because it's the easiest to use in Silhouette - simply drag and drop it into a new document and it's ready to be cut!
Click on over to my Etsy shop and treat yo'self! :) Happy International Scrapbook Day, in two days!

So Happy Layout by Bea Valint


Wednesday, May 2, 2018

Bea Valint is sharing her newest design team layout today - it's all kinds of pretty and makes me smile!
Hello ladies! If you are like me, you have a big box next to your desk full of teeny tiny paper pieces from your previous projects. Today I'll show you a fun and easy way to create a layout using your stash - you only need Paige’s Feathers cut file and a Silhouette Cameo!
I started by cutting some feathers from white cardstock and some more from patterned paper using only the feather outline. To add more dimension, I cut fringes on both sides of the feathers. I backed the white feathers with patterned paper then I bent up the edges and adhered them in three rows to a white cardstock background.

I arranged my photo on the right side and added the title using Glittered Foam Thickers from Fancy Free. This colorful page needs only a few embellishments: I placed some Chipboard Stickers next to the photo.

I then added a fun frame by fussy cutting four scalloped borders from Oh My Heart Paper 17 and stitched them to the edges. To finish the layout I dropped watercolors around and wrote my journaling under the photo. This layout was so much fun to create, thanks for stopping by!

SUPPLIES: TURN THE PAGE: 12x12 Paper Pad, Puffy Stickers, Chipboard Stickers; OH MY HEART: Paper 17, 12x12 Paper Pad; Cut file: Feathers by Paige Evans; Die cut machine: Silhouette Cameo 3; white cardstock

Blog: myshinystudio.blogspot.com / Instagram: @beavalint / Pinterest: @valint7 /
Facebook: myshinystudio / YouTube: Bea Valint

April 2018 Highlights


Tuesday, May 1, 2018

We spent Easter weekend in Wallace, Idaho and the kids woke up to find the Easter Bunny had hidden them eggs around the house.
Easter Sunday photoshoot around town.

Wallace is so legitimately retro.
One of the days during Spring Break I took the kids to downtown Seattle to check out an IMAX movie and visit the Pacific Science Center.
The iconic Space Needle. I've only been up it twice since my family moved there in 1995! Must go back.
Then I took the kids to my favorite Thai place in the whole wide world, a little hole in the wall (always the best!) called Mae Phim. I was so proud of myself for navigating through downtown Seattle and all of the crowds all by myself!
One Saturday we met up with Eric & Tanya & Zoe for dinner at The Spaghetti Factory in Tacoma.
I love love love making mini albums.
Rachel chawlin'.
Blowing dandelions. Can we just take a minute to talk about Jane's hair and outfit? Bless her heart :)

We tried a round of IUI which didn't end up working but that's okay. Between appointments we drove up to Kerry Park and admired the beautiful views of the Seattle skyline.

Mom Life Layout by Missy Whidden


All the heart eyes for this rainbowy layout by design team member Missy Whidden!
Hey, friends! Missy here, and I mixed and matched bits and pieces from all five of Paige’s collections (Fancy Free, Take Me Away, Oh My Heart, Turn the Page, Pick-Me-Up) for this layout! I wanted to create some sort of rainbow on my layout, so I cut several of Paige’s Scalloped Border Background cut file from white cardstock using a Silhouette Cameo. I sorted through all the papers from all collections and pulled out lots of colors. Most of the papers came from the Fancy Free 12x12 Paper Pad, the Oh My Heart 12x12 Paper Pad and 6x6 Paper Pad, the Turn the Page 6x6 Paper Pad, Take Me Away 6x6 Paper Pad, and the Pick-Me-Up 6x6 Paper Pad. I cut scalloped pieces from the patterned papers and glued them on top of the scallops.
I added lots of ink sprays to the white cardstock background and then arranged the scalloped borders in rainbow order in layers above and below the photos. I machine stitched through each border using coordinating thread colors. I wanted the scallops to be imperfect and kind of wonky, so I was okay with them being a little crooked. I fussy cut some butterflies from the Turn the Page 6x6 Paper Pad and tucked them in coordinating rows. I also used lots of stickers from the 30-page Paige Evans #StickerBook.

I mixed and matched the title, which I adhered right on top of the photos. I used “mom life” from the 30-page #StickerBook. I combined the Pick-Me-Up Mini Thickers and Chipboard Thickers to complete the title.

I layered in several pieces on both sides of the photos including tangled thread along with more stickers and fussy cut butterflies. I added foam adhesive behind my photos to make them more dimensional.

I hope this gives you some ideas on how to mix and match collections. It was fun to pick and choose all these fun colors to work with! Thanks for stopping in and have a great week!

SUPPLIES: PICK-ME-UP: 6x6 Paper Pad, Mini Thickers, Chipboard Thickers; TURN THE PAGE: Paper 17, 6x6 Paper Pad; OH MY HEART: 12x12 Paper Pad, 6x6 Paper Pad; TAKE ME AWAY: 6x6 Paper Pad; FANCY FREE: 12x12 Paper Pad; Cut file:  Scalloped Border Background by Paige Evans; Die cut machine: Silhouette Cameo; white cardstock; inks; gesso
Blog: littlenuggetcreations.blogspot.com  Instagram: @missywhidden  Pinterest: @missywhidden
Facebook: missy.whidden  YouTube: Missy Whidden
Paige Taylor Evans © // Quinn Creatives DESIGN