Pink Paislee LEAVES Layout


Friday, November 11, 2016

It's LEAVES week on the Pink Paislee blog and here is my take on the theme:
 photo My Awesome Fantastic Family by Paige Evans.jpg
MY AWESOME FANTASTIC FAMILY by Paige Evans

DESCRIPTION: This is one of those layouts that came out completely different than originally planned! I had started with the same large die cut leaf, punched a billion tiny leaves from patterned papers, and used them like confetti around the leaf’s edge… but it all blended together so I scrapped it. Then this layout you see now was supposed to have that yellow background coming through behind the leaf, but it was too much yellow so I came in with the white die cut leaf background (or is it the foreground since it’s the top layer?!) Anyway, I actually filmed the entire process which you can watch on my YouTube channel: Paige Taylor Evans.

JOURNALING SAYS: I went on a trip to Washington all by myself with Fox & Jane and we had so much fun jus the girls going to all of our favorite places!

HOW TO: Draw a large sectional leaf with a pencil onto the B side of Paper 11, pierce a hole every 1/4" around the outline only, then erase the pencil lines (you know, I actually didn't even stitch the outer leaf so you can skip this step!). Paint over the outline of the leaf using white paint. Die cut a leaf from white cardstock and lightly adhere the leaf over the painted background. Use the inner white cardstock pieces as templates to hand cut all the leaf pieces from patterned papers - I combined both of my collections (Fancy Free and Take Me Away) and used just one paper from each line – Paper 06 from Fancy Free and Paper 07 from Take Me Away; these are the papers that have lots of little patterned squares so it seems like I used tons of different patterned papers, but really only 2! Make sure to apply adhesive to the entire backside of each tiny paper piece before adhering in place. Once all the papers are cut and adhered, remove the white cardstock leaf, poke a hole every 1/4" around each paper piece, then backstitch around each piece - this took me about 4 hours. If you want to skip this stitching step I suggest adhering the paper pieces with foam squares for dimension! Generously cut out the leaf. Use a sewing machine and straight stitch around the negative leaf on the white cardstock then adhere it with foam squares over the leaf so everything is aligned. Tuck a photo under the right edge then embellish and create the title. Type journaling with a typewriter, trim it into strips, then adhere them to the top right corner. Stamp a row of hearts under the journaling to finish.

SUPPLIES: Patterned paper, Thickers, chipboard stickers, paper clip, die cuts, roller stamp: Fancy Free and Take Me Away by Paige Evans / Pink Paislee; Cardstock, pen, adhesive: American Crafts; Typewriter: Typecast by We R Memory Keepers; Leaf die cut, die cut machine: Silhouette Cameo; Sewing machine: Brother; Thread: Coats & Clark; Floss: DMC; Paint: FolkArt

PROCESS VIDEO: I am going to try and film the process of all my layouts going forward! Be sure to subscribe so you know when the newest videos are up :) Here is how this layout came together:

DETAIL SHOTS:
 photo My Awesome Fantastic Family Detail 3 by Paige Evans.jpg


 photo My Awesome Fantastic Family Detail 1 by Paige Evans.jpg

 photo My Awesome Fantastic Family Detail 2 by Paige Evans.jpg
Thank you ever so much for stopping by!

Katie Pertiet Layout


Wednesday, November 9, 2016

I love when the opportunity arrises to collaborate on projects! Today I'm sharing a layout made with Katie Pertiet cut files and my Take Me Away collection with Pink Paislee. 
 photo With Brave Wings She Flies by Paige Evans.jpg
WITH BRAVE WINGS SHE FLIES by Paige Evans

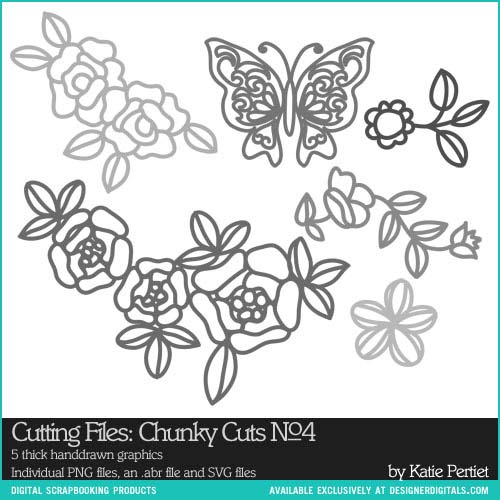
DESCRIPTION: I fell in love with the beautiful florals from Chunky Cuts No. 4 by Katie Pertiet. I turned to one of my all-time favorite techniques to make this layout: backing cut files with patterned papers!

JOURNALING SAYS: At long last you got to go to pre-school! This is your second year at Netzaberg CYS and you love getting to play with toys for three hours every week day with your little friends!

HOW TO: Die cut two pretty florals from white cardstock then back each section with patterned papers. Adhere the florals onto the B-side of Paper 05 using foam dots and a pair of photos between. Embellish by tucking and layering a few die cuts and chipboard stickers around the florals. I had a leftover patterned paper bow made from a previous page that I adhered on top of the scissors - I tried to use school-themed embellishments here and there to go along with the theme of the photos. Place three white foam hearts around the page. Journal on the bottom left corner then stamp around it as well as on the top right corner.

SUPPLIES: Patterned paper, chipboard stickers, die cuts, roller stamp, foam heart stickers: Take Me Away by Paige Evans / Pink Paislee; Cardstock, pen, adhesive: American Crafts; Cut files: Chunky Cuts No. 4 by Katie Pertiet; Die cut machine: Silhouette Cameo; Bow punch: Fiskars

PROCESS VIDEO: Watch how this layout was made from start-to-finish in this 6 minute process video (make sure to subscribe to my YouTube channel and be the first to know when my scrappy videos are up!):


DETAIL SHOTS:
 photo With Brave Wings She Flies Detail 5 by Paige Evans.jpg

 photo With Brave Wings She Flies Detail 2 by Paige Evans.jpg

 photo With Brave Wings She Flies Detail 4 by Paige Evans.jpg
Thanks for stopping by, have a wonderful day!

Chambord Chateau, France


Our final stop on our French roadtrip was Chateau du Chambord.
This massive mansion with spires and chimneys to spare is the toast of the Loire Valley. The property is surrounded by Europe's largest enclosed forest park, a massive game preserve ringed by a twenty mile long wall and full of wild boar and deer.
Then there is the chateau itself which is six times larger than your average Loire castle. It has 440 rooms and 365 fireplaces. The main portion is in the shape of a Greek cross with four towers and two wings surrounded by stables.

Each of the four floors is separated by 46 stairs resulting in soaring ceilings on every level. The main staircase has a fascinating double-helix with two spirals beginning on opposite sides that never intertwine. Two people could climb up and down on each side and never meet. Believe me, we tried it! Mind boggling.

In 1518, François I created this weekend hunting retreat that took 1,800 workmen 15 years to complete. Because hunters could see best after all the autumn leaves fell, this was a winter palace (which explains all those fireplaces!)
Fancy digs. Guests like Charles V, the Holy Roman Emperor, and the other most powerful men of the age came to Chambord.
The floral bedroom of Louis XIV's wife, Maria Theresa.
"Only" 80 of Chambord's hundreds of rooms are open to the public.

The second floor is crowned by a gorgeous coffered ceiling. This floor was a series of ballrooms that used to host post-hunt soirees.
The rooftop is a maze of spires and chimneys that decorate a hunt-viewing platform.

From a distance, the roof with its frilly forest of stone towers give the massive chateau a deceptive lightness.
Fanciest spiral staircase I've ever set foot on.
Looking towards the inner courtyard. | View out towards the grounds undergoing a MASSIVE renovation.

The rear facade of the estate.

Don't mind the scaffolding... Did I or did I not have a little meltdown when we arrived...


Our family at Chambord Chateau, France on Wednesday October 19th 2016.
Then we drove 9 hours home :) We had a wonderful time exploring France and seeing so many beautiful and unique places!

Chenonceau Chateau, France


Tuesday, November 8, 2016

After sleeping in Amboise, we woke up early to beat the crowds to see one of the most visited French chateaux: Chenonceau. 
First ones in! Nice!
The sun was just burning off the morning fog as we caught our first glimpse of the palace.
Caretaker's cottage. I wouldn't mind that being my actual house!

Chenonceau is one of the highlights of the Loire Valley. The sixteenth century Renaissance palace arches over the Cher River and it is impeccably maintained.


Other chateaux were built for defensive purposes, but Chenonceau was built solely as a place of luxury and refinement.
This old round tower predates the main palace from an earlier residence that was once here. A fine limestone veneer was added to the upper portions of the tower so it would better mesh with the styling of the new chateau.
 The original oak doors are still in place with carved coats of arms of the original owners.
The door knocker is up high so that visitors on horseback could use it.

Inside we saw the gorgeous chapel and some of the original surviving tiles along the edge of the floor in the guard room.

Looking out to the river from the Grand Gallery.
This 200 foot long gallery spans the river. The upper stories hold a ballroom and art gallery.

The state of the art (in the 1500s) kitchen down in the basement.

Pots and pans and a Fox.
The interior of this Chateau is one of the best maintained in France. Log fires are always lit in the winter and fresh flower arrangements are constantly on display in season.

All the flowers you see in the photos were real. The whole palace smelled lovely.
Famous residents of Chenonceau include King Henry II's mistress Diane de Poitiers and Catherine de Medici.

Art gallery above the Grand Gallery.
After touring the whole of the interior, we walked around the gardens enjoying the views.


Such a cool building built all on the water. We loved it.
Crossing one of three moats on our way back to the parking area.
Our family at the Chenonceau Chateau, France on Wednesday October 19th 2016.
Then we drove a short way to the Chambord Chateau which has been on my wanderlust bucketlist for a loooong time!
Paige Taylor Evans © // Quinn Creatives DESIGN