Love 2 Wander Layout by Kelly Daye


Wednesday, July 22, 2020

Hello, hello! Kelly Daye here to share my newest Silhouette Design Team layout for Paige. I’m taking you back with Paige’s very first collection, Fancy Free. It hit stores March 2016 and remains a favorite of mine. I fell in love with the colored transparencies in the ephemera package. It’s no longer in scrapbook stores, but you can buy the entire collection at AC Digitals and see Paige flip-thru of the collection on her YouTube. All the ephemera and patterned papers on my layout today are from Fancy Free.
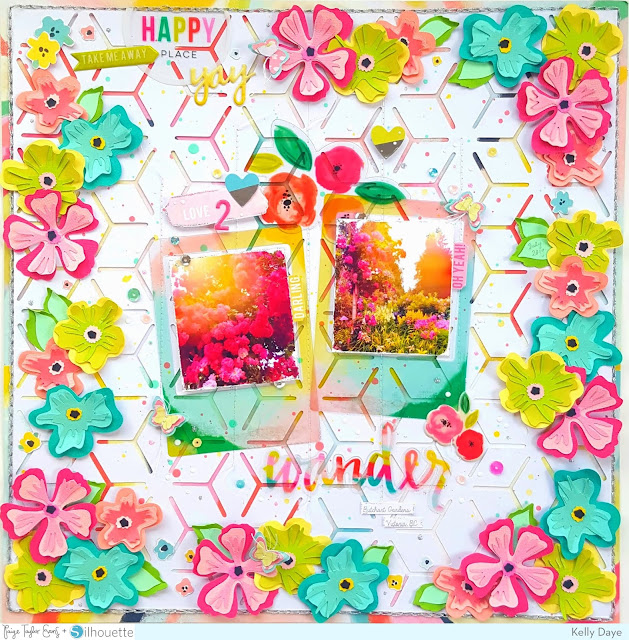
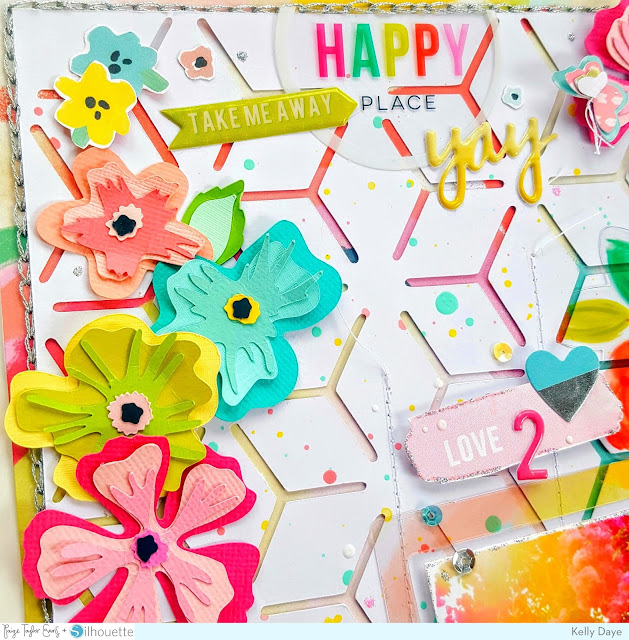
I knew I wanted to feature the gorgeous transparent polaroid frames and thought it would look best on white to pop. But I also wanted some subtle color on the background and Paige's Faux Flower Background cut file was perfect! After cutting it out of white cardstock on my Cameo 3, I used my sewing machine to add a few vertical rows of white stitching, leaving the ends of the threads loose. I love the way all the colors of Paper 10 peek through but doesn’t overwhelm the transparent polaroid frames. To add a little more color and texture, I splattered with coordinating paints and a small brush. After taping the frames directly to the background, I popped up my photos in the openings with foam tape. I really love how you can see the cut file through the frames. The edge of my photos were distressed with a sanding block to reveal a bit of white then gilded with Silver Stickles. Guess what? I love sparkly things, ha!
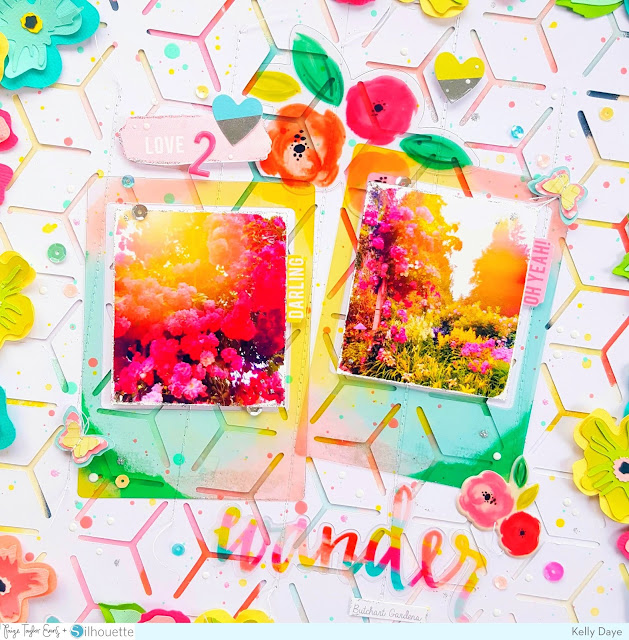
My title is a combination of an ephemera tag, a puffy number, and a transparent word. ‘Love 2 Wander’ is a nod to where the photos were taken, Butchart Gardens on Vancouver Island, just off Canada’s west coast. It's a gardener's dream. And what’s a garden without pretty flowers? Mine are all made with Paige’s Layered Flower & Leaf cut files. All cut out with AC Pastels Cardstock and AC Tropicals Cardstock. I wanted the flowers to be several tones of the same color then topped each off with black centers to match the floral ephemeral in the collection. I left some open spaces here and there between the floral clusters so it wouldn’t look too busy. Some teeny-tiny fussy cut flowers from Paper 11 connected the spaces nicely.

A sprinkle of butterflies were made with three of the 2x2 squares from Paper 06. They’re made with one of the butterflies from Paige’s Butterflies Background cut file. Once the cut file was on my mat in Silhouette Design Studio, I released the compound path and copied one of the butterflies onto a 2nd mat. Then made two extra, each one being a bit smaller so all three could nest together. Finally, a ‘fence’ of silver metallic thread was chain stitched around the entire garden.
Good luck with your own gardens this summer! See you again soon!

SUPPLIES: Patterned papers, die cuts, embellishments: FANCY FREEwhite cardstock; Die cut machine: Silhouette Cameo; Cut files: Faux Flower BackgroundLayered Flower & LeavesButterflies Background
Location: Edmonton, Canada / Blog: Kelly Made It / Instagram: @kellymadeit / Facebook: Petals Daye / Pinterest: Kelly Made It

Fun Memories at Home Layout by Brianna Lepper


Tuesday, July 21, 2020

Hey friends! Brianna Lepper here today sharing a new layout today using Paige's Memories cut file along with the Bloom Street collection. I had taken a photo of my son Elijah riding his bike on a trail near our house. We've been enjoying our days at home and love exploring and playing outside.
To start, I cut the Memories cut file out on a piece of textured white cardstock. While my Silhouette software was still open, I went ahead and offset the inner letter pieces and cut them out so that it would make backing the cut file easier. You can skip this step and back it any way that you prefer. I honestly bounce back and forth on how I back my cut files. Depends on my mood haha! For the inner pieces of the letters, I used the 6x8 Paper Pad.

Bloom Street is one of my favorite collections and with that being said, I don't waste anything!! I backed my photo using the scraps left on my cutting mat from backing my cut file. I layered them up and love how they look! You definitely can't tell that most of those layers are missing all of their centers. I was able to pull in the same colors and patterns and it all came together so nicely.

Next, I went through the 12x12 patterned papers in the collection and chose Paper 10. I loved the blue/green watercolor look and it matched with my photo. I was going to leave the paper as is, but I couldn't help myself and wanted to add a bit of mixed media. I took Paige's Tiles stencil and applied some light modeling paste through it in three different areas on the page. I wanted to take it a step further by applying color to the paste after it dried. I went through my Distress Oxides and pulled colors that matched Paper 10 perfectly. I took my ink blending tools and even my fingers and blended the colors onto the paste. Here's a look at the green areas:

And a look at the blues:

It looks like I colored the paste prior to applying doesn't it? I also splattered clean water on the applied ink and lifted it off with a paper towel. I love the oxidation look! I truly enjoy playing and painting on my layouts and I'm so pleased with how the mixed media turned out! Next I popped the entire cut file on dimensional foam and adhered it down to my background. I used the cut file as my title and added onto it using the Puffy Vinyl Stickers and the Floral Foam Thickers. I embellished using the 4-Page Sticker Book and some of the Floral Die Cuts. To finish my layout, I added some white acrylic paint splatters and sprinkled some sequins from the Mixed Embellishments around the page.
I love how this page turned out! How are you documenting your days at home? This Memories cut file is perfect for all of those special moments and so much more! Thanks so much for stopping by and we will see you soon in my next post! 

SUPPLIES: Patterned papers, stickers, die cuts, sequins, embellishments: BLOOM STREET; Stencil: Tiles by Paige Evans; modeling pastewhite cardstock; Die cut machine: Silhouette Cameo; Cut file: Memories by Paige Evans
Location: Louisiana, USA / Blog: I Love Paper Blog / Instagram: @briannalepper / Facebook: Brianna Nichole
YouTube: Brianna Lepper / Pinterest: Brianna Lepper

Fringed Cut File Cards by Elsie Robinson


Monday, July 20, 2020

Hey everyone, it’s Elsie Robinson back here again with a few cards using some of Paige's cut files and a super fun fringe technique using patterned papers from Bloom Street! Once I started making these cards, I couldn’t stop! These are the perfect cards to create in bulk, and the fringe will look great behind almost any cut file. Let me talk you through them…
I used the same technique to create the fringe for each card. I cut several strips of patterned paper at 0.5” and simply cut into them using some scissors. Even though I don’t have specialty fringe scissors, these didn’t take too long to make at all! Although I do suggest that you use a comfy and sharp pair of small scissors.

To create my fringed papers to back the cut files with, I adhered a strip of the fringe onto cardstock by putting a thin line of liquid adhesive along the top of the strip. I repeated this several times; always making sure to slightly overlap each strip. This meant that I could ruffle up the fringe to create lots of texture! I also varied the combinations of papers so each card had a different color palette.

For the sausage dog and butterfly cards I used the Dogs Set and Layered Butterfly cut files. I cut the outline of these shapes into a 5.5” square piece of white cardstock and hand-stitched around them. I popped each card front up with foam tape and backed with the fringed paper and then adhered to my square card base. For the sentiments I used foam Mini Thickers from Whimsical and a fussy-cut phrase from the 2x2 Paper Pads.

For the Hello and Shine Bright cards, I had to cut them a little differently. I still cut the cut files from white cardstock, but I made sure that the openings of the cards were slightly smaller than the cut file. This meant that I could layer the cut file onto the card front so the sentiment would show up against the colorful fringe. Again, I hand-stitched around each shape, popped it up onto some foam tape, and backed it with the fringed papers. Super easy, fun, and effective!

These are such easy, textural, and cute cards to create so I hope you give them a try with some of the cut files Paige has available!

SUPPLIES: Patterned papers, stickers: BLOOM STREET; Die cut machine: Silhouette Cameo; Cut files: DogButterflyHelloShine Bright and by Paige Evans; white cardstock
Location: England / Blog: Hey Elsie Instagram: @heyelsie_ / Facebook: Elsie Robinson / YouTube: Elsieeee / Pinterest: heyelsie

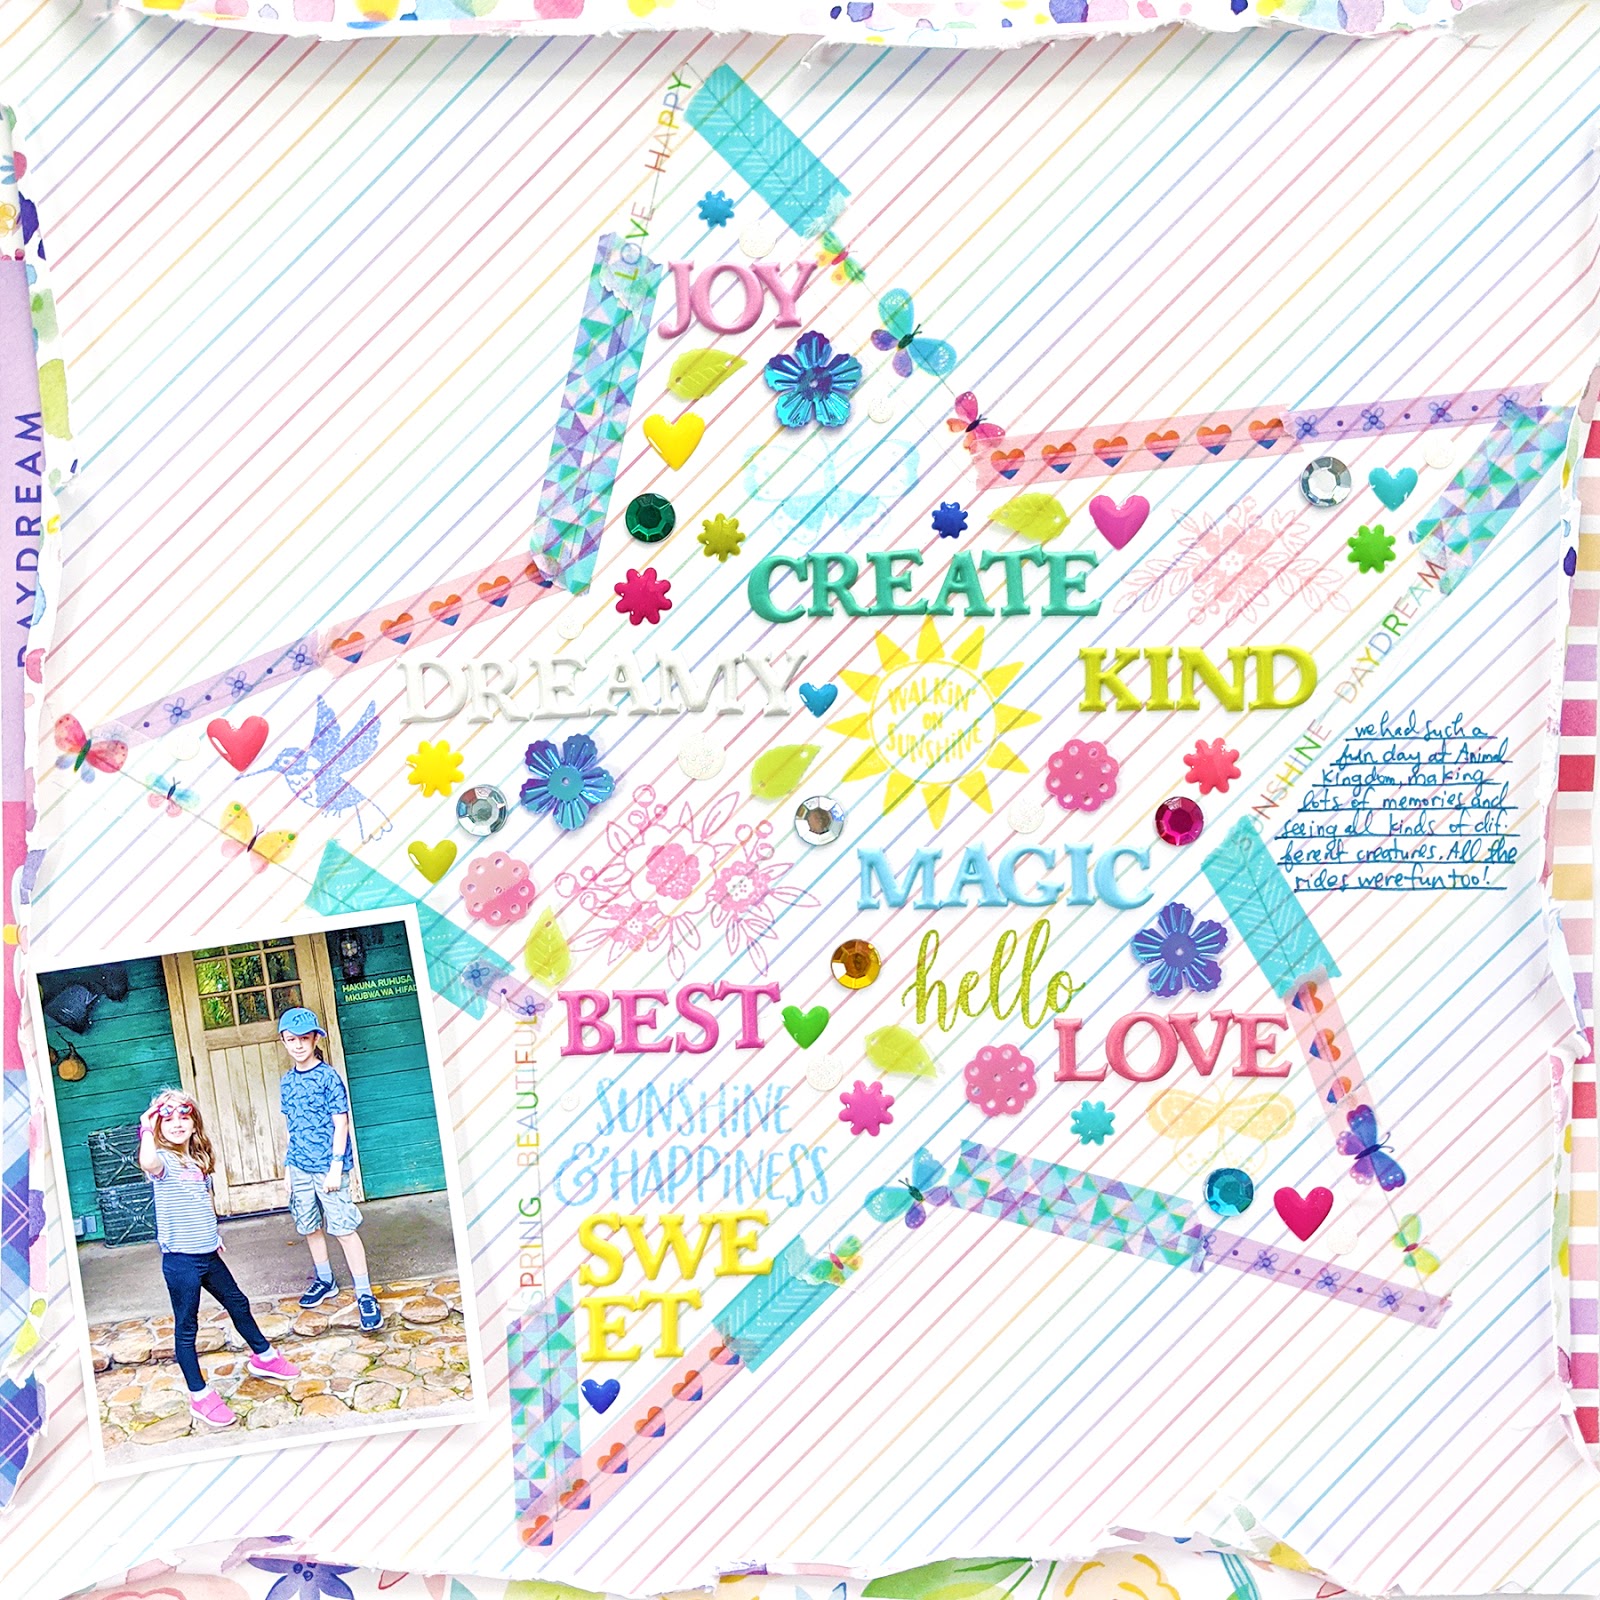
Magic Layout (Embellishment Filled in Star)


Sunday, July 19, 2020

Here is a layout I made with Bloom Street featuring an embellishment filled star!
I began by lightly tracing with a pencil my Star cut file at a slight angle onto the rainbow striped B-side of Paper 20. Then I heavily distressed all the edges of the background by bending, tearing, and folding them. I backed the distressed edges with the patterned barcode strips from Paper 20Paper 14Paper 12, and Paper 17. Then I covered the traced star with strips of Washi Tape.

Hey look! I finally used the Acrylic Stamps! I used scrapbook.com inks in the following colors which match Bloom Street perfectly to stamp the images inside the star: Lantern Light, Succulent, Ballgown Blue, Pink Lemonade, Candy Shop Pink, Caribbean, Butter Cream, and Parisian Purple.

I started filling in the empty spaces between the stamping with embellishments such as Puffy Word Stickers and floral & leaf sequins (adhered with glue dots) from the Mixed Embellishments. I filled in the tiniest spaces with adhesive jewels also from the Mixed Embellishments and Enamel Dots. I placed a 3x4” photo of Fox & Jane on the left side of the layout and stuck it in place with foam adhesive for dimension. I balanced the photo on the left with journaling on the right, written with a dark blue pen. All done! I hope you're inspired to pick up my Bloom Street collection and create something similar!
SUPPLIES: Patterned papers, stickers, sequins, enamel dots, stamps, washi tape, embellishments: BLOOM STREET; Cut file: Star by Paige Evans; Stamping inks: Lantern LightSucculentBallgown BluePink LemonadeCandy Shop PinkCaribbeanButter Cream, and Parisian Purple from scrapbook.com

Butterfly Cards by Anita Bownds


Saturday, July 18, 2020

Hi there crafty friends, Anita Bownds here with you sharing a couple of cute butterfly cards using the Bloom Street collection and one of Paige’s beautiful Butterfly cut files. They are so simple to make and perfect for a hello card or to say thank you. They would put a smile on anyone’s face!
Using my Cameo I cut out two of the Butterflies from white cardstock at a blade depth of 3, pressure 23, and speed 4, as I wanted the intricate lines to cut cleanly. For my first card I used pops of yellow, pink, and purple. From the 12x12 Paper Pad I selected a beautiful patterned paper with yellow, pink, and mint and backed one of the butterflies.
I then chose a paper from the 12x12 Paper Pad to decorate my card starting with the card base then I cut a border strip for the center of the card and layered another contrasting color behind with a scalloped edge that I created with deco scissors. I machine stitched each edge then I adhered a doily behind the border and glued it all down adding a Floral Die Cut in the middle of the butterfly.
For the second card I used the same steps to make the card but changed the colors using more greens, blues, and purples. I also added a flick of white acrylic paint to create more contrast.
I hope you have enjoyed my card inspiration today and happy crafting!

SUPPLIES:
Patterned papers, die cuts, stickers, embellishments: BLOOM STREET; Cut file: Butterfly by Paige Evans; white cardstockwhite acrylic paint
Location: Australia / Blog: Neat-N-Crafty / Instagram: @anitabownds / Facebook: Anita Bownds
YouTube: Anita B / Pinterest: Anita Bownds

Favorite Always Layout by Missy Whidden


Friday, July 17, 2020

Hey friends! Missy Whidden here with a bright and fun layout featuring another one of Paige’s new 20 Summer-Themed Cut Files. This one is Summer Tags and I dug into my older stash of Paige’s collections and used some Fancy Free. I also mixed in a few bits from Bloom StreetTruly Grateful, and Pick-Me-Up. On my background I used Paige’s Sunburst Rays, Polka Dots and Fish Stencils. I started out by cutting four of the six tags on white cardstock. I used a few Fancy Free papers to back them. I used gelatos and Shimmerz sprays to add extra color to them and then added machine stitching. I used thick smooth white cardstock as my background, and after coating it with clear gesso, I used a rainbow variety of Distress Oxides to create the watercolor effect. I scraped the ink pads directly onto the paper and spritzed it with water. After that dried, I used modeling paste paste over the Stencils to create some awesome texture.
I popped up all the tags with adhesive foam and then began sorting through embellishments to add. I tried to stick to the tone-on-tone idea. I fussy cut a few Fancy Free flowers as well as some circles from the 6x6 Paper Pad. I used a few stickers from the Bloom Street 4-Page Sticker Book as well as a few heart stickers and sequins from the Truly Grateful Mixed Embellishments. Here you can see the background texture as well as the detail on the tags. I went around the edges on them with the Distress Oxides and a foam blending tool. I also tucked in matching thread in several places.

I love how you can create a fun little scene with this palm tree tag. I almost left it white, but in the end I added blue Shimmerz to create a sky. I used brown and gold gelatos to create the trunks. I fussy cut tiny flowers from Fancy Free Paper 11 to add to a few places. To finish off the tags, I added string through the holes.

To back the sun tag, I sprayed a few yellow Shimmerz onto scrap cardstock. I went over the rest of the sun rays with the yellow Distress Oxide and then machine stitched through them with yellow thread.

I really had fun making this layout! I hope it inspires you to try out this Summer Tags cut file from the 20 Days of Summer Cut Files. There are six tags included, so the possibilities are endless. Thanks so much for stopping by!
SUPPLIES: Tags cut files: 20 Days of Summer Cut Files; Patterned papers, stickers, die cuts: FANCY FREE; Floral die cuts, stickers, butterflies: BLOOM STREET; Sequins: TRULY GRATEFUL; Mini Thickers: PICK-ME-UPStencilsgessomodeling pastewhite cardstockDistress Oxides
Blog: littlenuggetcreations.blogspot.com // Instagram: @missywhidden // Pinterest: @missywhidden
Facebook: missy.whidden // YouTube: Missy Whidden

Baby Mini Album by Nidia Rubio


Thursday, July 16, 2020

Hi, friends! Nidia Rubio from Scrapamundi here to show you my newest project with Paige's collections and cut files. This time I made a mini album to add to a super album. I know this could be weird, but let me explain.
I have discovered a new way for making albums. I always made albums starting on the binding and continuing to add the pages. But I discovered that I enjoy sooo much the process of making the pages and some details more. Then, when I have all these things on my desk, I see how to organize them and I start with the binding.

I'm showing you the mini album that I will put in an album bigger than this. I'm making it for a baby who will be born in August, so I have time to complete it with many pages like this.

I mixed papers from Truly Grateful and Bloom Street and I used Paige's Baby and Love Arrow cut files. I added some stickers and ephemera die cuts to decorate. You can see how simple this mini album is but you can put many photographs inside.

This is my project for you today! I hope you liked it! Thank you for stopping by and have a nice day!

SUPPLIES:
 Patterned papers, stickers, die cuts: BLOOM STREET & TRULY GRATEFULwhite cardstock; Die cut machine: Silhouette Cameo; Cut files: Baby and Love Arrow by Paige Evans
Location: Spain/ Blog: Scrapamundi / Instagram: @scrapamundi Facebook: Scrapamundi
YouTube: Scrapamundi / Pinterest: Scrapamundi

Beautiful (Banners) Layout


Wednesday, July 15, 2020

Hey friends! I have a new layout to share with you today using Bloom Street!
Start with the yellow floral B-side Paper 14 as the background and adhere the patterned barcode strip from the seed-packets Paper 11 across the top. Using a ruler, measure 2 ½” and 7” down from the top on the left and right edges, mark with a pencil, and make thin slits with scissors. Trim two pieces of cream yarn and wrap the left ends of the yarn pieces into the left slits, leaving the right ends free on which to add all the embellishments.

Cut up Paper 01 and Paper 17 into all the sections. Pick and choose the pieces you want to use and notch the ends of most of them to turn them into pennants. Fussy cut around the floral ampersand. Punch a hole through the tops of all the paper pennants and string them onto the yarns as shown to create two banners. Affix the bottoms of the banners in place with foam squares for dimension.
Add 3x4” photos onto a couple of the sections then embellish with Puffy Word Stickers, floral sequins from the Mixed Embellishments, colored adhesive jewels also from the Mixed Embellishments, and Enamel Dots. Journal with a dark blue pen on one of the journaling spots to finish. I hope you're inspired to make a "bannerific" layout with Bloom Street!
SUPPLIES: Patterned papers, stickers, sequins, jewels, embellishments: BLOOM STREET

Sandcastle Layout


Tuesday, July 14, 2020

Hey friends! I have a new layout to share today - my very first using my brand new Go the Scenic Route collection and the Sandcastle cut file from my 20 Days of Summer Cut Files!
 I received some samples of Go the Scenic Route in the mail last week, although no 12x12 papers or a few of the embellishments, but I just couldn't wait to play even without the entire collection! I began by die cutting my Sandcastle cut file from white cardstock and then backed it with Go the Scenic Route papers from the 6x8 Paper Pad and the Boxed Cards since I don't have the 12x12 Papers yet :)
 On a piece of kraft cardstock I splashed watered down white acrylic paint and let it dry. I adhered the cut file on top using foam squares to create dimension and shadows. I tucked two 3x4" photos into the top of the sandcastle. I only took these photos at the beginning of July - I had this sandcastle cut file designed already and when the kids starting building a sandcastle I was like HOLD UP! PICTURE TIME! I HAVE TO SCRAP THIS lol.
To embellish I added three of the Puffy Word Stickers color-on-color so the blue "HAPPY" in a blue space, the pink "PLAY" is in a pink section, and the yellow "FUN" is in the yellow "sand" at the bottom. I finished the title with Chipboard Stickers so all together it's "SUNSHINE, FUN, AND HAPPINESS".
I sprinkled a few colorful Chipboard Sticker dots across the bottom, added a "happy" heart Chipboard Sticker and red geotag Chipboard Sticker at the top, and wrote journaling on the right edge along with the date stamped below. I'm finally learning to stamp the dates as I create the layout to save myself so much time searching for the dates in a year or so when I finally put this layout in a scrapbook! To finish, I placed a strip of colorful Washi Tape across the top edge.
 I hope you are excited about my new Go the Scenic Route collection which starts shipping to stores in a few weeks and are inspired to purchase my 20 Days of Summer Cut Files to document your summer memories! Have a great rest of the week!
SUPPLIES: Patterned papers, stickers, washi tape: GO THE SCENIC ROUTE; Cut file: Sandcastle by Paige Evans (from my 20 Days of Summer Cut Files); white cardstockwhite acrylic paint

Notepad Planner Dashboard by Mik Godinho


Hi friends! It’s Mik from Papermiks back here, sharing more planner inspiration! One of the perks planners give us is the ability to learn that the more organized we are, the more time we have. There are several ways to make lists and sometimes you just need a little piece of paper to make a quick list to go to the market. Today I’ll show you a notepad that is also a dashboard.
Paige’s Cactus cut file was my decoration of choice. While the Silhouette was cutting, I started to make my background. I cut a 7½ x 5” piece from Paper 10 and a 6½ x 4½" piece from white cardstock. I machine stitched around both papers. Once the cactus was cut, it was time to embellish my dashboard. I backed the Cactus with Paper 10 and I used vellum for the pot.

I then glued the notepad’s back onto the back of the dashboard, decorated using Washi Tape, some stickers from the 4-Page Sticker Book, and the Notepad Planner Dashboard is ready! Important to say that I purposely left 1½" of the paper out of the planner so it’s easier to find it as quickly as if it were a bookmark.

I hope you’ve found some inspiration from this idea and enjoyed it! Thanks for stopping by and have a creative day!

SUPPLIES:
 Patterned papers, stickers, die cuts, sequins, washi tape, embellishments: BLOOM STREETwhite cardstock; Die cut machine: Silhouette Cameo; Cut file: Cactus by Paige Evans
Location: Bolivia / Instagram: @papermiks / Facebook: mik.godinho.papermiks 
Paige Taylor Evans © // Quinn Creatives DESIGN