Hello Lovely Sweet Friend & Awesome Blossom Layouts by Kelly Daye


Tuesday, July 25, 2023

Hello crafty friends, Kelly Daye here with two layouts this week, read on to see why! I’ve used Paige’s Rounded Squares Background cut file for both. My plan was to paper-back the cut file with Paper 18 from Blooming Wild then lay it over stitched Paper 12. Have you noticed these two papers are identical in color, but Paper 12 has flowers on it? Anyways, after two days of chain stitching with multiple colors of DMC floss I found that the paper-backed cut file overwhelmed all the pretty stitching! Gah! On to plan B, ha! I cut out another Rounded Square Background from white cardstock, left it open (no paper-backing), and glued it over my stitching. Then, I popped up the paper-backed cut file onto another sheet of white cardstock with foam tape. Voila, two pretty backgrounds to design with!
‘Hey Lovely Sweet Friend’ features photos of a visitor that joined us at a local pub as we sipped wine on their patio. I made the tiny squirrel sized banner from flags in the Sticker Book and added three little Flower Charms. My 2x2 photos are backed with the Floral Transparency. This adds more interest and color but doesn’t cover up the background. I made a small collage on the left of the photos with a Chipboard Tile, Chipboard Frame Stickers, Puffy Phrase Stickers, Mini Flower Puffy Stickers, and Floral Die Cuts. On the right, more floral embellishments, a butterfly from the Cardstock Stickers and a cute pink button from the Chipboard Stickers! To balance my vignette on the lower right, I made another vignette on the top left. You might have learned about the magic of three, that’s how I designed this cluster, spelling ‘HEY’ with Thickers.
Watch this Cameo Tutorial to see how I used Paige’s Rounded Squares Background cut file to create the stitching on Paper 12. Meanwhile, check out how Paige stitched Paper 12 for her own gorgeous design!!
‘Awesome Blossom’ features my sweet and lovable kitty Blossom. How perfect that her name is part of the Puffy Phrase Stickers! This layout was made with the Rounded Squares Background cut file paper-backed with Paper 18. I’ve embellished Chipboard Frame Stickers with Washi Tape.
A cluster of pretty things including Floral Die Cuts, Chipboard Stickers, Mini Flower Puffy Stickers, transparent flowers from the Sticker Book, and Cardstock Stickers all surround my chunky cuddle-bug.
There are no mistakes in scrapbooking, LOL! I hope you’re inspired to use one cut file in two ways too! Thanks so much for coming by!
SUPPLIES: Patterned papers, stickers, Thickers, die cuts, embellishments: BLOOMING WILD; Cut file: Rounded Squares Background by Paige Evans
Snow Angels & Merry Christmas Layouts by Paige Evans with the Exclusive SBC Stencil


Monday, July 24, 2023

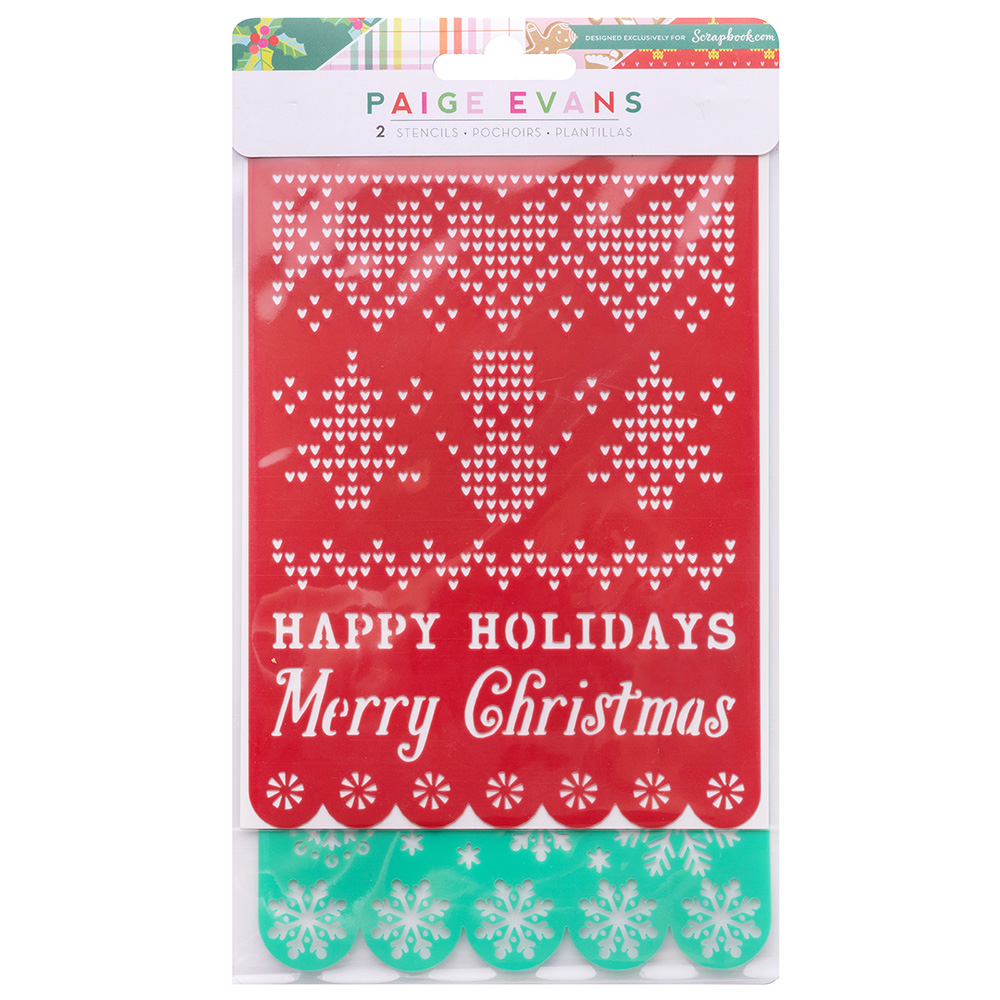
Hello friends! Scrapbook.com has a FREE and EXCLUSIVE Stencil that goes with my Sugarplum Wishes collection!
How do you get your freebie Stencil? It's easy! Shop as you normally would, then add (1) Paige Evans - Sugarplum Wishes Collection - Stencil to your cart and the price will be $0.00! This is a FREE add-on gift while supplies last. Shipping rates still apply. One free Stencil per day, per order, during the promotional period for all orders. To enable you, I've made two layouts with the two stencils with tutorials!

SNOW ANGELS LAYOUT BY PAIGE EVANS

Step 1 - Gather supplies: white modeling paste, a palette knife, rainbow of textured cardstock, the SBC exclusive Stencil, and some Sugarplum Wishes (Sticker Book, Cardstock Stickers, Mini Thickers, Enamel Dots, and Ephemera Die Cuts).

Step 2 - Squeeze white modeling paste onto a palette knife then scrape it through the Stencil onto cardstock.

Step 3 - Carefully peel off the Stencil.

Step 4 - Let the white modeling paste dry or speed up the drying time with a hair dryer.

Step 5 - Choose a rainbow of textured cardstock (I used 15 different colors of textured cardstock by American Crafts) and repeat steps 1-4 on every color.

Step 6 - Trim a 3" square from the stenciled area of every cardstock.

Step 7 - Arrange (15) squares and one 3" square photo in a grid design on a white cardstock background, only adding adhesive on the back center of the squares so the edges can lift and bend. I also didn't place them perfectly straight so it creates an interesting and textured background.

Step 8 - Create a title on the white square using Mini Thickers. Embellish tone-on-tone using coordinating embellishments from Sugarplum Wishes such as pieces from the Sticker Book, Cardstock Stickers, Mini Thickers, Enamel Dots, and Ephemera Die Cuts as shown.

All done!


**********************


NUTCRACKER BALLET LAYOUT BY PAIGE EVANS

Step 1 - Gather supplies: SBC mini ink daubers, a rainbow of ink pads, smooth white cardstock background, the SBC exclusive Stencil, and some Sugarplum Wishes (Paper 11, 6x8 Paper Pad, Mini Thickers, Floral Die Cuts, and the Sticker Book). 

Step 2 - Line the Stencil on the top left corner of the smooth white cardstock background then dab ink through the upper part. Move the Stencil over, line it up with the previous part, then continue inking all the way across the background paper.

Step 3 - Move the Stencil back to the top left corner, switch ink colors, and dab another row across the background.

Step 4 - Continue dabbing lines with different colors of ink until you've used the entire Stencil across the top part of the background.

Step 5 - Add a block of the colorful Christmas trees Paper 11 across the bottom half, place a photo on a few layers of patterned papers from the 6x8 Paper Pad, and make the title using Mini Thickers on the seam. Top the photo block with a holly bow and poinsettia from the Floral Die Cuts. Write journaling on a small label from the Sticker Book to finish.
All done!
I hope you're inspired to pick up the FREE and EXCLUSIVE Sugarplum Wishes Stencil from SBC!
And might as well add some more Sugarplum Wishes while you're shopping ;)

Hello Beach Layout by Kat Flores


Hello scrappy friends! Kat Flores here on Paige's blog with my first layout featuring Paige’s cut files and Blooming Wild collection. I’ve been enjoying my summer so far, so as a scrapbooker I must document a weekend out at the beach.
I started by cutting the gorgeous Seashells Background from white cardstock and I backed it with papers from the 6x8 Paper Pad. I love these papers because they have holographic foil accents! The seashells look so cute with an iridescent touch. For my background, I used gesso and gelatos in blue tones to make a water look. I finished it with acrylic paint splatters. I added adhesive foam on the backed cut file and placed it in the center. I added my photos into the cut file hiding a bit of them and kept my design simple with just a few embellishments. I used some flowers from the Ephemera Die Cuts and Floral Die Cuts, some tiny hearts from the Puffy Phrase Stickers and added my title using tone-on-tone letters from the Thickers over the cute Ephemera Die Cut with rainbow hearts. Finally, I added some machine stitching on my title because I love stitches!
I had so much fun creating this beach-themed layout! I hope it inspires you to document your summer and use Paige’s cut files along with the Blooming Wild collection. Have a wonderful day and happy scrapping!
SUPPLIES: Patterned papers, stickers, Thickers, die cuts, embellishments: BLOOMING WILD; white cardstock; Cut file: Seashells Background by Paige Evans

Cute Cousins Layout by Paige Evans for SCT Magazine


Sunday, July 23, 2023

Here is the last of my layouts that appeared in the Summer 2023 issue of Scrapbook & Cards Today Magazine which you can download and browse for free HERE! I used my Blooming Wild collection and featured the Chipboard Rounds!

To create this layout, I started with a solid pink paper from the Blooming Wild Project Pad as my background. Then I grabbed a package of Chipboard Rounds and tried to figure out which ones to use. Well, I couldn't narrow them down, so I used them all :) I layered the circles in a grid design on the bottom left triangular side of the page and simply glued them in place. So easy peasy!

 Then I added two photos and embellished minimally with mini silver alpha stickers from the Sticker Book, Journaling Spots tucked under the photos as layers, and Cardstock Stickers.

To finish I wrote journaling on a label fussy cut from Paper 13 and stamped the date on a little label from the Sticker Book.

I hope this layout inspires you to check out the Summer 2023 issue of Scrapbook & Cards Today Magazine and try the Chipboard Rounds from Blooming Wild! Let me know if you have any questions and thanks for stopping by!

SUPPLIES: Patterned paper, die cuts, stickers, Thickers, embellishments: BLOOMING WILD

Sweet Summer Layout by Paige Evans for SCT Magazine


Saturday, July 22, 2023

Here is another one of my layouts that appeared in the Summer 2023 issue of Scrapbook & Cards Today Magazine which you can download and browse for free HERE! I used my Blooming Wild collection and this page features hand stitching on the rainbow burst Paper 22!
To create this layout, I poked a hole about every 1/4" between all of the rays of Paper 22 - I use a ruler and paper piercer over a foam mat to help make piercing easier and consistently spaced.
Then I went through my DMC threads and found colors to match the rainbow rays. I did a chain link stitch through all the holes and it took a few hours to complete. I love the way hand stitching adds texture and interest to my pages!
Once the stitching was complete, I placed 3 photos of Fox and Jane at various pools across the middle then made the title above with a combination of Thickers and a Chipboard Sticker. To finish I embellished on, under, and around the photos with tone-on-tone bits from the Cardstock Stickers, Sticker Book, and Chipboard Stickers.
I hope this layout inspires you to check out the Summer 2023 issue of Scrapbook & Cards Today Magazine and try hand stitching a Blooming Wild paper! Let me know if you have any questions and thanks for stopping by!
SUPPLIES: Patterned paper, die cuts, stickers, Thickers, embellishments: BLOOMING WILD

My Guy Layout by Jackie Ashton


Friday, July 21, 2023

Hi friends! Jackie Ashton here with my next design team project using Paige's My Guy Cut File paired with Blooming Wild!

To start my layout, I cut the My Guy Cut File from white cardstock and backed it with vellum. This gives it a soft tone so that you can still see the background paper underneath which is the B side of Paper 20. I added 3D foam to the back of the cut file to give it dimension. Then I used 3 patterned papers as layers for my photograph - Paper 11, Paper 13 and Paper 16. I added journaling to a Journaling Spot to the side of my photograph. The ‘Hey Cute Stuff’ banner is cut from Paper 1 which is a great cut apart sheet to use on your projects. To finish my layout I used a selection of embellishments from the Sticker Book, Chipboard Stickers, and Puffy Phase Stickers.

I loved how this page came together using the My Guy Cut File paired with Blooming Wild and I hope it inspires you in some way!

SUPPLIES: Patterned papers, stickers, Thickers, die cuts, embellishments: BLOOMING WILD; white cardstock; vellum; Cut file: My Guy by Paige Evans

Nordic Christmas Layout by Heidi Lewis


Thursday, July 20, 2023

Hi friends, it’s Heidi Lewis here on the blog today to share a festive layout! Have you heard of the Christmas-in-July trend? It’s the perfect excuse to get a head start on all your Christmas crafting. Plus, in coincides with the release of Paige’s first Christmas collection Sugarplum Wishes!
To make this layout I cut out Paige's Christmas Nordic Background cut file from white cardstock and backed it with Paper 4 from Garden Shoppe. Then I cut out the 25 from the 25 Christmas Cut Files 2021 and stitched both numbers with all 6 strands of DMC 760 in a chain link stitch. I used the stitched numbers and a 4x4 photo to create a central embellishment cluster. I fussy cut two letterboards from Garden Shoppe Paper 12 to layer around my photo. Then I continued to layer Sugarplum Wishes Ephemera Die Cuts, Flower & Snowflake Die Cuts, Cardstock Stickers, and Mini Puffy Stickers tone-on-tone around my photo. I love how easy it is to mix-and-match Paige’s collections!
My favorite elements on the layout are the little bitty puffy stickers and the rainbow of colors. A Christmas tree Paper Clip makes the perfect finishing touch. Well, that’s it, folks! Hope you have a merry Christmas in July!
SUPPLIES: Patterned papers, die cuts, stickers, Thickers, embellishments: SUGARPLUM WISHES & GARDEN SHOPPE; white cardstock; Cut files: Christmas Nordic Background and 25 from the 25 Christmas Cut Files 2021 by Paige Evans

Beautiful Blooms Layout by Heather Rubert


Wednesday, July 19, 2023

Hello there! Heather Rubert here with my first design team layout! Today I’m sharing a page featuring Paige’s Lightbulbs cut file paired with the bright & happy colors of the Splendid collection.

I started off by cutting the Lightbulbs from white cardstock and painting the cardstock with watercolors and a little gold acrylic paint. Next, using the light blue paper from the Splendid Project Pad as my background, I glued down most of the cut file. I turned the bulbs into shaker pockets using vellum, sequins, and my sewing machine. Using white embroidery floss I added more texture to the “strings” with a chain link stitch. To spice up the edges of the page I used a border punch and more gold acrylic paint. I decided I needed even more flowers, so I fussy cut lots of pretty flowers from Paper 6. Finally, I finished up with a few embellishments from the Project Pad and made my title using Thickers.

Thanks for stopping by and I hope you feel inspired to use this Lightbulbs cut file along with Splendid!

SUPPLIES: Patterned papers, stickers, Thickers, die cuts, embellishments: SPLENDID; Project Pad; vellum; watercolors; gold acrylic paint; white cardstock; sequins; border punch; Cut file: Lightbulbs by Paige Evans

Instagram // Facebook // YouTube

Lookin' Sharp Layout by Audrey Mutschall


Tuesday, July 18, 2023

Hello friends! Audrey Mutschall here with a new layout featuring Paige’s Cactus with Flowers cut file and Blooming Wild! This design was absolutely perfect for documenting a photo from a recent trip to Red Rock Canyon where we enjoyed the beautiful scenery and took way too many photos of cacti! The day we visited Red Rock Canyon was a bit chilly, so I wore a denim shirt with an embroidered desert landscape on the back. I’d bought the shirt in Las Vegas the previous day as a souvenir and it ended up being the perfect accessory for posing in the desert amongst the scenery!

I used white cardstock for the Cactus with Flowers cut file and backed it with a variety of patterned papers from the 12x12 Paper Pad. I added extra dimension by layering leaves from the Floral Die Cuts behind the potted plant and fussy cut flowers from Paper 24 on top of the cut file. With the cut file completed, I created a geometric background using inks and a stencil. I printed my photo 3.5x5 inches in size and matted it with zig-zag Paper 7. I placed a Chipboard Tile and a Mini Frame at the top of the photo along with two tags from Paper 1. My title, “Lookin’ Sharp!” is made from the mini silver alphas in the 8-Page Sticker Book, a label from the Journaling Spots, and Thickers. Lastly, I fussy cut some butterflies from Paper 16 and placed them around the layout as a finishing touch.
I hope this inspires you to have some fun with Paige's cut files and the gorgeous Blooming Wild collection!
SUPPLIES: Patterned paper, sticker, Thickers, die cuts, embellishments: BLOOMING WILD; white cardstock; Cut file: Cactus with Flowers by Paige Evans

Happiness is Being a Grandma Layout by Ashley Neu


Monday, July 17, 2023

Hello scrappy friends! It’s Ashley Neu and I have another awesome layout created for the Paige Evans Cut File Design Team. At the end of each school year after the spring concert, our school has Grandparent’s Day and this year was extra special. It is my middle daughter's last year in elementary which means it was her last elementary concert and her last day to share Grandparent’s Day with her awesome grandparents! I just had to document these photos and the Happiness is Being a Grandma cut file was the perfect cut file to do so! I grabbed Paige’s Blooming Wild collection to bring in these beautiful colors!
Usually I like to use white cardstock for cut files but sometimes it gives such a big impact to use colored cardstock or patterned paper. That’s exactly what I did for this layout. Using Paper 23, I cut out the title and backed it with Paper 2. I just love these two patterns together. One is a tone-on-tone pattern and the other a bold floral design - just so awesome together!
The background of this layout is white cardstock to balance out all of the colors that I wanted to include. After I adhered the cut file using foam adhesive, I matted my photos with papers from the 6x8 Paper Pad and tucked them slightly under the cut file. These photos were both printed at 3x4. I love this size because you can print 2 photos out of one 4x6 print. Awesome way to save money!
Have you seen the Floral Die Cuts in the Blooming Wild collection?? They are just pure perfection! So many deep and rich colors with a variation of flowers and leaves. You don’t want to miss out on these! I used a handful to embellish in 3 places on my layout, creating a triangle design. This keeps the eye moving around the layout. I also grabbed some embellishments from the Chipboard Stickers and Cardstock Stickers to sprinkle in some more goodness. Isn’t the little purple birdie just the sweetest thing ever?! In two corners of the layout I added handmade photo corners to finish off the layout.
Large titles are a great way to start the design of the layout. They really help you make decisions on where your photos and embellishments can live. Try one out! Thank you so much for stopping by Paige's blog today and have a wonderful day!
SUPPLIES: Patterned papers, stickers, die cuts, embellishments: BLOOMING WILD; white cardstock; Cut file: Happiness is Being a Grandma by Paige Evans
Paige Taylor Evans © // Quinn Creatives DESIGN