
Hi friends! Paige Evans here today with an embroidered scrapbook layout!
Have you ever tried hand stitching on your pages before? With the help of the WeR Foam Mat for piercing the initial holes, it's a breeze!
 Check out this process video to see how I created this layout:
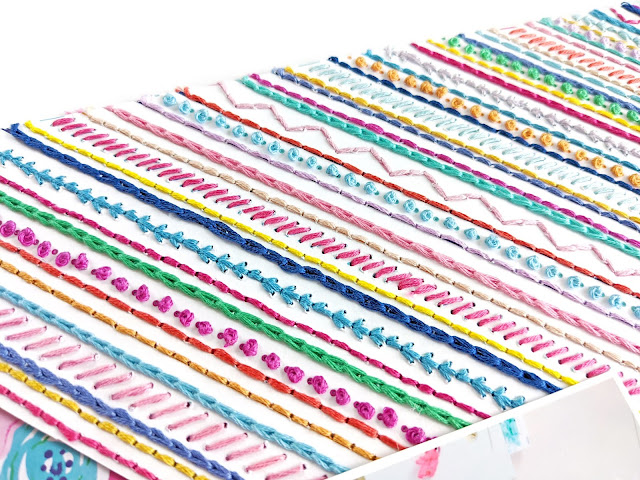
I began by trimming off the barcode strip from the stitched design B-side of Paper 5 in my new Go the Scenic Route collection with American Crafts. Then I grabbed a paper piercer and the WeR Foam Mat and went to town piercing holes all across the printed design. I pierced holes through everything - the polka dots, the lines, the leaves, the stripes, trying to keep the spaces between the holes even.
Then I chose DMC threads in colors to match.
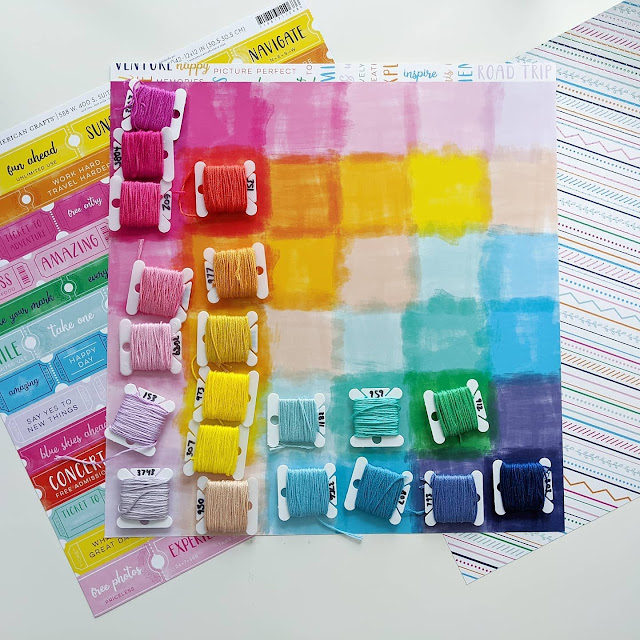
Here you can see the colors I used, and when I stitched I used all 6 strands of thread.

Then I did the embroidery! Here is a shot in progress.
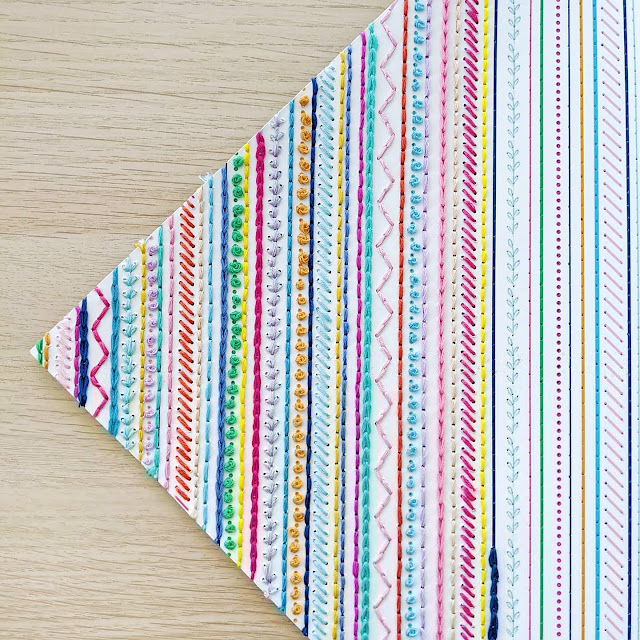
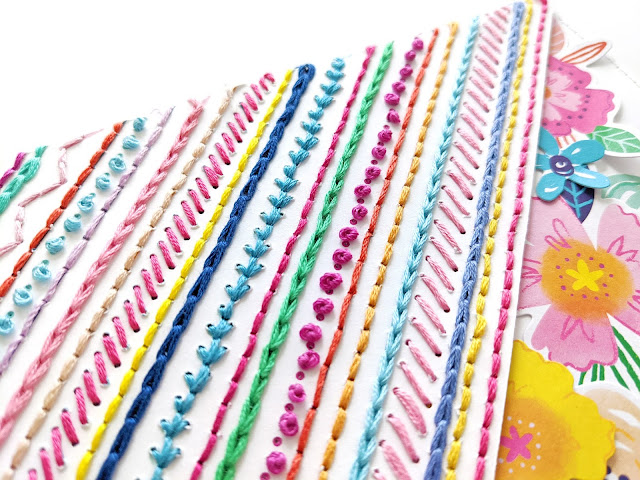
It took about 15 hours to hand stitch half of the patterned paper which I ended up trimming into a triangle. Half was enough :)

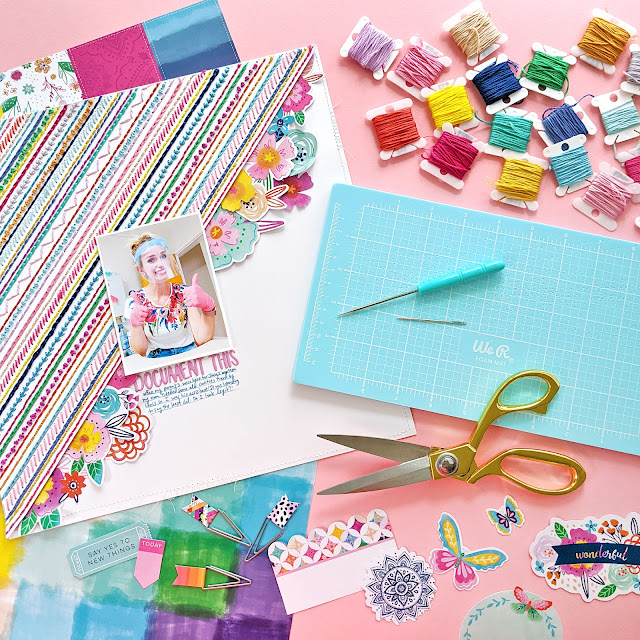
I placed the embroidered paper on a piece of smooth white cardstock and then tucked Floral Die Cuts under the seam. I added a 3x4" photo of myself to the center, placed "Document This" Puffy Phrase Thickers under for the title, and then journaled below to finish.

I hope you are inspired to try hand stitching on your layouts using the WeR Foam Mat to pierce your holes and my new Go the Scenic Route collection for embellishing!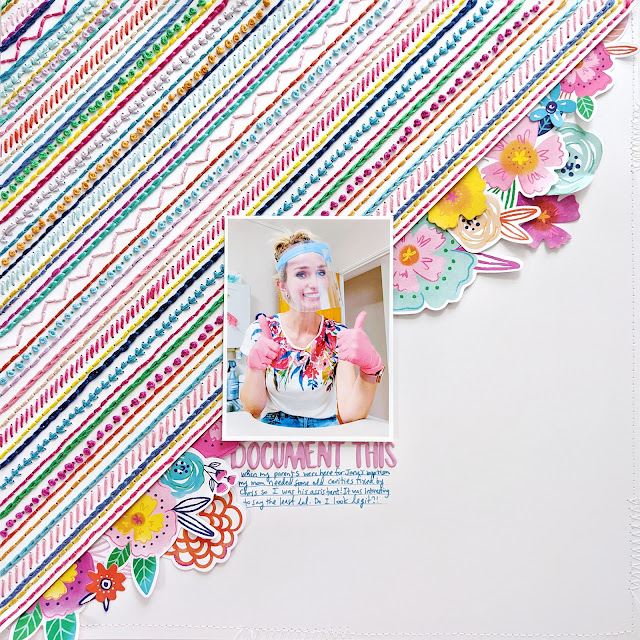
I'll leave you with some detail shots:


SUPPLIES: Patterned paper, die cuts: GO THE SCENIC ROUTE; WeR Foam Mat

Have you ever tried hand stitching on your pages before? With the help of the WeR Foam Mat for piercing the initial holes, it's a breeze!


I began by trimming off the barcode strip from the stitched design B-side of Paper 5 in my new Go the Scenic Route collection with American Crafts. Then I grabbed a paper piercer and the WeR Foam Mat and went to town piercing holes all across the printed design. I pierced holes through everything - the polka dots, the lines, the leaves, the stripes, trying to keep the spaces between the holes even.

Then I chose DMC threads in colors to match.

Here you can see the colors I used, and when I stitched I used all 6 strands of thread.

Then I did the embroidery! Here is a shot in progress.

It took about 15 hours to hand stitch half of the patterned paper which I ended up trimming into a triangle. Half was enough :)

I placed the embroidered paper on a piece of smooth white cardstock and then tucked Floral Die Cuts under the seam. I added a 3x4" photo of myself to the center, placed "Document This" Puffy Phrase Thickers under for the title, and then journaled below to finish.

I hope you are inspired to try hand stitching on your layouts using the WeR Foam Mat to pierce your holes and my new Go the Scenic Route collection for embellishing!

I'll leave you with some detail shots:


SUPPLIES: Patterned paper, die cuts: GO THE SCENIC ROUTE; WeR Foam Mat


This is totally awesome. I love stitched pages. They add so much to the design. Your projects are so inspirational. Thanks for sharing.
ReplyDeleteHoly stitching!!! This is absolutely AMAZING!!! I don't have enough words to describe how much I love this!!!!! WOW!!!! Loving that adorable photo of you too!! This is FABULOUS!
ReplyDeleteI'm blown away by the variety and number of tiny stitches it took to work this into a beautiful confection of colour. You are so creative, dedicated and inspiring. Plus! You had THE perfect photo to document! A stunning layout my dear 🌸😍
ReplyDeleteHi!
ReplyDeleteI love the stitching page project! I bought that go to scenic route paper pack from Scrapbook.com, but page 5 was not the stitching page but rather a page with a lot of small butterflies. That’s OK because I really like the rest of the paper pack anyway. Still, where can I find this stitching page?
Thank you!
Laura
Thanks for your kind words! It's from the single 24 double-sided patterned papers, and it's Paper 5 of the 24. Here is a link: https://www.scrapbook.com/store/ac-369755.html?sscid=c1k4_jaxk7
Delete