Michaels Small Explosion Box for Fox


Wednesday, January 20, 2021

 Here is the 2nd Explosion Box I created for my endcap at Michaels! Have you seen all these super fun supplies at your local Michaels? You can also grab everything online - supplies are linked at the bottom of this post. I made this box for Fox, just because - he's so awesome!

Here is a video of me flipping through and talking about this finished Small Kraft Memory Explosion Box:
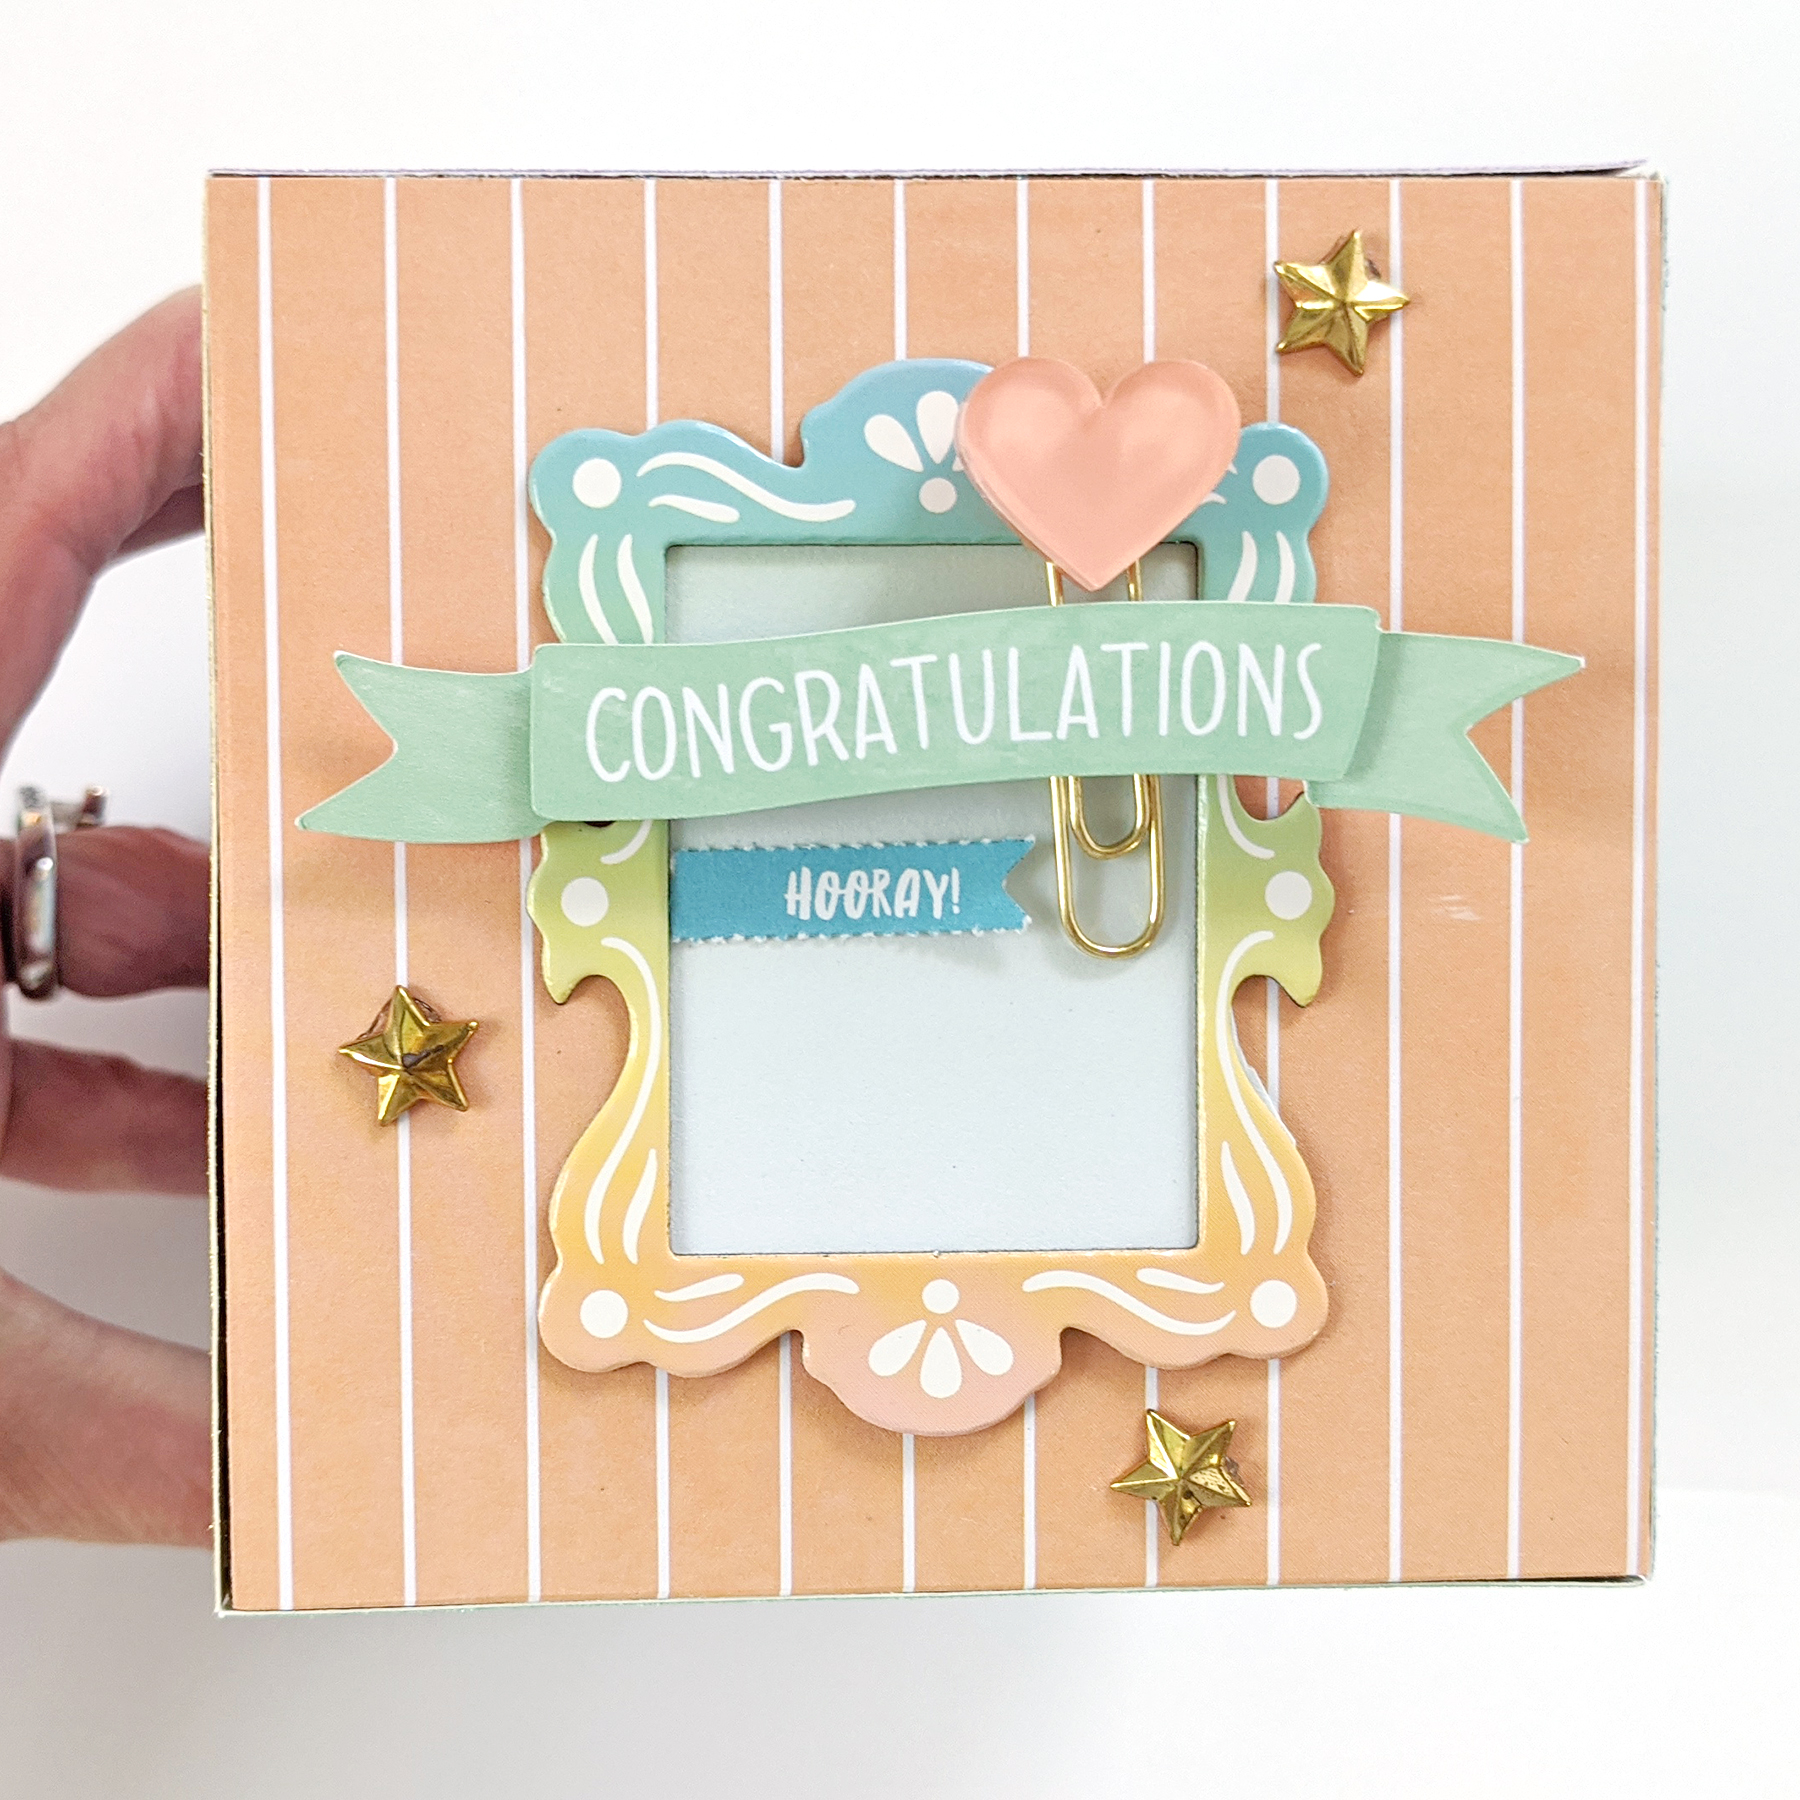
I covered the sides of the Small Kraft Memory Explosion Box with patterned papers from the Double Sided 6x6" Paper Pad. I added an orange striped paper from the 12x12" Paper Pad to the lid and added glitter strips from the Glitter 6x6" Paper Pad to the edges.
I embellished the lid with a Chipboard Frame Sticker, orange Heart Paper Clip, green "congratulations" Celebration Banner Sticker, blue "hooray" perforated die cut from the Shapes & Phrases Die Cuts, and three gold stars from the Embellishment Mix.

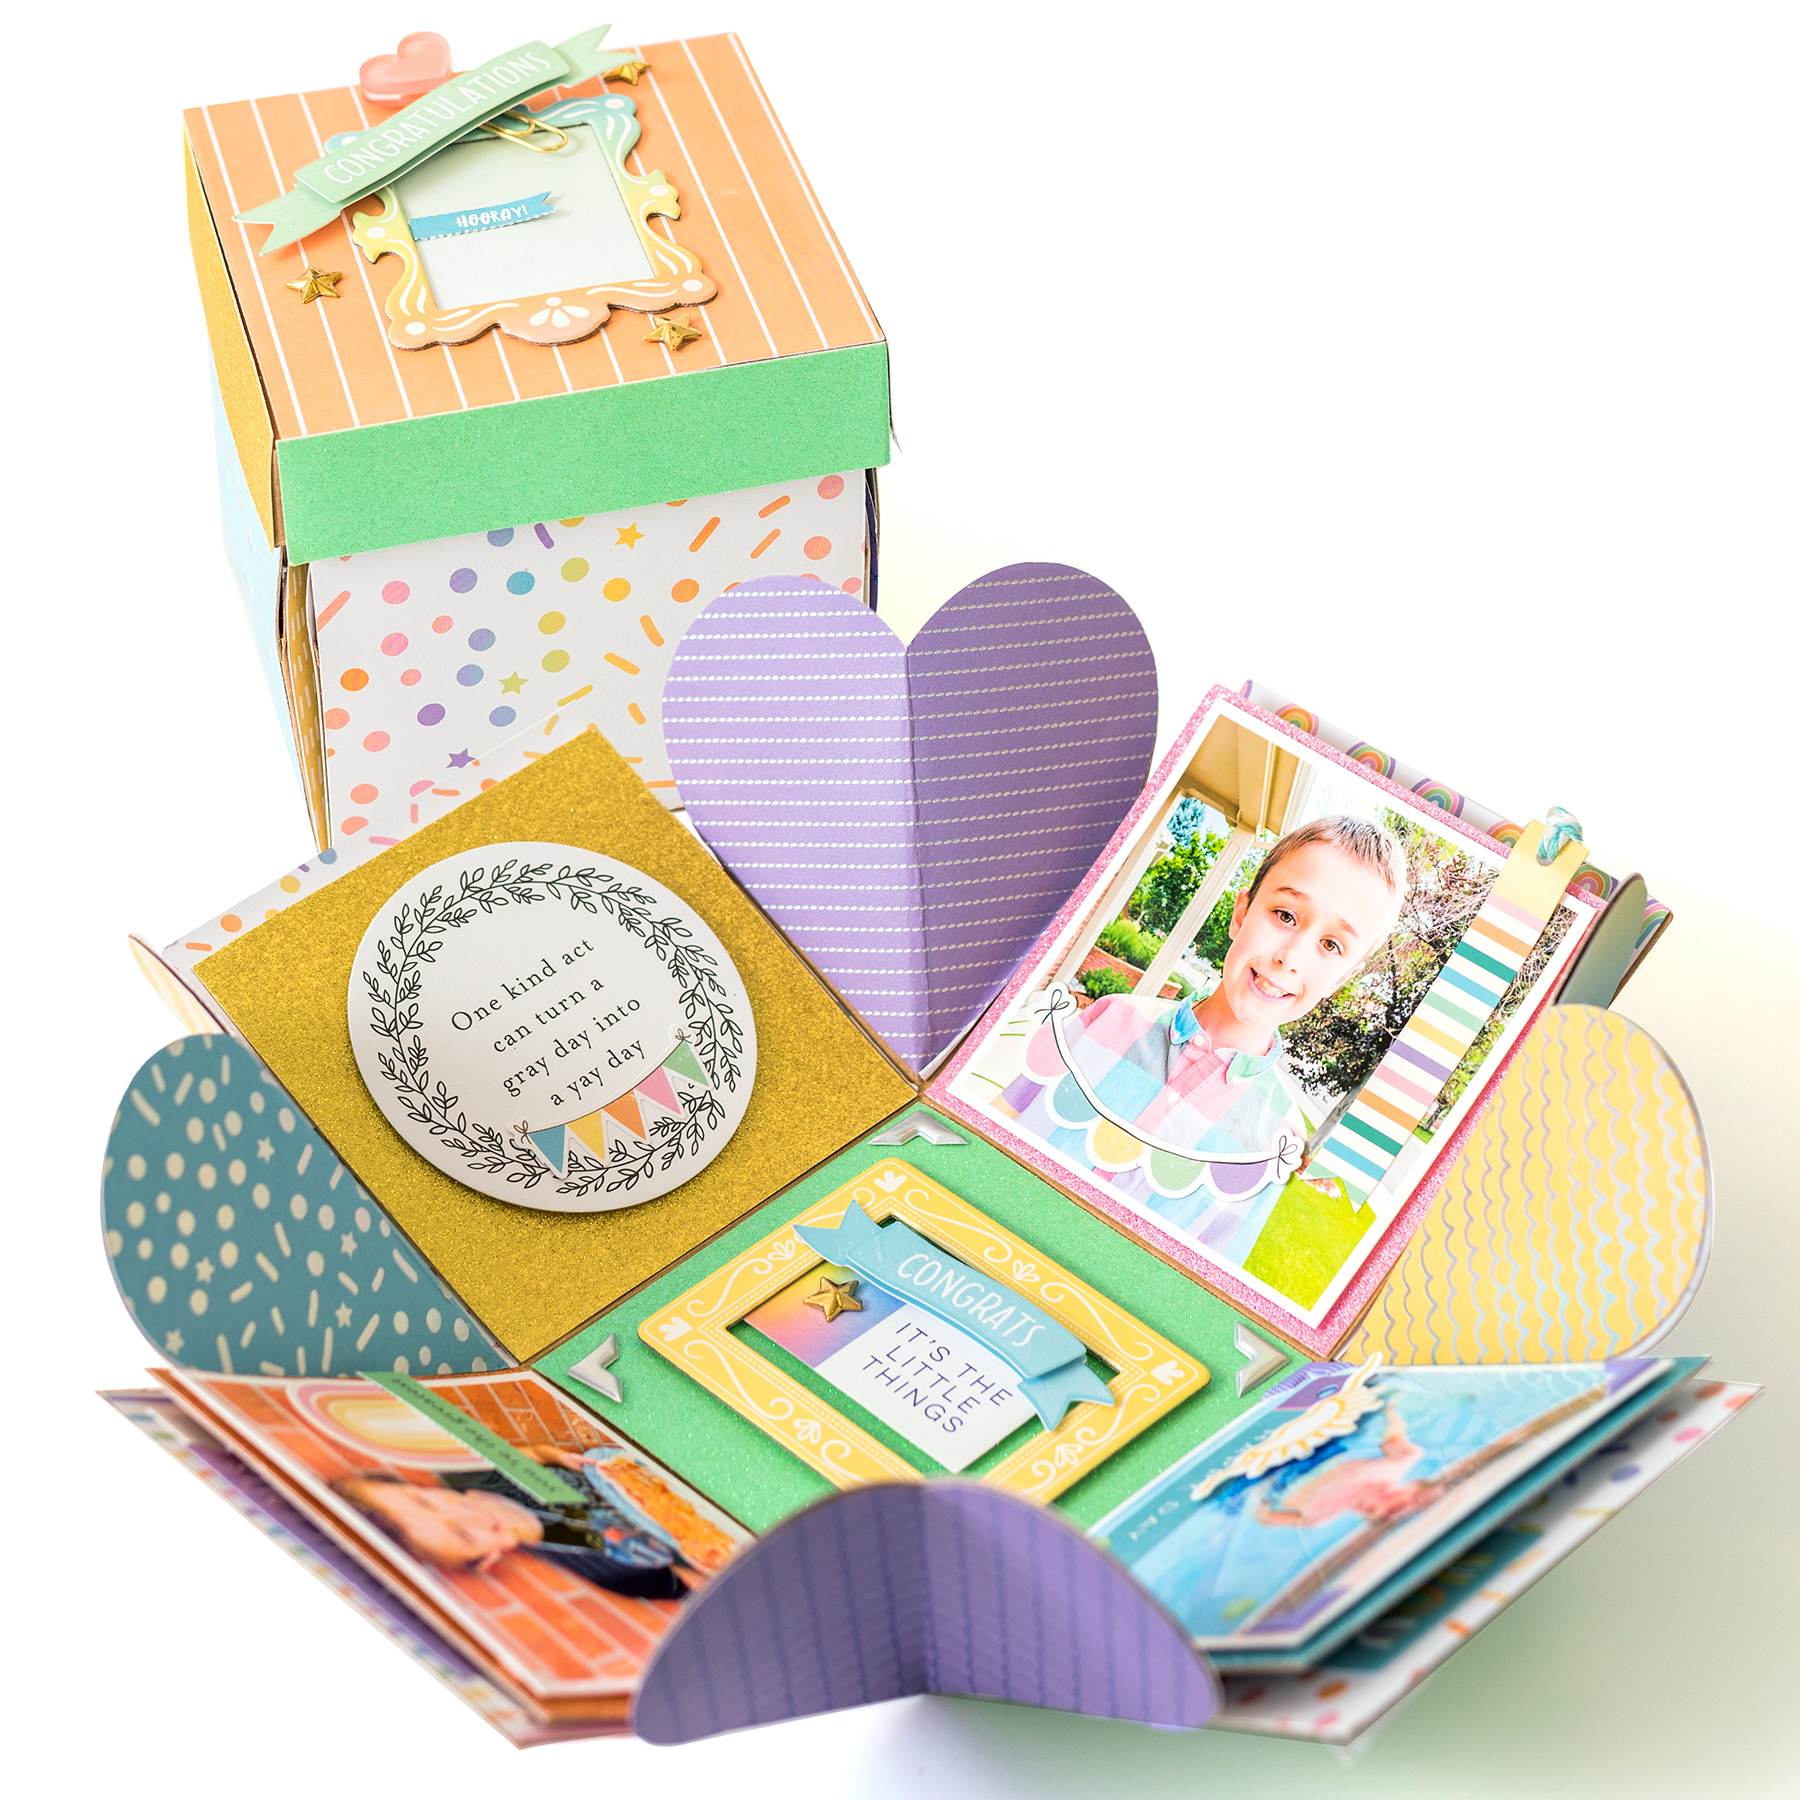
A fun thing about these smaller Explosion Boxes is the heart-shaped corners! Here's a look at the box from above as the lid is taken off.
And then here is a look at the box when it's splayed out a bit more - check out those cute heart corners! I didn't embellish those parts, but you easily could. I'm thinking this would be an adorable gift for Valentine's!
Let's go through the box flap by flap.
In the center, I added a square of green glitter paper from the Glitter 6x6" Paper Pad, silver Puffy Photo Corner Stickers, and a yellow Chipboard Frame Sticker filled with an "it's the little things" die cut from the Travel Die Cuts, blue "congrats" banner from the Celebration Banner Stickers, and a gold star from the Embellishment Mix.
On the first flap above the center, I covered it with pink glitter paper from the Glitter 6x6" Paper Pad then added a 3 1/2" square photo on top. I tied blue baker's twine through the top of a pastel striped tab from the Birthday Die Cuts and added it to the top right corner of the picture.
I covered the bottom flap of the next section with pink silver foil sprinkles paper from the Foil 6x6" Paper Pad and embellished with a mint Chipboard Frame Sticker and a "you don't look a day over fabulous" die cut from the Birthday Die Cuts. I covered the top flap with rainbow paper from the Double Sided 6x6" Paper Pad, placed a 3 1/2 square photo in the middle, and added yellow Puffy Photo Corner Stickers.
Rotating the box to the next set of flaps - I covered this flap with blue silver paper from the Glitter 6x6" Paper Pad, added a 3 1/2" square photo to the middle, and placed purple Puffy Photo Corner Stickers on the corners. The "happy day" sentiment and sun die cuts are from the Travel Die Cuts and then I sprinkled on a trio of mint enamel dots from the Embellishment Mix.
Next I covered the bottom flap with aqua silver foil hearts paper from the 6x6" Paper Pad and placed a 3 1/2" square photo on top. On the white space of the photo I added a gold heart from the Embellishment Mix, and a "ticket to fun" perforated die cut and "now" tab from the Travel Die Cuts. I covered the top section with rainbow sprinkles paper from the Sprinkle 12x12" Paper Pad and created a cluster in the middle with a "yay" journaling spot and purple tab from the Travel Die Cuts as well as a "you're a true friend" clipboard die cut from the Shapes & Phrases Die Cuts.
On the next section, I covered the flap with orange glitter paper from the Glitter 6x6" Paper Pad and added a 3 1/2" photo on top. I placed a rainbow die cut from the Birthday Die Cuts to some white space on the photo and added a green "you're the greatest" perforated sentiment found in the Shapes & Phrases Die Cuts.
On the next section of flaps, I covered the bottom with orange sprinkles paper from the 12x12" Paper Pad and added a trio of die cuts from the Travel Die Cuts: a perforated heart square, yellow "ticket to adventure", and green "document this". I covered the top flap with rainbow striped paper from the Double Sided 6x6" Paper Pad and added a photo on top with a purple "adventure calls" die cut from the Travel Die Cuts.
Onto the last section! I covered this flap with gold glitter paper from the Glitter 6x6" Paper Pad and added a round "one kind act..." die cut from the Shapes & Phrases Die Cuts to the center along with two pastel banner stickers from the Celebration Stickers on and under the round die cut.
I covered the bottom flap with yellow patterned paper from the Sprinkle 12x12" Paper Pad and placed a photo on top. On the white space of the photo I added a green/blue "here" tab and purple "every day is amazing" ticket from the Travel Die Cuts. And a tiny pink glitter enamel heart from the Embellishment Mix. I covered the top flap with rainbow confetti paper from the Sprinkle 12x12" Paper Pad and placed a rolodex card from the Travel Die Cuts in the middle as well as a green tab die cut also from the Travel Die Cuts. I wrote a message to Fox with a black pen on the rolodex card.
All done and ready to give to my boy!
I hope you are inspired to check out the Explosion Box products in Michaels stores and online!
Here are the clickable product links to all of the Explosion Box supplies:


1 comment

  1. Love this box. How perfect with Valentines Day just around the corner. Thanks for sharing Paige. These new explosion boxes are the best and help newbies like myself to get a great start.

    ReplyDelete

Paige Taylor Evans © // Quinn Creatives DESIGN