
Hello crafty friends, Amber Mitchell here on Paige's blog today to share with you a fun, fall-themed mini album set I created using the Truly Grateful collection (Truly Grateful Digital Collection).

This project was inspired by a past project of mine that consisted of a small bag with a mini album inside. I adapted that idea to fit my vision for this project and I love how it turned out! The storage boxes and the albums with the acetate, embellished straps are so fun!

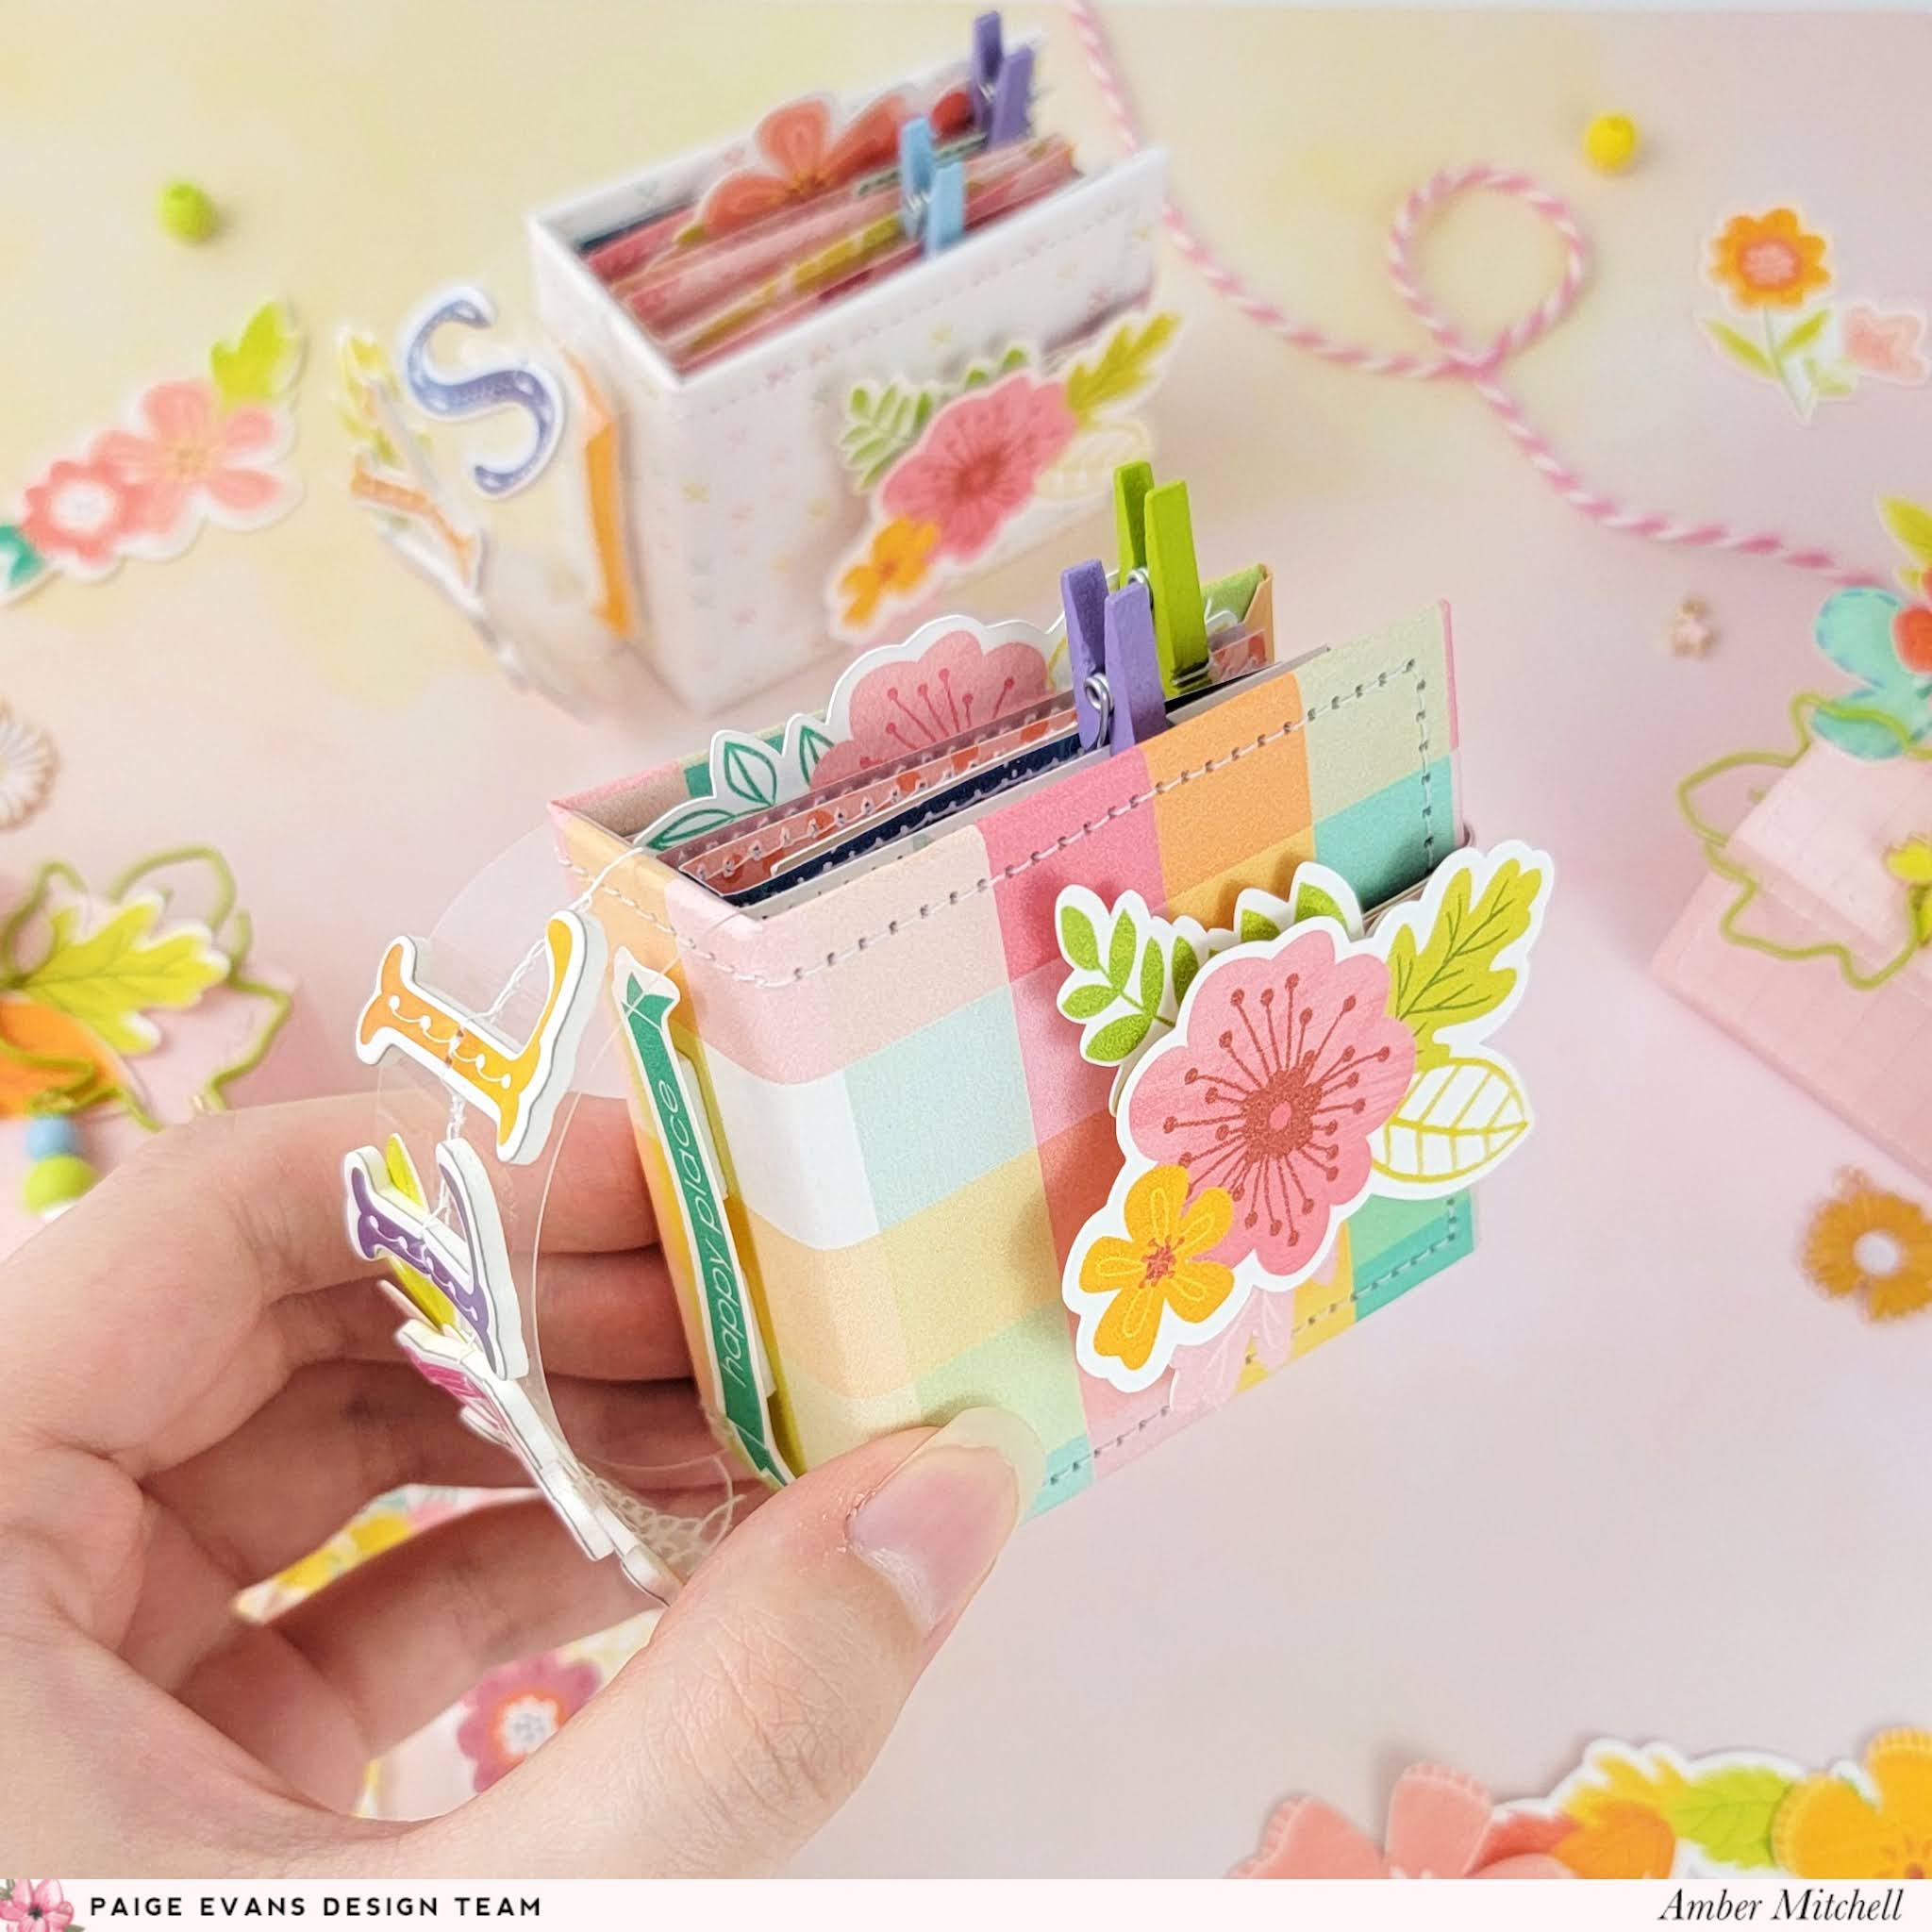
To create the storage boxes for these minis, I took a sheet of paper that measured 5.5 x 6 inches. I scored on the 5.5-inch side at 1.25 inches on both ends. On the 6-inch side I scored at 2 3/8 inch on both ends. This creates a template that just needs to be assembled by cutting the center squares into tabs and using them to adhere the box together.


To create the mini albums, I started by creating chipboard bases. For each album, I used three pieces of chipboard with the following measurements: (2) 2.5 x 2.5 inch and (1) 1 x 2.5 inch. I wrapped my base using patterned paper and sticky, double-sided tape. Before adding the lining to my albums, I took strips of acetate that measured 1 x 5 inches and scored them on both ends at 3/4 inch. I then added titles to them using the Thickers from the collection, along with some floral clusters, and stitched across them to keep everything in place. After that, I used the tabs on either end to adhere the title strip to the inside of the album. Finally, I layered the lining on top to secure everything down.


This album consists of eight pages that are made by four sheets of paper. Those measurements are as follows, going from the largest to the smallest gusset:
Page 1: 2.25 x 5.5 inches, score at 2.25 and 3.25 inches
Page 2: 2.25 x 5.25 inches, score at 2.25 and 3 inches
Page 3: 2.25 x 5 inches, score at 2.25 and 2.75 inches
Page 4: 2.25 x 4.75 inches, score at 2.25 and 2.5 inches
Once the pages are cut, scored, and creased, I stacked and adhered them one on top of the next from the smallest to largest gusset. Then, using a strong adhesive on the back of the largest gusset, I glued the pages to the inside spine of the album.

To keep the albums closed, I used craft magnets and a strips of paper that measured 1.25 x 4 inches. I wrapped these around the albums starting at the back covers and secured them down on the front covers. With the base of the project done, I moved on to embellishing. I used the Truly Grateful Digital Collection to print and cut my own die cuts using a Cricut. I sized them down to fit perfectly on and in these tiny albums.

To dress up the storage boxes, I created large flower clusters using Paige's Rolled Flower cut file. I love the texture that these add. For the final touch, I added leaf-shaped paperclips that I attached beads, paper tassels, and charms to.
With that, this cute mini album set is all ready for Fall memories! Thanks so much for stopping by my post today. I'll see you next time with another fun project!

SUPPLIES: Patterned papers, stickers, die cuts, embellishments: TRULY GRATEFUL, Truly Grateful Digital Collection; Die cut machine: Cricut; Cut file: Rolled Flower by Paige Evans

Location: California, USA / Blog: Happy Crafty Studio / Instagram: @bambidearr / YouTube: bambidearr / Pinterest: bambidearr


Post a Comment