
Yesterday I taught in-person classes at our Sugarplum Wishes Weekend Event!
Here is the double-page spread we made using Sugarplum Wishes!
Here is the double-page spread we made using Sugarplum Wishes!

1. Trim off the barcode strips from two sheets of mint 12x12 cardstock then use Washi Tape on the back to hold them together.
2. Cut blocks, bows (I made a template with 3 sizes of bows - please reach out to me to purchase), & ¼” strips from papers in the 6x8 Paper Pad as follows:
Floral: 3½” square, medium bow, 3½” & 5” strips
Poinsettias: 4” square, large bow, (2) 4½” strips
Plaid: 4” square, large bow, (2) 4½” strips
Pink Nordic: 2¾x3½”, small bow, (2) 3¼” strips
Teal Plaid: 5x3”, medium bow, 2¾” & 4” strips
Winter Scene: medium bow, (2) 3¾” strips
Pink Gingerbread: 4x3”
Polka Dots: 3” square, large bow, (2) 4½” strips
Green Floral: 3½x3”
Pink Plaid: 4” square, medium bow, (2) 4½” strips
Red Candy Canes: 3” square, small & medium bows, (3) 2½” & 4” strips
Stripes: 2” square, large bow, 4” & 3½” strips
Holly: 4” square, medium bow, (2) 4“ strips
Purple Nordic: 2½x3½”, medium bow, 3½” & 3“ strips
Snowflakes: 3½x2½”, medium bow, 2½” & 4” strips
Green Stars: 2½” square, medium bow, (2) 3½” strips
3. Glue the paper strips centered horizontally and vertically across the paper blocks as shown to start turning them into presents. Trim off the excess and save for the bows.
4. To assemble the bows, flip them over face down, bend the ends towards the middle, and secure with glue. Use a piece of the excess strip as a band to wrap and glue around the middle part. Glue the bows to the tops of the presents as shown.

5. Arrange the presents and (7) 3x4” photos down the left, across the bottom, and up the right sides of the page. I have things overlapping, crooked, and hanging off the edges for lots of whimsy. Don’t glue anything down until you’re sure of the placement. Once you like how everything looks, take a picture to refer back to and glue everything down.
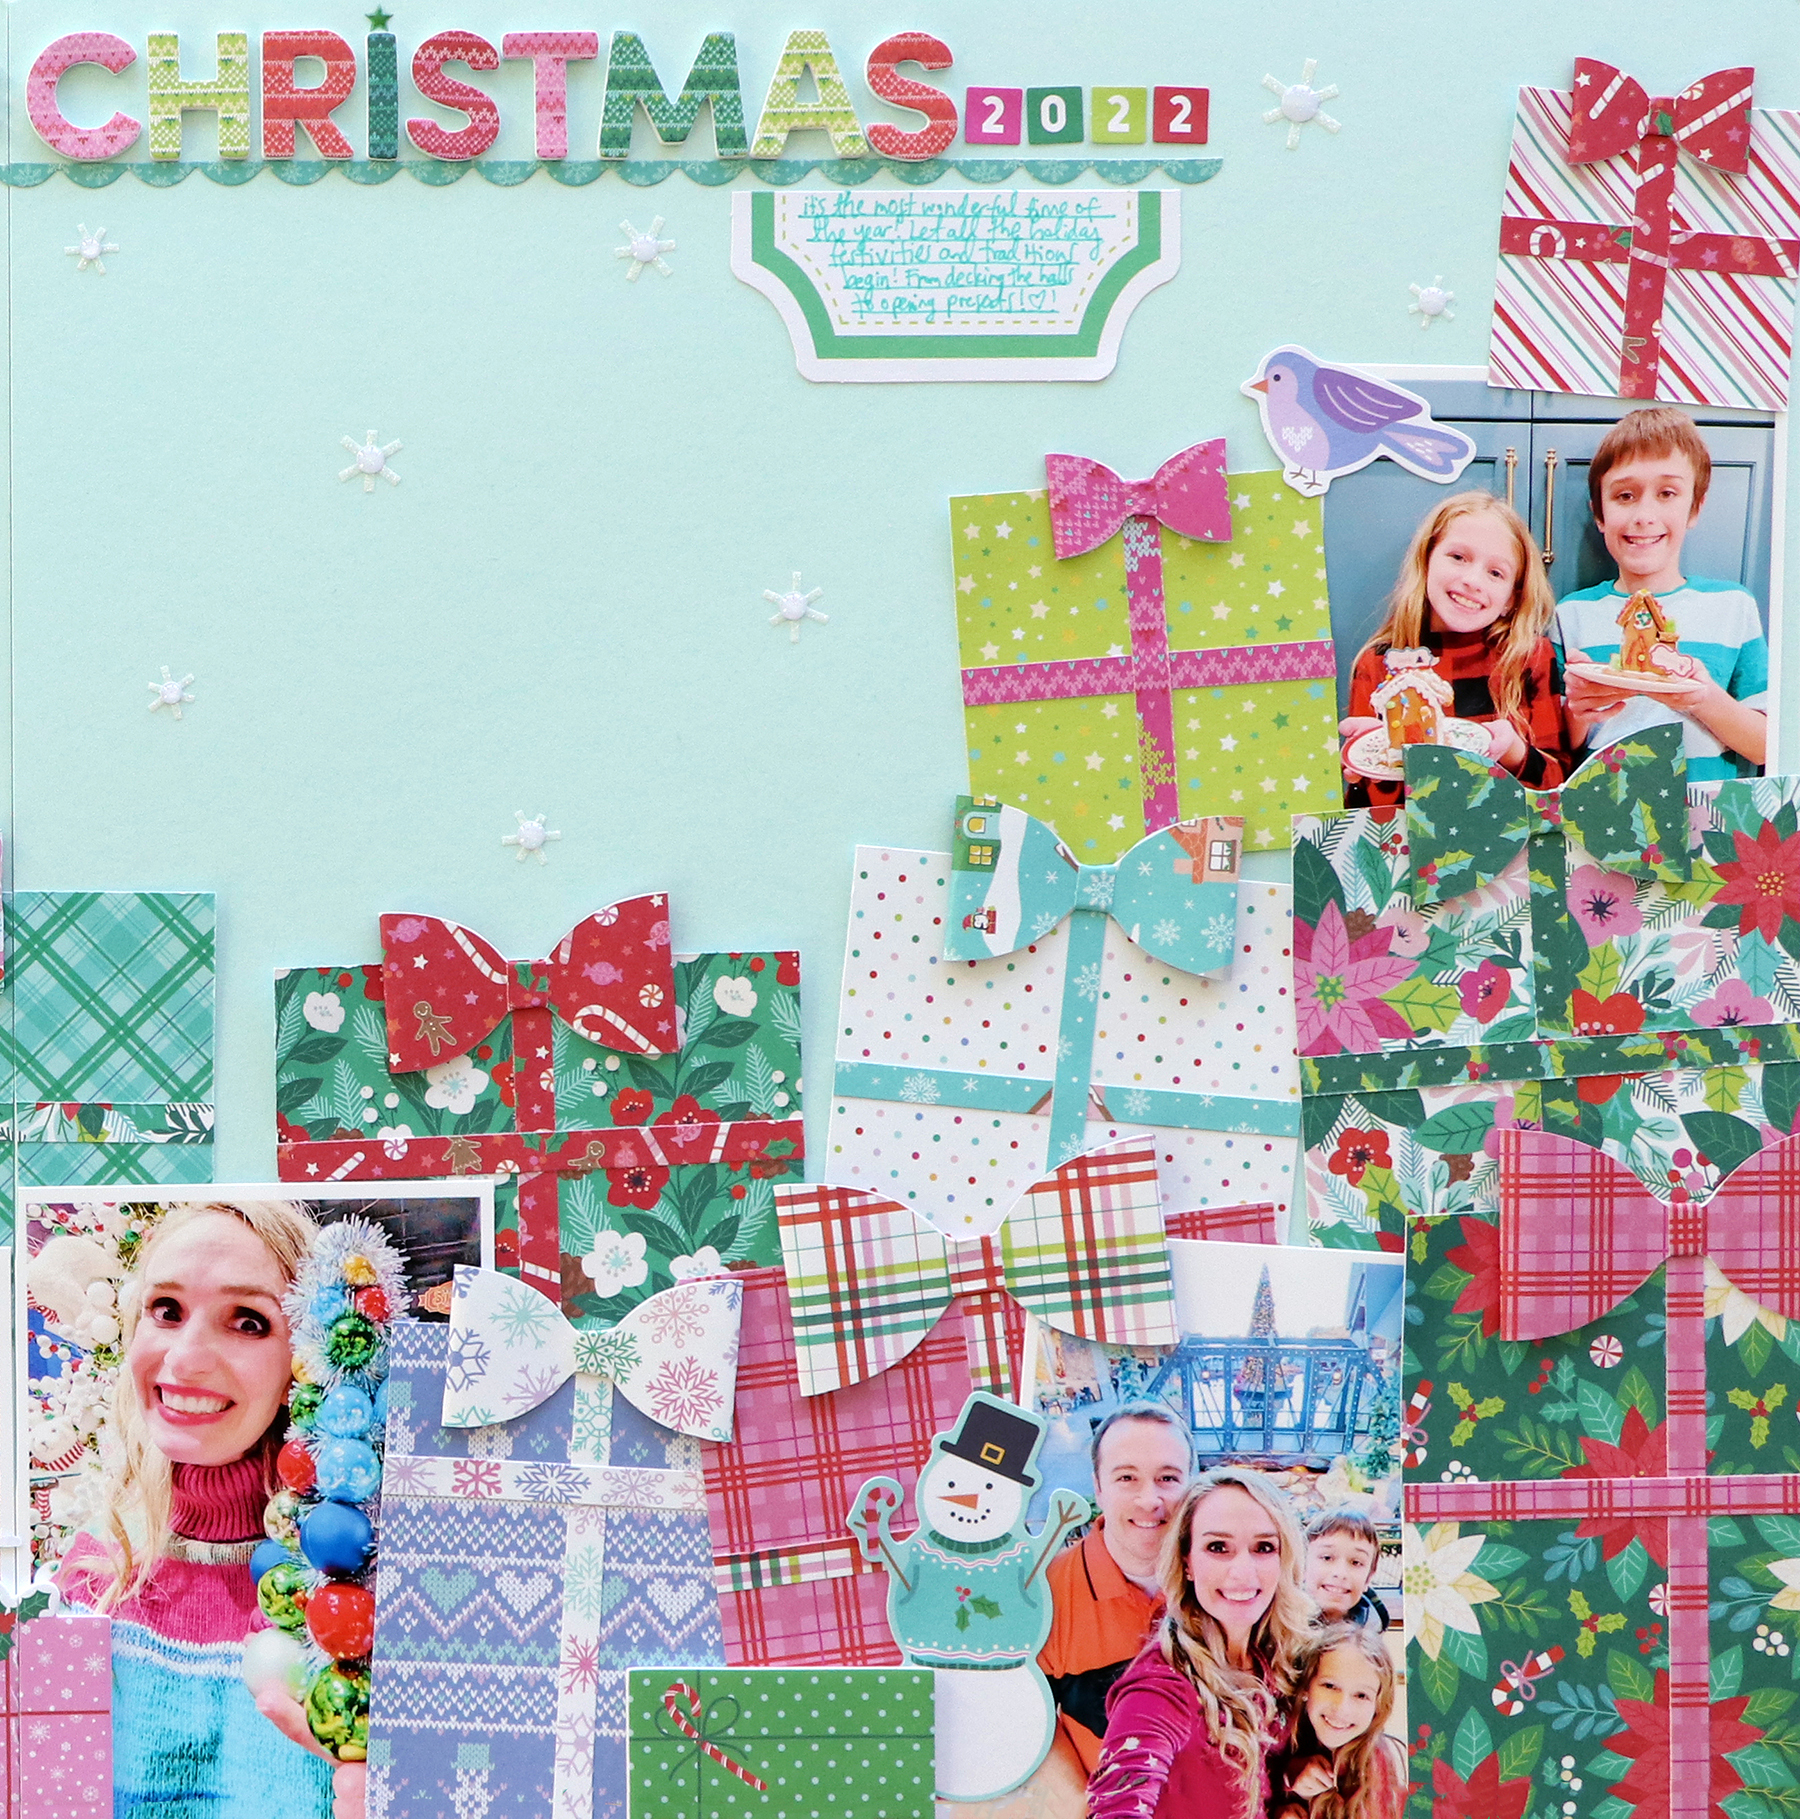
6. Use Mini Thickers across the top of the left page and larger Thickers across the top of the right page to create the title. Make the year at the end with colorful numbers from the Sticker Book. Use a paper trimmer to carefully cut a ric rac border Cardstock Sticker in half and glue below the title.
7. Cut off the bottom portion of a journaling spot Ephemera Die Cut and add it below the right side of the title. Draw lines and write journaling with a blue pen. Add more Ephemera Die Cuts around the spread: a penguin at the top left, Santa at the bottom left, snowman at the bottom right, and bird at the top right.

8. Place three present Foam Stickers across the bottom edge.
9. Scatter white glitter snowflakes from the Sticker Book across the empty space at the top and embellish with white Enamel Dots.
10. Finish by carefully cutting between the pages to separate them.

I hope you're inspired to paper piece patterned presents and make a double-page spread with Sugarplum Wishes!
SUPPLIES: Patterned papers, stickers, Thickers, die cuts, washi tape, enamel dots, embellishments: SUGARPLUM WISHES; Bow template: Paige Evans


Post a Comment