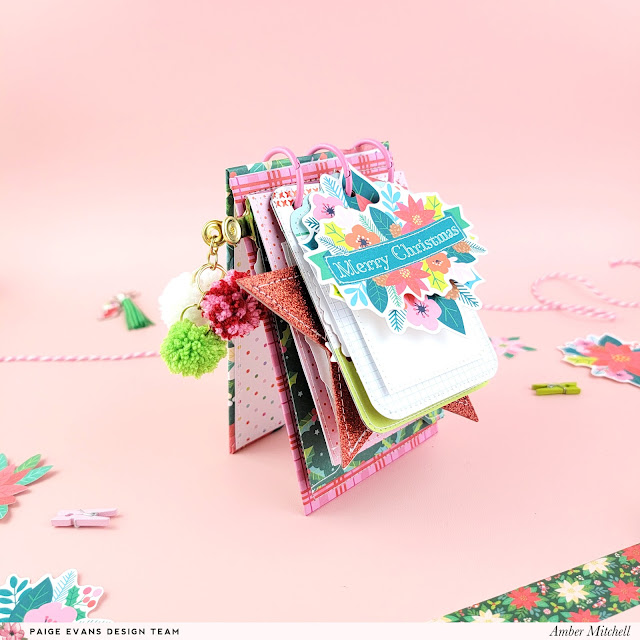
Hi crafty friends! Amber Mitchell here on Paige’s blog today to share my first project of 2024! I cannot believe that it is already the new year; time has gone by so fast! I’m starting this year off with a fun, easel mini album that I created using Sugarplum Wishes.
I’m always sad to see Christmas go, so although it’s now January, I’m squeezing in one more holiday project! And what better project to make then one that can be displayed during next year’s holiday? This easel-style album can stand up on its own and holds a variety of different pages, elements, and more!
To create the base for this project I used chipboard, binder rings, and patterned paper. The covers of this project are made from medium weight chipboard. I took two sheets that measured 3.5 x 5.5 inches and wrapped them using patterned paper from the 12x12 Paper Pad that I trimmed down to 4.5 x 6.5 inches. Next I lined the inside space using sheets of paper that measured 3 3/8 x 5 3/8 inches. To bind these covers together I put them together back-to-back and punched three holes along the tops of both using a Crop-A-Dile. I then added pink binder rings to these holes and that was it - the base of this album was done!
When it came to creating the pages for this project I used a mix of different styles:
• I created a 3 x 4.5-inch envelope to use as a storage page for extra photos or mementos. I created this envelope using the Envelope Punch Board.
• I created two pages using some holiday Project Life cards from my craft stash. I adhered these cards back-to-back and made sure to choose them by coordinating colors.
• I also used tags and small interactive pieces to create both more pages and more character throughout the album. These add interest when flipping through the project as a whole.
• I created a shaped page by using some red glitter stars from my stash. I machine stitched them together so that both sides would have glitter, and then added photo mats and embellishments to them.
• I also created a page using patterned paper trimmed down to the size I wanted - 3.5 x 4.25 inches.
To embellish I used a mix of physical products as well as some digital elements from the Digital Sugarplum Wishes Collection.
I love incorporating digital elements when needed. I’m a HUGE fan of layering embellishments, and adding bits here and there and everywhere, so I tend to go through embellishments fast. That’s left me with a low stash of supplies for this collection so I just purchased the Digital Collection and printed some extra die cuts to include in this project!
On the journaling pages I used the Enamel Dots to add bullet points. I also used the Sticker Book and the Cardstock Stickers to fill in any empty spaces.
To add a bit more fun to the finished album I created handmade pompom charms in coordinating colors and attached them to the front cover using a gold clip.
I’m sad to see Christmas go but I’m also excited to move on to some spring-themed projects! And I love how my last project of the season turned out!
Thanks so much for stopping by my post today! I’ll see you next time! Happy New Year!
SUPPLIES: Patterned paper, embellishments, die cuts, stickers, embellishments: SUGARPLUM WISHES
Location: California, USA / Blog: Happy Crafty Studio / Instagram: @bambidearr / YouTube: bambidearr / Pinterest: bambidearr


Post a Comment