
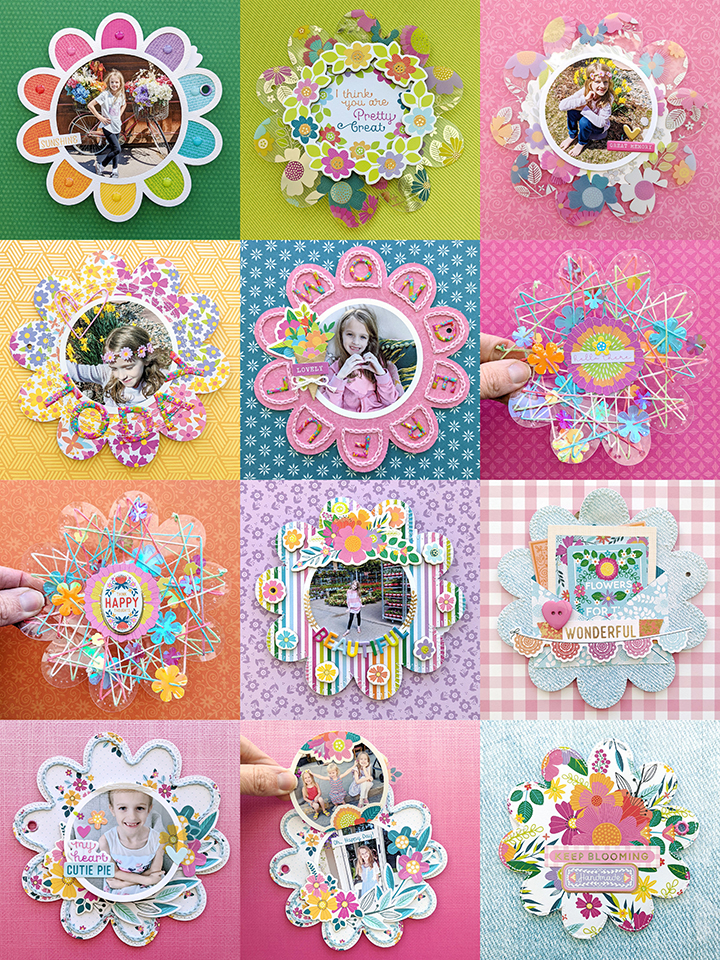
Here is my mini album that appeared in the Spring 2022 issue of Scrapbook & Cards Today Magazine! It's my second made with Splendid which is now available! The first mini album can be found HERE.
Check out the video of me walking and talking through this mini album:
For this mini album I designed a flower-shaped mini album base with a few different options such as solid, outline, stitching, and more stitching. And the best part? It's available as a free download HERE! Once the pages were cut and the photos were added, this album came together quickly! I love when that happens :)
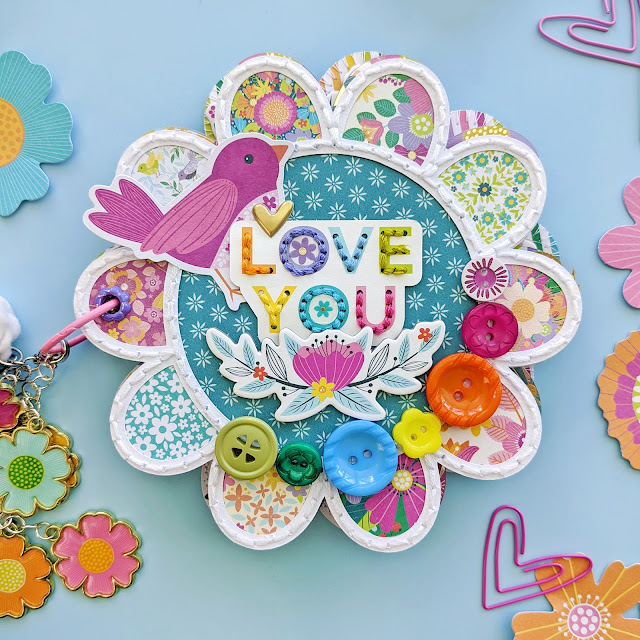
For the cover I cut the outline flower with stitching holes from white cardstock and did a basic back stitch with white thread. I backed the open center with the blue floral Paper 11 and backed all the petals with various floral papers from the 6x8 Paper Pad and 2x2 Paper Pads. To embellish, I grabbed a "LOVE YOU" die cut from the new Cross Stitch Kit, used the coordinating threads that come in the kit to stitch through the die cut, and adhere it to the center. I tucked a magenta bird Ephemera Die Cut under the top left corner and added a gold heart Epoxy Sticker, two tiny transparency flower stickers from the 8-Page Sticker Book, and a floral Chipboard Stickers. On the curve of the middle I placed almost an entire sheet of the colorful Buttons. I love buttons and am so glad to have some in Splendid!

For this page I die cut an outline flower from white cardstock and backed each petal with a different color from Paper 13, the yellow petal is Paper 5. I topped each petal with a coordinating enamel dot from the Sequins & Enamel Shapes. Inside the middle I added a photo and then placed an orange "sunshine" sticker overlapping the left which is from the 8-Page Sticker Book.

For the 2nd page I cut a solid flower from the Floral Transparency. All I did to embellish was frame a sentiment Ephemera Die Cut with a floral Chipboard Sticker and added it to the middle. Simple & sweet!
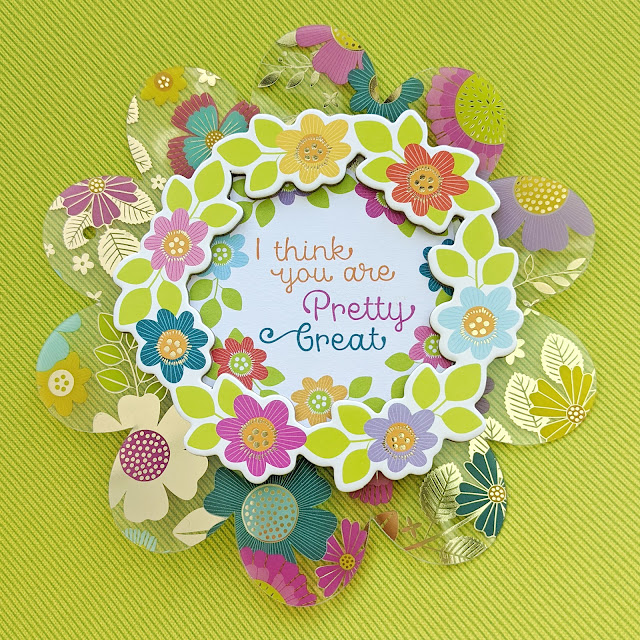
On the back of the Floral Transparency I added a 3" round photo to the center and embellished with a gold heart and pink "great memory" Epoxy Sticker. Easy does it!

For the 3rd page I cut a solid flower from the colorful floral Paper 17 and placed a 3" round photo on the center. Around the bottom curve I placed floral "TODAY" Epoxy Stickers then machine stitched around and around 4 times with a basic running stitch and white thread. I clipped a light pink Heart Paper Clip onto the top left side of the photo.

I cut a flower with petals stitching holes from the pink Paper 23 and used light pink thread to do a chain link stitch through every petal. A 3" round photo was adhered to the center then to embellish I placed floral "WONDERFUL" Epoxy Stickers in the petals, a floral Cardstock Sticker tucked under the left side of the photo, topped with a layered Bouquet Sticker, and finished with a pink "lovely" sticker from the 8-Page Sticker Book.

For the 4th page I cut a flower with stitching holes from a plain piece of transparency paper. I did a string art technique by stitching with rainbow ombre thread back and forth, up and down, across and sideways through the front and back of the transparency flower, sliding on flower sequins from the Mixed Sequins & Enamel Shapes here and there. My tip is to not pull the thread too tight as you're stitching or it'll warp/bend the flower. On the center I glued a Floral Die Cut, topped it with a "hello there" sticker from the 8-Page Sticker Book, and added a tiny yellow/blue flower Cardstock Sticker.

On the back of the stitched transparency flower I added another Floral Die Cut (so the flowers are adhered back-to-back so as not to really see the edges of either through the transparency), and topped with an oval sentiment Chipboard Sticker.

For the 5th page I cut a solid flower from rainbow striped Paper 3 (and adhered another solid flower cut from the blue jean Paper 16 on the back) and zigzag stitched around the edges for fun texture & interest. I added a 3" round photo to the center then embellished every petal with a flower Chipboard Sticker. To further embellish I added a floral Chipboard Sticker at the top of the photo and place "beautiful" colorful mini foam Thickers around the bottom curve of the photo. I flanked the title with gold leaf transparency stickers from the 8-Page Sticker Book to finish this page.

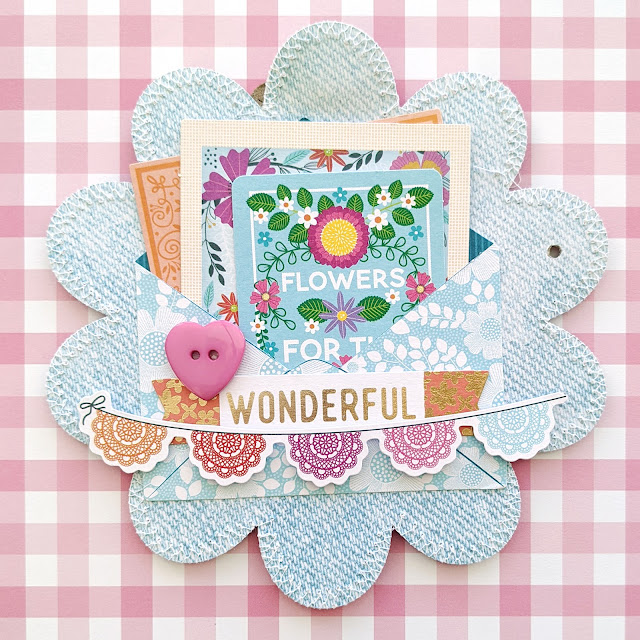
On the blue jean Paper 16 back, I added an envelope Ephemera Die Cut to the lower section and tucked additional sentiment card Ephemera Die Cuts inside the pocket. To embellish the pocket I added a "wonderful" Ephemera Die Cut, doily banner Cardstock Sticker, and the final Button from the set which is a cute pink heart.
For the 6th and last page I cut a stitching holes flower from the floral bunch Paper 12 and did a chain stitch with light blue thread around the edges. Before machine stitching with white thread around the outer edge I backed the page with a solid flower cut from the floral Paper 1. I had more photos than I could seemingly fit inside the album so I created a photo flip up with (3) 3" round photos. I embellished the top photo with castickers from the Cardstock Stickers, Epoxy Stickers, and 8-Page Sticker Book. Before embellishing, I adhered two photos back to back, placed them over a third, and machine stitched across the tops to create the flip up.

On the photo on the back side, I attached floral Cardstock Stickers across the top and bottom and trimmed the excess. On the last photo I added a few Floral Die Cuts around the curve at the bottom as well as a floral Chipboard Sticker. To finish I added an "oh, happy day!" sentiment sticker at the top of the photo from the 8-Page Sticker Book.

On the back cover I placed two sentiments from the Cardstock Stickers layered at the bottom.

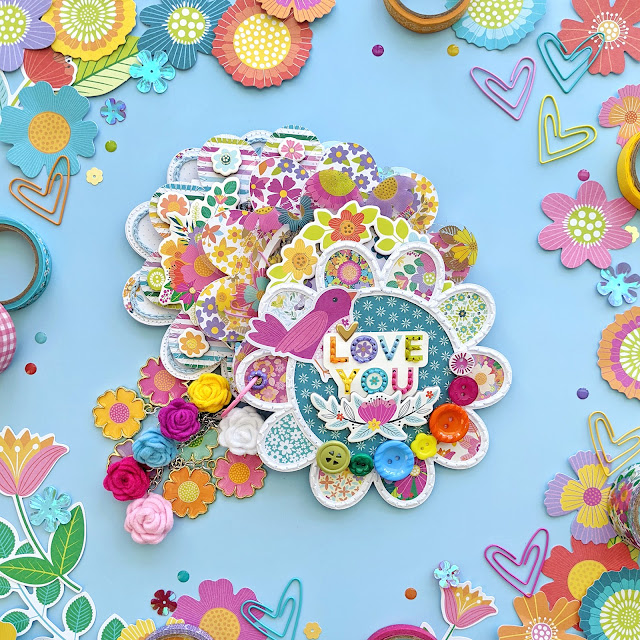
Here are all the colorful pages in a collage!
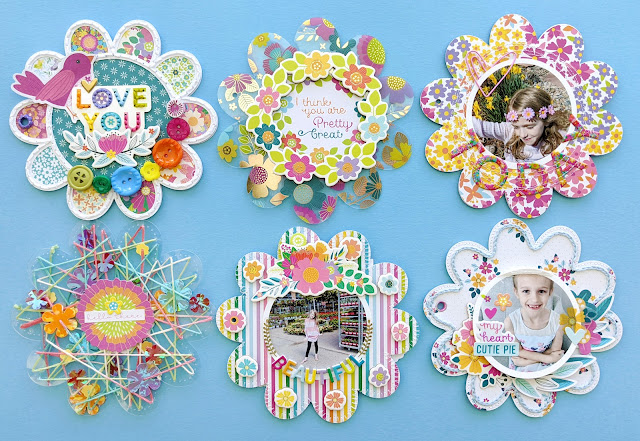
To attach all the pages together, I set a purple flower eyelet using a Crop-A-Dile through the left side of the front cover, a pink flower eyelet through the right side of the back cover, and punched a coordinating hole through all the pages. I slid all the pages onto a pink 1" loose leaf binder ring. These are the fronts of the 6 pages:
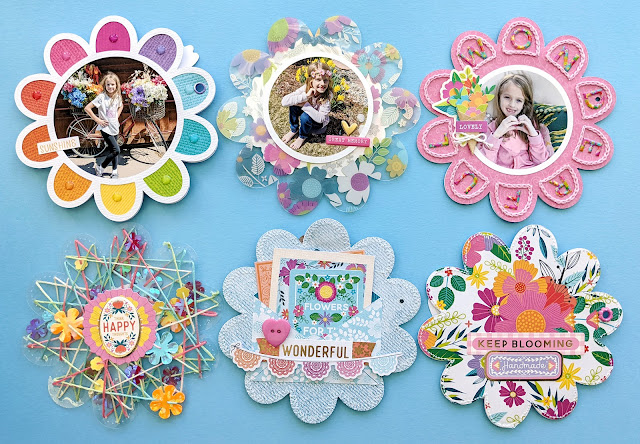
Here are the backs of the 6 pages:
As a finishing touch, I made a custom charm with a combination of a felt flowers charm from Emily Inspired Designs and added jump rings to all 6 Flower Charms to create a dangling tassel. I slid the finished charm onto the binder ring to finish!

I hope this mini album inspires you to pick up my new Splendid collection to document your memories, download the free flower mini album cut file HERE to make your own, and check out the Spring 2022 issue of Scrapbook & Cards Today Magazine! Let me know if you have any questions and thanks for stopping by!

SUPPLIES: Patterned papers, floral transparency, stickers, sequins, enamel dots, buttons, die cuts, charms, embellishments: SPLENDID; Flower mini album cut file: Paige Evans; white cardstock


Post a Comment