
Here is the layout I showed how to make during my "snack & scrap" mini class at the Crop & Create Delivered Papercrafting Event in April!
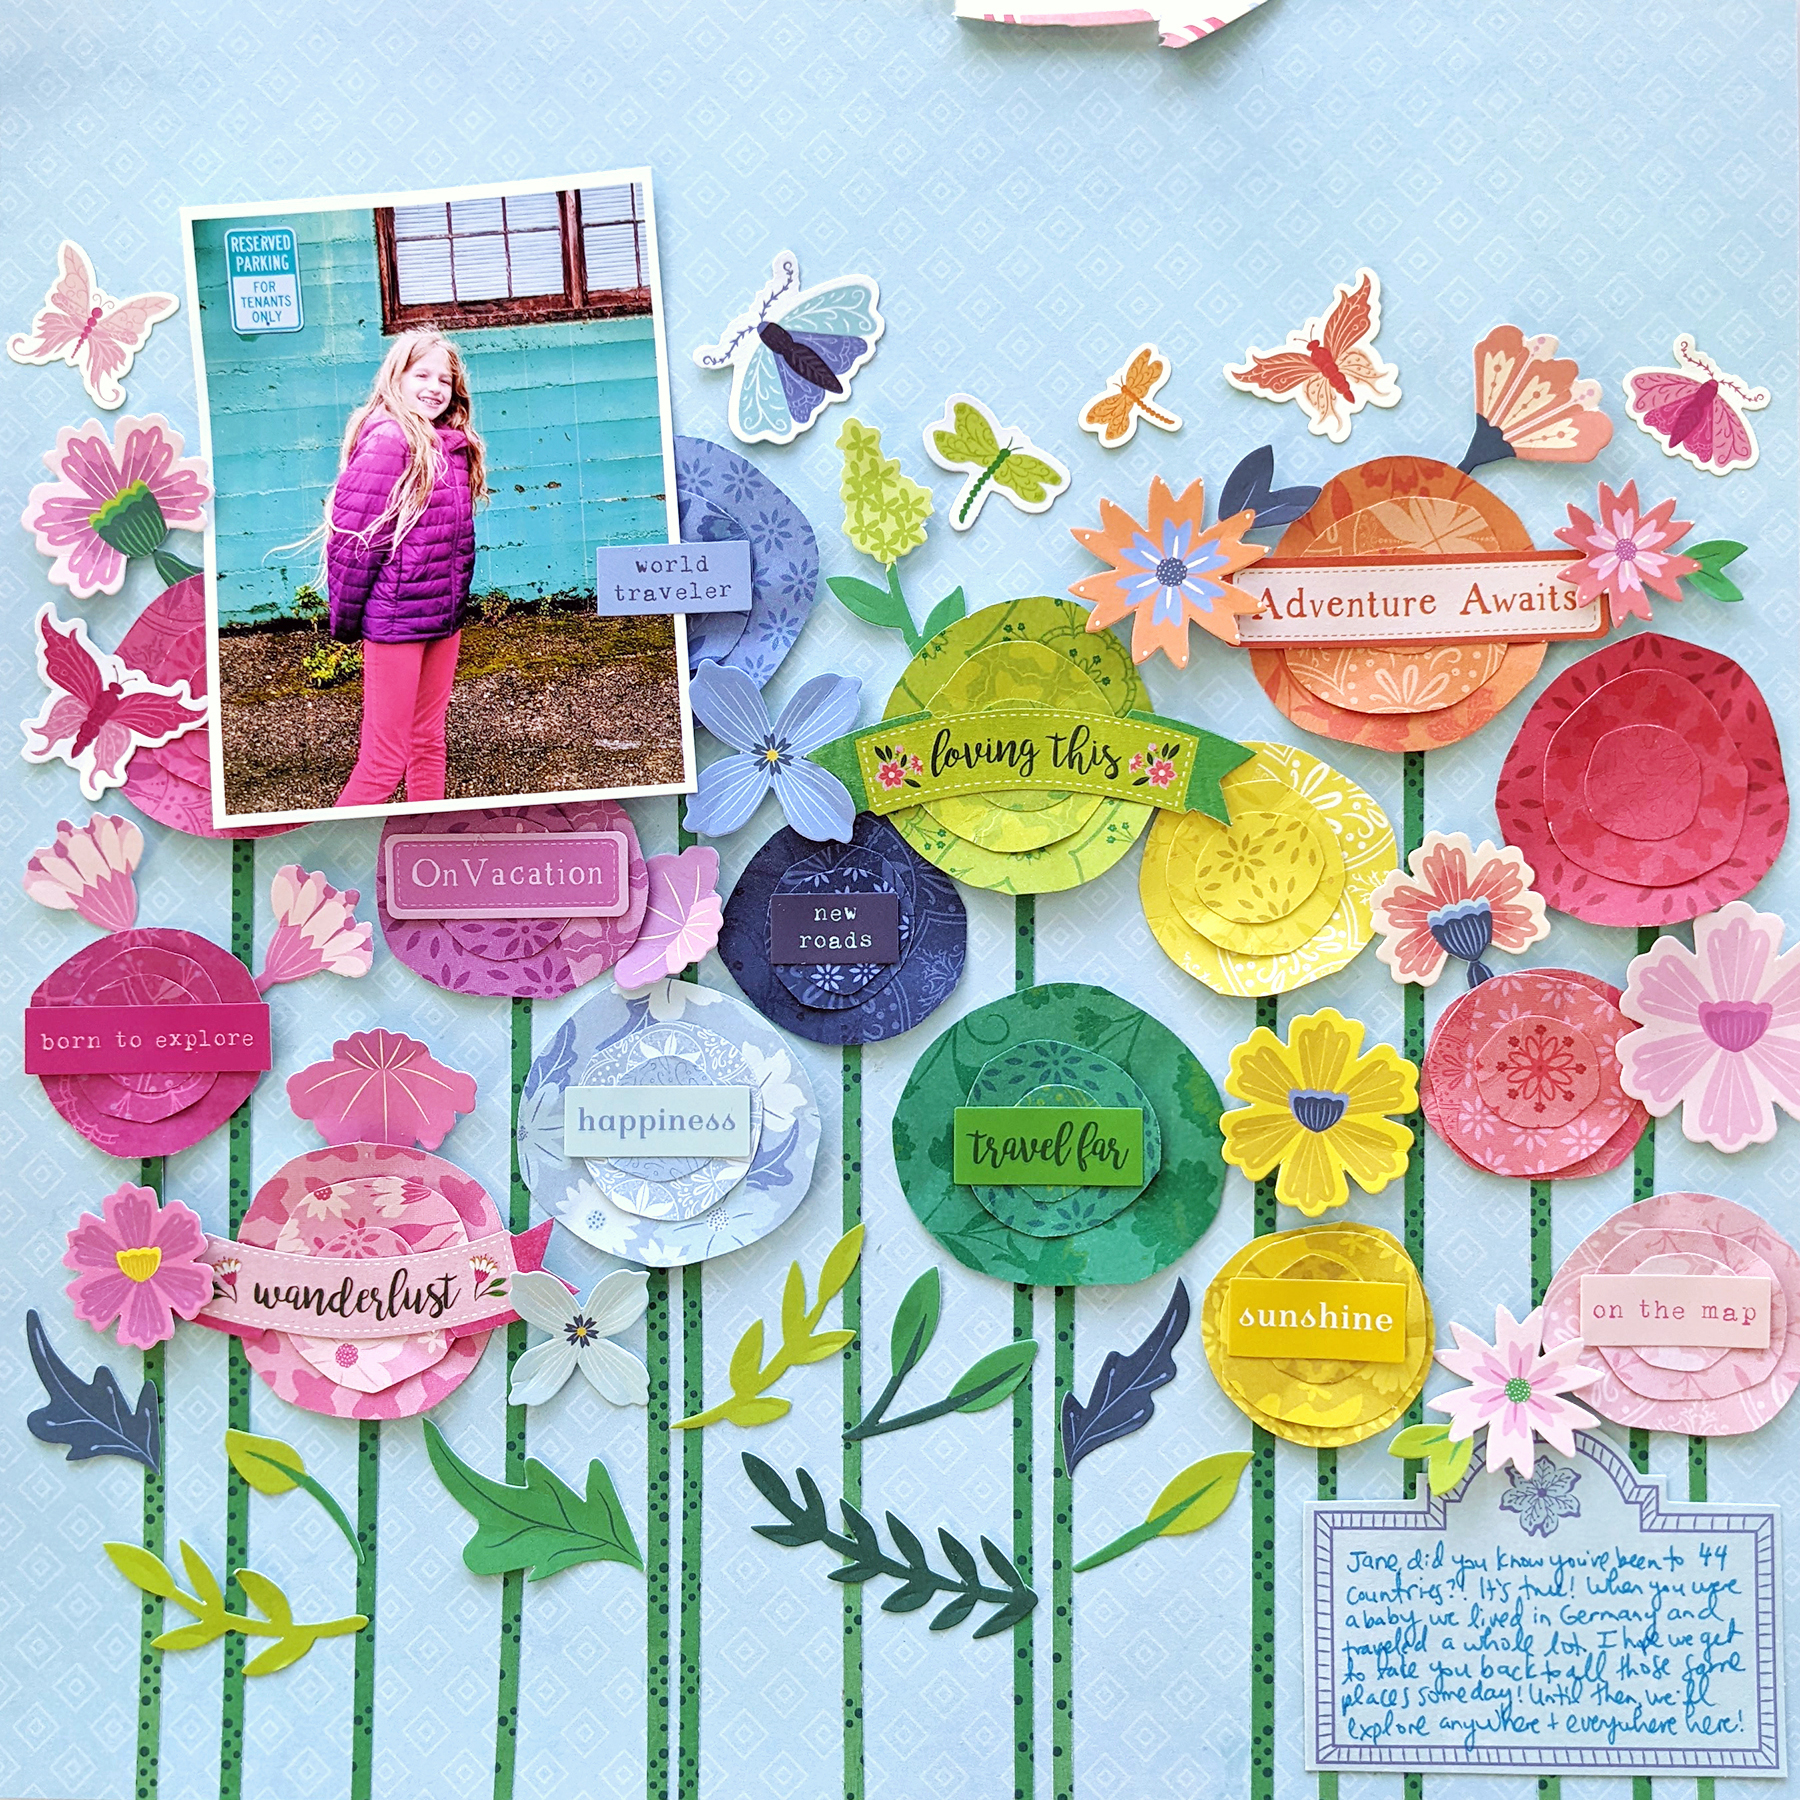
WORLD TRAVELER LAYOUT by Paige Evans
SUPPLIES: Horizon: Paper 01, 02, 03, 08, and 12, Cardstock Stickers, Ephemera Die Cuts, Floral Die Cuts; paper trimmer; fine-tipped scissors; blue journaling pen; adhesives (liquid, foam)

INSTRUCTIONS:
1. Trim the rainbow burst Paper 03 into the 16 individual wedges. I did not use the darker green wedge.
2. Hand cut three circles from each wedge - these are about ¾” to 2” in width. Or if you have 3 sizes of circle punches, that’s a great option! I do however love the wonkiness and varying sizes of the circles made from hand cutting them.
3. Once all the circles are cut, distress them by slightly crinkling the edges. You could also distress the edges which I would love to do to reveal the white core and create more definition between the circles, only because of time I did not for this sample :)
4. Layer the trios of circles from large to small and adhere them together with dabs of glue in the center so the edges can lift and bend.
5. Grab the blue patterned paper B-side Paper 08 as the background and place the circles as the beginnings of flowers across the middle, staggered, in a rainbow order. You could also mix up the order and create different color ways and patterns.
6. Once you like the placement of the circles, I recommend taking a picture to refer back to in case anything gets bumped.
7. Trim ⅛” strips from green patterned paper for stems, tuck and glue them in place, then glue the circles in place. Trim any excess stems.
8. Give dimension and life to die cut flowers by pinching and creasing the petals and leaves then adhere them between the round flowers using foam adhesive for dimension.
9. Adhere a 3x4” photo on the top left overlapping the flowers. You could add additional photos across the top.
10. Embellish with butterfly/moth/dragonfly stickers between the upper flowers in the same color order, scatter leaf die cuts across the bottom along the stems, and top a lot of the flowers with the same color of sentiment sticker.
11. Add a journaling spot on the bottom right corner and journal with a blue pen.
12. Tear a small section of the top edge for interest.

Check out all of my virtual layout classes HERE!


Post a Comment