Hi everyone! My name is Zelda Smith and I’m very excited to be Paige’s guest designer for February. You can find me on Instagram, Facebook, and Pinterest. Here are my layout’s created using Paige's cut files and collections!
Because February is the month of romance and food, I scrapbooked a picture of my husband and I using the Pizza cut file. I titled this layout You Stole A Pizza My Heart! I know it's super corny but I couldn’t resist.
I used papers from the Horizon collection to create my background. I trimmed down and distressed the edges of the colourful crosses Paper 15, framing it onto navy cardstock. For some extra texture I machine stitched around the edges in navy thread then backed the pizza cut file using that gorgeous starburst Paper 03.
I removed a slice of pizza from the cut file to have a placement for my picture. Once the cut file was adhered to the background, I splattered tone-on-tone watercolors around the pie, and added tone-on-tone sequins to each slice to mimic toppings on a pizza.
I layered my picture with papers from the Horizon collection and popped it up on 3D foam for dimension. Adding clusters of ephemera, tags, chipboard, and tangled thread around the picture and layout. Lastly I used puffy heart stickers from the Truly Grateful puffy phrase stickers, as well as glittered enamel hearts from the Embellishment Mix, Puffy Photo Corner Stickers, and Pink Letter Stickers from Paige's Memory Explosion Box collection at Michaels.
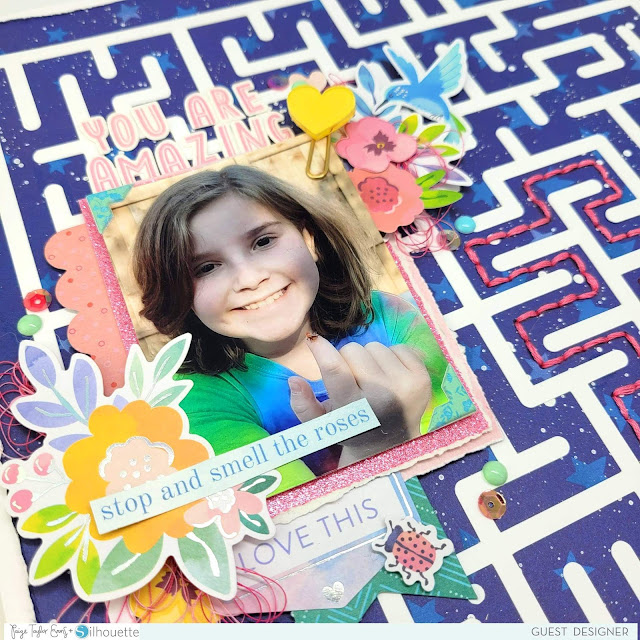
My second layout is a picture of my daughter holding a ladybug. I chose the Maze cut file because I wanted to use the title You Are Amazing!
For my background I trimmed down and distressed the edges of the blue stars B-side of Paper 13 from Truly Grateful, and splattered it with watered down white acrylic paint, framing it onto white cardstock. Once the maze was in place, using my paper piercing tool I poked holes ¼” apart, and stitched the path of the maze in pink DMC floss.
I embellished my photo using those cute Puffy Photo Corner Stickers and a yellow Heart Paper Clip. The next step was layering pink glitter paper from the Glitter 6x6" Paper Pad behind the photo, and adding 3D craft foam to pop up my photo for dimension. I created two clusters around my picture and one on the bottom right of the layout using ephemera and stickers from the Bloom Street collection. To finish my layout I used tangled thread, scattered pink iridescent sequins and enamel dots from the Embellishment Mix.
For my final layout I used a picture of our dog playing in the snow, titled You Are Loved! Using Paige’s Paw Print Background cut file was perfect to capture this photo.
I cut the Paw Print Background cut file at 11” on the beautiful watercolor Paper 24 from the Horizon collection and removed all the paw prints to save for later. I placed the paw print background over a 12x12 piece of white cardstock to use as a stencil, tracing each paw print with a pencil so I could refer back and know where to adhere all the paw prints. I trimmed down the white cardstock distressing the edges, reusing Paper 24 as a frame for the background.
I decided to place my photo at the bottom right of the layout. For extra dimension I added 3D foam to all the paw prints that I had saved from Paper 24. I realized I wanted a bit more texture so I used my paper piercing tool and poked holes into several larger paw prints. I then used coordinating DMC floss to stitch them.
I layered my picture with tissue paper and further embellished it using papers, ephemera, and tags from the Horizon collection. I added a little journaling, puffy hearts, enamel dots, and the title You Are Loved from the Truly Grateful collection. To finish my layout, I added splatters of watercolors to mimic the colors in the watercolor paper.
Thank you so much for stopping by today! I had so much fun working with Paige's cut files. I hope these layouts inspire you and that you all have a beautiful creative day!


Post a Comment