Love Layout by Flóra Farkas


Tuesday, March 13, 2018

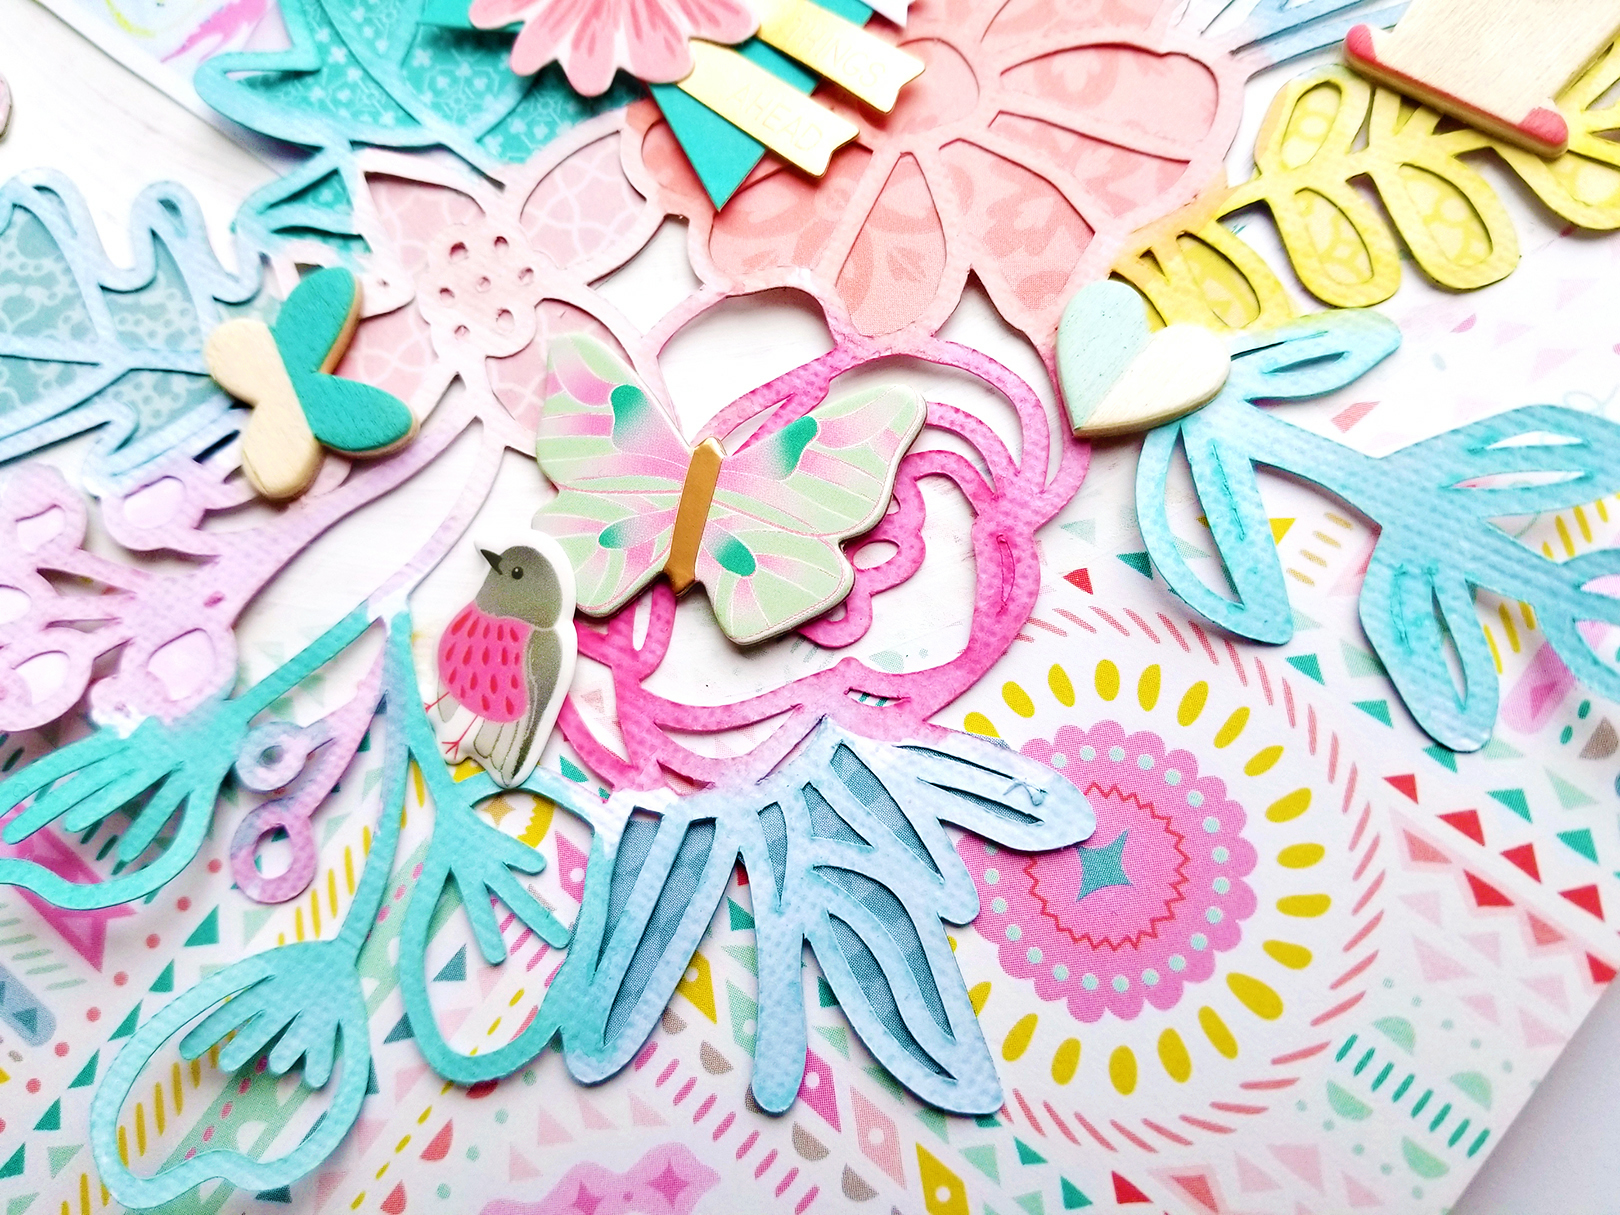
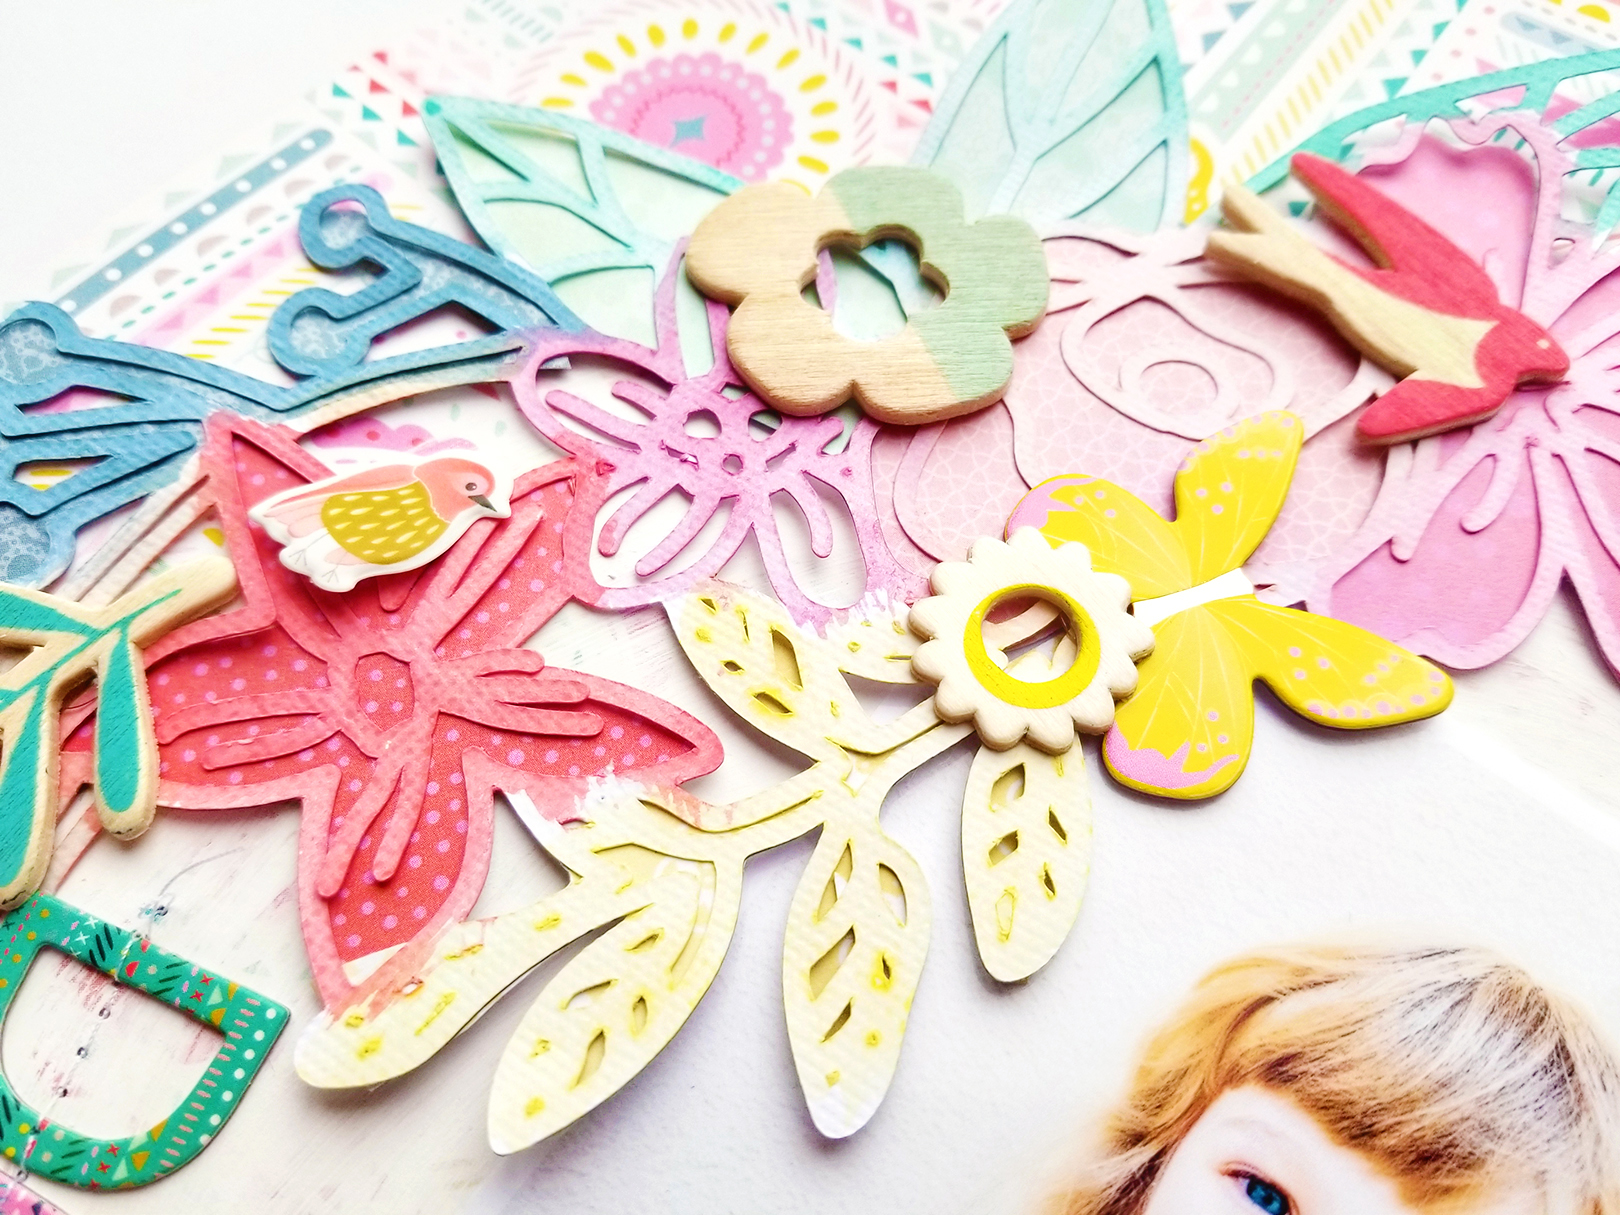
I love this beautiful half and half design by design team member Flóra Farkas - oh so gorgeous!
Hi girls! It’s Flóra back with a dichromatic scrapbook layout created with the pretty Pick-Me-Up collection. The layout is based on opposites: pink & blue and man & woman.
First, I grabbed Paper 15 and Paper 16 and cut out Paige's Flower Grouping cut file, a half from both, and placed them on a smooth white cardstock background. I trimmed 1 cm from every side and placed it on Paper 21 to add a tiny colorful frame.

I embellished the pink and blue side with the tone-on-tone technique. I used many moths from Paper 14Chipboard StickersWashi Tape BookEphemera Die Cuts, sequins from the Haberdashery Multi-Pack, and Stickers to embellish. I highlighted them with foam tape to add dimension.

In the middle I placed my photo. Underneath I layered a die cut frame. For the title I used Chipboard Thickers in blue and pinkish colors. I completed the title with Rub-Ons.

I love this wonderful cut file and the pretty Pick-Me-Up embellishments I used to decorate it. I love to make monochromatic layouts, but using only two colors is so much fun. Give it a go and try it out! Thanks for stopping by here today!
Blog: pinkandpapergift.blogspot.com Instagram: @floramfarkas Pinterest: @floramfarkas
Facebook: pinkandpapergift YouTube: Flora Monika Farkas
I am loving seeing all of these sweet couple photos scrapbooked, to be forever remembered by Flóra and her family!

Be Your Beautiful Self Layout by Lorilei Murphy


Monday, March 12, 2018

I am all about dimensional backgrounds and so I'm head-over-heels for this new layout by Design Team member Lorilei Murphy!
I started out by cutting the Simple Flower Background from 8.5x11 white cardstock using my Silhouette Cameo 3. Once I peeled off the background I realized I would have all these gorgeous little flowers left over. Out came the pop dots! I chose to back the cardstock with Pick-Me-Up Paper 18 from the 12x12 Paper Pad because the gold foil glimmers on the pretty blue were too hard to resist! I stitched in a diamond pattern in between the flowers and then popped up the white flowers over the open space. To add a bit more color I cut down the white sheet and added it onto Paper 21, I love how the colorful and gold bits stick out around the edges of the layout.
To embellish my photo I used the gold journal card from the Journaling Spots, a floral Ephemera Die Cut, sweet little flower Puffy Sticker, and a word Sticker. The "Be Your Beautiful Self" Chipboard Sticker became my title and I added a little Hello Puffy Sticker for a finishing touch. I kept the photo cluster pretty simple to reflect the simple and pretty background.

The dimension created by using 4,675 pop dots (kidding) is so pretty. The watermelon background peeks out just enough to add sparkle and color.

I encourage you to give this simple technique a try with one of Paige’s cut files. The results are so pretty!

Blog: roseyposeystudio.com / Instagram: @roseyposey_studio / Pinterest: @roseyposeygirl /
Facebook: 
Rosey Posey Studio / YouTube: Lorilei Murphy
Another beautiful layout! I am so inspired by the talent in this community!

Darling Sweet Jane Layout


Sunday, March 11, 2018

Here is the second of the four layouts in my Paige's Pages 15 class at Big Picture Classes - I combined my love of lots of things on this layout – watercoloring, cut files, and floral wreaths! You just can’t go wrong with a wreath design! Bonus - the cut file is included for free in the lesson!
 For the watercoloring, I left the cut file on the mat and went to town – I think it’s easier this way because everything stays in place and you can easily cover the intricate lines and designs with color. I tried to mix colors to match my Turn the Page collection which is what I embellished with.
A self-imposed challenge I have is to use patterned paper for my background and not repeat which pattern I use – there are 48 patterns in each of my collections so I try to use a different one every time! Instead of white cardstock like I am so(oooo) drawn to for the background, I chose a colorful yet subtle design (Paper 10) and painted a large circle in the middle as my white space.
The start-to-finish process video can be found over in the class if you're interested to see exactly how this layout came together!

Pick-Me-Up Card Trio by Zsoka Marko


Saturday, March 10, 2018

How GORGEOUS is this card trio by design team member Zsoka Marko?!
Hey there, Zsoka here to share three new cards I've made for the Paige Evans + Silhouette Design Team!
I pulled out some of my favorite papers from the gorgeous Pick-Me-Up collection - I just love the peach and berry tones! I started with the peach color card (the peach paper is from the 6x6 Paper Pad). I cropped the Bend Up Flower Petals cut file so I only had a semi-circle left and sized it down to fit into a  4 x 5.25" rectangle. Then I sent it to my Silhouette Cameo. I cut a 4.25 x 5.5" piece from the white-gold patterned paper which you can also find in the 6x6 Paper Pad. I adhered the gold foil paper onto my A2 size top folding card base then I added the cut file panel on top. I machine stitched around the edges.

I wasn't sure how to decorate this card because the cuts are so tiny! In the end I kept it very simple so that the cut file could shine. I just added a few gold Chipboard Sticker pieces, some gold tangled thread, and a heart button from the Haberdashery Multi-Pack. It sounds simple, and when you want to re-create it, it doesn't take long at all, but I'll tell you I didn't finish this card in one sitting because I had no idea how to finish it, ha! I love how it turned out though!

For my next card, I cut a lot of the Daisy Flower Borders from white cardstock. I sized them down to look good on a card. Originally I wanted to create a white on white background that looked like lace, but then ended up using patterned paper anyway. I can't deny my nature it seems :)

Again, I cut a 4.25 x 5.5" piece of purple floral paper from the 6x6 Paper Pad then made a diagonal cut. I adhered this onto my top folding card base. I layered some of the daisy borders on the top white part and stitched them down using my sewing machine. To finish off my card, I added some gold tangled thread, a sentiment from the Ephemera Die Cuts (I popped this up for some dimension), and a die cut butterfly.

Now for my third card. I had a lot of the daisy borders left and I was not going to throw them away, so I created a third card! For this, I used the pink ombre striped paper, also from the 6x6 Paper Pad. I cut out one of the darker pink stripes because I only needed 5 stripes and I wanted to keep both the darkest and the lightest colors. I reassembled the papers on my A2 size top folding card base. By the way, the five strips are almost exactly this size, I only had to cheat a little bit and that is hidden under one of the flower borders!

I added a die cut frame using foam adhesive, as well as a couple of other pieces from the Ephemera Die Cuts. I fussy cut 3 butterfly-moths (haha!) and attached these to the frame as well. I tucked some gold tangled thread under my die cuts and added a few pink sequins from the Haberdashery Multi-Pack.

I hope you like these cards and are inspired to create your own! Thanks for stopping by today and have a wonderful day!


Blog: apocketfullofscrap.blogspot.com / Instagram: @zsokamarko / Facebook: Zsoka Marko / YouTube: Zsoka Marko
I love all of the texture goin' on on these cards - oh so very beautiful!

Forever Layout by Missy Whidden


Friday, March 9, 2018

I'm a big fan of big titles and this new layout by design team Missy Whidden fits the bill perfectly!!
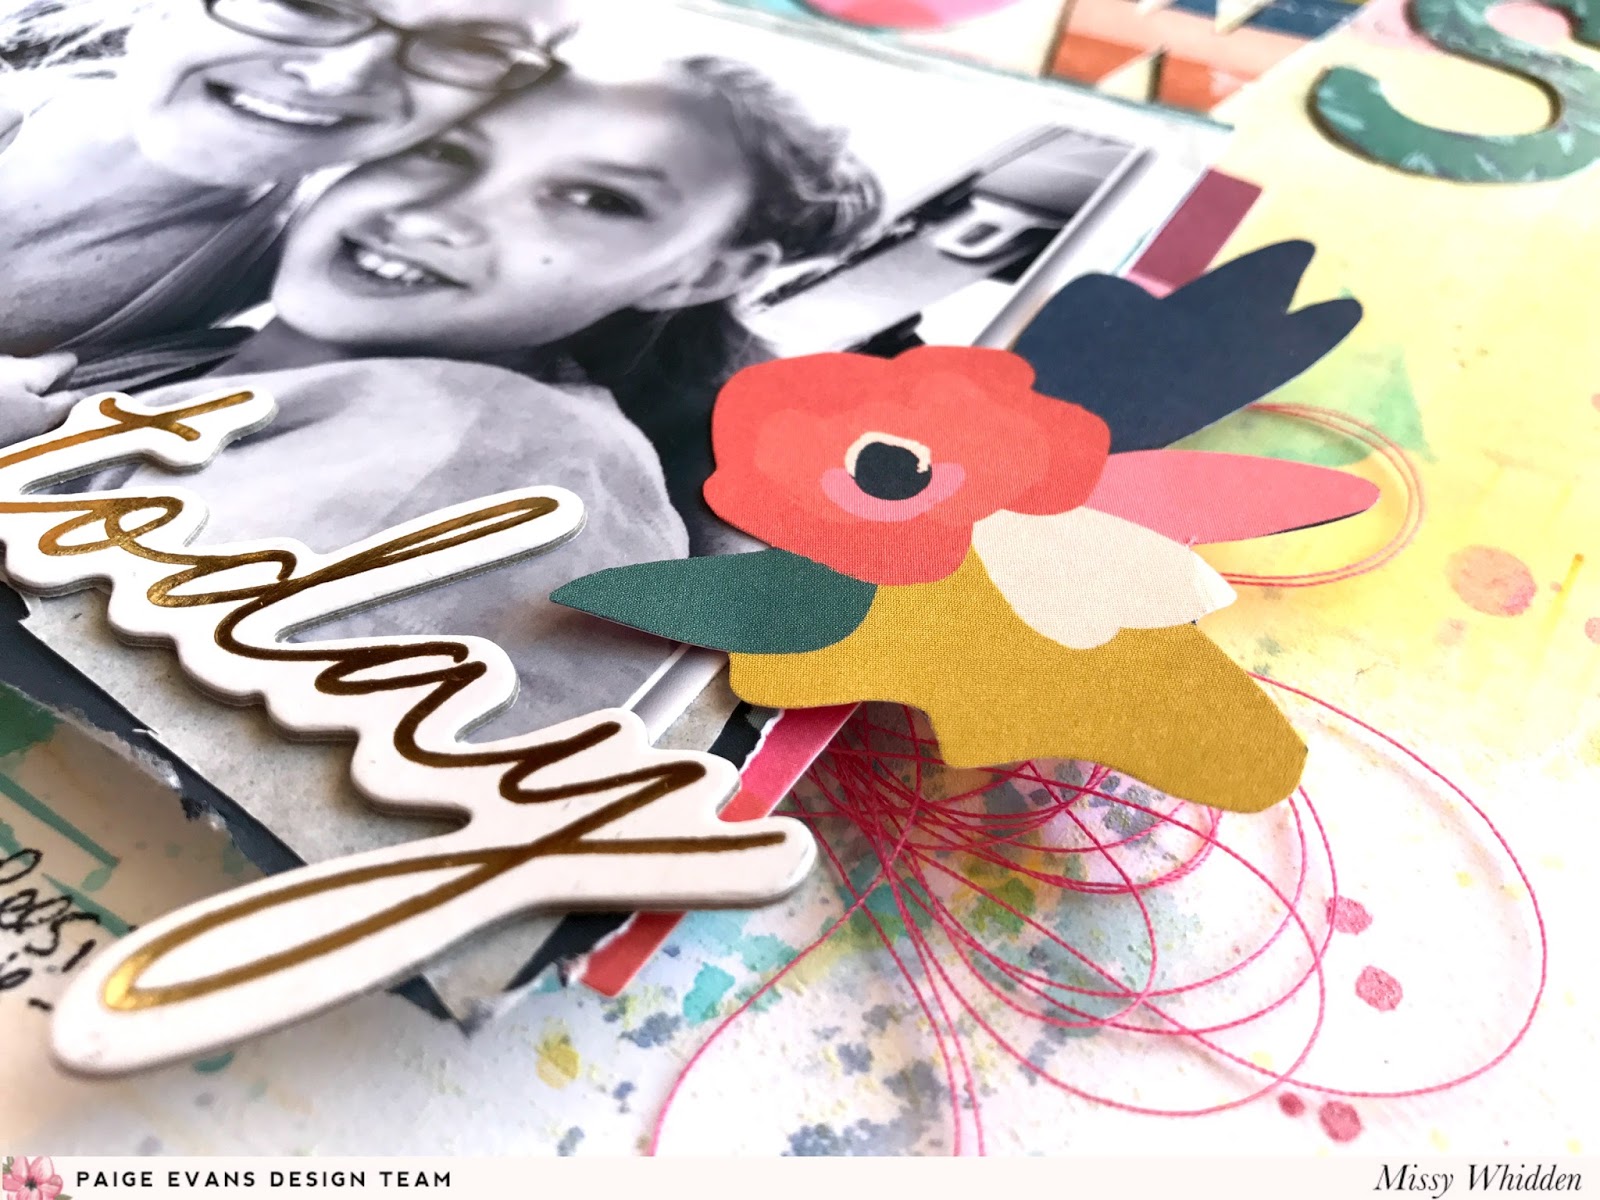
Hello again, friends! Missy here with a new layout and I used mostly the Pick-Me-Up 2x2 Paper Pads. One of my favorite designs is to create a large title using a quote. The 2x2 Paper Pads are perfect for cutting out letters. I decided to not use my Cameo for this(!), so I hand drew the letters and cut out each one by hand. Since the letters were pretty big, I knew I wanted to have them on the top half of the layout and center my photo under it. I used white cardstock as my base and I covered almost all of it with clear gesso first. Next I came in with coordinating colors of Distress Oxides inks mixed with some Shimmerz sprays. I used the packaging technique and a brush to add splatters.
The awesome thing about these 2x2 Paper Pads is that all the papers look good mixed together like this. I didn’t have to think twice about anything not matching because all the colors and patterns are so bright and bold. After I arranged the title, I lightly adhered them to the cardstock and then machine stitched through them. I used some bits and pieces from the Pick-Me-Up Haberdashery Multi-Pack to embellish some of the letters. I also added a tiny shadow around the letters using a fine tip Sharpie to make them pop off the page a bit more.

I went light with embellishments around the photo since the title was pretty busy. I fussy cut this floral cluster from Paper 02 and added a sentiment Chipboard Sticker on top of the photo. I used a piece of Paper 05 and a frame from the Pick-Me-Up Ephemera Die Cuts as layers behind the photo. For an extra pop of pink, I tangled up some thread.

On the left side of the photo I used a Rub-On and a small fussy cut piece from the phrases 2x2 Paper Pad. I stitched through it for more texture and detail. I topped it off with a cute Pick-Me-Up Puffy Sticker. I also added a frame Rub-On under the photo and then wrote my journaling.

I hope this gives you some fun ideas to try on your next layout! It’s fun to fussy cut letters and create your own large title and the 2x2 Paper Pads are perfect for it!

Thanks for stopping by, and have a great day!
SUPPLIES: PICK-ME-UPPaper 02Paper 052x2 Paper PadsHaberdashery Multi-PackEphemera Die CutsRub-OnsChipboard StickersPuffy Stickerswhite cardstockDistress Oxides inksgesso
Blog: littlenuggetcreations.blogspot.com  Instagram: @missywhidden  Pinterest: @missywhidden
Facebook: missy.whidden  YouTube: Missy Whidden
Such a gorgeous layout for a photo of two gorgeous girls!

50% Off My Cut Files!


Thursday, March 8, 2018

Hi friends! I wanted to let you be the first to know that now through March 11th you get 50% off my cut files in etsy! With each design you get the .PNG, .DXF, and .SVG files so you can use the cut files with ANY machine: Silhouette, Cricut, Scan N Cut, etc! No code needed, the discount is already applied!
CLICK HERE to start shoppin'!

Grateful for You! Layout by Heather Shank


You're going to love the intricate details on design team member Heather Shank's layout for today!

Hi friends, Heather here and my layout today features lots of stitching and the Pick-Me-Up collection! I used Paper 24 to cut the Cross Stitch Heart Background on my Silhouette Cameo and used seven embroidery threads that matched the colors perfectly! It took a long time to stitch through the holes but I find it to be very relaxing.
I wanted to keep my layout simple, so I added this sweet picture of my granddaughter in the top left corner along with a few Chipboard StickersEphemera Die CutsRub-Ons, and Mini Thickers to highlight the picture and use as my title.
I love the pretty flowers on Paper 02 and can never resist fussy cutting them out and scattering them around somewhere on my page. This time I used them on the side of each heart along with fussy cut moths from Paper 14.
I hope you love how this layout turned out!

SUPPLIES: PICK-ME-UPPaper 02Paper 14Paper 23Paper 24Mini ThickersChipboard StickersEphemera Die CutsRub-Ons; Cut file: Cross Stitch Heart Background by Paige Evans; Silhouette Cameo
Instagram: @crafts_by_heathers | Facebook: Heather Wilson Shank
All the of the time and effort put into hand stitching through the cross-stitched hearts is so worth it!

Altenew March 2018 Release Blog Hop + Giveaway


Wednesday, March 7, 2018

Hello and welcome to the Altenew March 2018 Blog Hop + Giveaway! I hope you find something to inspire you today - be sure to leave a comment on this post to be entered to win a $30 Altenew gift certificate! Here is the layout I made using this new release of lovely products:
It all started with the Floral Flurries Washi Tape. I love love love flowers and wanted them to be the main focus of my layout. So I took some time fussy cutting them - first I applied the giant washi tape roll to smooth white cardstock and then cut out all the flowers and leaves.
Then I got messy!! I really wanted to push myself out of my comfort zone with this one. It's new-to-me product of things I don't use all that often - stencils and sprays so I decided to make the most of it! I grabbed a piece of smooth white cardstock for the background and then used the Classy Stripes Stencil with modeling paste to create a textured surface down the center. Then I used the Deco Wallpaper Stencil, Scallop Builder Stencil, and Weave Builder Stencil with watercolors that matched the colors of the flowers all over the page. Such a pretty color palette!  Once the watercoloring dried I came in with Antique Silver Metallic Ink SprayAntique Gold Metallic Ink Spray, and Pure White Ink Spray and splashed/flicked/dropped it all around, letting it dry between each color.
Then came more washi tape: I tore thin pieces of the Dotted Washi Tape and Monochrome Washi Tape and stuck them in three places across the background. For more texture I machine stitched over the washi with light pink as well as metallic gold thread - using straight and zig zag stitching. I also stitched in a few more places across the page with the gold thread.  To finish the background I came in with the Watercolor Bouquet Stencil and more modeling paste to create a final layer on top and around the layout.
I placed the clusters of fussy cut flowers over the washi tape strips and tucked in a photo to the bottom cluster. I used an "xoxo" floral tag from Altenew as my title and then wrote journaling with a precision pen next to the photo. As the finishing touch I added Altenew enamel dots in matching colors around the page.
 This is such a departure from my usual style! And it was so fun! I've definitely been bitten by the mixed media bug and can't wait to try getting messy again!


To celebrate this release, Altenew is giving away a $50 gift certificate to SIX lucky winners! Please leave a comment on the Altenew Card Blog and/or Altenew Scrapbook Blog by Wednesday, March 14th for a chance to win. Six winners will be announced on the Altenew blogs on 3/17/2018. 
You also have a chance to win a $30 Altenew gift certificate here on my blog! Simply leave a comment on this post and I will randomly select a winner on March 16th! Thank you and good luck!

***UPDATED WITH THE WINNER - congratulations 3KIDMAMA - please send me an email! :) ***

Good Life Layout by Stefanie Ried


Tuesday, March 6, 2018

Feast your eyes upon this CUTE CUTE CUTE new layout by design team member Stefanie Ried!
One year ago I created a layout with a picture of myself. I hung various stickers, pendants, etc. on yarn. This year I felt like circles. I LOVE circles! The more the better :)
I created a background of 1.3" circles on the computer and then cut them out with my Silhouette Cameo from white cardstock.

I filled the circles with various papers, Stickers, ButtonsRub-Ons, and Sequins from Pick-Me-Up. Oh yes, one of my favorites are sequins!

Some circles have also been decorated with a sewing machine. I really like the effect with the stitching.

The colors from the Pick-Me-Up collection are so beautiful. I cannot say that often enough. I think every layout looks so fresh with all the great stuff from Pick-Me-Up.

Many thanks for stopping by!

Blog: steffiried.blogspot.com / Instagram: @steffiried / Pinterest: @steffiried / Facebook: stefanie.ried.96 YouTube: Steffi Ried
Okay, off to scraplift this! :) :) :)

Soaking Up Life Layout by Bea Valint


Monday, March 5, 2018

Check out this new and simply stunning layout by design team member Bea Valint!
Hi everyone! It’s Bea back today and I have a new layout to share using the gorgeous Pick-Me-Up collection and the super fun Dot Scallops background cut file. I have loved this cut file from the first time I saw it at the Silhouette Store. The fun design reminds me of the waves upon the sea.
I grabbed a photo from our last vacation to the Greek Islands and chose the beautiful ombre blue Paper 04 as my background. I cut six dot scallop lines from white cardstock using my Silhouette Cameo 3, trimmed the bottom, and adhered it to my background. I placed the photo in the center and fussy cut some pretty flowers from Paper 02.

I arranged all the pretties around my photo and added the title by mixing and matching cardstock StickersMini Thickers, and Ephemera Die Cuts.

To add a touch of fun of my page I adhered sequins from the Haberdashery Multi-Pack and cute Puffy Stickers among the flowers. It really finishes off the page well.

I hope you like my first layout with this lovely collection, it was so much fun to create! Thank you for stopping by!

SUPPLIES: PICK-ME-UPPaper 02Paper 04Chipboard ThickersMini ThickersEphemera Die CutsChipboard StickersPuffy StickersHaberdashery Multi-Pack; Cut file: Dot Scallops by Paige Evans; Silhouette Cameo 3white cardstock

Blog: myshinystudio.blogspot.com / Instagram: @beavalint / Pinterest: @valint7 /
Facebook: myshinystudio / YouTube: Bea Valint

Just goes to show you don't need a whole lot on a page to make a big impact!! So pretty!
Paige Taylor Evans © // Quinn Creatives DESIGN