October 2017 Layout


Friday, October 19, 2018

I created a tutorial for the Silhouette Blog featuring my Pumpkin Banner cut file!
I backed the banner with papers from the Pink Paislee Spellcast collection, tucked photos in and around the pumpkins, and then embellished with all things spooky cute! Be sure to check out the Silhouette Blog for the complete tutorial!
SUPPLIES: Patterned paper, Thickers, stickers: Spellcast collection by Pink Paislee; Cut file: Pumpkin Banner by Paige Evans; Die cut machine: Silhouette Cameo 3

Whimsical 2x2 Paper Pad Mini Album by Flóra Farkas


Hi girls, it’s Flóra is here today sharing a cute mini album! This album was inspired by the cute new Whimsical 2x2 Paper Pads. I really love them but found them hard to use, until now - they're perfect for mini albums! I mainly used the Whimsical collection along with a Scalloped Lid cut file designed by Paige. I dedicated this album to Füli, our westi, who was on a trip with us a few weeks ago and was a really good girl.

I cut two 6x6 paper pieces from Whimsical Paper 04 and scored them at every two inches. You can also use a 6x6 Paper Pad for the base. I removed a few squares to get a cross shape and adhered them on each other in the middle. Then I added 2x2 papers from Whimsical 2x2 Paper Pads. This time I only used the Phrase Pad.


On the empty places, I placed my photos and Turn the Page Journaling Spots. Then I decorated every page with Puffy Stickers, as many as I could fit. It was so fun to complete the cute 2x2 pages with those pretty stickers. I also used Whimsical Rub-Ons to cheer up my photos. Have you ever used rub-ons on photos? The effect is just stunning!


To finish I made the Scalloped Lid using Paige’s cut file. I picked Paper 03 for the lid because I love this deep magenta color. I fussy cut flowers and leaves from Paper 13 and adhered them on the top with foam tape. I cut out a cute butterfly from Paper 01 and placed it over the flowers. On the side of the lid I added phrase Puffy Stickers and my title using Pick-Me-Up Mini Foam Thickers and Turn the Page alphas from the Sticker Book. It means Füli (my dog) is on the trip.

I think this is the perfect gift to create when you need something fast. I will make few more for sure! I hope you like it and will try out!
Blog: pinkandpapergift.blogspot.com Instagram: @floramfarkas Pinterest: @floramfarkas
Facebook: pinkandpapergift YouTube: Flora Monika Farkas

Good Life Today Layout


Thursday, October 18, 2018

The Fall 2018 issue of Scrapbook & Cards Today Magazine is live and available to download for free! Here is one of the two layouts I have inside:
To create this layout I started with Pick-Me-Up Paper 05 as the background and splashed white acrylic paint across it. Then I used my Layered Flower cut file and a Silhouette Cameo 3 to die cut three monochromatic flowers. There are seven concentric layers per flower and I used lots of papers from Pick-Me-Up to create each one. In the center of each flower I added a Chipboard Sticker sentiment and then machine stitched through all three before adding them and a central photo to the layout.
Next I cascaded embellishments down the center of the page using Ephemera Die CutsChipboard Stickers, and Puffy Stickers in the color-on-color technique.
 To finish I wrote journaling in two places between the embellishments. All done! Cute memory of Jane documented!
I hope you are inspired to pick up the Pick-Me-Up and download the Fall 2018 issue of Scrapbook & Cards Today Magazine!

Trick or Treat Layout by Kim Jeffress


Wednesday, October 17, 2018

Hi everyone! It's Kim Jeffress here today and I am excited to be sharing a brand new Halloween layout with you today! Living in Australia, Halloween is slowly building in popularity and my family joins a small group of friends for our annual trick or treat walk. I have been wanting to scrap these photos from last year and when I saw the  new Haunted Houses Border cut file I knew it was perfect!
I began by cutting the cut file on some black American Crafts cardstock. I then backed the windows and doors with vellum to add a slight translucent touch to the houses. I added pop dots to the back of the cut file and adhered it to the middle of that patterned paper from the Pink Paislee Wild Child collection.

I then tucked my photos above and below the cut file border, adding two titles - one below the border with some gold Thickers from Crate Paper and the other on a diagonal- following the line of one of the house’s roof. I love the fun feel this gives to my layout! I then added a couple of stickers from the 30-page Paige Evans #StickerBook in and around the elements of my page before adding the all important journalling to my layout. I just love the whimsical feel I have created, it goes to show you don’t need a dedicated Halloween paper collection to create a Halloween layout, just grab your photos, some coordinating patterned paper, and a Halloween cut file and you are all set!
SUPPLIES: Cut file: Haunted Houses Border by Paige Evans; Die cut machine: Silhouette Cameo
Blog: Glass Half Full / Instagram: @kimjeffress / Pinterest: @kimjeffress / Facebook: Kim Jeffress Designs / YouTube: Kim Jeffress

Flourish Butterrfly Layout by Missy Whidden


Tuesday, October 16, 2018

Hey, friends, Missy Whidden here! I just love creating a stencil from a cut file and that’s exactly what I did for this layout. I used Paige’s new Flourish Butterfly cut file and cut it on white cardstock using a Silhouette Cameo. I placed it on top of Turn the Page Paper 10 at an angle to create my design. First, I scraped white gesso over the stencil so I could see the shape of the butterfly. Then I went around and on top of the shape with more white gesso using my finger to smudge it so it would appear light and hazy. I laid the stencil back over the design and then used a few colored texture pastes and sprays to create a fun, shiny, and colorful butterfly.
I used black and white photos to make the colors pop and I layered Oh My Heart Paper 09 and Paper 19 behind them for some more bursts of pink. I fussy cut some butterflies from Turn the Page Paper 04 to layer in on top of and around the photos. I wanted more pops of gold, so I machine stitched trails from the butterflies. I added smaller details with some phrase stickers from the 30-page Paige Evans #StickerBook.

I blended some of the colored pastes together and added some Heidi Swapp Gold Color Shine. Since my stencil was made of cardstock, some of the paste smudged underneath it. I’m okay with that because I think it just adds to the fun messy factor. I found another butterfly to add here from the Pick-Me-Up Stickers.

I went simple with my title and used these gold foiled Pick-Me-Up Chipboard Stickers. I love the shine! I wanted a bit more orange on the layout, so I fussy cut a small scalloped border piece from Oh My Heart Paper 17 and tucked it under the bottom of the photos. I also added in matching tangled thread in a few places.

I had a blast getting messy and making this fun page! I hope you are inspired to use one of Paige’s cut files as a stencil and create your own background. Thanks so much for stopping by!
Blog: littlenuggetcreations.blogspot.com  Instagram: @missywhidden  Pinterest: @missywhidden
Facebook: missy.whidden  YouTube: Missy Whidden

Flower Wreath Layout by Lucile Peignon


Monday, October 15, 2018

Hello everyone, it's Lucile! Today I have a new flowery layout to share! I have used the new Flower Wreath cut file by Paige and I love it. I used papers from the Pick-Me-Up collection.
For starters, I backed the cut file with papers from the collection. I stayed in pink tones. Then I decided to combine the two parts of the cut file to form a circle. I also printed my photo in a large format and I trimmed it following the shape of the die cut.

I cut different kinds of 3D flowers to add to the flower wreath. I also cut leaves in two different papers that I added in some places of the cut. Finally, I added stickers and die cuts in pink tones to decorate my layout.

I hope you like this layout and you will see that you can make a beautiful layout with few embellishments, mostly cut files!

SUPPLIES: PICK-ME-UP6x6 Paper PadStickersEphemera Die Cuts; Cut file: Flower Wreath by Paige Evans; white cardstock; Die cut machine: Silhouette Cameo

Instagram: @dejolieschoses18 / YouTube: Lucile Peignon / Facebook: dejolieschoses18 / Pinterest: dejolieschoses18

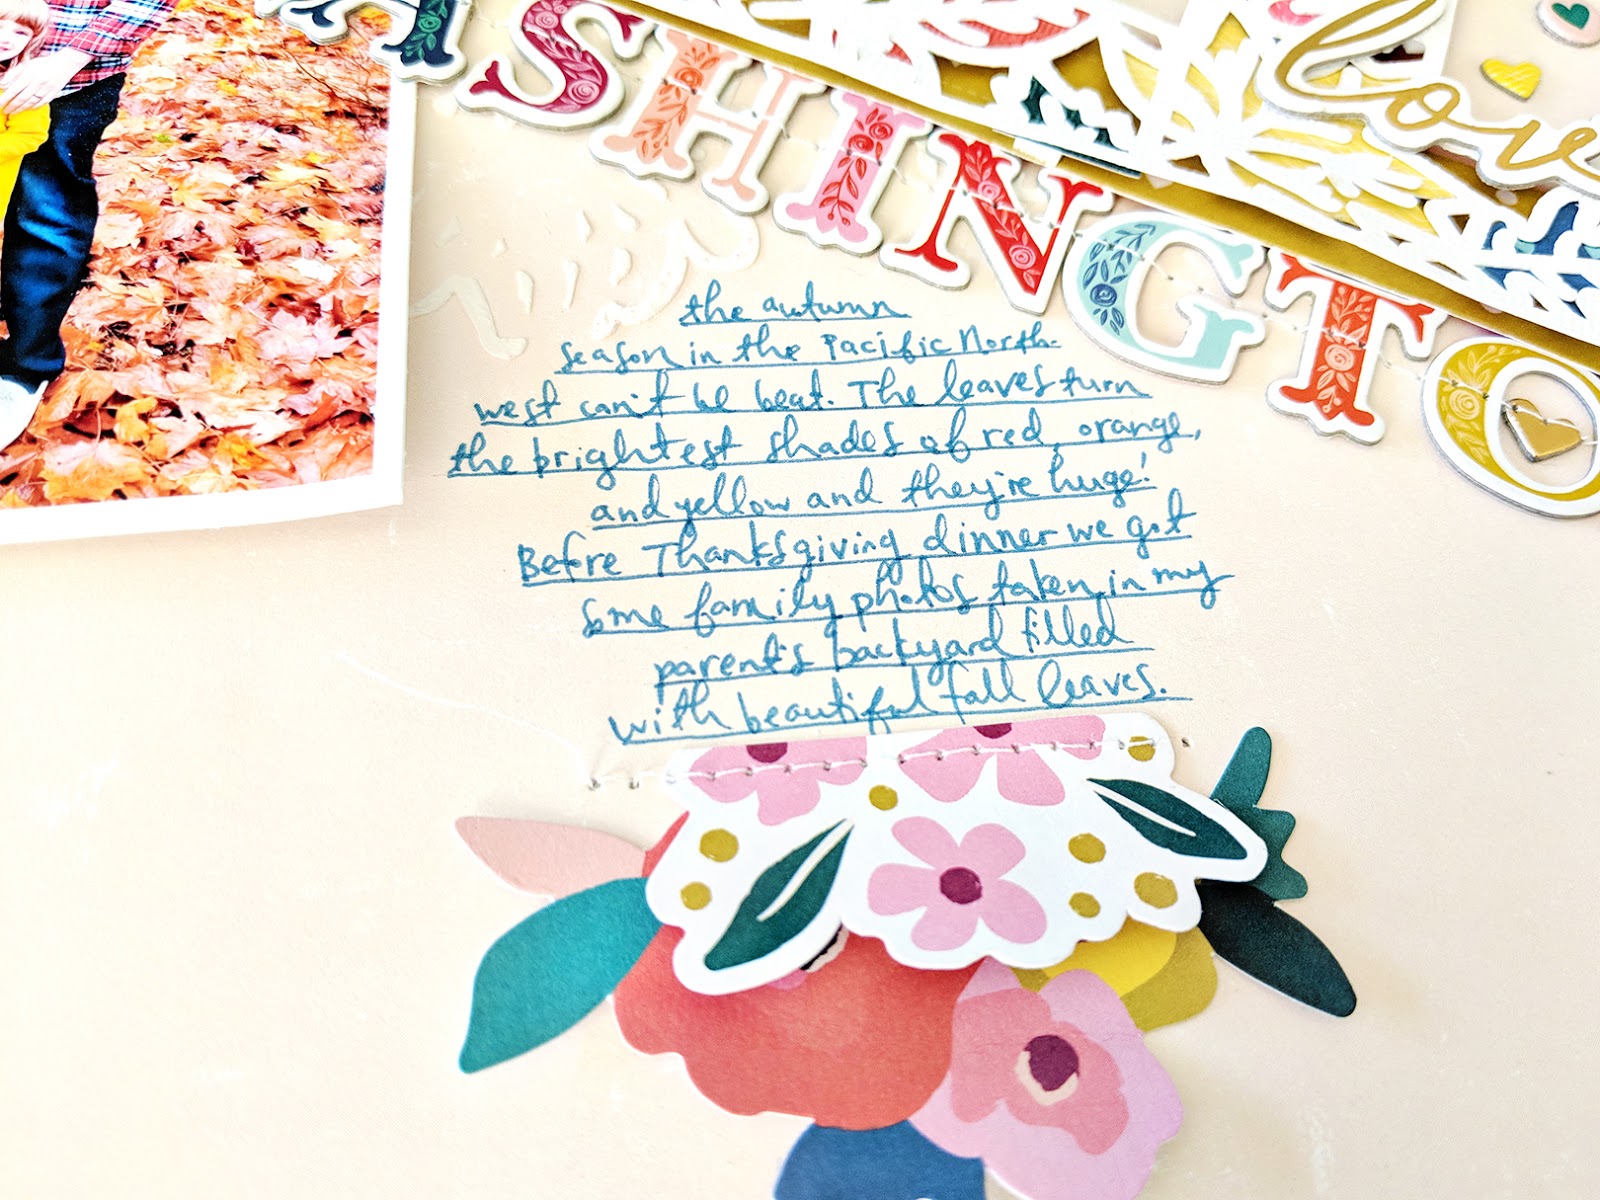
Fall in Washington Layout


Sunday, October 14, 2018

Here is a new layout I made for the Scrapbook & Cards Today Blog!
I started by die cutting my Fall cut file from white textured cardstock using a Silhouette Cameo 3. Then I backed each of the leaves with patterns from Pick-Me-Up Paper 10 and Paper 21. I love using non-traditional colors that still could work for fall: pink, aqua, mint? Why not!


 Once I had all of the leaves backed I backed the entire word with a section from Paper 12 which includes brown on it - more fitting for an autumnal page!
 I chose Paper 05 for my background. To create more interest and texture on it, I used a large doily stencil and scraped modeling paste over it at the intersection of all the patterns. Once the background dried I placed the title at an angle across the paper following the diagonal line of the printed design.

I tucked a family photo taken in fall foliage under the title and then finished the title with Chipboard Thickers. I machine stitched over the Thickers to help them stay in place permanently.
 To embellish I added floral Chipboard Stickers trimmed in half around the edges and machine stitched over them. I added a few more Chipboard Stickers here and there but didn't add a whole lot more - the title is the main embellishment!
I wrote journaling next to the photo with a few more floral Ephemera Die Cuts stitched underneath to finish up this layout. I hope you are inspired to check out my Fall cut file as well as my Pick-Me-Up collection with Pink Paislee! Thanks for stopping by!
SUPPLIES: PICK-ME-UPPaper 05Paper 10Paper 21Chipboard ThickersChipboard StickersEphemera Die CutsPuffy Stickers; Cut file: Fall by Paige Evans; Die cut machine: Silhouette Cameo 3white cardstockmodeling paste; Pen: Zig; Stencil: Unknown; Sewing machine: Brother; Thread: Coats & Clark

Whimsical Embellishment Kits!


Saturday, October 13, 2018

I have some Whimsical Embellishment Kits! (or sold individually as marked)
- 6x6 paper pad with 36 sheets and gold foil accents ($5)
- 2x2 mini swatch books ($4)
- rainbow and pink mini foam Thickers ($5)
- patterned chipboard Thickers ($4)
- chipboard icon stickers (89 stickers per pack) ($4)
- 6x12 stickers (87 stickers per pack) ($3)
- enamel dots (72 pieces per pack) ($4)
- 4 page sticker book with icons, alphabet, tape strips, and more (256 stickers per pack) ($3)
- ephemera die cuts (40 pieces per pack) ($4)
- rub-ons (2 sheets) ($2)
- mixed floral embellishments (50 pieces per pack) ($4)
Please send me a message or email (paigetaylorevans @ gmail dot com) and I'll get right back to you!
$50 including USPS Priority Mail 2-3 Shipping, US only.

HAPPY SCRAPPING!

Flower Power Layout by Zsoka Marko


Hello crafty friends, Zsoka checking in today with a new layout I've made for the Paige Evans + Silhouette Design Team. While waiting impatiently for Paige's new collection, Whimsical, I've been working with some older collections. To be honest, I don't mind doing that because I have too much stuff and it's always a good feeling to use up something from my older supplies! On today's layout I've mostly used the beautiful Oh My Heart collection plus a few items from Pick-Me-UpTurn the Page, and Fancy Free.
 I've chosen the Geometric Peace Sign cut file because when I saw it, I remembered I once made some Flower Power cookies for a friend and thought the photo would work well with this cut file. Seeing these cookies now I realize they looked rather bad; I didn't know all the tricks of icing back then. However, I loved the color scheme and knew I could make it work with Paige's collections!

I cut the cut file from textured white cardstock using a Silhouette Cameo then backed some of the shapes with different patterned papers. I fussy cut a bunch of flowers, luckily I had most of them done before. Sometimes I'm not in the mood to scrap but still want to do something, and then I normally either fussy cut or hand stitch. So I have several bags full of flowers and butterflies ready to go!

After preparing my background and adhering the cut file to it, I glued down my picture. I then created three clusters of flowers. I added foam dots here and there for some dimension. Finally I stitched on some buttons in the middle of the biggest flowers. I used the small white Mini Foam Thickers from Pick-Me-Up for my title and a white gel pen for my journaling. To finish off my page I added some gold paint splatters.

I hope you have enjoyed today's layout inspiration! Thanks so much for stopping by! I wish you a beautiful day!

Blog: apocketfullofscrap.blogspot.com / Instagram: @zsokamarko / Facebook: Zsoka Marko / YouTube: Zsoka Marko

Pink Cards by Stefanie Ried


Friday, October 12, 2018

Hello and welcome to a new blog post from me, Steffi! Today I have two cards to show you which I created with different materials from Paige's collections. I was inspired by the great pink paper with the flowers - Paper 17 from Pick-Me-Up.
I cut out the beautiful Folk Art Flower Frame cut file from Paige. Then I designed the background with acrylic paints.

With simple brush strokes this was quickly created. After drying I glued on the paper wreath and decorated it with stickers.

For the second card I used another cut file - Leaf Branch. I cut it out of white cardstock and painted it with acrylic paints. Then I decorated it with a ribbon.

There are so many beautiful things in Paige's collections that are pink. You could make a lot of cards with them!

Thanks for stopping by and until next time!

Blog: steffiried.blogspot.com / Instagram: @steffiried / Pinterest: @steffiried / Facebook: stefanie.ried.96 YouTube: Steffi Ried
Paige Taylor Evans © // Quinn Creatives DESIGN