Good Vibes Only Layout by Kim Jeffress


Monday, January 21, 2019

Welcome back to Paige’s blog! It’s Kim Jeffress here with a new layout using Paige’s fun Good Vibes Only cut file. I wanted to create a dramatic effect with the cut file so I cut it almost full size using some of Heidi Swapp’s Minc Toner Sheets. Once cut I ran it through my Minc using the gorgeous new Cheetah Minc foil. I then popped it up with pop dots and adhered it to the bottom area of my layout for some depth and dimension. Doesn’t it make a bold impact!?
I then went ahead and added some of the Heidi Swapp Ephemera in and around the cut file. I grabbed the Whimsical Foam Mini Thickers and added them in a semi circle around the sticker to create my subtitle. I love all the bright fun colors!
I then adhered that cute little yellow Butterfly Charm to complete my layout. I added hidden journaling on a tag and tucked it behind my photo. I added tape under the photo to keep the tag from slipping down under the photo.
It’s always fun way to create a layout with a large title. It sets the scene and makes a big bold impact! Be sure to check out the Good Vibes Only cut file and if this doesn’t suit the theme of your layout Paige has lots of other large titles that could work for you! Until next time!

SUPPLIES: WHIMSICALFoam Mini ThickersButterfly Charms; Die cut machine: Silhouette Cameo; Cut file: Good Vibes Only by Paige Evans
Blog: Glass Half Full / Instagram: @kimjeffress / Pinterest: @kimjeffress / Facebook: Kim Jeffress Designs / YouTube: Kim Jeffress

Pretty Love Great Layout by Stefanie Ried


Wednesday, January 16, 2019

Hello and welcome to another layout from me, Stefanie Ried! This layout is all about pennants. When I cleaned up my scrap room before Christmas, the Pennant Paper Clips from the Turn the Page collection fell into my hands. Do you remember them? I love them and wanted to create my own with Whimsical.
To make the nine paper clips I removed a few tassels from the Whimsical Tassel Paper Clips and glued them to my gold paper clips. Then I used papers from the 6x6 Paper Pad to make pennants - they are perfect for smaller motifs and have gold accents to match the gold paper clips.
I printed the photos in a small format and attached them to the paper clip. I sewed a border around the layout with my machine. Next I cut little slits in the paper with a knife and tucked the paper clips into the slits. I added foam squares under the pennants for dimension.
Thank you for stopping by and see you next time!

Blog: steffiried.blogspot.com / Instagram: @steffiried / Pinterest: @steffiried / Facebook: stefanie.ried.96 YouTube: Steffi Ried

Lovely Layout by Zsoka Marko


Friday, January 11, 2019

Hi there Zsoka Marko here! You might remember my last post for Paige's DT called 1 paper 2 ways! Today I'm sharing the second part with a new layout idea using Paper 23 from the gorgeous Whimsical collection. 
I fussy cut out all the scallops from this paper. They are not all the same size but I didn't really mind. I then started layering the scallops, going from the bottom towards the top. Once done, I glued a piece of purple ribbon with a bow on top then added my photo. I have some tissue paper and a die cut frame behind my photo.
For my title I chose a "lovely" word from the Ephemera Die Cuts. I used pop dots to add it on top of my picture. I decorated the opposite corner with a flower sticker from the Sticker Book.
I went through the Rub-Ons next and I picked out a bunch of them to add to my background. I also created a few heart clusters for which I used Rub-OnsChipboard Stickers, and Stickers. Last but not least I added my journaling and splattered some rose gold ink all over the page.
That's it guys! I hope I could inspire you in some small way today! Thanks for stopping by and have a wonderful day!

Blog: apocketfullofscrap.blogspot.com / Instagram: @zsokamarko / Facebook: Zsoka Marko / YouTube: Zsoka Marko

Love You Layout for Paige's Pages 17


Wednesday, January 9, 2019

Here is the last layout from Paige's Pages 17 at Big Picture Classes!
This layout features some of my favorite things: hand stitching with a chain link stitch, lots of flowers, and repetition of hearts, all popping off of a white cardstock background.

 I did use a Silhouette Cameo 3 to create the heart and stitching holes and included the cut file in the lesson, but since the shape is so simple it could easily be drawn by hand and the holes made with a piercer!
 Texture is made with white acrylic paint splatters, using dimensional adhesive between layers, and different types of materials like paper, stickers, metal charms, puffy stickers, chipboard stickers, rub-ons, embroidery thread, and more! Lots of different thicknesses going on to help the page pop!
 Find the start-to-finish process video and more tips & tricks over in Lesson 4 of Paige's Pages 17 at Big Picture Classes! :)
SUPPLIES: WHIMSICALFloral Die CutsStickersPuffy StickersChipboard StickersSticker BookButterfly CharmsTassel Paper ClipsRub-Onswhite acrylic paint; Embroidery floss: DMC; white cardstock

Happy New Year Layout by Missy Whidden


Tuesday, January 8, 2019

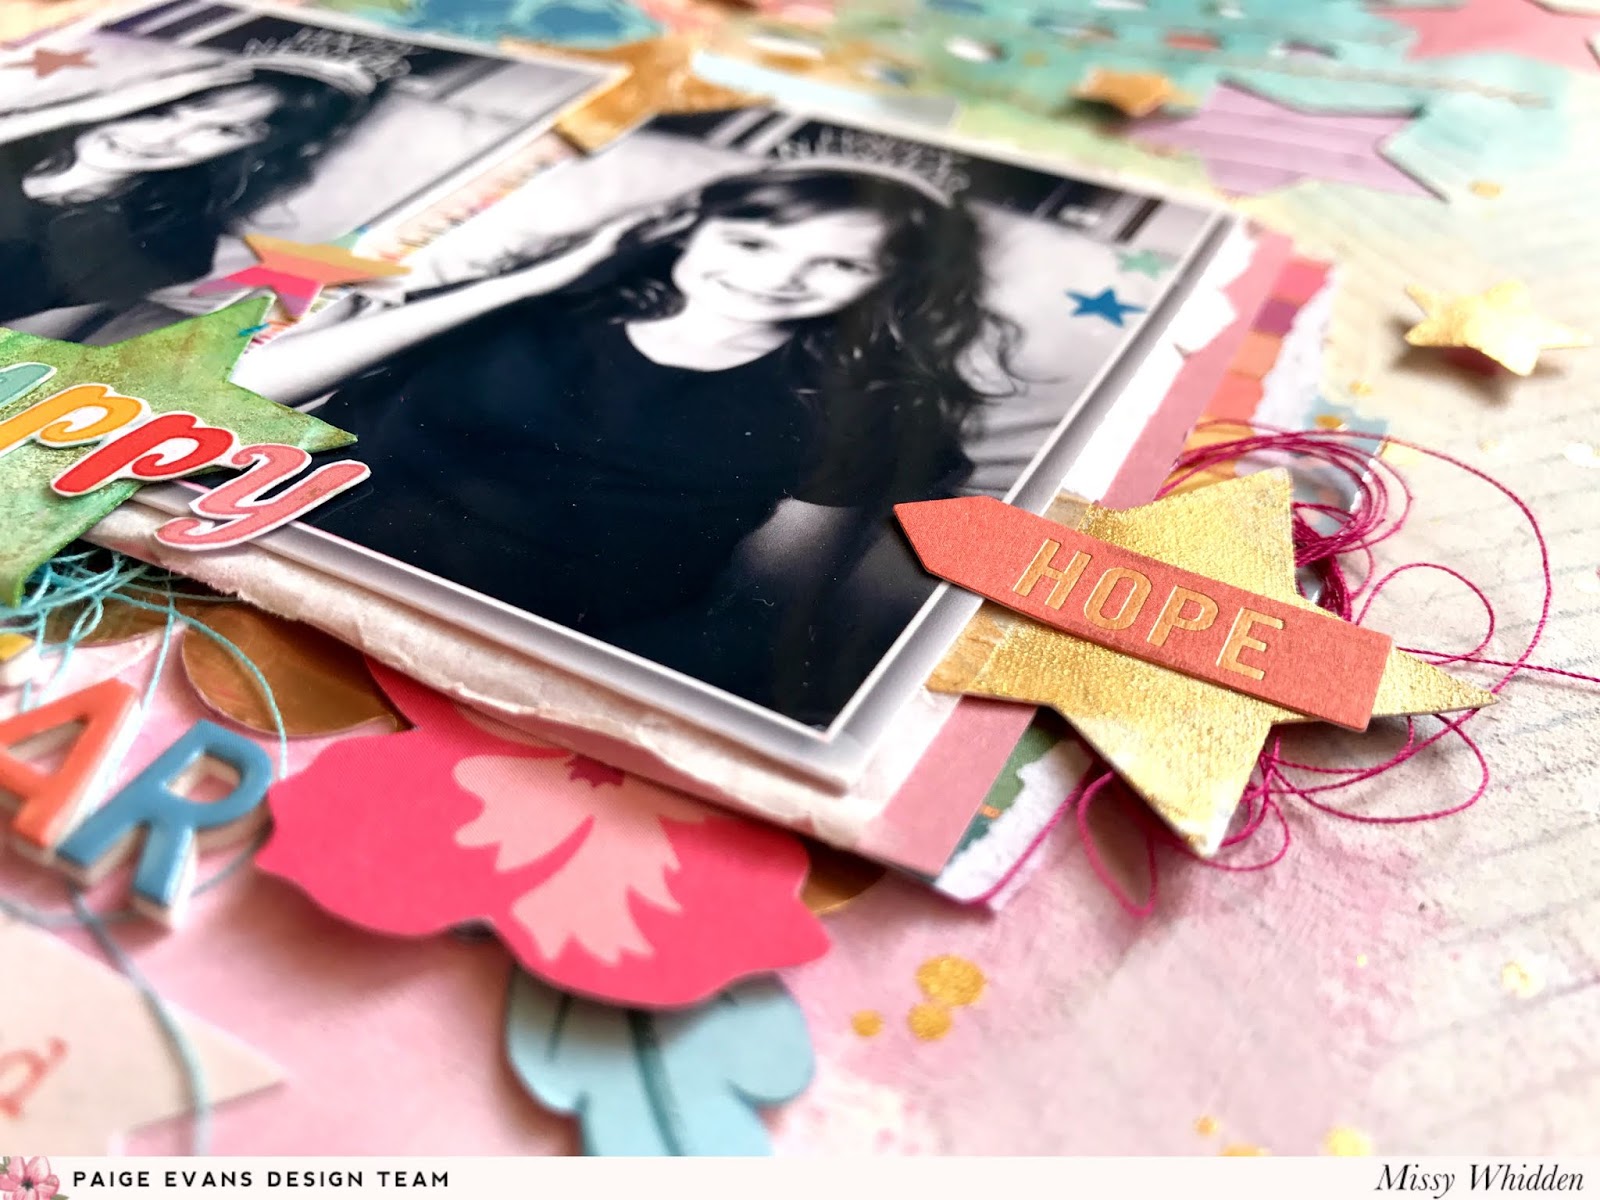
Happy New Year, friends! Missy Whidden here with a new layout using the Whimsical collection. I used Paige’s Fireworks cut file to showcase these cute photos of my daughter from a few years ago. I always think of fireworks on New Year’s Eve, so this was perfect. I used Paper 02 as my background and I cut the fireworks on it first. Before peeling it off the mat, I coated most of it with white gesso to prep it for some mixed media. I used a few ink sprays on it before backing the open spots. I wanted lots of color pops, so I backed most of it with Paper 15 and all the stars with various patterned papers.
I wanted some shiny gold on the layout so I used Heidi Swapp Gold Color Shine on some of the stars left on the cutting mat. I also punched a few smaller ones and scattered them around the page. I embellished around my photos with stickers from the Whimsical Sticker BookStickers6x6 Paper Pad, and Floral Die Cuts. I also used a few paper scraps as layers behind the photos as well as some tissue paper and adhesive foam. I also added a few star Rub-Ons right onto the photos.
I went simple with the title. I used the “Happy” Rub-On and applied it to white cardstock and then fussy cut it. This allowed me to move it around and add it on top of my photos. I completed the title with the Foam Mini Thickers. I love those rainbow colors! I used some shimmery ink sprays to color the green star behind the rub-on. I also fussy cut the sentiment piece below the title from a patterned paper and stitched through it.
I really love how this background turned out. I decided to stitch lines through all of the cut file dotted lines with rainbow thread colors. I love the texture and color this gives! I added tiny pieces of dimensional adhesive behind the little gold stars to give them some dimension as well.
I hope this inspires you to create something fun and bright this week! Be sure to check out Paige’s cut files for inspiration. I always get ideas for my pages just by browsing through them and finding ways to use them. Thanks so much for stopping by and here’s to another fun-filled year of scrapping!
Blog: littlenuggetcreations.blogspot.com  Instagram: @missywhidden  Pinterest: @missywhidden
Facebook: missy.whidden  YouTube: Missy Whidden

Bayreuth, Germany Mini Album with Whimsical


Monday, January 7, 2019

I finished up a new mini album using my Whimsical collection that documents our day in Bayreuth, Germany a few years ago! I started by using my Mini Album with Scalloped Edges cut file to make the base pages. I used a different patterned paper for the front and back of each page and then machine stitched around three edges to create pockets for holding even more photos and memories.
Here is a flip through of me talking about the album in detail:

On the cover I added the name of the city we visited with the colorful mini alphabet stickers found in the Sticker Book and then made the country with the gold mini foam Thickers from the Auburn Lane collection. I layered these words over two Floral Die Cuts and then added them to the front after splashing white acrylic paint and watercolors on top. On the top of the three binder rings holding the album together I looped on five of the thread tassels from the Tassel Paper Clips as well as one of the Butterfly Charms.
Inside the first spread I added journaling strips and a small photo to the left page as well as a Flower Die Cuts trimmed in half and a "play" Chipboard Sticker. On the right page I embroidered the floral pattern on the paper. I love the texture and pop of color this technique adds!
Inside the first pocket I cut another page from smooth white cardstock and then created a border with Floral Die Cuts. Another little photo and typed journaling finish up the front!
On the back side I added a larger photo and layered Stickers and Die Cuts at the top. This card slips perfectly into the pocket and then I ruffled the page edges for lots of dimension.
Here is a closer look at the first two pages:

On the second pocket page I added modeling paste through a doily stencil, let it dry, then added a floral die cut trimmed in half under two small photos. On the back side I added a full page photo and layered icons and journaling at the top.
On the left side of the second spread I added pennant Chipboard Stickers in a curve across the top and machine stitched over them. I always created the pages first and added any planned stitching before attaching the pages back-to-back. Butterfly Die Cuts and Puffy Stickers and printed journaling finish up this simple page.
 
On the right side I splashed white acrylic paint and then layered on the stickers and die cuts to create a pretty place to hold a photo.
For this third pocket page I did some mixed media on the front and back and added more photos and flowers. Bring on all the flowers!!
On the left side of this spread I added modeling paste through a floral stencil and then layered two photos over two Floral Die Cuts. A sentiment and heart Chipboard Sticker adorn the center as well as two floral Puffy Stickers.
 
On the right page I left the background clean and added two pictures over two patterns from the mini 2x2 Paper Pads with a few Stickers and Ephemera Die Cuts between.
On the pocket page I layered embellishments, journaling, and a photo and splashed white acrylic paint on the background for texture.
For this last spread I added a large photo on the left side and placed journaling and a couple stickers on the white space.
 
On the right page I added hand stitching to the butterfly trails and then partially cut out the butterfly wings so they could lift and bend to create lots of texture. I added a photo on top and attached a Butterfly Charm to the photo using a paperclip.
On the last pocket page I create a border with the leftover Floral Die Cuts and made room for one more photo to wrap up the album.
Here is a look at the front sides of all the inner pocket pages:
And the back sides:
I hope you are inspired to use Whimsical to create a mini album that documents a fun day or other special event!
Paige Taylor Evans © // Quinn Creatives DESIGN