
I finished a new mini album about London featuring Vicki Boutin mixed media! This mini album was supposed to convince me to fall in love with mixed media and I can now say with confidence that I'm a convert.

I do have a process video for the most of the foundation pages and a flip through at the end - it's almost a half hour so sit back, relax, and enjoy the show!
Before getting into the written instructions, I want to mention that American Crafts has generously offered a Vicki Boutin prize pack so I'm hosting a giveaway over on my instagram!
Before getting into the written instructions, I want to mention that American Crafts has generously offered a Vicki Boutin prize pack so I'm hosting a giveaway over on my instagram!

Now the good stuff :) I started with a Graphic 45 tag-shaped album - there are 9 tags measuring about 5x5". To prepare the surfaces I painted the front and back of each tag with a layer of Gesso. Tags are a great place to start if you're intimidated by mixed media - they're small and inexpensive so you can go to town practicing techniques and not worry about "messing up".


On the left side, I used my Wonky Hearts Background cut file as a stencil to apply Iridescent Glaze. Once that dried I dripped and splashed Daiquiri Ice mint blue acrylic paint from Set 2 across the front. To embellish I added a photo at the bottom and placed a feather Ephemera Die Cut die cut underneath. I typed/printed/trimmed/adhered journaling above the photo using my favorite font called Remington Noiseless.

On this tag I used the same technique as the cover with the Art Crayons in Warm, Cool, and Neutral to create a painterly background. I applied a gold script Rub-On to the front and added a photo over a teal doily Ephemera Die Cut on the right edge.

This might be my favorite spread because there is a lot of pink and bright colors!

On the left I painted the tag pink then mixed a red Art Crayon with modeling paste. I applied the paste over a Heidi Swapp stencil to create texture. I die cut my Overlapping Hearts Background cut file from white cardstock using my Silhouette Cameo 3 and then adhered it on top using tiny foam squares. I embellished minimally after that with a photo in the center and a floral Ephemera Die Cut tucked underneath.

The next page is a filler page with sequins. I used a tag as a template to cut one out of a page protector and then sewed around the bottom and sides to create a pocket. I placed mint green sequins in the bottom and the sewed a line across the top. Then I added blue sequins and sewed across the top. Followed by orange sequins, and finally pink sequins, then I sewed the rest of the pocket closed. When I punched a hole at the top and holes in the sides I sewed around those circles so the sequins wouldn't fall out. For the title I used my Oh My Heart mini alphabet stickers from the Sticker Book.

On the right tag I used bubble wrap and six acrylic paints (Set 1, Set 2, Set 3, Set 4) to create a fun texture. Once it dried I used more bubble wrap and white acrylic paint to tone the bright colors down a bit.

After adding a pair of photos over vellum and writing the location with a pencil at the bottom, I made tiny flowers. To do this, I used the tiny flower stamp from the Dies and Acrylic Stamp Set 2 and Art Crayons in Warm, Cool, and Neutral - I colored the stamp with the crayons, spritzed it with water from the Mister Bottle, and then stamped it onto smooth white cardstock. Once the flowers dried I fussy cut them out and adhered them color-on-color with foam squares.

These two tags were actually the very first ones I made, but as I was putting the album together, they looked best here in the middle.

On the left tag I used an orange Art Crayon from the Warm set and Matte Acrylic Gel to create a colored paste which I scraped down the tag. I used the butterflies stencil from the All the Good Things Stencils Set 2 and Gold Glaze to create another layer. While the glaze was still wet I applied all three kinds of Mixology Gold Glitter, first the largest kind, then the middle, then the fine gold glitter to fill in any gaps. I stapled two photos (of Shake Shack!) on the right side and then used my journaling lines Acrylic Stamp from Oh My Heart down the left edge to write journaling with my favorite .03 black Precision Pen.

This was the very first tag I made in this entire magical mixed media madness! :) I used the floral stencil from the All the Good Things Stencils Set 2 as sort of a stamp and applied Art Crayons in Warm colors to it. I sprayed it with water from the Mister Bottle and then dabbed it onto the tag. I used a Paint Brush and water to fill in some of the gaps. For even more texture, I came back in with the exact same stencil in the exact same placement and added modeling paste. I love the texture! Then I die cut my Branch cut file from smooth white cardstock and placed it on top for another layer of interest. Underneath the photo I added a small piece of white tulle and used my We R Memory Keepers Typecast Typewriter to type "Oxford Street".

Here is the 5th spread of the album - I love the silvers and blues!

The left tag is very simple: I used my Love Love Love Love cut file as a stencil and scraped Silver Glaze over it. After adding a trio of photos across the middle I placed an epoxy Finishing Embellishment on each "O". Done and done!

On this tag I painted circles with Daiquiri Ice and Saltwater Taffy acrylic paints from Set 2 and then sprinkled all of the Mixology Silver Glitters on top while it was still wet. Underneath the photo I added an Ephemera Die Cut leaf. Keep in mind I created the opposite side first with the machine stitching :)

Another fun spread with lots of texture and soft colors!

On this tag I made a light pink colored paste with reds from the Watercolor Set mixed in to white modeling paste. I applied the paste to the circles stencil from the All the Good Things Stencils Set 2. Once dry, I used my sewing machine to stitch loose circles inside all the circles. To continue with the pink theme, I layered photos over pink flower and feather Ephemera Die Cuts, placed two pink Finishing Embellishments, adhered everything onto a doily that I sprayed pink many years ago, and added it to the left edge. I placed a pink Heart Charm on the right along with pink puffy Alphabet Stickers by Pinkfresh Studio for the title.

On this tag I started by using the Paint Brush Set and Art Crayons in Warm, Cool, and Neutral to splash color across the background. I used a hair dryer between each layer to keep the colors separate. Then I used a Tim Holtz stencil to scrape Matte Acrylic Gel over the left edge and sprinkled the finest Mixology Silver Glitter over it. Since I was done using the Wonky Hearts Background as a stencil, I trimmed a piece of it for another layer. I added some sequin ribbon behind the photo and stitched light blue Puffy Alphabet Stickers by Pinkfresh Studio underneath for the title. Once again I used the Art Crayons and the kissing technique to color a piece of smooth white cardstock and then die cut a tiny Butterfly Cluster from it - I added the butterflies to the tag and bent up the wings for dimension.

Okay, I think THIS might actually be my favorite spread of the entire mini album :)

I couldn't stop making layered butterflies! They're so addicting and so pretty and so versatile! You can see the technique in my layout process video, it's essentially the same technique that I used for creating the LONDON title and other pages of this album with Art Crayons and an acrylic stamping block. (Cut file is my Butterfly Background). After mopping up the blue paint from the first tag, I used it as the background for a whole bunch of these butterflies. I love having the thread ends long for whimsy and texture. I tucked a photo into the mix and wrote a caption with a pencil next to it.

Just a few more tags! On this one I painted lots of colors with the Acrylic Paints (Set 1, Set 2, Set 3, Set 4) and then white washed it to soften it up. Then I die cut my Heart Love cut file from smooth white cardstock, pierced holes through it, and backstitched through using pink variegated thread. I added the cut file using foam squares, tucked a photo under the right side, and wrote a little journaling under the left side.

Second to last spread!

On this tag I used the largest flower from the Dies and Acrylic Stamp Set 2 and blue and yellow Art Crayons to color it, sprayed it with water, and then stamped across the background. Depending on how much water you use, you'll get a different look every time. Once dry, I applied a gold banner All the Good Things Rub-On and then piled on the flower Ephemera Die Cuts, topped with two photos.

Here I used the script stencil from the All the Good Things Stencils Set 1 and Gold Glaze to create a textured background. I placed two photos on top of messy string and then went through my scrap stash to add bits and pieces for embellishments.

And finally we come to the last spread!
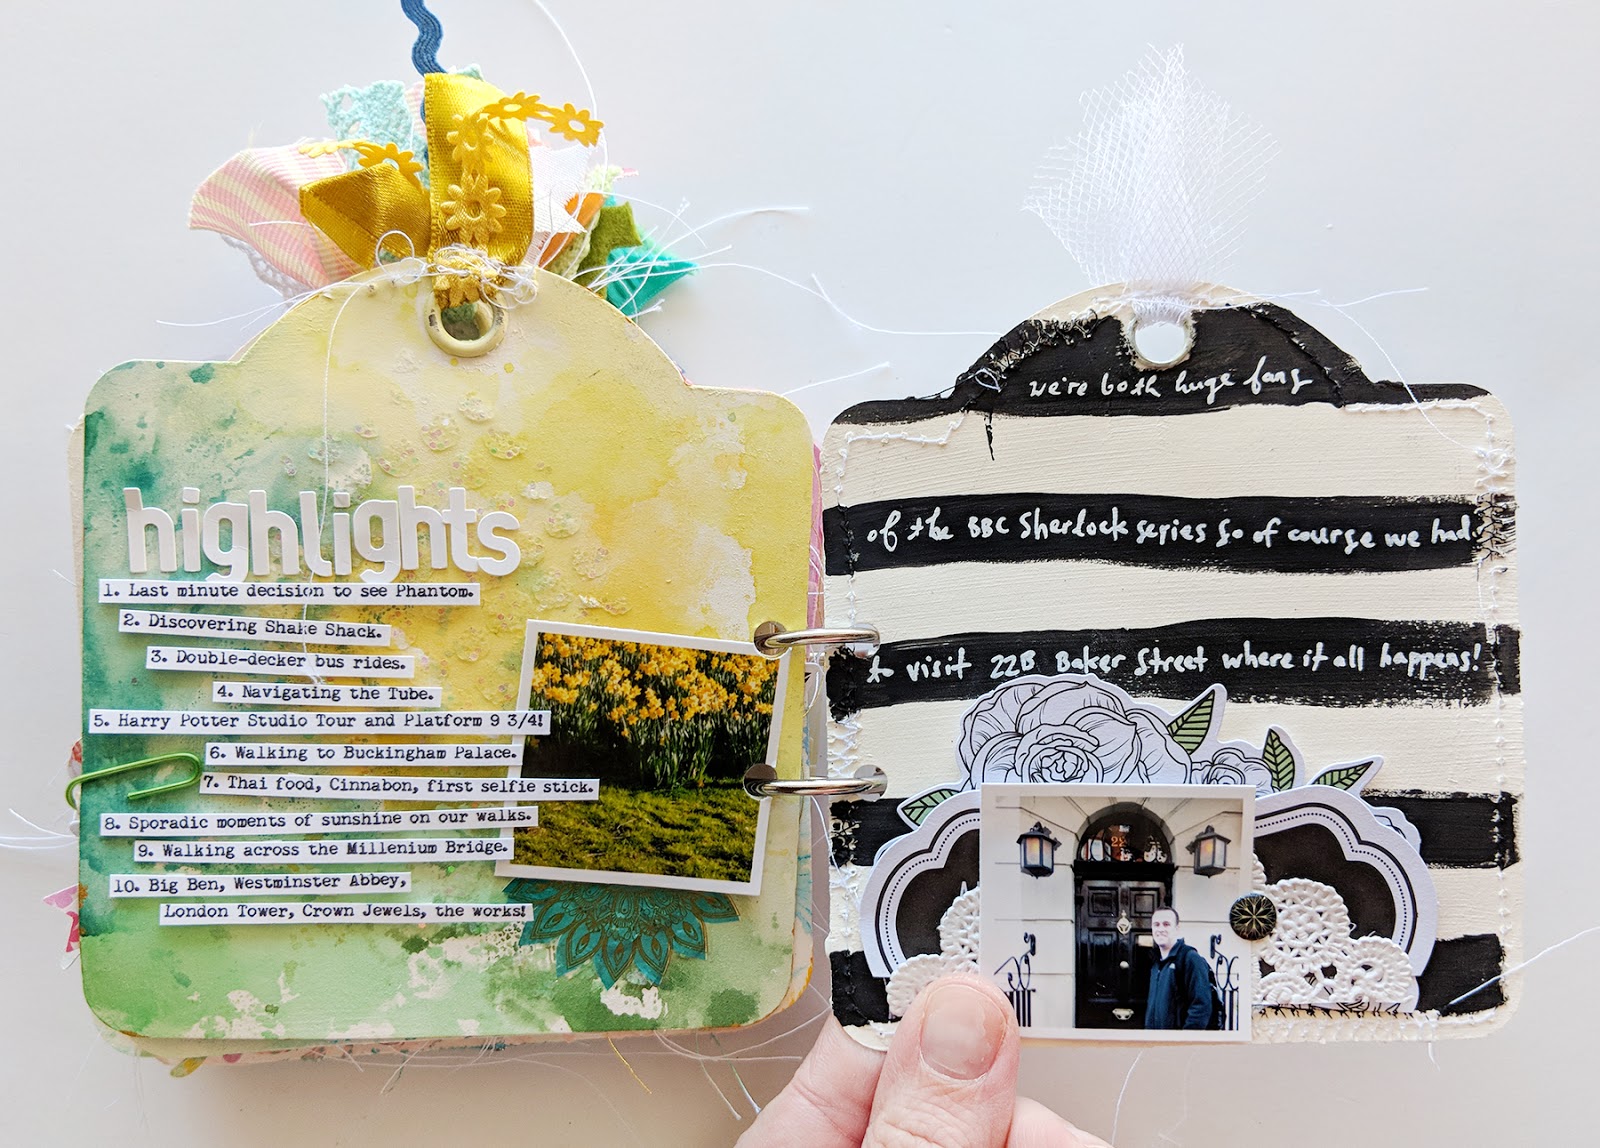
I used the packaging technique and Watercolors to create the background on this left tag and then mixed in iridescent glitter with Matte Acrylic Gel to make a paste which I applied through a circles stencil by Tim Holtz. I added a photo to the right edge, applied a doily Rub-On underneath, and then typed more journaling to document the highlights of the trip. The alphabet stickers are from Elle's Studio.

On this tag I painted black stripes and then wrote journaling with a white Sharpie paint pen on top. I created a cluster of black & white embellishments underneath the photo. This side was done after I made the other side with machine stitching.

The back cover is another favorite - it's simple yet effective. I used white modeling paste and a 6x6 Bloom Stencil by Kaisercraft to create a beautiful texture and then mixed straight and zigzag stitching with white thread around the edges for a border.

Originally I was going to use the ring that came with the album to hold the book together, but it was hard to view the album in that orientation. I asked Stefanie Ried, the mini album queen, what she would do in this situation and she said she would punch holes in the sides and tie ribbon through the tag holes. So I did :) I had fun going through my ribbon stash and picking colors to coordinate.


And that, my friends, is how I created this mini album and got over my fear of mixed media! It was funny because in the beginning I was running to the sink every two seconds to wash my hands and the glitter was getting everywhere. But soon I realized that was all part of the fun! Getting messy! I had to embrace it! And embrace it I did - I LOOOOVE working with Vicki Boutin's mixed media supplies! I hope you are inspired to try them too :)


