Happy Layout by Stefanie Ried


Friday, November 23, 2018

Hello and welcome to a new post from me, Steffi! Today I have a layout to show you which I created with the participants at Paper Fest. There were more than 100 guests at this event and we created two layouts with the beautiful Whimsical collection. The colorful colors perfectly matched the cheerful participants and the enchanting decoration of the party. We used the Rub-Ons, tFoam Mini Thickers, and the Stickers to embellish.
In the middle of the 9x12" background is a small piece of white cardstock which is decorated with a photo. The Rub-Ons have great motifs like embroidery seams so you get a great effect on the layout even without a sewing machine.

The beautiful flower Paper 03 is my favorite. I decorated the top and bottom of the cardstock edge with it.

I hope you enjoyed my project! See you next time!

Blog: steffiried.blogspot.com / Instagram: @steffiried / Pinterest: @steffiried / Facebook: stefanie.ried.96 YouTube: Steffi Ried

Science Museum Layout by Kim Jeffress


Wednesday, November 21, 2018

Hi everyone! It's Kim here, welcome back to Paige’s blog. I don't know about you but I just adore story telling. And what I love more is telling my stories through photos and words. Lots of photos are even better! Sometimes all those photos are hard to get on one page so today I want to share a double page layout. The star of the show is of course the Nucleus cut file which I cut full size with some white cardstock using my Silhouette Cameo.
The left hand side sets the scene with a single photo, the Nucleus cut file, title, and journaling, while the right hand side tells the details with lots of supporting photos that are displayed in a grid style design.

I began with a piece of white cardstock and then trimmed that stunning striped Paper 16 from the Whimsical collection as my base. I then added vellum behind the Nucleus, popped it up with pop dots, and adhered it to my page. I added my photo, an Ephemera Die Cut, the title using the Foam Mini Thickers, and Stickers and Enamel Shapes in and around my photo. I also added a hand stitched arrow at the top of my layout to lead the viewer's eye to the right hand side.

I printed off my photos at 3" square and added them into a grid design on another piece of white cardstock. I then trimmed papers from the 6x6 Paper Pad into 3" squares and added them into my design. I added Chipboard StickersStickers, and even one of the cute Butterfly Charms to embellish each square of patterned paper. I used my corner rounder on one of the papers from the 2x2 Paper Pads and attached it to one of the squares.

I cant wait to use the amazing Whimsical collection again for my next layout, it is just too much fun!

Blog: Glass Half Full / Instagram: @kimjeffress / Pinterest: @kimjeffress / Facebook: Kim Jeffress Designs / YouTube: Kim Jeffress

Envelope Cards by Zsoka Marko


Tuesday, November 20, 2018

Hello crafty friends, Zsoka back today with some new projects I've created for the Paige Evans Design Team! When I saw this adorable new Envelope cut file I knew I had to use it right away.
I resized the envelopes so that the square is slightly bigger than 4.25" and cut them from Paper 03 and Paper 10 from the Whimsical collection. I used my Crop-A-Dile to add eyelets so I can close the envelopes properly with the help of some twine. I also added a Tassel Paper Clip and Heart Charm to both cards so they don't look so empty. I then created two 4.25" square note cards. Originally I wanted to glue these down but then I realized it would be better to leave some space for a message on the back of each card.

This first one has a pink patterned paper base to which I added a wide strip of white cardstock. I chose some Rub-Ons for my sentiment. I added a few hexagon paper pieces that I had left from a previous project. Last but not least, I placed a Floral Die Cut and another sentiment on the card.

I chose a vibrant yellow-white stripe paper (Paper 09) for background on my second card. I layered Floral Die Cuts in opposite corners. I cut the Thankful cut file from a purple scrap paper, and glued it on my card. To finish it all off I added one of the sentiments from Paper 08.

I hope you like my easy card/envelope idea and want to give it a try! Who are you thankful for this Thanksgiving? Thank you so much for stopping by today!

SUPPLIES: WHIMSICALPaper 03Paper 05Paper 08Paper 09Rub-OnsFloral Die CutsTassel Paper ClipsOH MY HEARTHeart Charms; Eyelet setter: Crop-A-Dile; Die cut machine: Silhouette Cameo; Cut file: Envelope by Paige Evans
Blog: apocketfullofscrap.blogspot.com / Instagram: @zsokamarko / Facebook: Zsoka Marko / YouTube: Zsoka Marko

DreamBox by The Original ScrapBox


Monday, November 19, 2018

The Original ScrapBox was kind enough to send me their brand new DreamBox to test out! Three words to sum it up: SO.MUCH.STORAGE! I wasn't even able to fill the entire thing up which means I have room to grow which is more than awesome! Use coupon code PAIGE when checking out for $100 off your DreamBox, WorkBox 3.0 and Ultimate SewingBox!
Here is me opening up the DreamBox:
What is the difference between the WorkBox 3.0 and the DreamBox you may ask? Here is a blog post with everything you need to know for comparison: https://www.theoriginalscrapbox.com/blogs/news/dreambox-vs-workbox-3-0
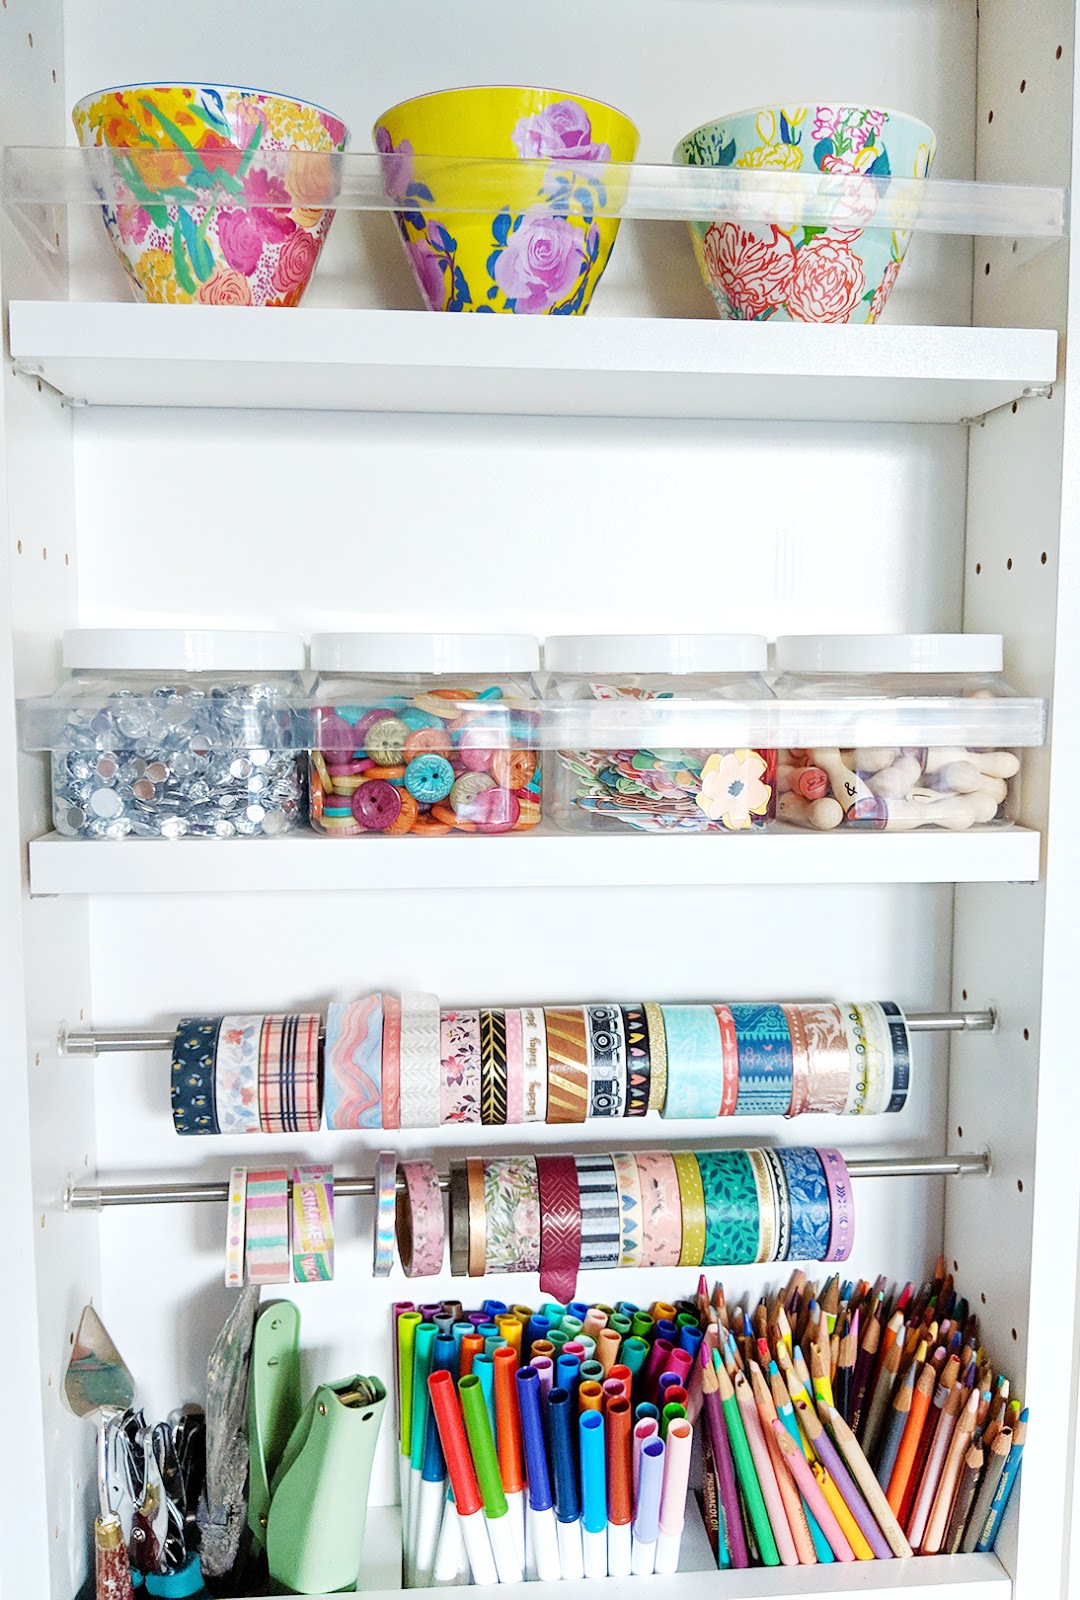
You know I love things in rainbow order! I finally got my ribbons out of ziplock bags and into these cute jars that come with the DreamBox. The metal poles are PERFECT for storing washi tape.
Paints, sprays, and baker's twines adorn the right cabinet shelves so now I can see them at all times which means I will use them more.
I mainly scrapbook by collection and have used ziplock bags since the beginning. These plastic bins are so much nicer and easier to see and access and tote from the shelf to the desk. Win win all around!
I love how everything is see through so I don't need to open up the drawers to see what's inside and I don't even really need to label anything because there it is!
I filled the buckets with lots and lots and lots of things! Like these large stencil brushes.
In the center I had so much storage I didn't even know what to do with so I filled in some of the shelves with colorful words. When I do get more stuff (and that's definitely "when", not "if" lol) I can replace the words with more plastic bins.
The left cabinet mirrors the right cabinet and I've got lots of little bits and embellishments stored here.
Yarn. Threads. Beads. Oh my!
A whole drawer full of punches.
Roller stamps. Embroidery threads. Mixed media crayons.
Ribbon spools, sticker books, a vase for a pop of color.
Glitter glue. Glitter. Silhouette Sketch Pens.
There is a small round hole in the center for cords to reach through so I'm all hooked up with the Silhouette Cameo and sewing machine!
A bin for scraps because I can't seem to throw even the tiniest bits away!
There is a light that comes in the crown piece so I can scrapbook during these darker winter days. I've also got my typewriter, die cut machine, and another basket of embellishments underneath. The table can be set to sitting or standing so you can scrap whichever way you prefer!
They really thought of everything! It's a scrapbooker's Dream(Box!) come true!
Let me know if you have any questions! Thanks for stopping by! And remember, use coupon code PAIGE when checking out for $100 off your DreamBox, WorkBox 3.0 and Ultimate SewingBox!

My Passion Layout by Lucile Peignon


Hello everyone, it's Lucile! Today I present to you my first layout with the new Whimsical collection! I was so excited to use this collection, it is so beautiful! I love flowers so I decided to make my layout around a floral arrangement. I used the Branch Leaf and Branch Leaves cut files.
For starters I cut the B-side of Paper 21 slightly smaller for my background and framed it with Paper 16. This is the first time I have made a frame for my layout and I think it really adds something nice. Then I cut out several flowers from Paper 03. I started to glue the flowers with 3D foam squares to form a diagonal.

Then I cut with my Silhouette Cameo different foliage and branches to put around my flowers. I use three different cut files and I cut them in several sizes and from two different green papers, Paper 13 and Paper 20. I tucked the leaves under my flowers and I also added dies cuts of leaves from the Floral Die Cuts pack.

Finally, I stuck my picture in the center of my diagonal and matted it with Paper 04. Then I added some Ephemera Die Cuts and Chipboard Stickers with a scrapbooking theme. I add "my passion" using the Foam Mini Thickers.

I hope that this layout inspires you, I had so much fun making it!


Instagram: @dejolieschoses18 / YouTube: Lucile Peignon / Facebook: dejolieschoses18 / Pinterest: dejolieschoses18

Spellbinders Holiday Wishes Card


Sunday, November 18, 2018

To begin I die cut two or three of each snowflake from smooth white cardstock then I painted over them with my new favorite Pastel Dreams watercolors by Prima. Once the snowflakes finished drying I adhered them with a glue dot to a smooth white cardstock card base, placing adhesive on only the middle or an edge so the snowflakes lift and bend off the card base, creating lots of dimension and shadows.
For more texture and to help the little pieces of snowflakes around the edges stay in place, I machine stitched with white thread around the border then I trimmed off the excess snowflakes.
To finish I added a Crate Paper fabric button to the center snowflake, cut a "holiday wishes" sentiment sticker in two, and tucked the halves under the button. I hope you like this non-traditional colored holiday card and are inspired to check out the Shapeabilities Yuletide Snowflakes in the Charming Christmas Collection by Becca Feeken / Spellbinders!

SUPPLIES: Snowflake metal dies: Spellbinders; Manual die cut machine: Platinum by Spellbinders; Watercolors: Pastel Dreams by Prima; Button, sentiment sticker: Merry Days collection by Crate Paper

Whimsical Cards by Missy Whidden


Friday, November 16, 2018

Hey, friends, Missy Whidden here with a couple cards featuring the new Whimsical collection. I used two of Paige’s cut files on these cards along with a little mixed media.
For the first card, I cut Paige’s Branch cut file on papers from the 6x6 Paper Pad. I really love the deep pink, orange, and golden yellow color mix. I used a white cardstock base for the card so the colors would pop. I jazzed up the background with Heidi Swapp Gold Color Shine and a few coordinating colors of Shimmerz sprays. I fussy cut flower clusters from Paper 03 and layered them in between the branches. I went simple with the sentiment and used a Sticker. I added foam adhesive under it to add dimension and tucked in metallic gold thread before gluing everything down.

For the second card, I cut Paige’s Beautiful cut file on white cardstock. I backed all the letters with papers from the 6x6 Paper Pad and one of the 2x2 Paper Pads. I used more 6x6 papers to create a few layers behind the cut file. I smudged white gesso on the background papers before painting on blue, purple, and yellow watercolors. I wanted flowers behind the cut file, so I fussy cut some from Paper 14 and layered them around the edges of the card. To add more detail and shine, I machine stitched around the edge of the paper layers and tucked in metallic gold thread under the cut file.

How often do you make cards? The Whimsical collection is perfect for cards and it’s fun to mix in Paige’s cut files, too! I hope this gives you some fun ideas to try. Thanks so much for stopping by!
SUPPLIES: WHIMSICALPaper 03Paper 146x6 Paper Pad2x2 Paper PadsStickers; Cut files: Branch and Beautiful by Paige Evans; Die cut machine: Silhouette Cameowhite cardstock
Blog: littlenuggetcreations.blogspot.com  Instagram: @missywhidden  Pinterest: @missywhidden
Facebook: missy.whidden  YouTube: Missy Whidden

Good Day Layout for Silhouette Blog


Thursday, November 15, 2018

Hey there! I have a new layout up on the Silhouette Blog sharing how to easily back cut files using a Cameo instead of cutting each and every piece by hand!
I made a process video so you can see how this is done:
First, I cut my Floral Butterfly Outline cut file from smooth white cardstock using a Silhouette Cameo 3. Then I ungrouped the shape, deleted all of the not needed inner pieces, put the similar shapes into groups, offset them to .065, and then deleted the inner images (it's all in the video above so it makes more sense ;). I put all of the grouped shapes into 2", 3", or 4" squares and then trimmed patterned papers to 2", 3" or 4" squares to mirror what was shown on Silhouette Studio with the 1" grid lines on the cutting mat.
It took the Cameo about a minute to cut all of the backing shapes whereas cutting them hand would have taken hours! Literally such a time saving machine! I adhered the shapes to the back of the cut file group by group using liquid adhesive. Flipping the finished backed cut file is always a TA DA moment! I love backing cut files :) I carefully machine stitched around the left edge of the butterfly.
I backed the left half of the butterfly with the blue floral Paper 14 then adhered the backed butterfly onto the rainbow ombre hearts B-side of Paper 16. I tucked a photo of Jane into the left half and trimmed the excess corner. Next I fussy cut a whole bunch of butterflies from Paper 21 and adhered them at the top, bending up the wings for dimension. I also added five Butterfly Charms into the mix then I machine stitched through each butterfly (just the paper ones, not the metal charms ;) and trimmed the thread ends.
For the title I applied a sentiment Rub-On to scratch white cardstock, fussy cut it out, and then added it to the bottom of the photo. I slid on two Tassel Paper Clips and placed a gold foil scalloped border Sticker underneath the picture. Two Ephemera Die Cut butterflies were added above the photo and I placed a couple more butterfly Puffy Stickers. To finish I wrote journaling with a blue pen all around the left half of the butterfly.
I hope this new technique for backing cut files with the Cameo inspires you to back even more cut files quickly and easily!
Paige Taylor Evans © // Quinn Creatives DESIGN