Go the Scenic Route Coptic Book


Saturday, August 22, 2020

With every collection I love to create a coptic book and here is the Go the Scenic Route edition!
I love making these handmade coptic books and giving them away as gifts. You can use them as diaries, "smash books" or art journals, daily gratitude journals, wedding sign-in books, mother-to-be baby shower books, as a scrapbook, making lists, for instax photos, book reviews, and so much more! I even made my December Daily 2017 in one and I think it's my most favorite December Daily to date :)
 My absolute favorite part is the exposed binding and tying charms, enamel dots, stickers, pearls, beads, buttons, sequins, & more into the binding as I'm sewing. The book lays flat when opened which makes it easy to write & "art" in.
 This book is 4x6" which is perfect for full-sized photos and smaller memorabilia.
 The covers are made from painted wood that my dad and I cut and sanded together - sandpaper is included in the kit so you can sand it to your liking.
 I decorated the cover with paint to match one of the patterned papers in Go the Scenic Route and then added a smattering of Floral Die Cuts and Enamel Dots - both of which are included in the kit.
Check out all the previous coptic books made with my collections:
Bloom Street coptic book
Truly Grateful coptic book
There's nothing quite like the feeling of making a cute book completely from scratch!!

Favorite Layout by Anita Bownds


Hi crafty friends, Anita Bownds back with you today sharing another beautiful Bloom Street layout. My page today features a photo of a beautiful rose that I absolutely adore and smells amazing that I snapped on one of our little adventures around the garden. If you’re wondering, my kitty and I love to walk around the garden together, she absolutely loves it!
I started by cutting out Paige's Flower cut fileHoliday Bow cut file, and the Heart Confetti Background cut file on white cardstock. I layered the Heart Confetti Background cut file over Paper 15 and backed the Flower cut file with Paper 18. I backed the Holiday Bow cut file with paper from the 12x12 Paper Pad and layered it on top of one of the flowers using double sided foam tape.
Next I matted my photo using papers from the 6x8 Paper Pad and then adhered it down on the center leaving enough space to tuck tags made from the 2x2 Paper Pads and a Flower behind one corner of the photo. I added my title using the Puffy Vinyl Stickers.
I pulled out paper Paper 12 and started fussy cutting a heap of flowers. Then using the Flower cut file I cut one in half and add it to the top and bottom of my layout and the other on the opposite corner to the one I tucked underneath my photo. Then using the fussy cut flowers and leaves I started tucking them underneath the flowers. I added a few of the Layered Butterfly Stickers and some enamel dots to finish it off.
I hope you have enjoyed my pretty floral inspiration today, happy crafting!

SUPPLIES: Patterned papers, die cuts, stickers, embellishments: BLOOM STREET; Cut files: FlowerHoliday Bow, and Heart Confetti Background by Paige Evans; white cardstock
Location: Australia / Blog: Neat-N-Crafty / Instagram: @anitabownds / Facebook: Anita Bownds
YouTube: Anita B / Pinterest: Anita Bownds

Grateful Layout by Missy Whidden


Friday, August 21, 2020

Hey friends! Missy Whidden here with a new layout using Paige’s Bloom Street and Truly Grateful collections. I love mixing & matching different products and I combined papers and embellishments from both lines to create a bright summer layout. I wanted to focus on a paper I haven’t used yet, so I started with the scallops from Bloom Street Paper 01. I designed my layout around those. I also used Paige’s Wonky Hearts Stencil to create some background texture with modeling paste. I used a mix of Distress Oxides and Shimmerz to create a fun watercolor effect over the paste.
I love the fun texture this Wonky Hearts Stencil creates! I decided to go with orange tones first to accent the pink scallops. I also wanted to use the Grateful piece as my title from the Truly Grateful Epoxy Stickers as my title. I wanted more of that color. Later, I decided to add in blue to mimic the water in the photo. I machine stitched through the scallops with blue thread and then popped them up with adhesive foam. I created a cascade of words and phrases here with the title, a Truly Grateful Journaling Spot piece, and a few Bloom Street Cardstock Stickers. To make the “grateful” title stand out a bit more, I layered white cardstock behind it and then fussy cut around it. I also tucked in some blue thread for an extra pop of color and texture.

I fussy cut a few pink flowers from Bloom Street Paper 12 to tuck in around the photo. These cute butterflies matched my color scheme perfectly, so I popped the wings up to give them dimension. They are both from the Bloom Street Cardstock Stickers. I decided to add gold splatters along the way as well.

I layered a few pieces of patterned paper behind the photos as well as white tissue paper. I wanted a sun above the photo so I used another Bloom Street Cardstock Sticker. I also used a sun stamp from the Bloom Street Acrylic Stamps to create a bit more background interest behind the sun. I used Distress Oxides and then used a water brush to help blend the color a bit. I also trimmed the outer edge of a gold Bloom Street sticker to layer around the edges of the photo.

I love how this page turned out! I hope it gives you a few ideas to try on your next layout. How often do you mix & match collections like this? It’s fun to see what you can come with. Thanks so much for stopping by!

Laugh Everyday Layout by Migbell Guzman


Thursday, August 20, 2020

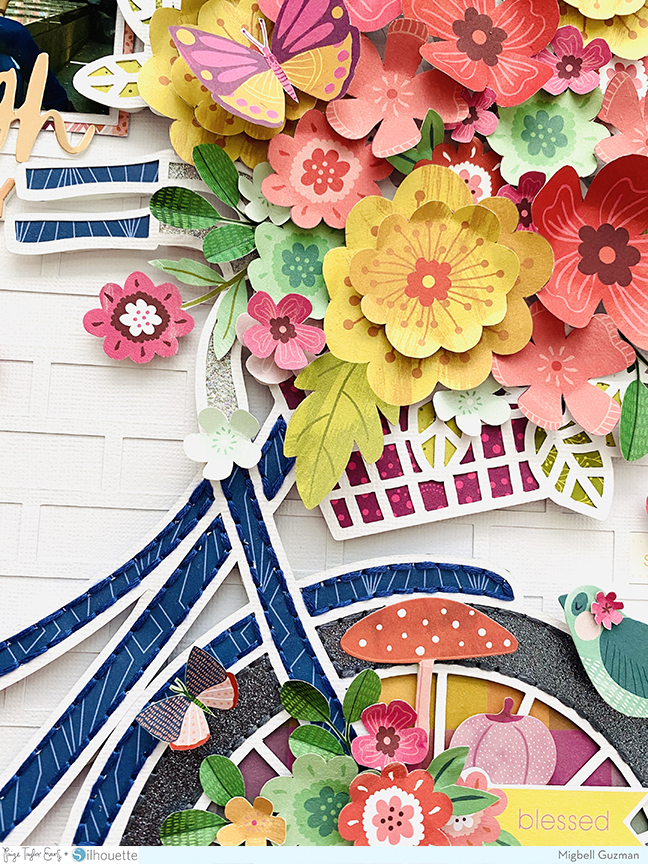
Hi all! I'm Migbell Guzman and I am excited to share with you my first layout as a member of Paige's cut file design team! I want to show you what we can achieve with Paige's cut files, so give your creativity free reign.
For this page I selected the Bicycle with Flowers cut file and the beautiful Truly Grateful collection. After cutting the file on my Silhouette Cameo from white cardstock, I started decorating and embroidering.
I cut flowers and foliage and put them on different layers to create the 3D effect in the bike basket. I added details with epoxy stickers in letters and motifs to finish decorating my layout.
I hope I have inspired you to create a beautiful memory! Blessings!

SUPPLIES: Patterned papers, die cuts, stickers: TRULY GRATEFUL; Die cut machine: Silhouette Cameo 3; Cut file: Bicycle with Flowers by Paige Evans
Location: Puerto Rico / Instagram: @migbellguzman / Facebook: Migbell Guzman

Planner Dashboard by Mik Godinho


Wednesday, August 19, 2020

Hi friends! It’s Mik from Papermiks! Who loves snail mail? I do, and today I’ll show you how I used Paige’s Accordion Mini Album cut file to make a penpal dashboard.
When opening the file, you’ll find all the pieces joined together. To make the accordion dashboard you must separate the pockets, just as you do to separate each item to cut them. Here we’ll use only the inner part of the file - we won’t use the items from the cover.

I started separating the heart from the first page to create the dashboard. I ungrouped the heart, removed it and left the insert on 6x8” size for the dashboard. So, I returned the heart to the center of the 6x8” page, removed the dotted line, and transformed the opening of the mini album into my dashboard. In the place of the heart, I created a shaker. I think it gives a fun touch to the page!

Then I put the accordion pockets at the back of the dashboard. This gives my dashboard an interactive touch and I love it! Now it's time to decorate! You can use this idea to keep the memories of your penpals or you can adapt it to any other type of planner.

I hope you’ve got some inspiration from this idea and enjoyed it! If you have any question or want to talk more about planners, leave a comment below the post or check out my IG account. Thanks for stopping by and have a creative day!

SUPPLIES: Patterned papers, stickers, embellishments: HORIZON; Die cut machine: Silhouette Cameo; Cut file: Accordion Mini Album by Paige Evans
Location: Bolivia / Instagram: @papermiks / Facebook: mik.godinho.papermiks 

Foil Quill Layout by Paige Evans


Tuesday, August 18, 2020

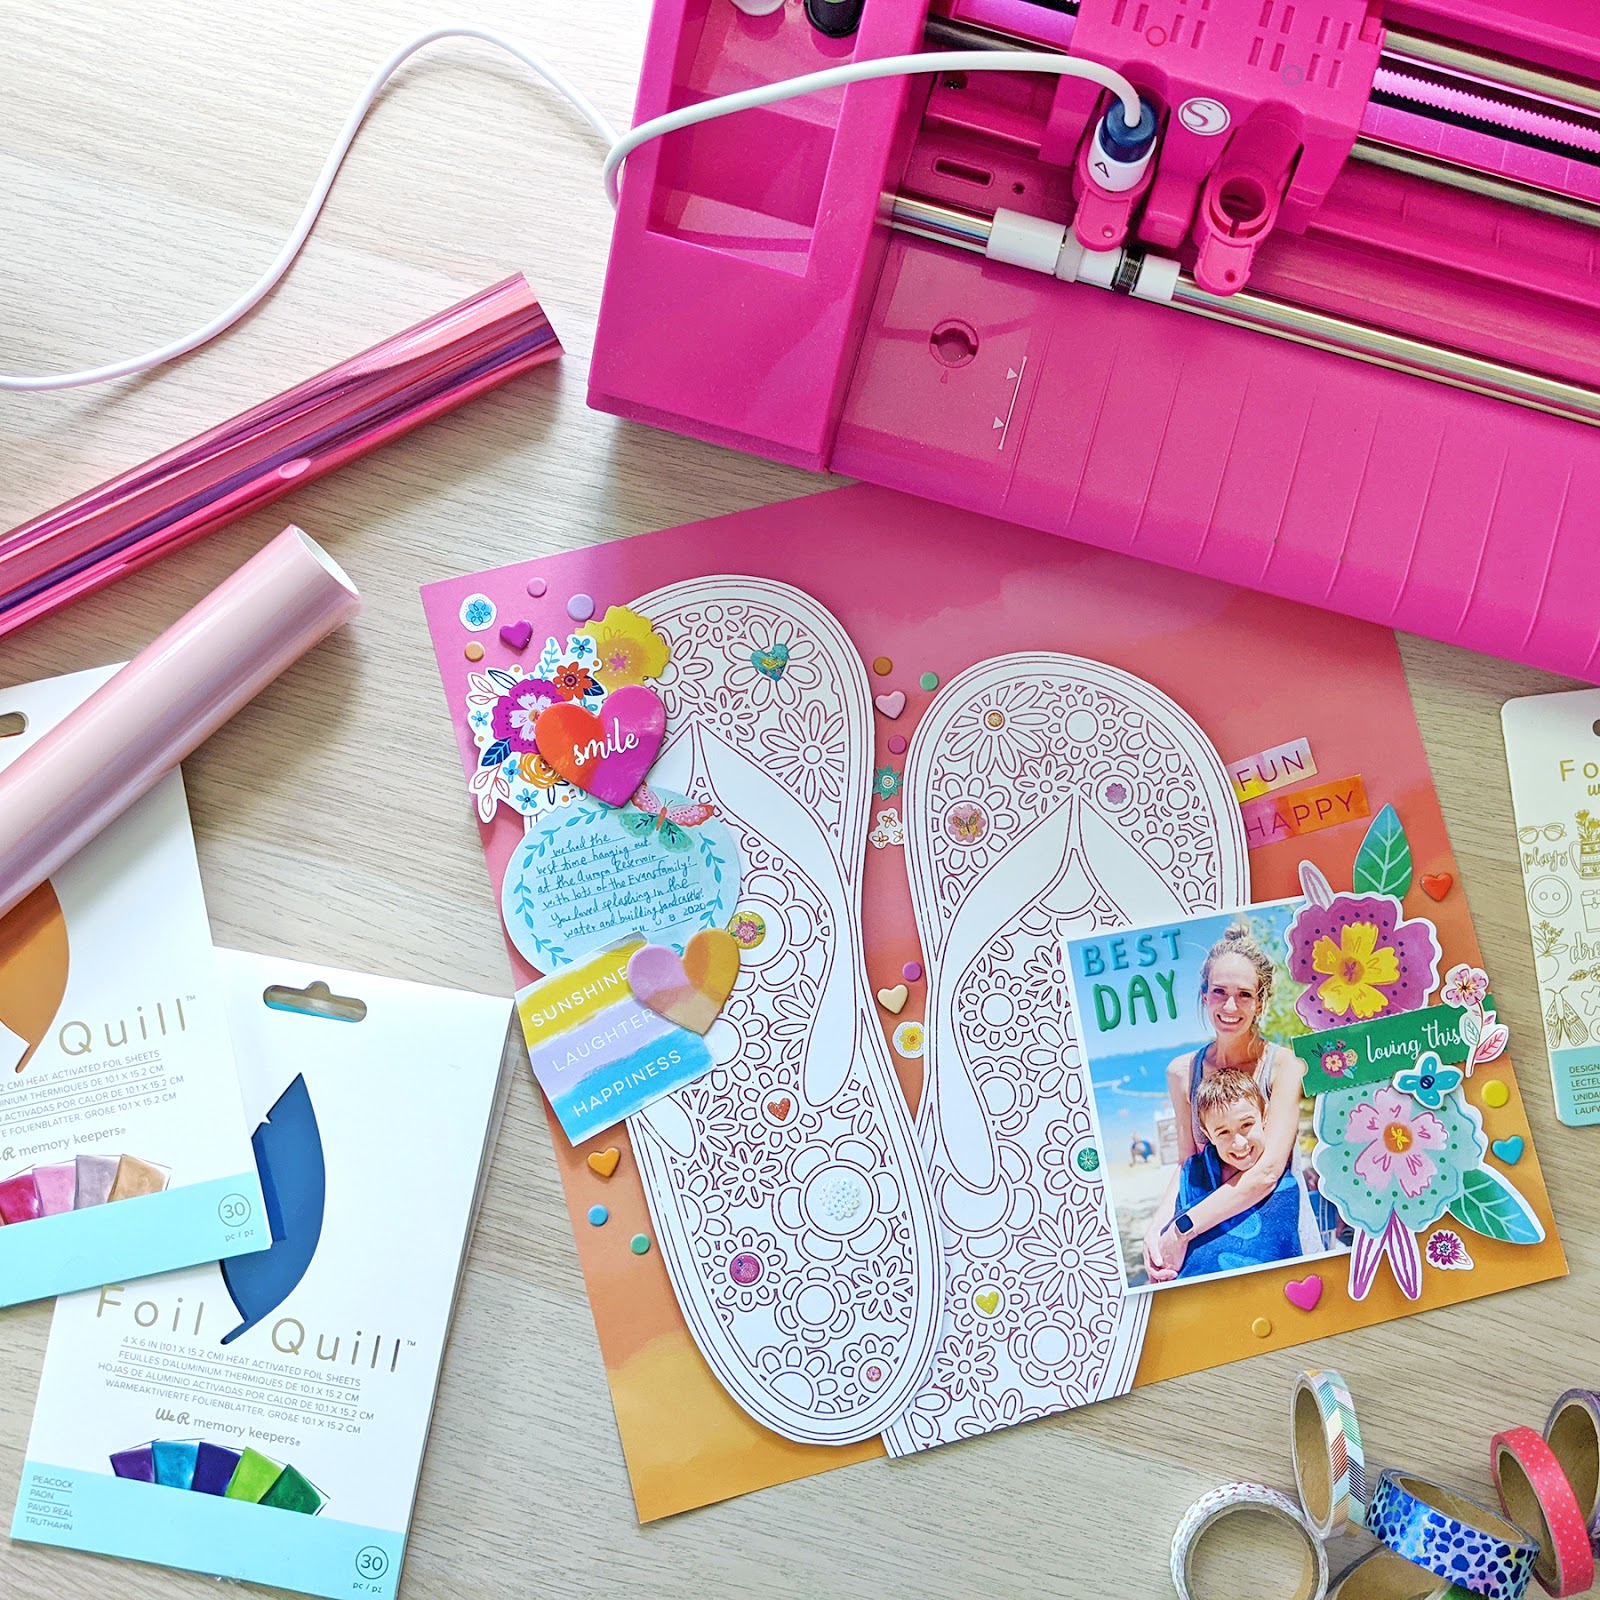
Hey there! I have a new layout to share today using the Foil Quill by WeR Memory Keepers and my new Go the Scenic Route collection!
Check out the process video to see how this layout came together from start-to-finish:

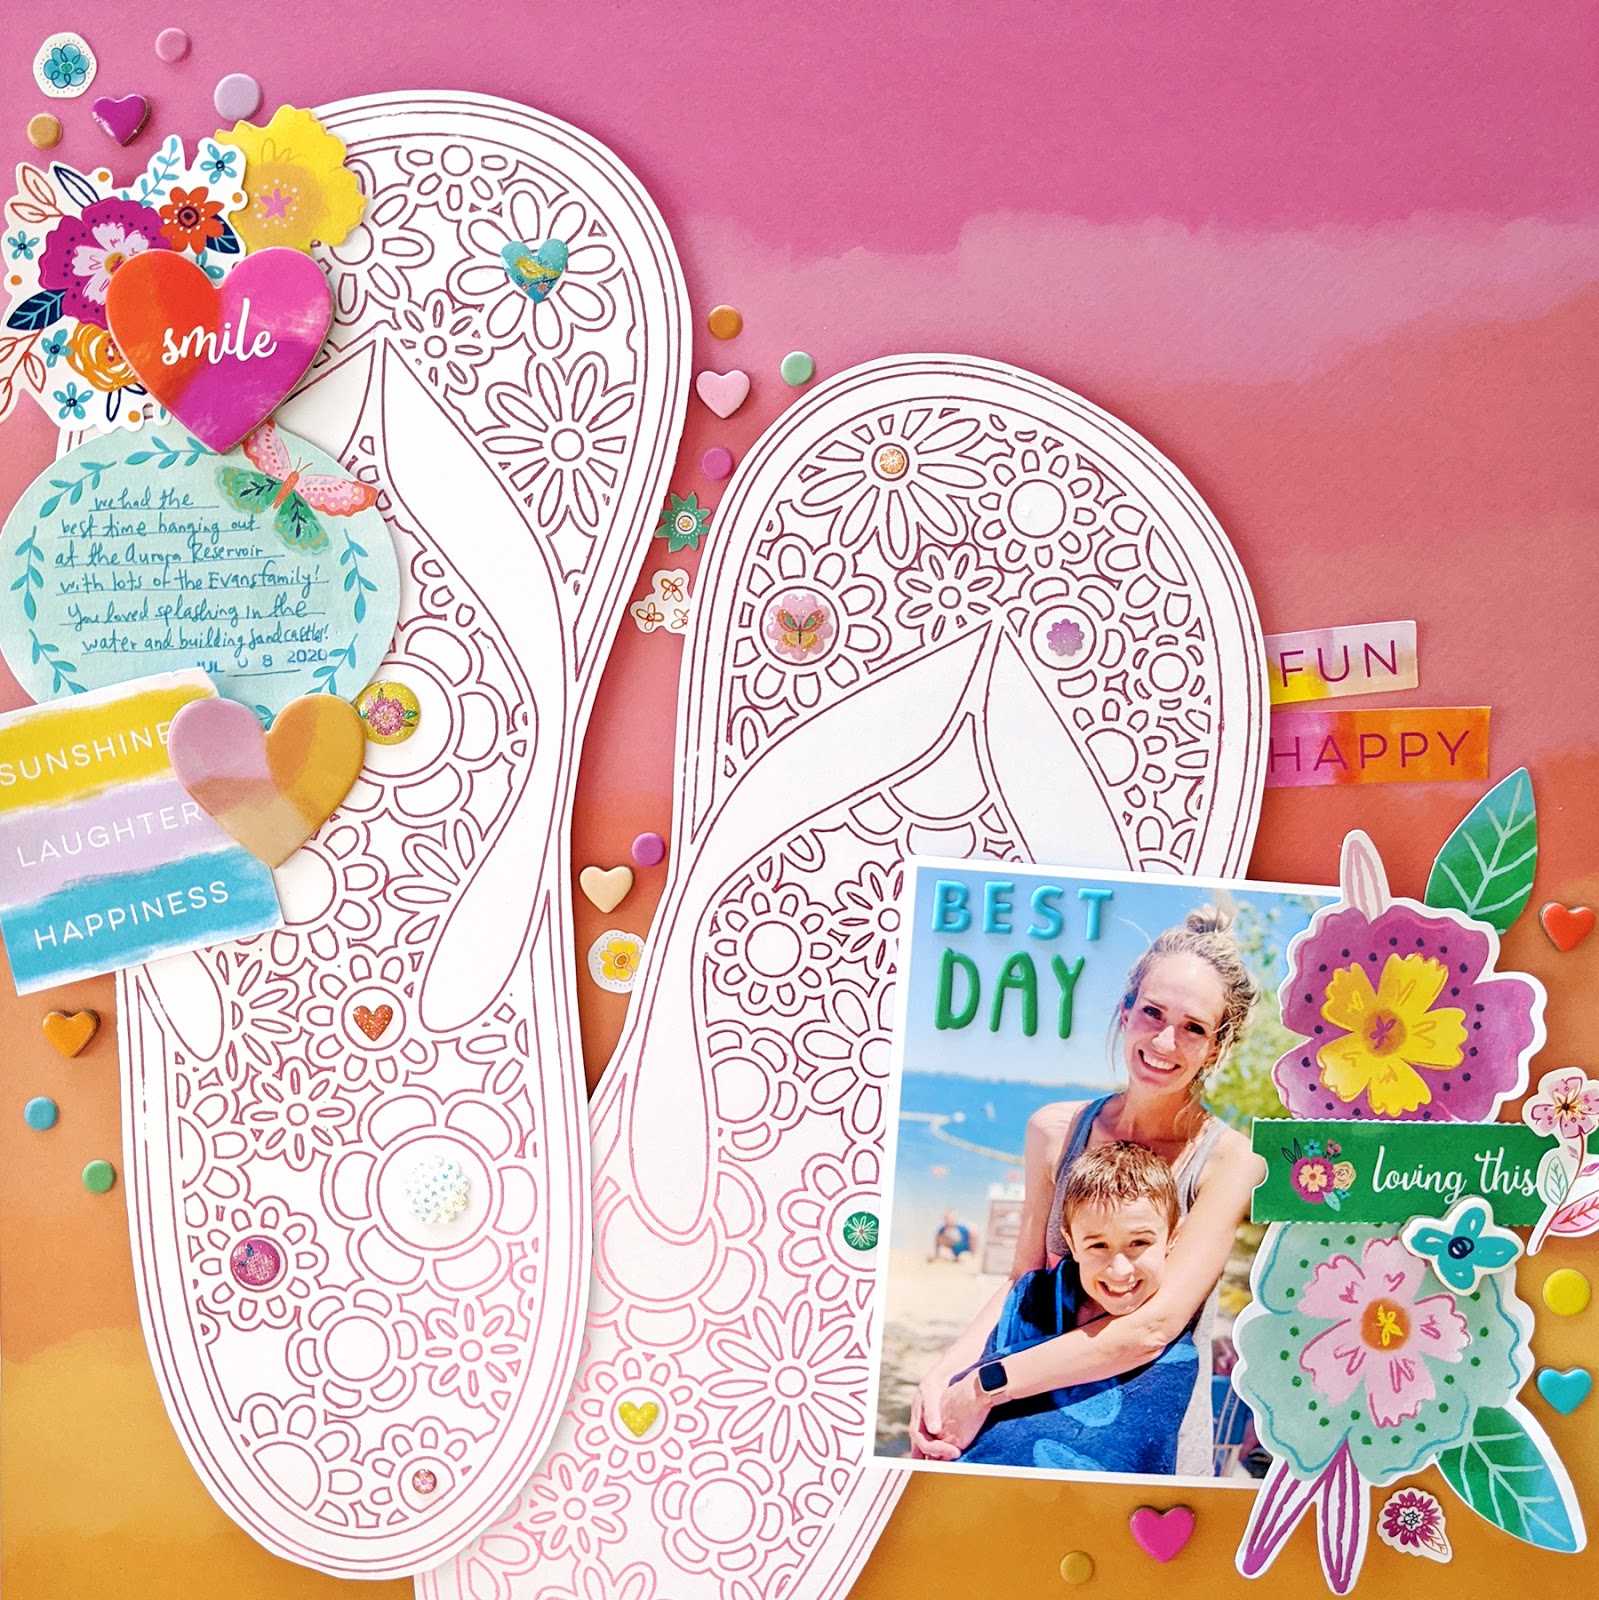
To begin, I used the Floral Flip Flops from my 20 Days of Summer Cut Files as the basis for my design. You can use any image from your library and have the Foil Quill draw it! There are also USBs filled with designs that you can choose from. SO MANY FUN OPTIONS!

I cut a piece of Rose Foil to almost completely cover a piece of smooth white cardstock, stuck it in place with washi tape, and plugged in the Bold Tip Pen to begin heating it up. Let the pen heat up for about 5 minutes. Then I loaded the mat into my Silhouette Cameo 3 and the machine drew the Floral Flip Flops design. After unloading, lift up to remove the foil, and “Oooh!” & “Ahhhh!” So pretty!

For the background of my layout I chose the ombre B-side of Paper 24 which reminds me of a sunset, which I thought was appropriate for a beachy page. I wanted to use the Floral Flip Flops more as die-cuts, so I fussy cut them out and layered them on the background using foam squares for dimension.

I printed a photo of me and Fox and added it to the bottom right side. At this point I started embellishing with stickers and die cuts from Go the Scenic Route, keeping things in clusters and layers from the top left to bottom right side to draw the eye all around the page and create momentum. I used Puffy Phrase ThickersPuffy Word StickersCardstock StickersChipboard StickersEnamel DotsFloral Die CutsEphemera Die Cuts, and a phrase from the 2x2 Paper Pads. I kept the top right side of the layout empty to balance everything else going on.

To finish I wrote journaling on an oval Ephemera Die Cut and stamped the date below. I LOVE the sparkle & shine the Foil Quill adds to my layouts! And the possibilities for different shapes and designs is truly endless! I hope you are inspired to pick up the Foil Quill and my Go the Scenic Route collection!

Here is another look at the finished page:

Let me know if you have any questions about the Foil Quill, I'm happy to help!

SUPPLIES: Foil Quill; Patterned paper, stickers: GO THE SCENIC ROUTE; Cut file: Floral Flip Flops by Paige Evans

Card Mini Album by Maija Männistö


Monday, August 17, 2020

Hi, Maija Männistö here to share a mini album made with Bloom Street! This summer all the traveling will be within our own country but that doesn’t mean we can’t see amazing places and record memories! I used the Mini Album Card With Pocket Envelope and Tags cut file for this one. For the cover I used Paper 20 and I hand stitched around the edges of both covers, piercing the holes first and then stitching with thin crochet yarn.

For the title of the mini I cut a banner from a paper from the 6x8 Paper Pad. I used several flowers from the Floral Die Cuts on the back of the banner. The title “Saimaa”, a huge lake and district in the Eastern Finland, I made with letters from the Puffy Word Stickers. I love the possibility to create my own mixtures for different words with these! To keep the mini album closed I took three yarns and braided them to make a long piece to tie the mini closed.

The inside piece of the mini I cut from Paper 17. It is a perfect backdrop for all the other patterned papers I added as it is not too busy.

I hand stitched around the shaped cut outs, bringing some texture and color to the background. For the circle I even added stitches across the circle to create a fun way to add embellishments.

For the patterned paper squares I used various papers from the 6x8 Paper Pad, also backing the cut outs. For embellishments I used the Floral Die Cuts and the Ephemera Die Cuts. I also added some stickers from the 4-Page Sticker Book. To add as many photos as possible into the mini I layered photos by stapling them together. I always have such a hard time narrowing down the amount of photos so this is perfect for me! I also created a pocket into one of the squares by cutting a slit in the middle of it. I adhered it onto the mini with some foam tape so there is enough room for the photos.


Thank you so much for stopping by today, have a lovely and crafty day!

SUPPLIES: Patterned papers, stickers, die cuts: BLOOM STREETwhite cardstock; Die cut machine: Silhouette Cameo; Cut file: Mini Album Card With Pocket Envelope and Tags by Paige Evans
Location: Finland / Blog: Mai Makings / Instagram: @maimakings / YouTube: Mai Makings / Pinterest: Mai Loves

Back to School Layout by Paige Evans


Sunday, August 16, 2020

Tomorrow Fox & Jane go back to school for an orientation day in this most unpredictable and interesting school year! They'll be in 4th & 3rd grade. They grow up so flippin' fast! I thought it would be fun to use my most recent free cut file from my Happy Scrappy Place Facebook Group to create a layout about a past back to school day using my new Go the Scenic Route collection.
 I started by die cutting my Back to School with Backing Pieces cut file from smooth white cardstock and the inner pieces from scraps of Go the Scenic Route papers. I backed the cut file with all the coordinating backing pieces and then machine stitched around the apple, stem, and leaf using a Brother sewing machine and white thread by Coats & Clark.
 Next, I chose a background paper, and thought this ledger B-side of Paper 12 was PERFECT! Totally goes with my back to school theme. Meant to be. Then I printed my two 3x4" photos at home and trimmed them leaving a white border for contrast. I tucked the photos under the right side of the apple.
 While I do enjoy fussy cutting, I needed to finish this layout quickly, so I utilized the PixScan feature of the Silhouette Cameo and had it cut out all the images from Paper 6. I have a tutorial showing how to use the PixScan here. Fussy-cutting is usually more precise than the PixScan, but these ones turned out okay! I layered some backpacks along the right edge and tucked in all kinds of school-themed supplies into the title tone-on-tone. The "adventure awaits" globe is from Paper 1 (which I did fussy cut, lol).
 For additional interest I added a few Puffy Word Stickers and Puffy Phrase Thickers on the photos and tucked in a book Chipboard Sticker. To finish I wrote journaling on the lines printed on the background paper (how convenient!) at the bottom left corner.
 I hope you are inspired in some way by this page using my Back to School with Backing Pieces cut file and Go the Scenic Route collection! See you again soon!
SUPPLIES: Patterned papers, stickers, die cuts, embellishments: GO THE SCENIC ROUTE; Cut file: Back to School with Backing Pieces by Paige Evans; Sewing machine: Brother; Thread: Coats & ClarkSilhouette CameoPrinter: Canon Pro-100Canon photo paper

Embroidery Hoop by Paula Fiihr


Saturday, August 15, 2020

Good morning! Paula Fiihr here and today I am sharing a fun project using Bloom Street and an embroidery hoop! It’s a fun way to combine a mini bulletin board and a layout that allows you to switch out pictures or sentiments.
I wanted to make one for my hubby, so I used the Flower Heart cut file and cut it from white cardstock. I filled in a few of the flowers and leaves using embroidery floss. The other flowers were fussy cut from the blue flower sheet in the 12x12 Paper Pad. I found this pink fabric at Hobby Lobby that is almost a direct match to the pink polka dots from this line! Score! To assemble the hoop, first I cut one piece of cork and one piece of foam board that fit into the inside of the hoop. I hot glued them together and hot glued them into the inside hoop. Next, I laid the fabric over this and put the top hoop on. Some pom pom trim completed the hoop. Then the Flower Heart was attached with fabric glue. I stitched around the ‘you make me happy’ piece which is from Paper 17.

I added a couple hearts I punched from scraps and a few more flower pieces before glueing it all down. On a bulb pin, I made a fun charm with a Flower Charm and a few things from my stash that fit my hubby. Finally I put a few dots with Nuvo Drops to add a little pop in the flowers. And it is done! I love how versatile embroidery hoops are. Use them for gifts, decor, memory keeping, or happy mail. Can’t wait to see how you use yours! If you have any questions please let me know. Have a lovely day 

SUPPLIES: Patterned papers, stickers, die cuts, enamel dots, flower charm: BLOOM STREET; Die cut machine: Cricut; Cut file: Flower Heart by Paige Evans
Location: Texas, USA / Instagram: @psplannergirl / Pinterest: pfiihr / Facebook: Paula Fiihr
Paige Taylor Evans © // Quinn Creatives DESIGN