
Happy day before Valentine's Day! Speaking of which, did you catch my Zoom class yesterday with Michaels showing how to make a Valentine's Day Memory Explosion Box?

I started with the Small White Memory Explosion Box as the base and then went through all of the Memory Explosion Box supplies and found anything and everything related to love - from flowers and hearts to sentiments and sequins!
I found photos of me and Chris from the last year to use in this box and give to him tomorrow (although I'm pretty sure he's already seen this lol) :) To begin I measured and cut squares of patterned paper to cover the sides and bottom of a Small White Memory Explosion Box: the yellow with white mini stripes, green floral, and blue with silver mini stripes papers are from the Sprinkle 12x12" Paper Pad, the pink with silver stripes paper is from the 6x6" Paper Pad, and the purple with silver stripes paper is from the Foil 6x6" Paper Pad. I'll talk about the lid later on. Moving onto the inside layers!

I measured and cut a piece of green with silver hearts paper from the 12x12" Paper Pad and adhered it to the center of the box. I layered a round, colorful floral die cut and a purple with gold floral die cut from the Shapes & Phrases Die Cuts with thick foam adhesive on top. You can make these embellishments in the center super chunky - even put a treat such a cupcake or candy in the middle because this space is all open! From the Celebration Stickers I added a pink, round "love" sticker on top (also with thick foam squares) and placed a pink glitter heart enamel dot from the Embellishment Mix. To finish I tucked a flower die cut from the Birthday Die Cuts into the layers.

I covered the first flap with a pink floral paper from the Foil 6x6" Paper Pad. I created a pocket by trimming a triangle from a multi-pattern striped paper in the Sprinkle 12x12" Paper Pad, placing adhesive on the left and bottom edges only, then adding it to the flap. I added a piece pink washi tape from the Rainbow & Pastel Washi Tape to cover the stripe that says "happy birthday" and edged it with the mint sequin trim from the Decorative Trim Assortment. I topped the pocket with a blue rosette from the Balloon & Gift Layered Stickers.

Inside the pocket I added tags, journaling, and die cuts - it's also a great place to tuck in extra photos. The tag is from the Travel Die Cuts and I embellished it with a perforated green heart die cut also from the Travel Die Cuts and aqua baker's twine from the Decorative Trim Assortment tied through the hole in the top of the tag. The round yellow birdie die cut is from the Travel Die Cuts and I topped it with an "it's the little things" sentiment from the Travel Die Cuts - I trimmed off the multicolor edge from the sentiment before adhering it in place. The Journaling card with the little heart on it was trimmed from a paper in the Foil 6x6" Paper Pad and I wrote a lovey dovey note to Chris on it with a pink pen. To embellish the journaling card I tacked on a blue Heart Paper Clip and placed a purple "happy anniversary" sticker from the Phrase Stickers over it.

In next section of flaps, I covered the top with blue glitter paper from the Glitter 6x6" Paper Pad and covered the bottom with white/silver tiles paper from the Foil 6x6" Paper Pad. I placed a 3 1/2" photo on the top and added purple floral Puffy Photo Corner Stickers. I fussy cut a heart from a perforated die cut in the Travel Die Cuts, added a purple enamel heart from the Embellishment Mix in the middle, and placed it at the top of the photo. On white space of the photo I placed an orange "I love you forever" sticker from the Phrase Stickers and added a blue and a mint enamel dot from the Embellishment Mix. On the bottom section I adhered a Chipboard Frame Sticker and tucked a scalloped die cut from the Travel Die Cuts underneath. I topped the frame with a sentiment die cut from the Shapes & Phrases Die Cuts.

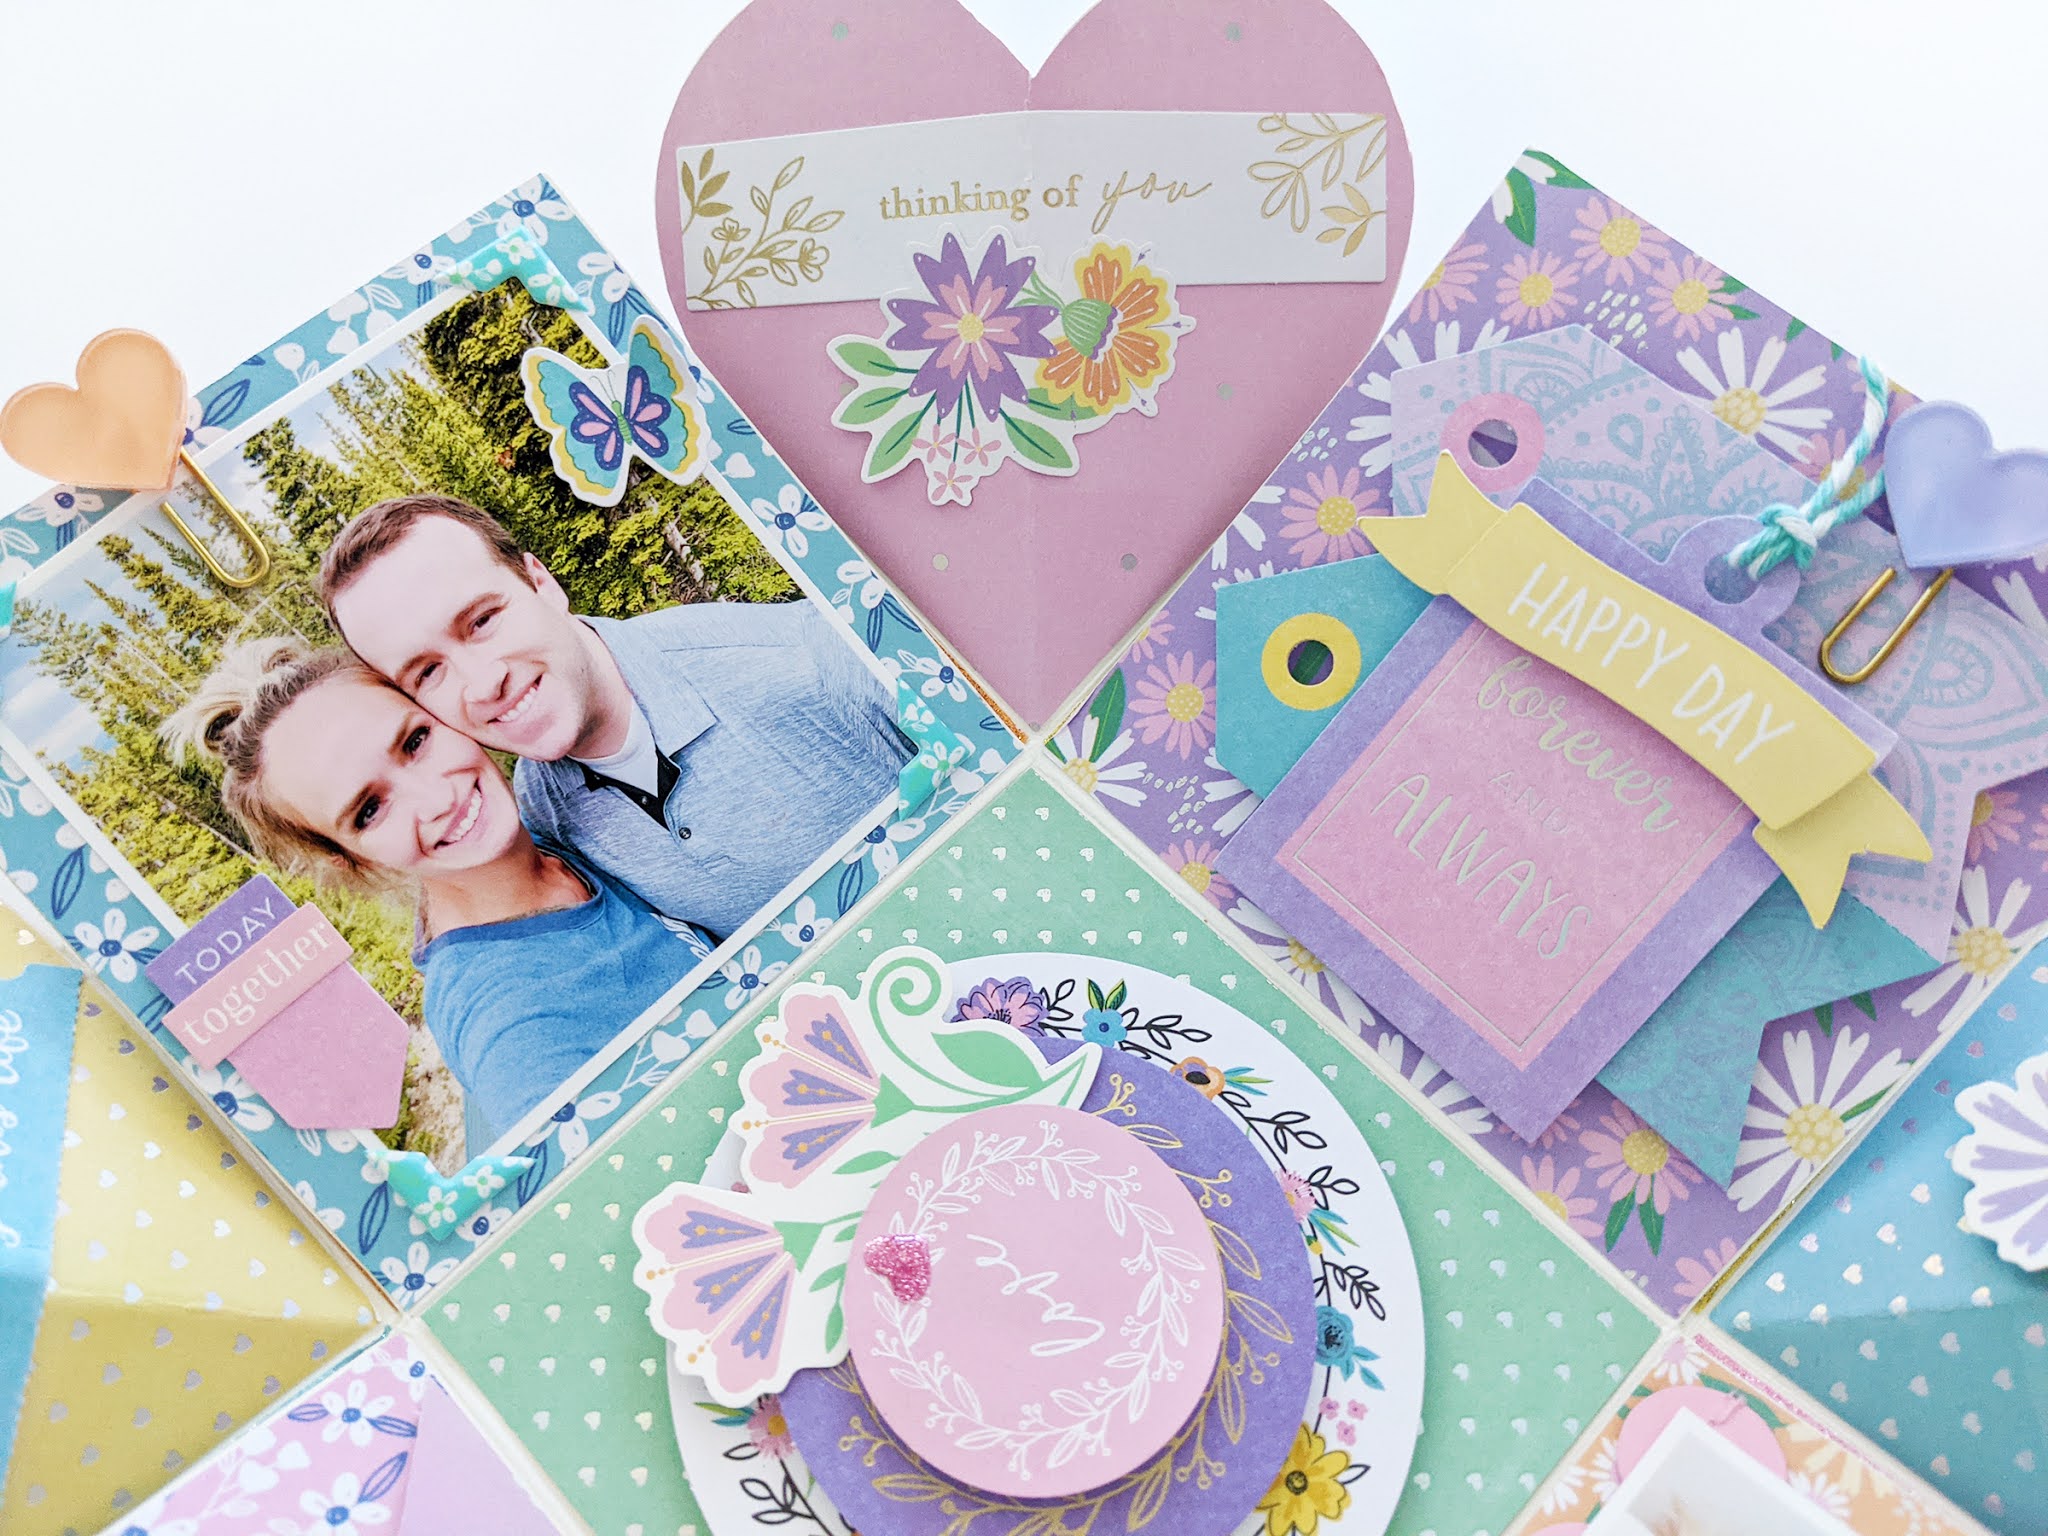
Rotating the box clockwise, I covered the next flap with a blue floral paper from the Foil 6x6" Paper Pad, added a 3 1/2" square photo on top, and embellished with blue floral Puffy Photo Corner Stickers, a colorful butterfly and purple/pink "today" tab die cuts from the Travel Die Cuts, a pink "together" sticker from the Phrase Stickers placed over the tab, and slid on an orange Heart Paper Clip.

In the next section of flaps, I covered the top with orange glitter paper from the Glitter 6x6" Paper Pad and covered the bottom with silver striped paper from the 12x12" Paper Pad. I added a 3 1/2" square photo in the top section and embellished with green floral Puffy Photo Corner Stickers, a floral frame die cut from the Shapes & Phrases Die Cuts, an orange flower die cut from the Birthday Die Cuts, and made a "me" "you" title with the Pink Letter Stickers on the frame with a purple enamel heart from the Embellishment Mix between. On the bottom section, I backed a mint Chipboard Frame Sticker with a pink butterfly journaling spot from the Travel Die Cuts and wrote a note with a purple pen. The floral sticker on the corner is from the Celebration Stickers.

Rotating the box clockwise, I covered the next flap with a purple floral paper from the Foil 6x6" Paper Pad. I embellished with connected arrow die cuts from the Travel Die Cuts placed with thick foam adhesive and topped with a "forever and always" tag die cut also from the Travel Die Cuts with aqua baker's twine from the Decorative Trim Assortment tied through the top. I placed a yellow "happy day" Celebration Banner Sticker and slid on a purple Heart Paper Clip.

In the next section of flaps, I covered the top with gold glitter paper from the Glitter 6x6" Paper Pad and the bottom with silver purple floral paper from the 12x12" Paper Pad. I added a 3 1/2" square photo to the top and embellished with pink Puffy Photo Corner Stickers. On the bottom, I trimmed a floral die cut from the Birthday Die Cuts in half and added the halves to the top and bottom. In between the floral pieces I added a "Celebrate Everyday" sticker from the Celebration Stickers and a green "love" sticker from the Phrase Stickers.

Rotating the box clockwise, I covered the next flap with orange floral paper from the Foil 6x6" Paper Pad. I attached two 3 1/2" square photos together with a strip of orange striped washi tape from the Confetti Washi Tape set along with a green "love you" sticker from the Phrase Stickers and a little pink flower sticker from the Celebration Stickers.

The washi tape creates a flap so you can lift and see another photo (or two or three!) underneath. I added a strip of yellow/pink polka dot washi tape from the Confetti Washi Tape between this layer of photos and added a strip of pink paper circles trim from the Decorative Trim Assortment to the bottom of the photo which makes it look like scallops when the other photo is closed on top.

In the next section of flaps, I covered the top with pink glitter paper from the Glitter 6x6" Paper Pad and covered the bottom with white floral paper from the Double Sided 6x6" Paper Pad. I placed a 3 1/2" square photo on the top and embellished with yellow polka dot Puffy Photo Corner Stickers and a "the best is yet to come" die cut from the Shapes & Phrases Die Cuts at the bottom of the photo. I added a purple perforated die cut from the Shapes & Phrases Die Cuts at the bottom and covered the sentiment with a blue floral Adhesive Pocket Card. On the card that slips into the pocket, I wrote a note with a blue pen and then created a tab to help make pulling it out easier with a folded piece of purple striped washi tape from the Rainbow & Pastel Washi Tape set. Then I finished the flap with a floral sticker from the Celebration Stickers.

For this box I embellished the heart corners as well! I covered the front of this heart with purple/silver polka dots paper from the 6x6" Paper Pad and the back with pink/white scallops paper from the Sprinkle 12x12" Paper Pad. I folded a gold foil "thanks" heart die cut from the Shapes & Phrases Die Cuts over the crease and topped the left corner with a green/yellow flower die cut from the Birthday Die Cuts attached with a foam square for lots of dimension - you can add thick embellishments to these heart corners, yay!

I covered this heart with yellow/silver hearts paper from the 6x6" Paper Pad and the back with green floral paper from the 12x12" Paper Pad. I wrapped sentiment die cuts over the crease (the From/To is from the Shapes & Phrases Die Cuts and the "loving this life" perforated sentiment is from the Travel Die Cuts) and topped the left corner with a colorful butterfly die cut from the Travel Die Cuts using a thick foam square.

This heart is covered with pink/silver polka dot paper from the 6x6" Paper Pad and I covered the back with purple floral paper from the 12x12" Paper Pad. I placed a gold "thinking of you" sentiment from the Shapes & Phrases Die Cuts over the crease and added a floral sticker from the Celebration Stickers below.
I covered this last heart corner with blue/silver hearts paper from the 6x6" Paper Pad and the back with white/floral paper from the 12x12" Paper Pad. I wrapped a gold "thankful for you" die cut from the Shapes & Phrases Die Cuts over the crease and placed a purple flower die cut from the Birthday Die Cuts below with a thick foam square for dimension. The inside of the box is done!

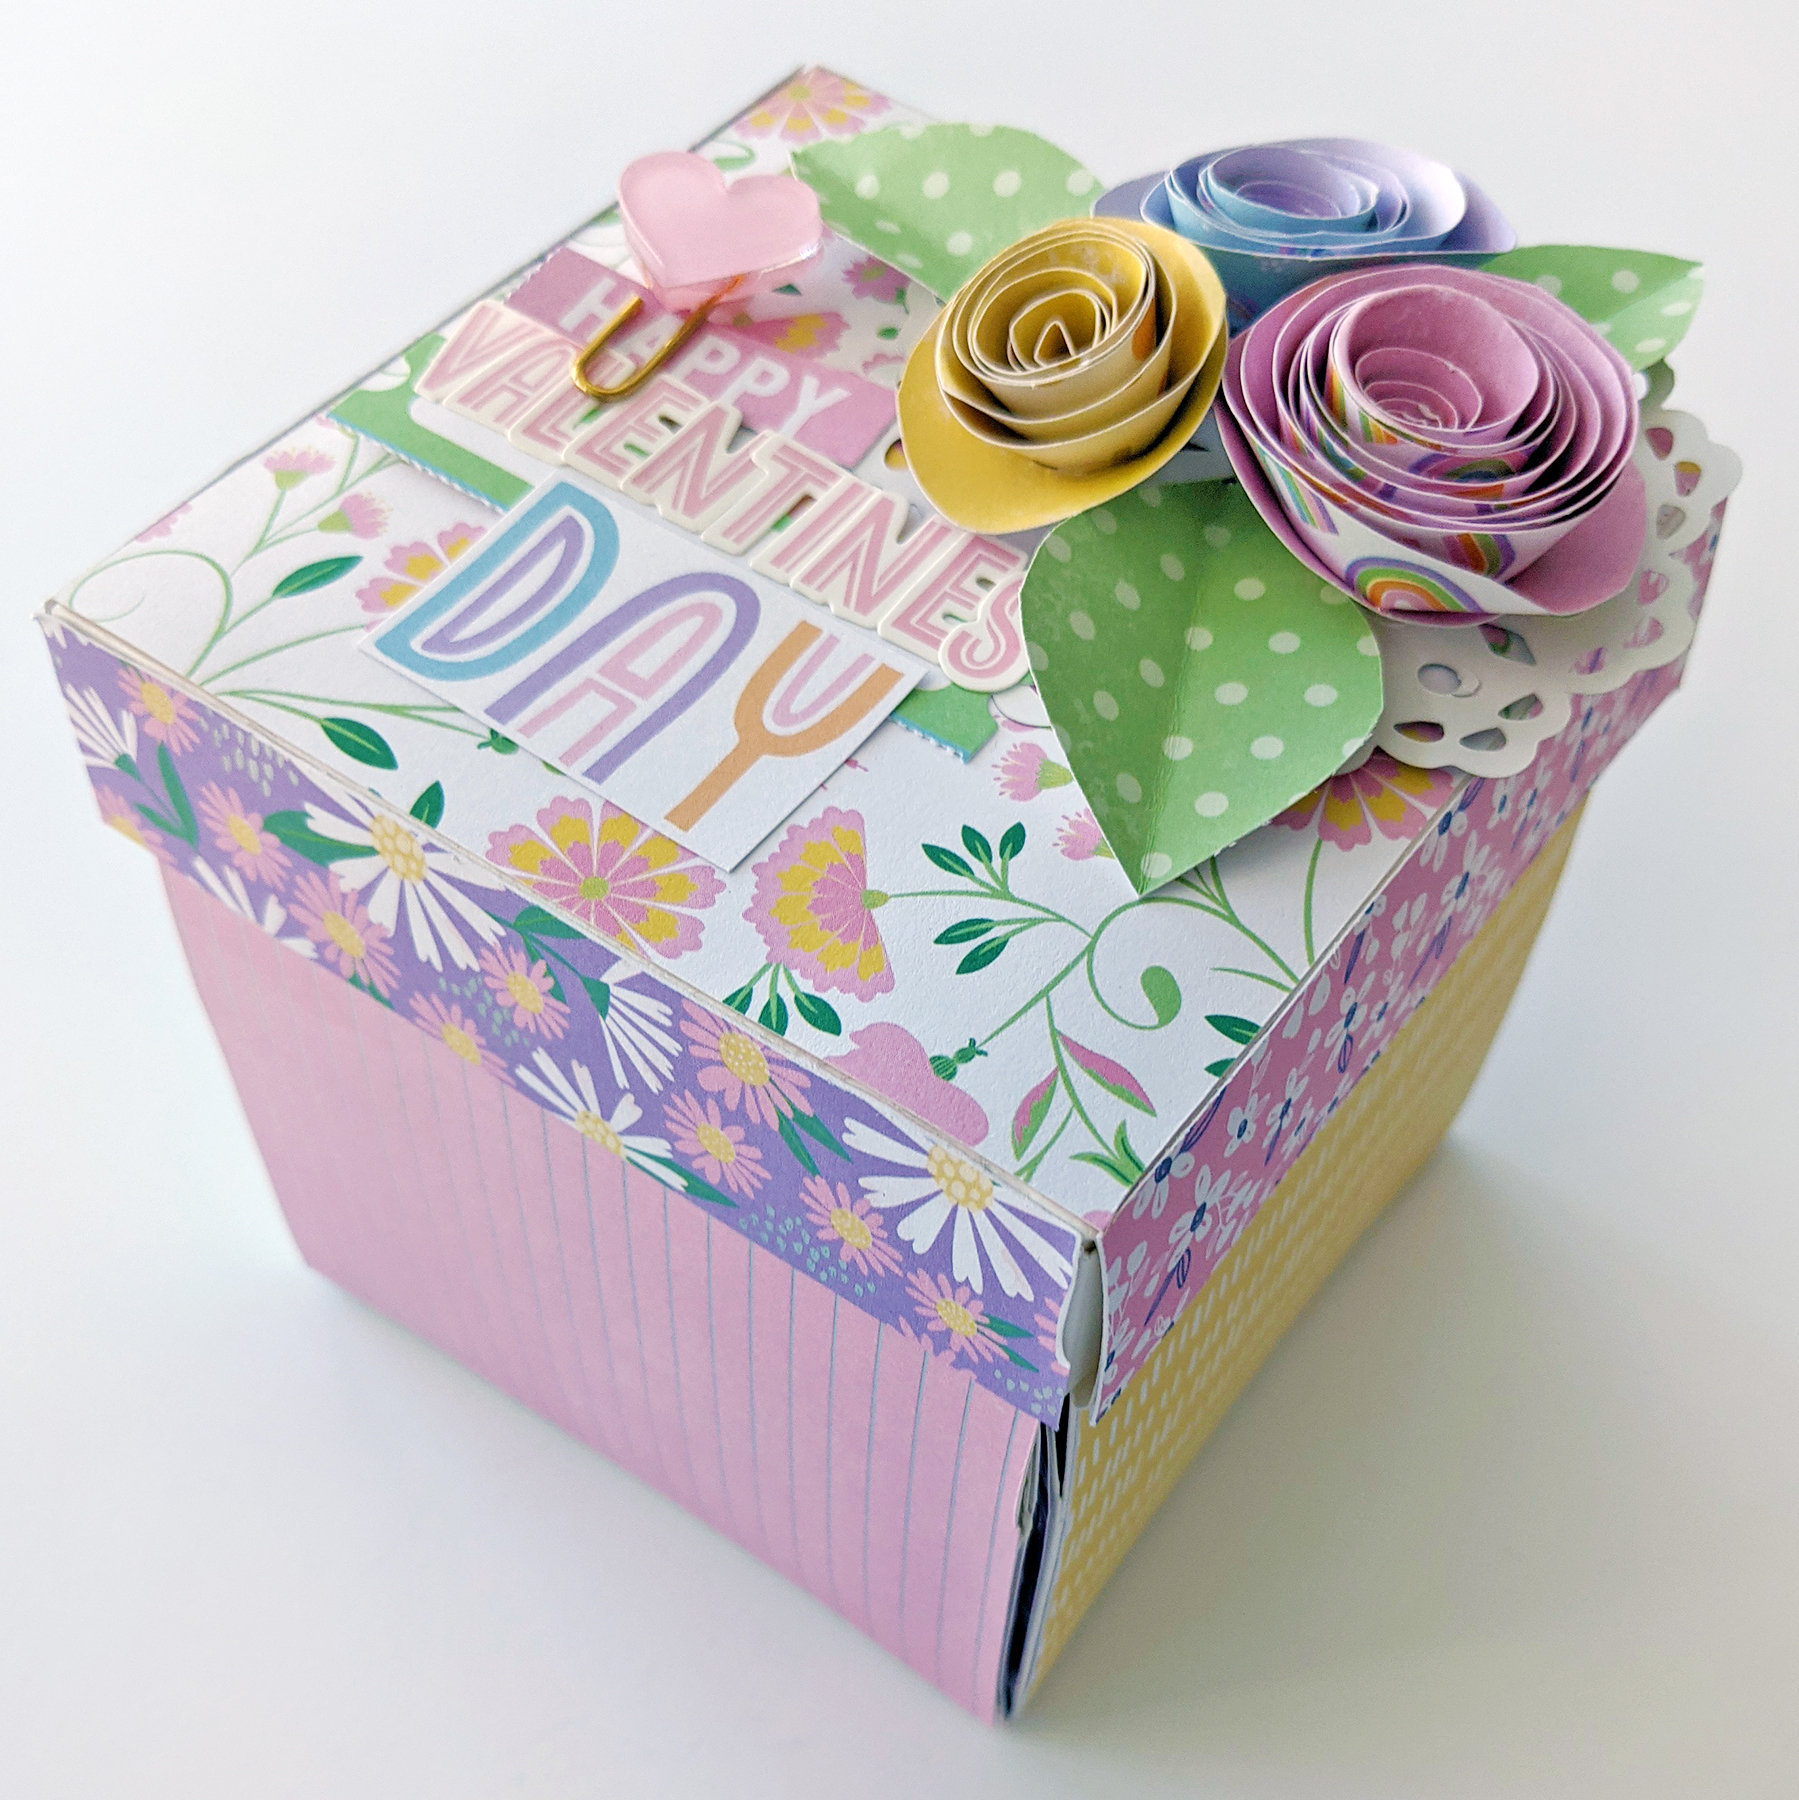
To decorate the lid, I covered the top with white floral paper from the Double Sided 6x6" Paper Pad and covered the edges with orange floral, purple floral, blue floral, and pink floral paper strips all from the Foil 6x6" Paper Pad.

To embellish the lid I added a green perforated label die cut from the Travel Die Cuts and topped it with a "HAPPY VALENTINES DAY" sentiment: the pink "happy" was trimmed from a "happy birthday" die cut in the Shapes & Phrases Die Cuts, the "VALENTINES" is made with the Pink Letter Stickers, and I trimmed a colorful "DAY" from the 12x12" Paper Pad.

Then I handmade three rolled flowers! The pink, yellow, and purple papers as well as the green polka dot paper for the leaves are all from the Double Sided 6x6" Paper Pad. I simply cut a spiral into the three papers, wound them up into spirals, let them unwind a bit to create a flower, and secured the ends in place with a dab of hot glue. I hand cut three leaves from the green polka dot paper, folded them in half for dimension, and then adhered all three flowers and leaves over a Holographic Paper Doily (turned upside down to be the plain white side) placed on the top right corner of the lid. And to finish the whole thing, I slid on a pink Heart Paper Clip over the sentiment.

All done and ready to be given to my honey bunny tomorrow!


Here are the clickable product links to all of the Memory Explosion Box supplies:
I hope you are inspired to create a Valentine's Day Memory Explosion Box! Thanks for stopping by today, happy Valentine's Day tomorrow, and see you again then!


Post a Comment