

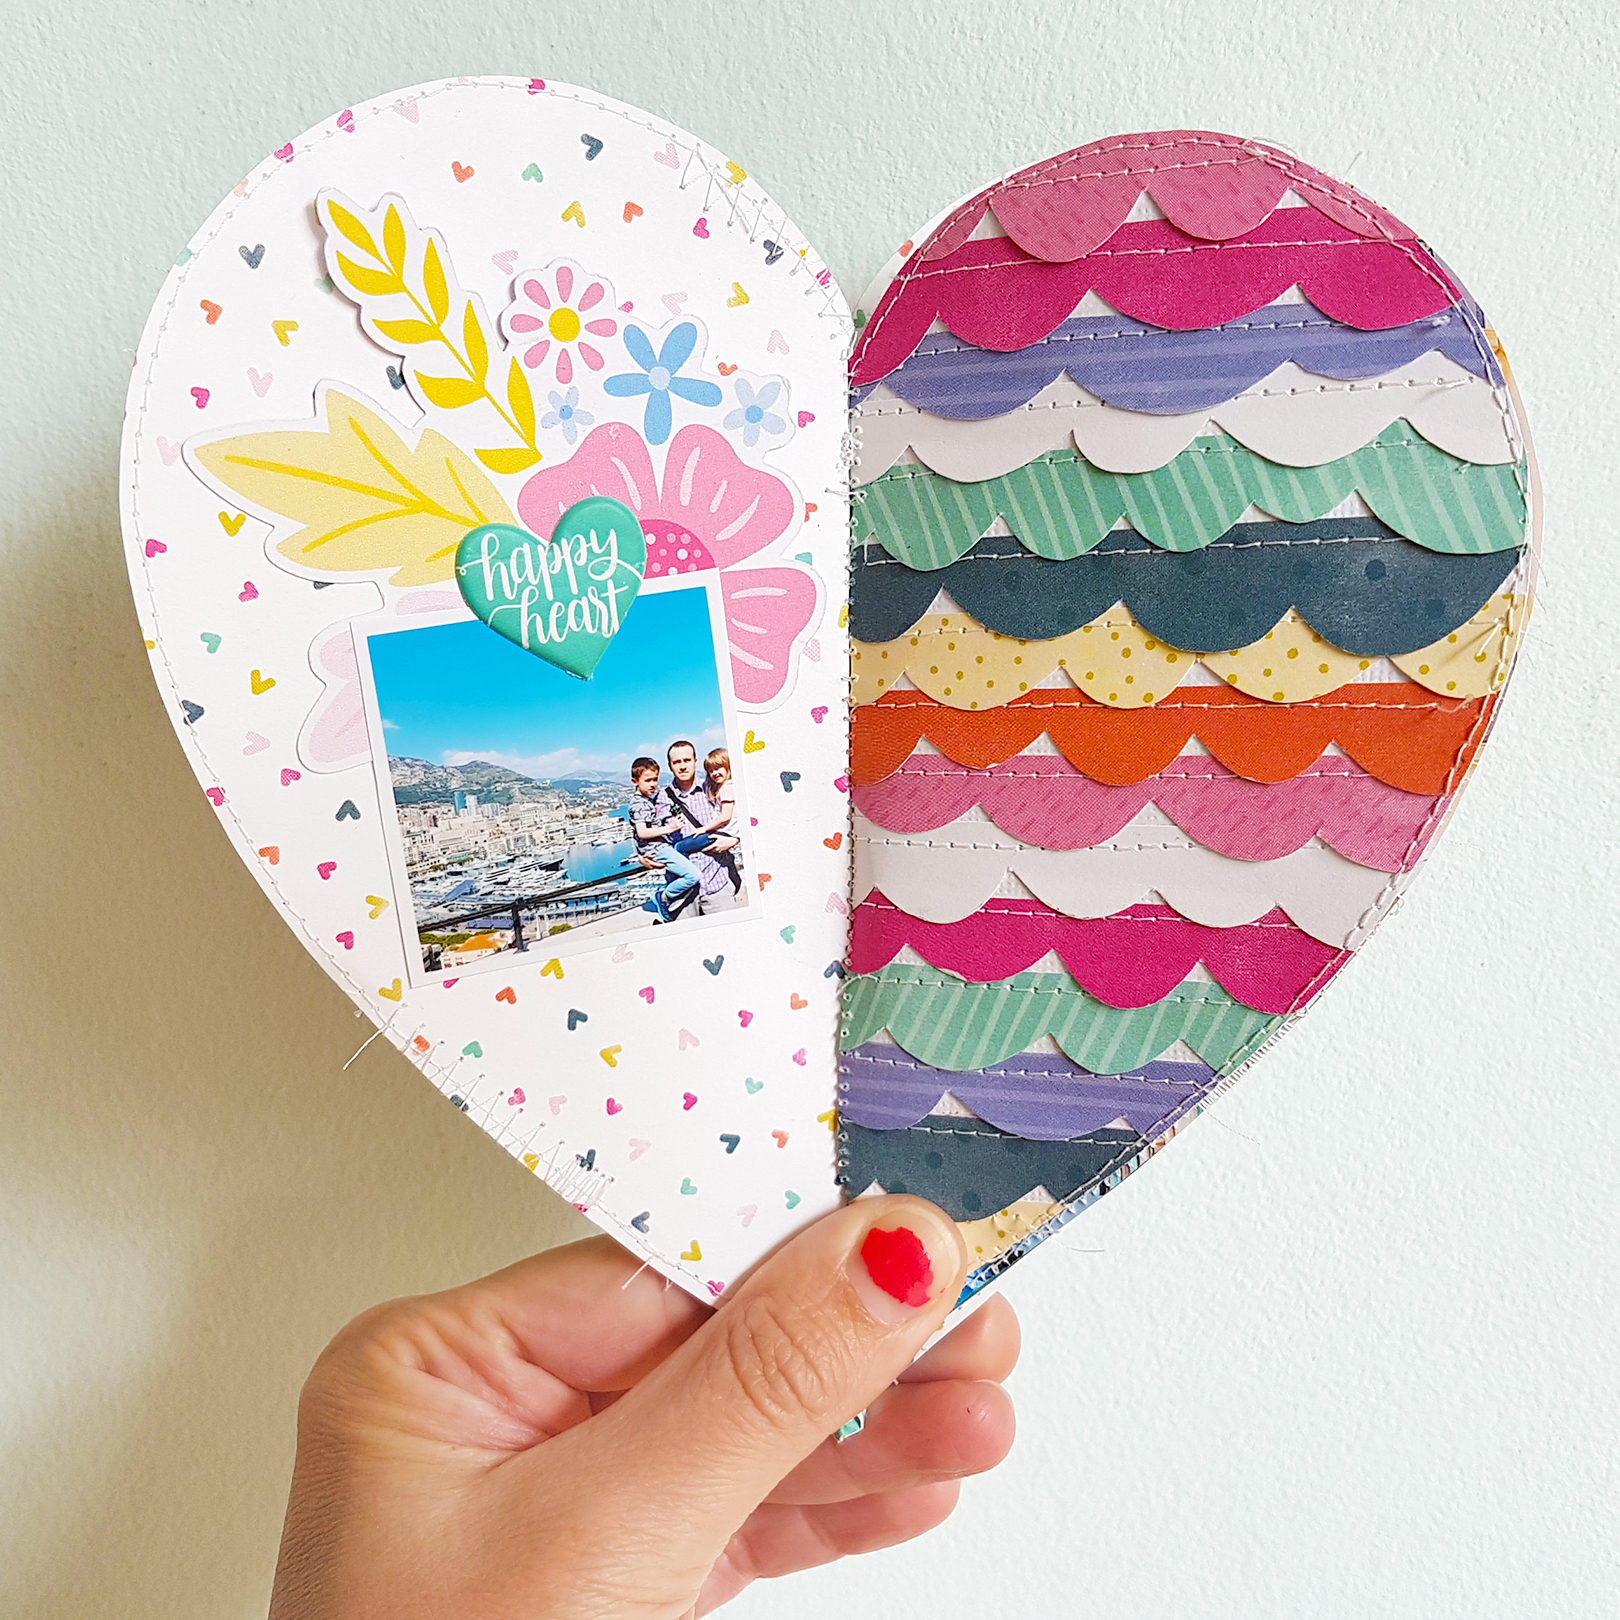
In the first spread I used one of the Oh My Heart florals that I printed and die cut with my Cameo and attached a small photo with a puffy heart sticker. I fussy cut the scallops from Paper 17 and stitched them to the page.
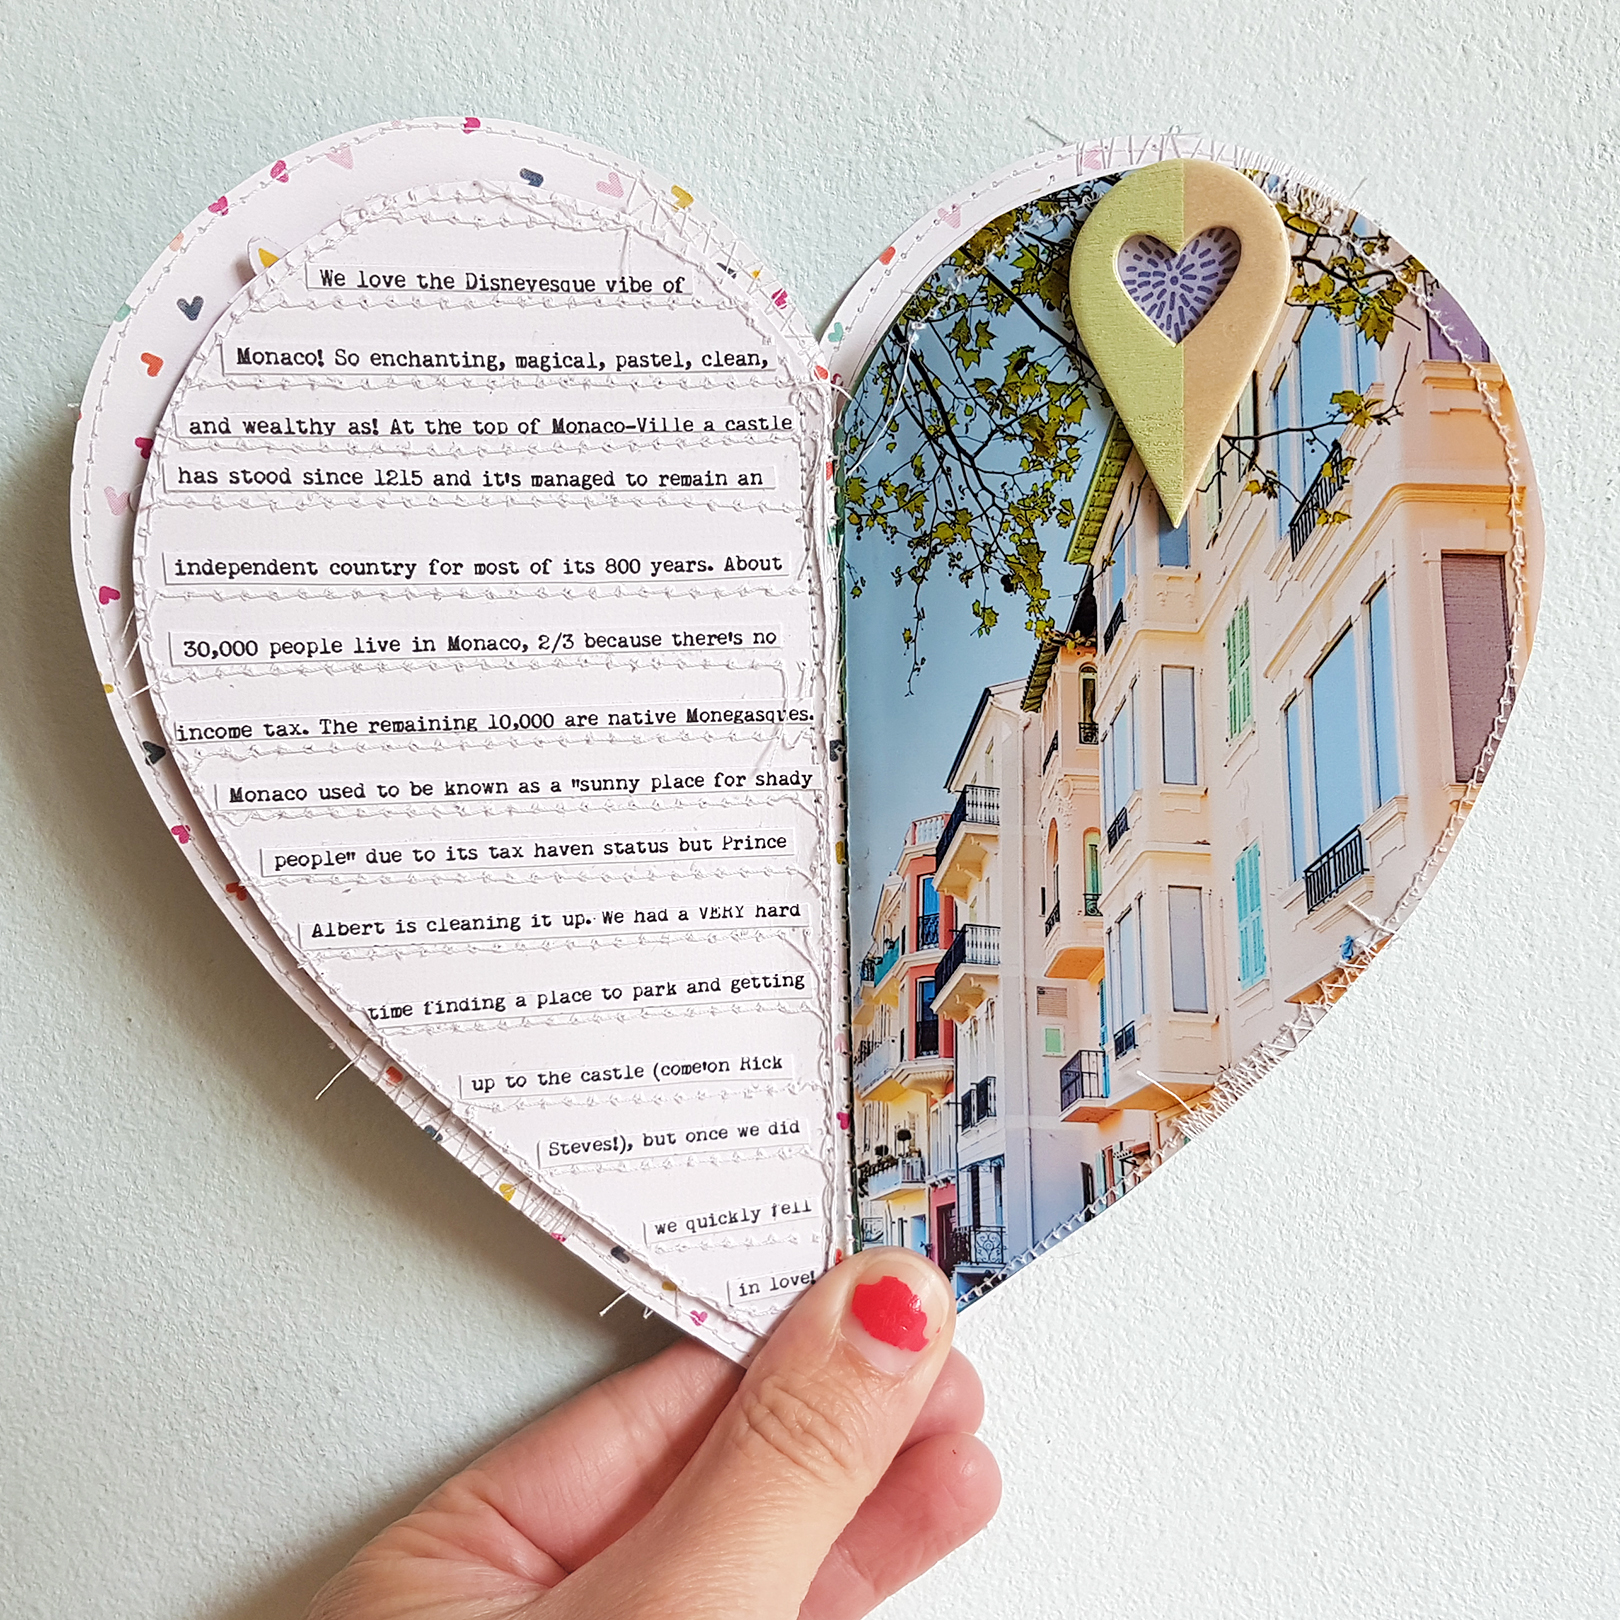
The stitching lines made great dividers for typed, printed, and trimmed journaling strips. I love the font Remington Noiseless so of course I used it here. The right side is a full-page photo and at the top I added a wood veneer heart geo-tag.
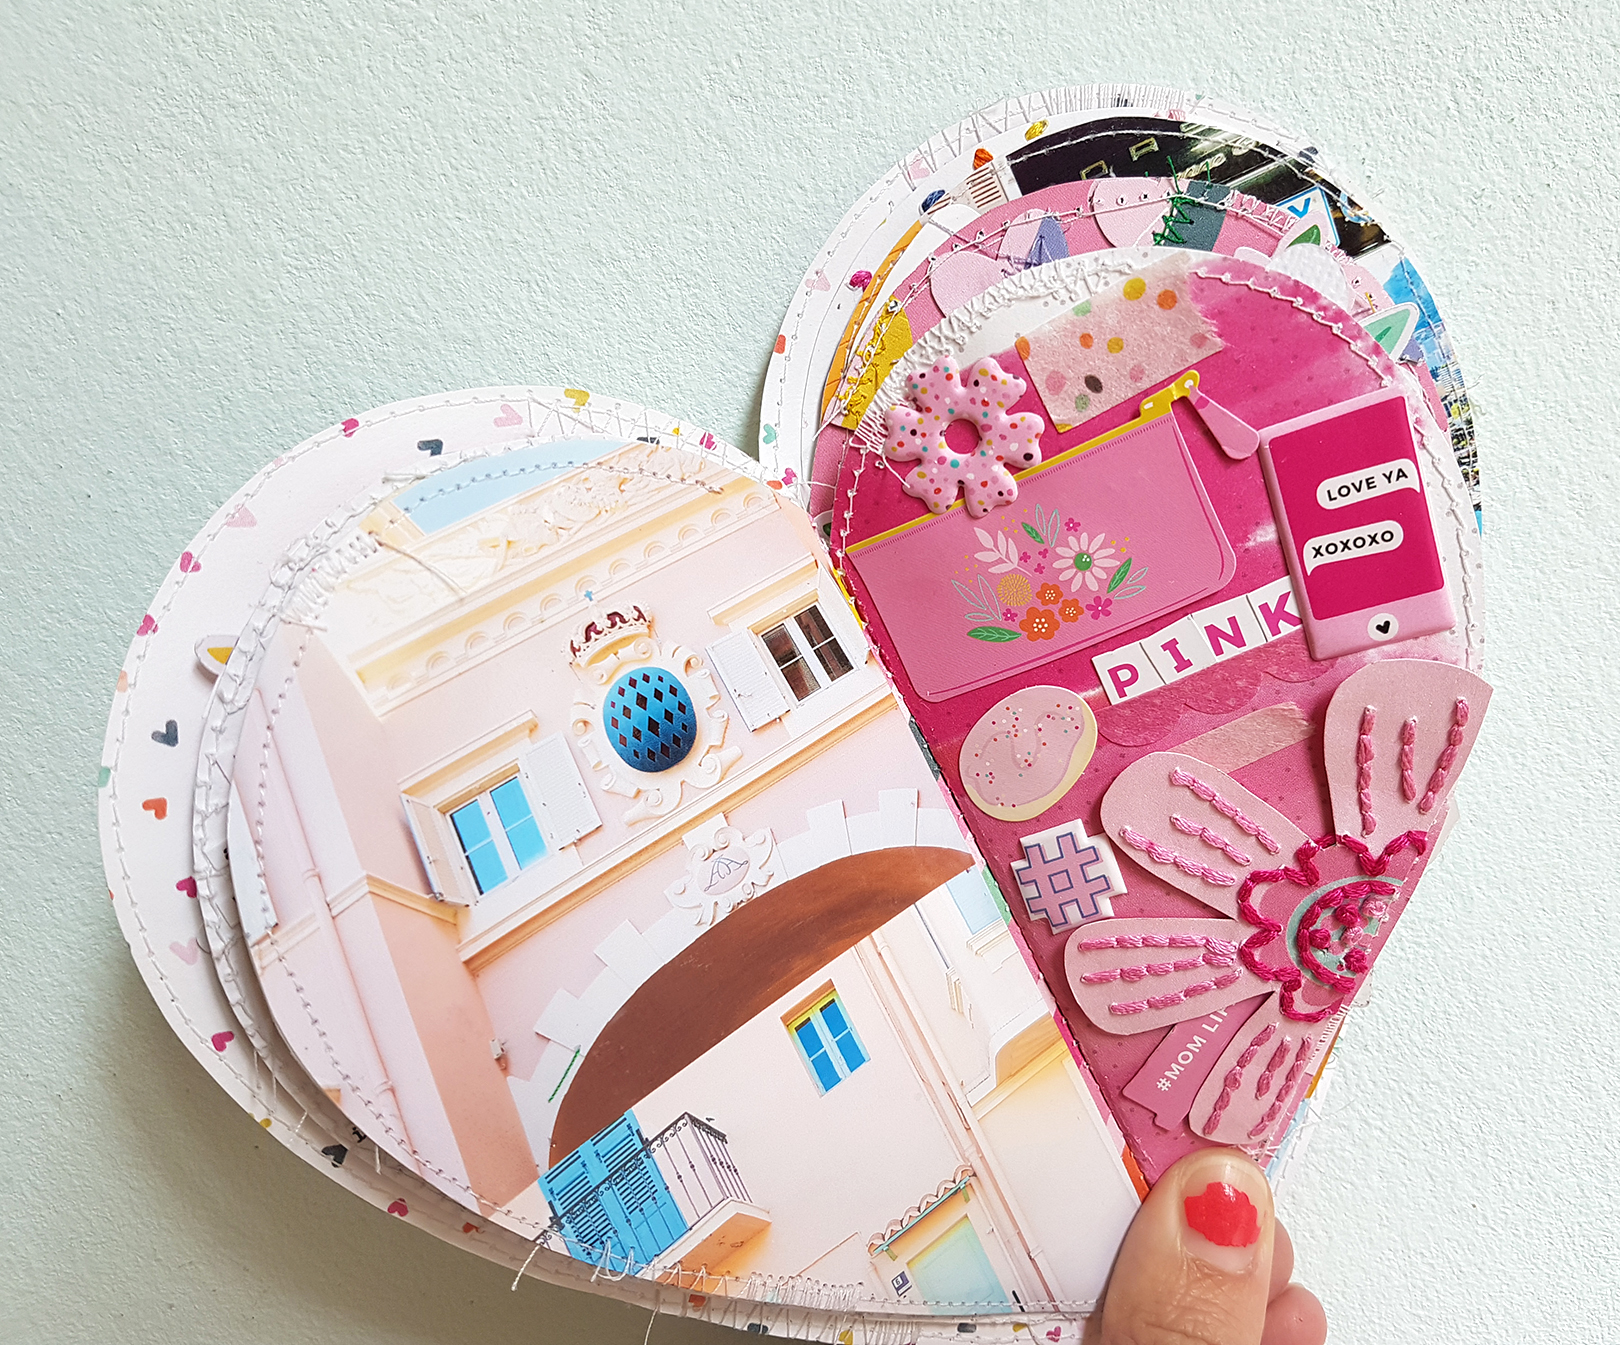
The next spread is an explosion of pink! I made a collage of two pink building photos for a full-page photo spread and on the right pink patterned paper I found all the pink things from Oh My Heart and added hand stitching details to a flower fussy cut from Paper 06.
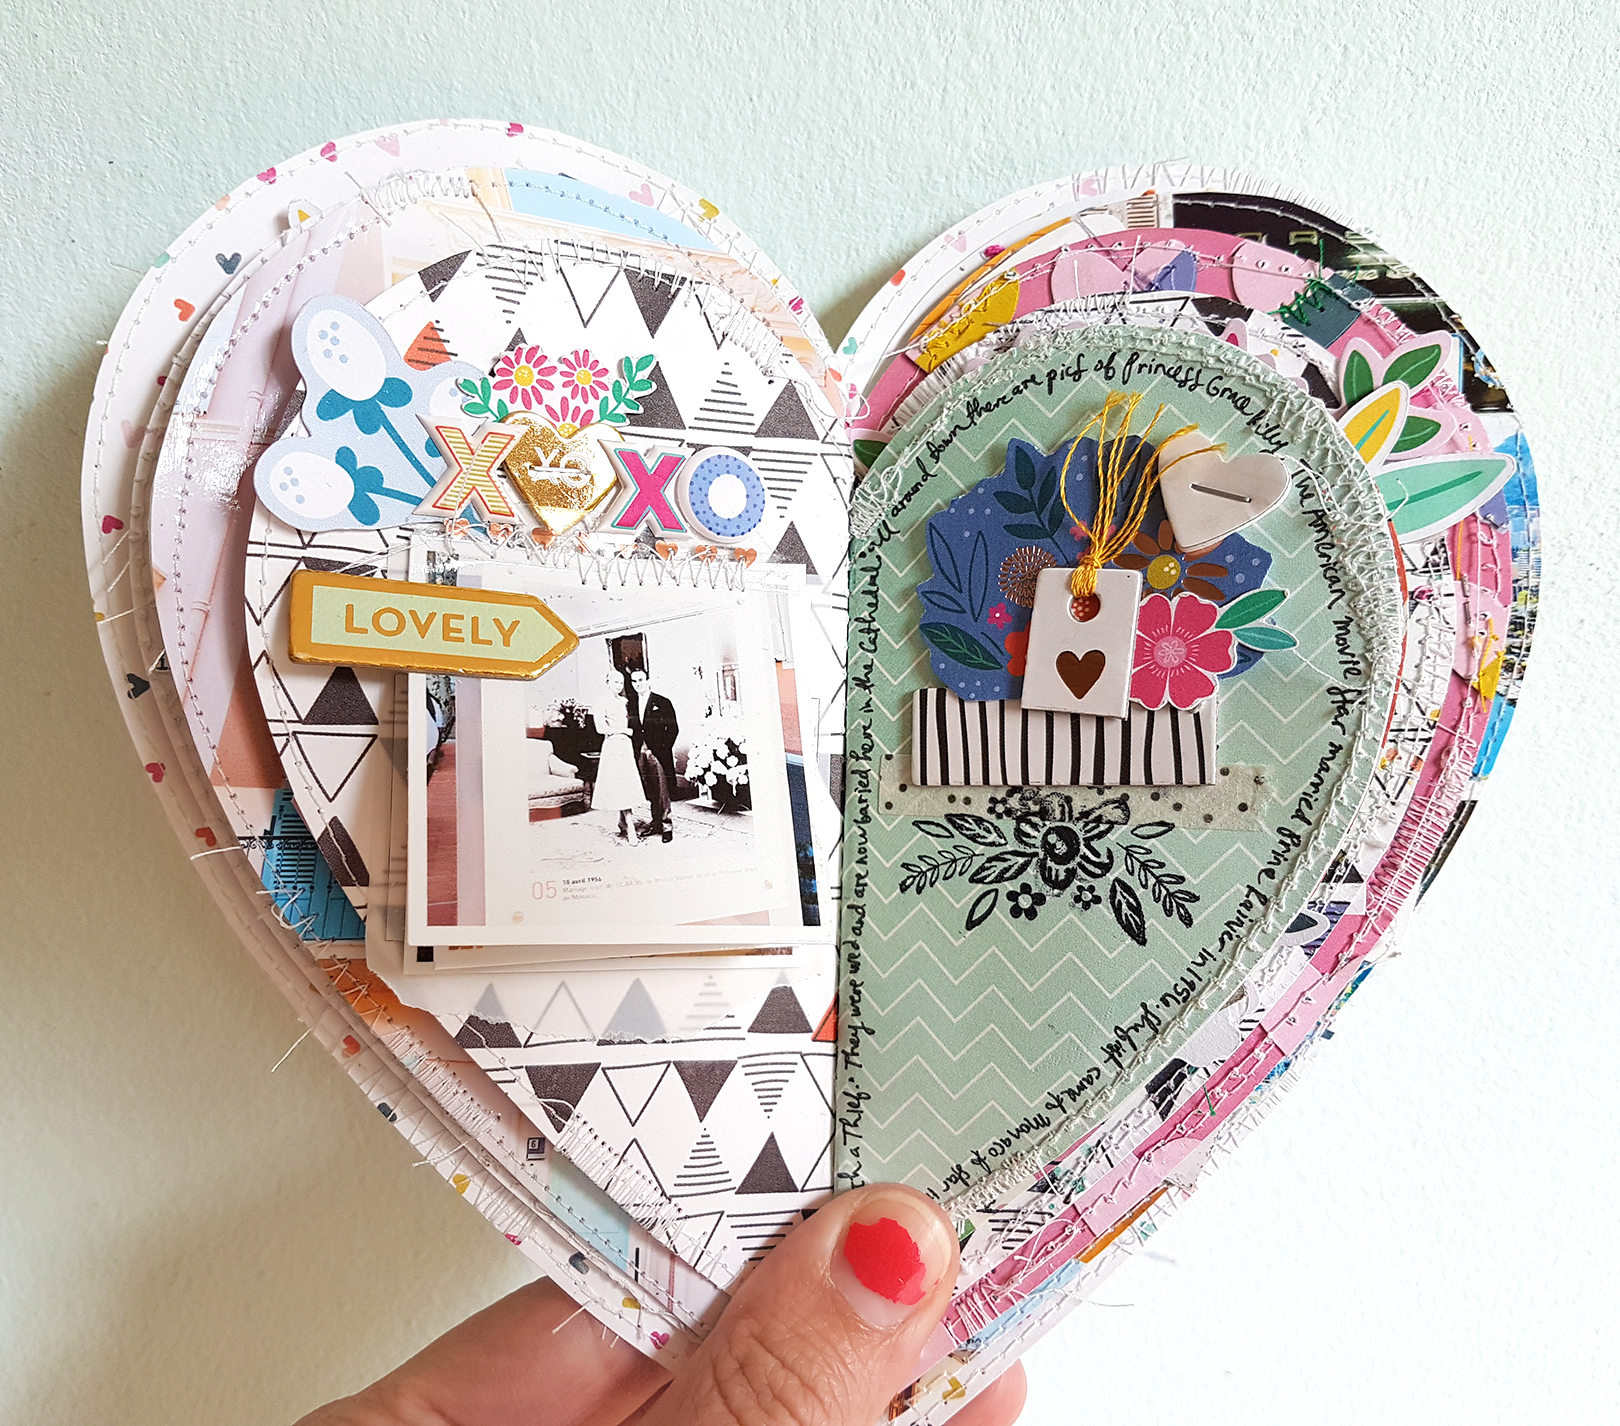
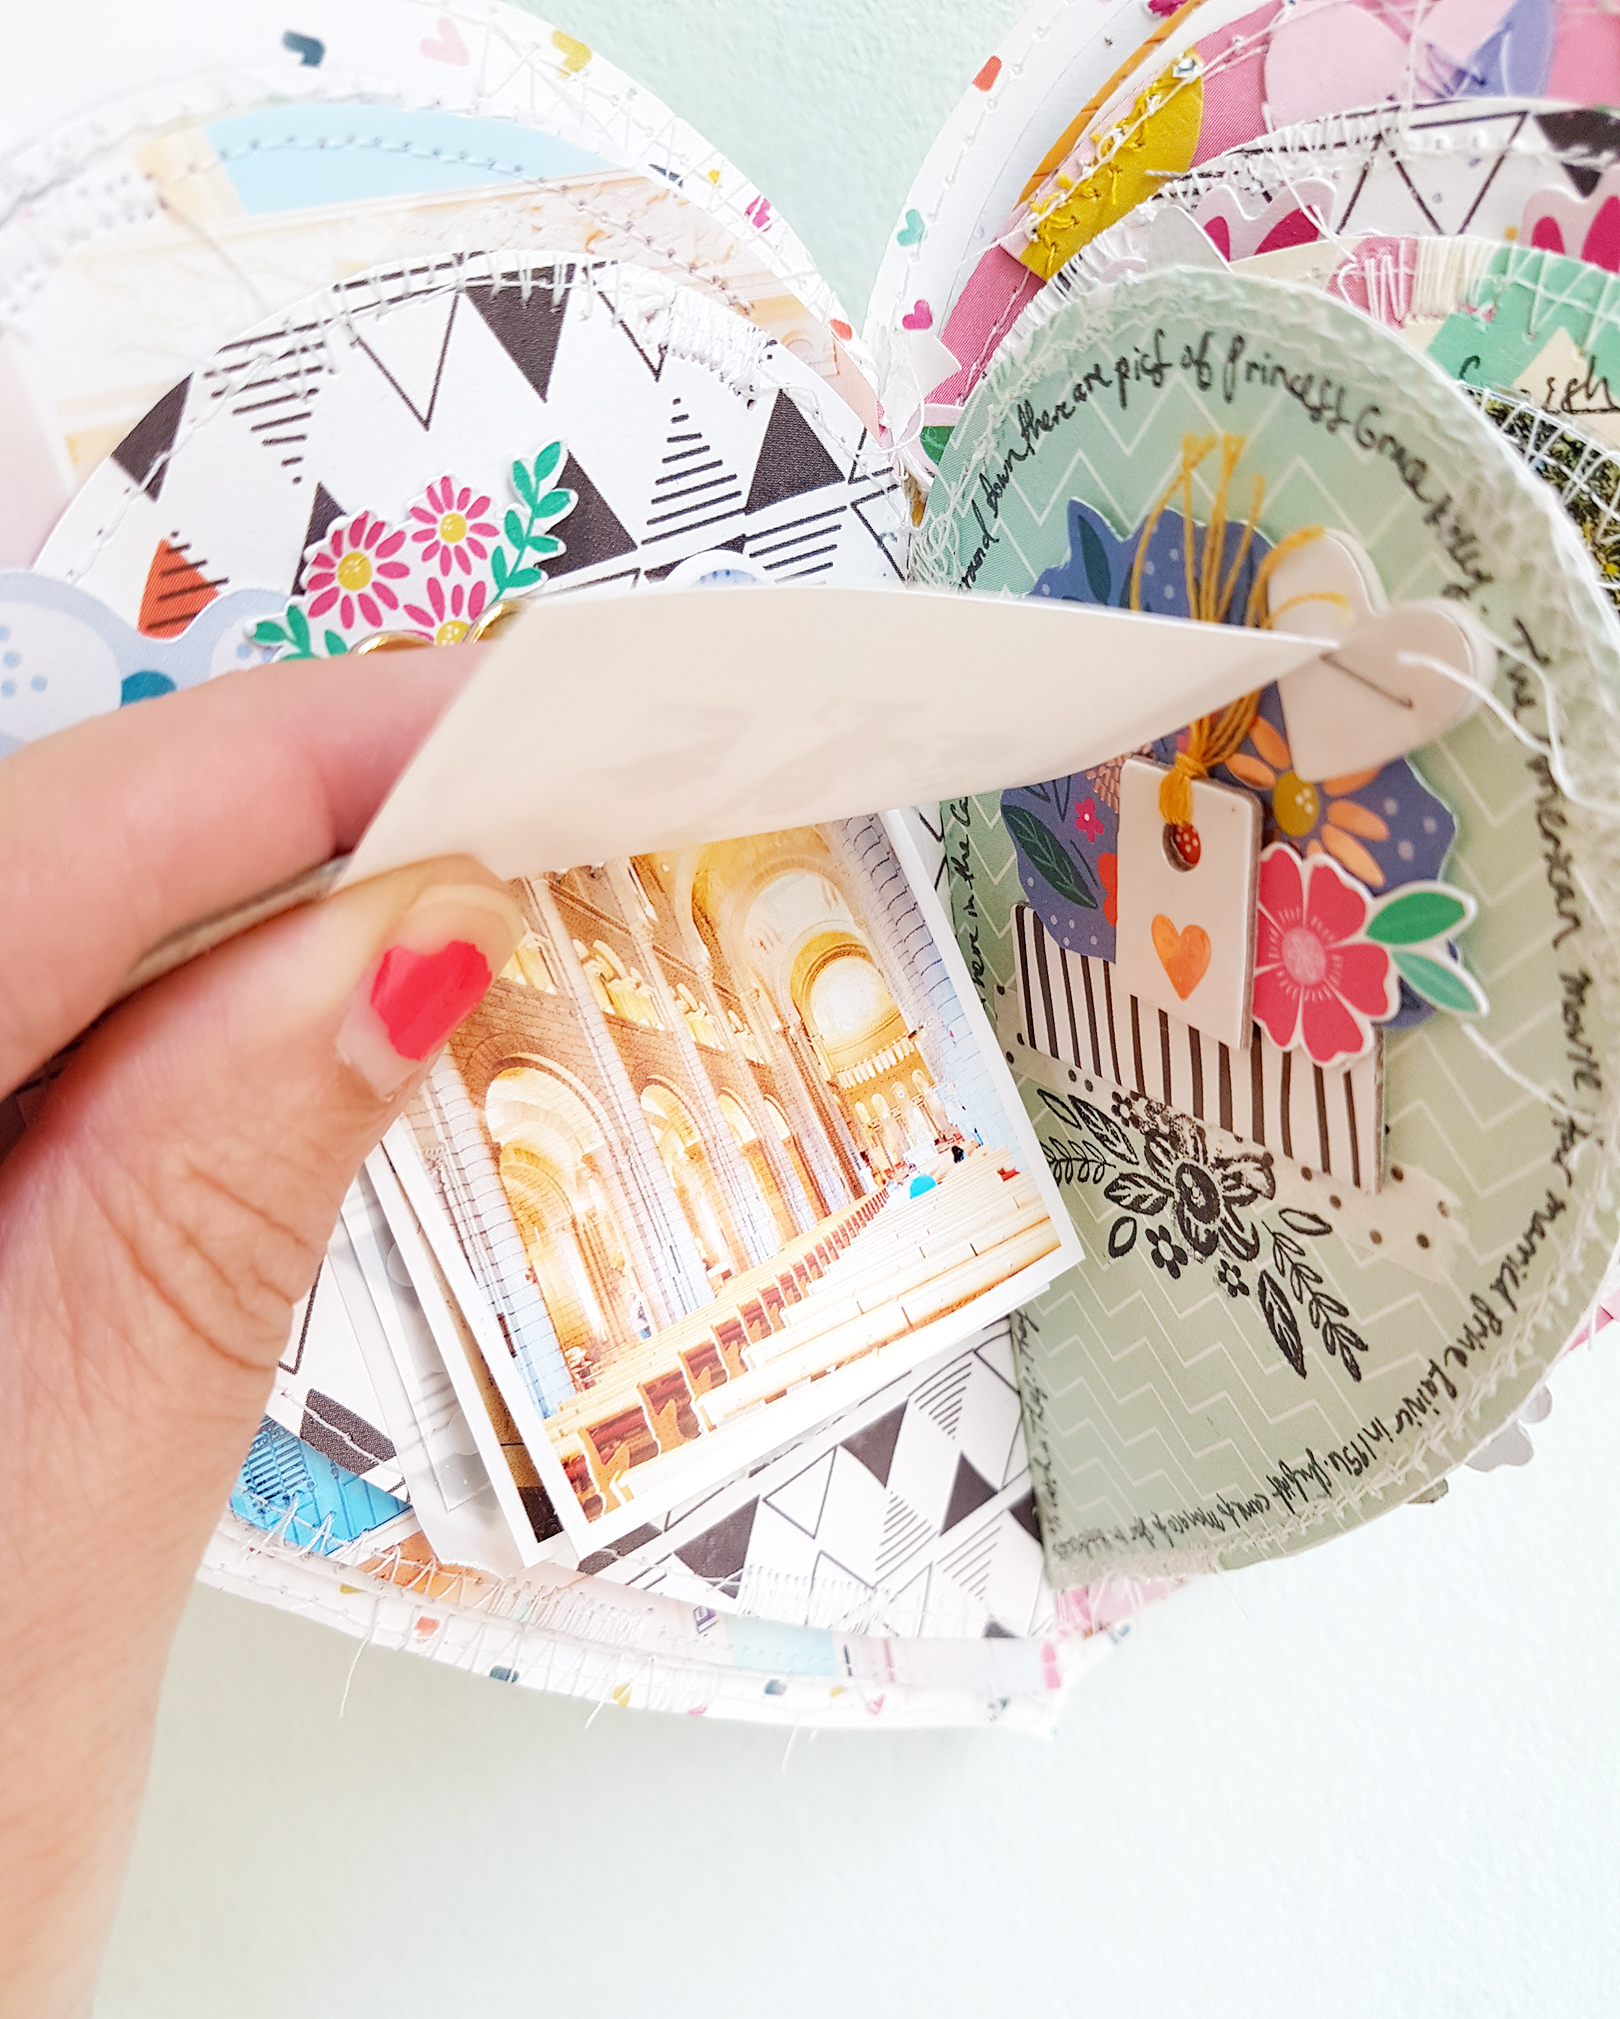
And then I started getting crazy with layered embellishments! I stacked three photos about Princess Grace Kelly and the church she was married and buried in together and stitched them at the top. The "lovely" chipboard piece on the top photo makes an easy photo turner. I journaled around the edge of the right page and added all kinds of embellishments to the center.
Closer look at the stacked photos.
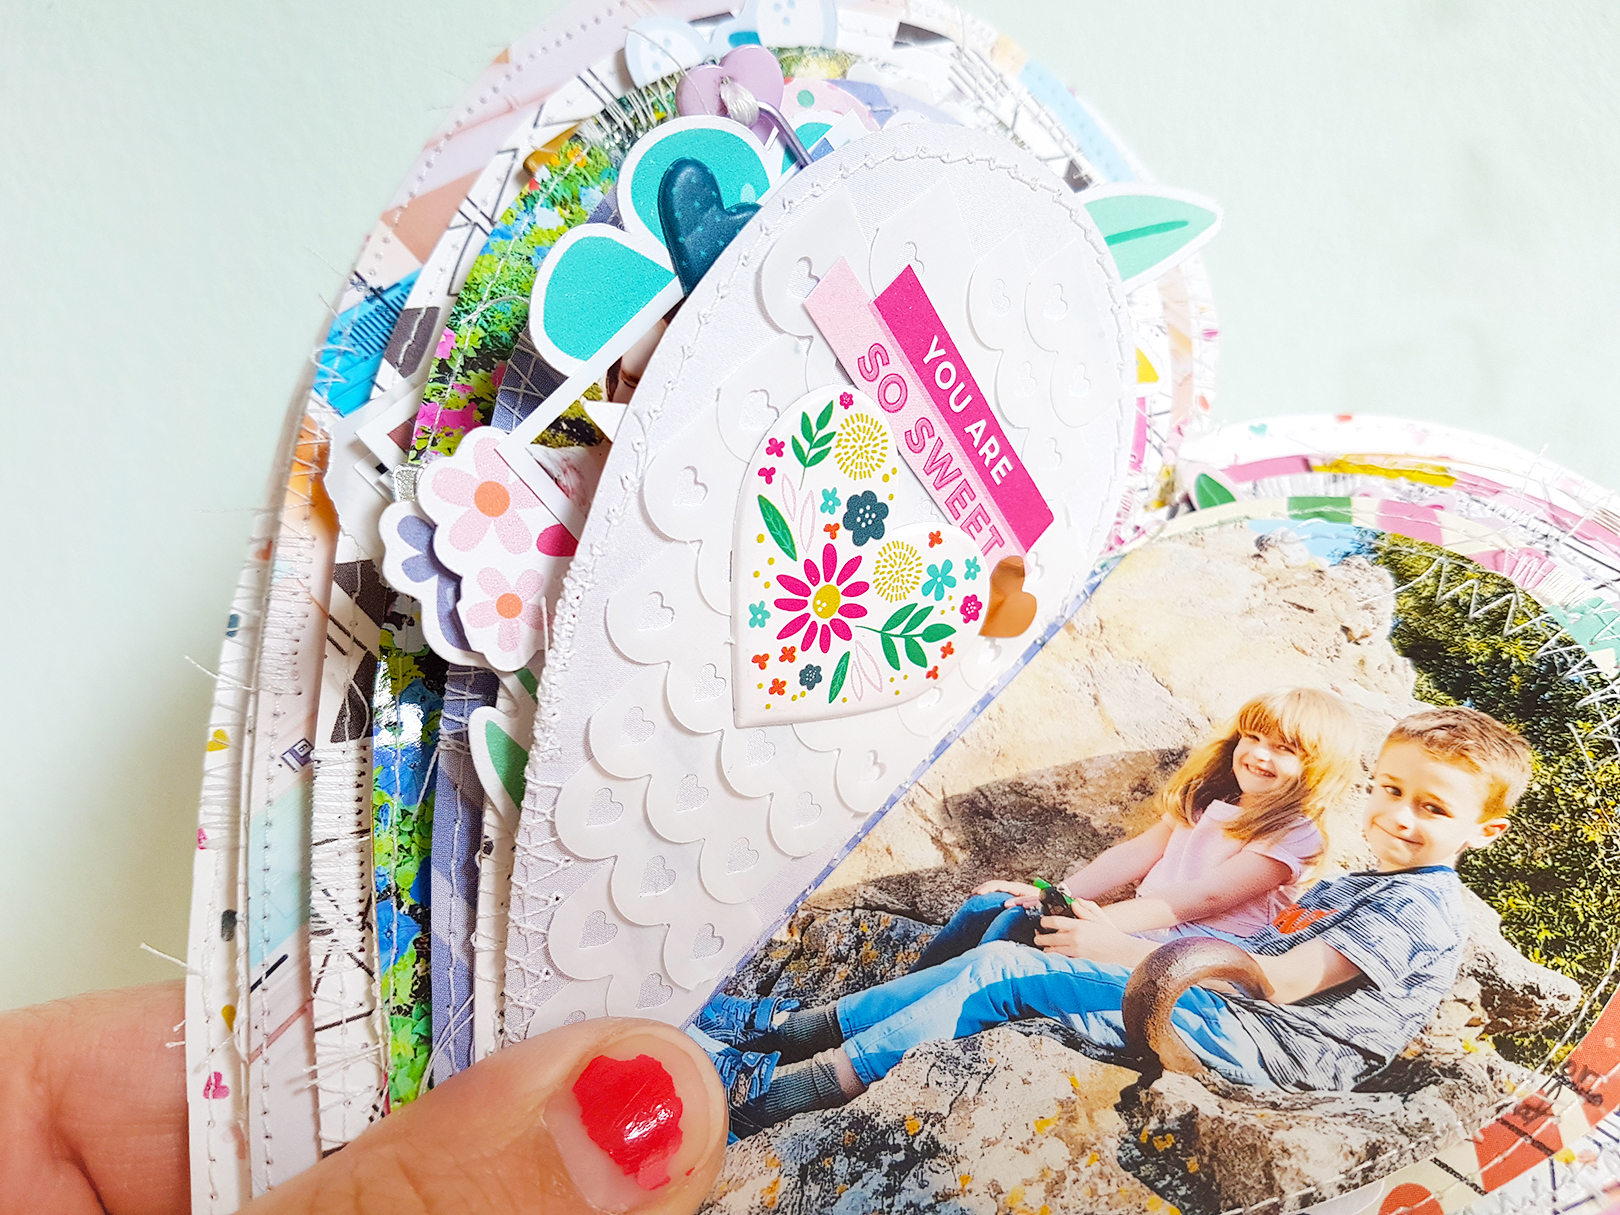
Jane was tiny in the left full-page photo so I drew attention to her by stitching a heart around her mischievous little self and added a heart die cut and a trio of tiny hearts punched from vellum. I toned down the right side die cut from Paper 15 with white paint and then trimmed a chipboard flower sticker in half. The Mirror Leaf Stickers are from Take Me Away and there's a little bit more journaling on top.
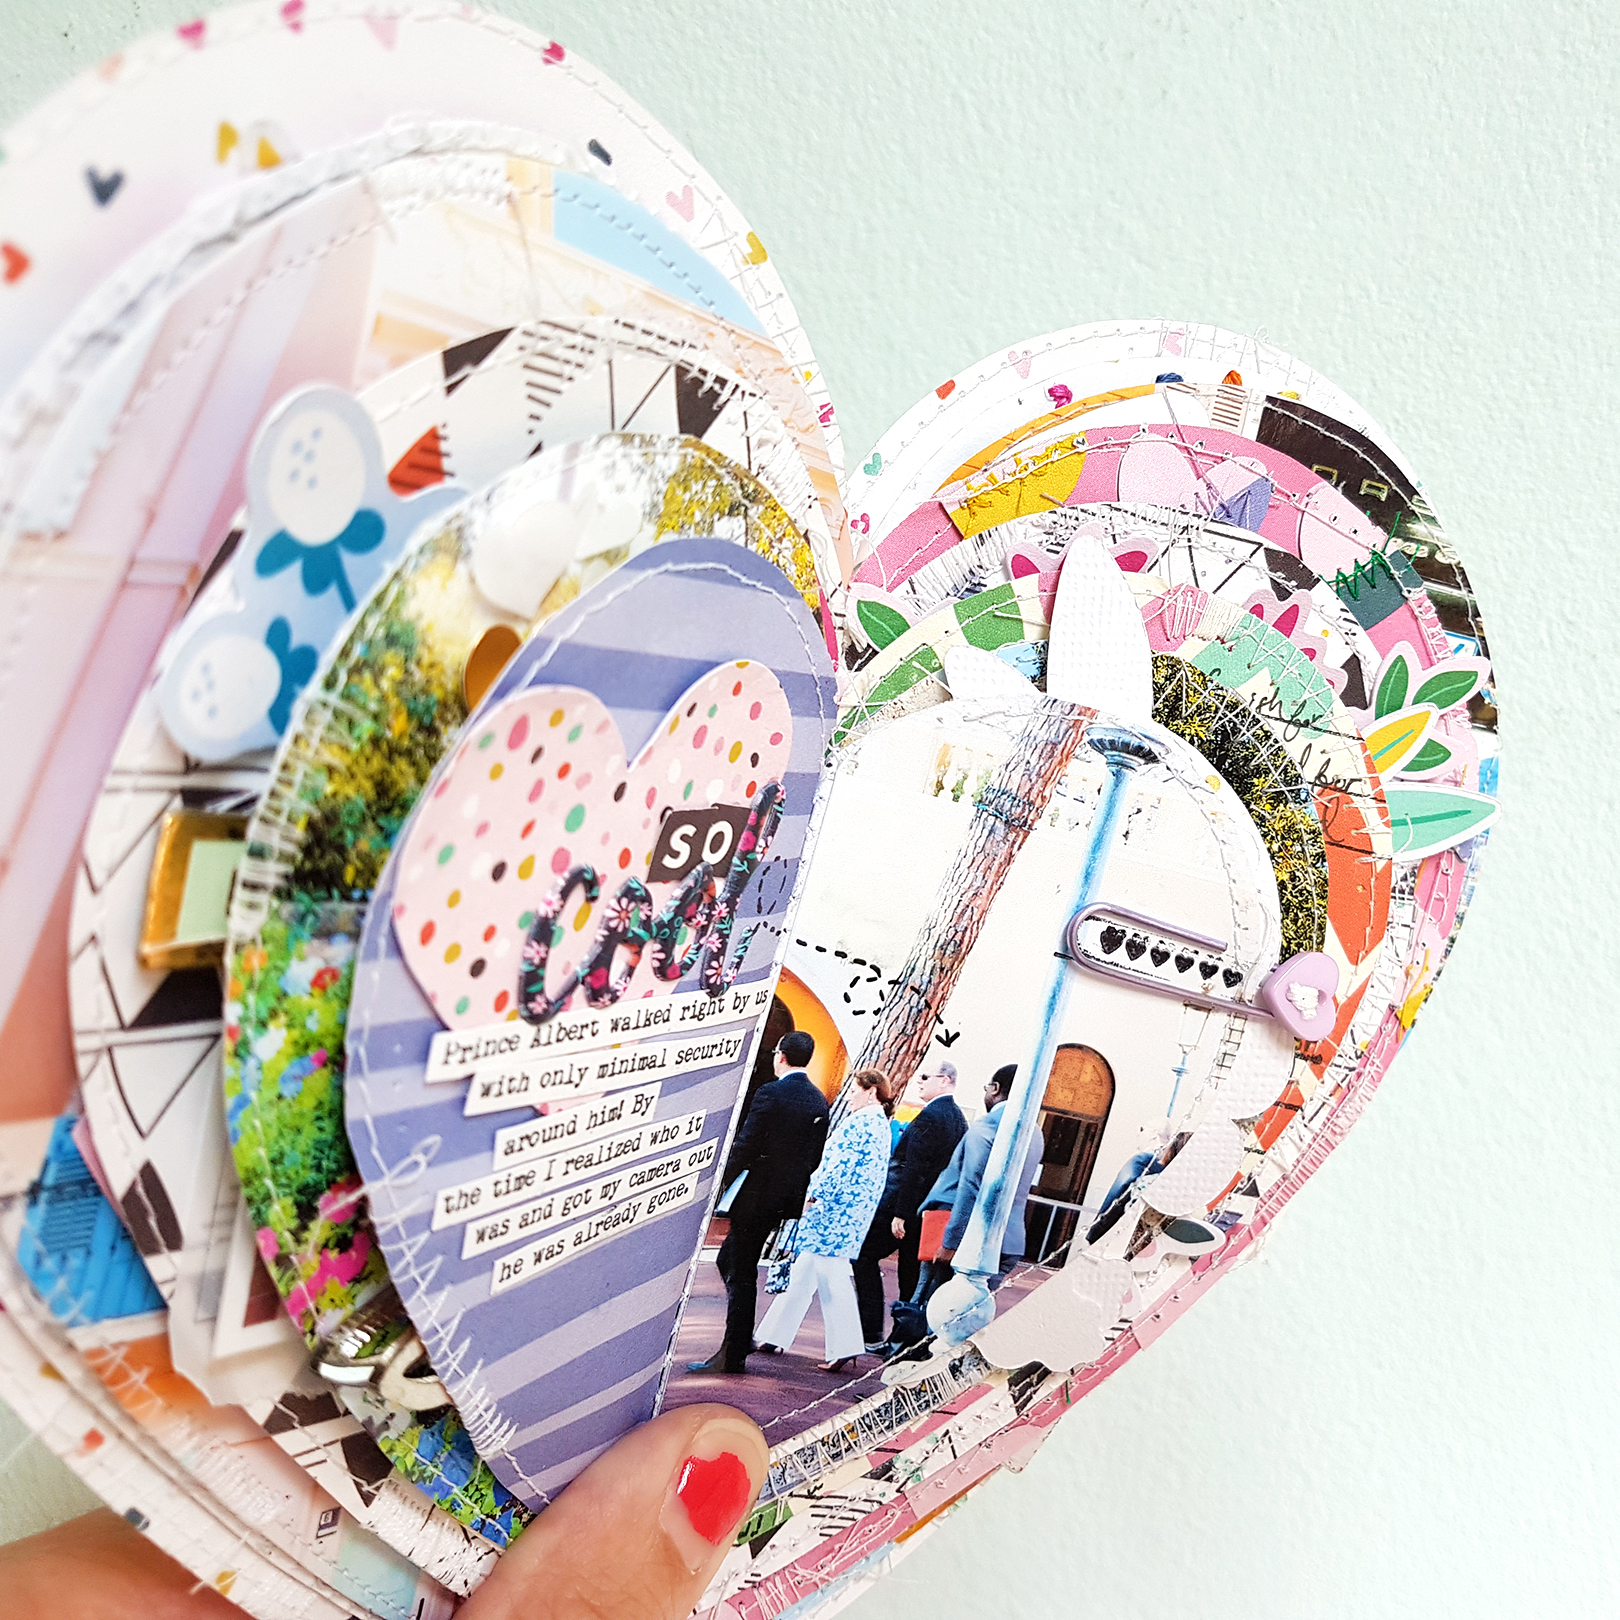
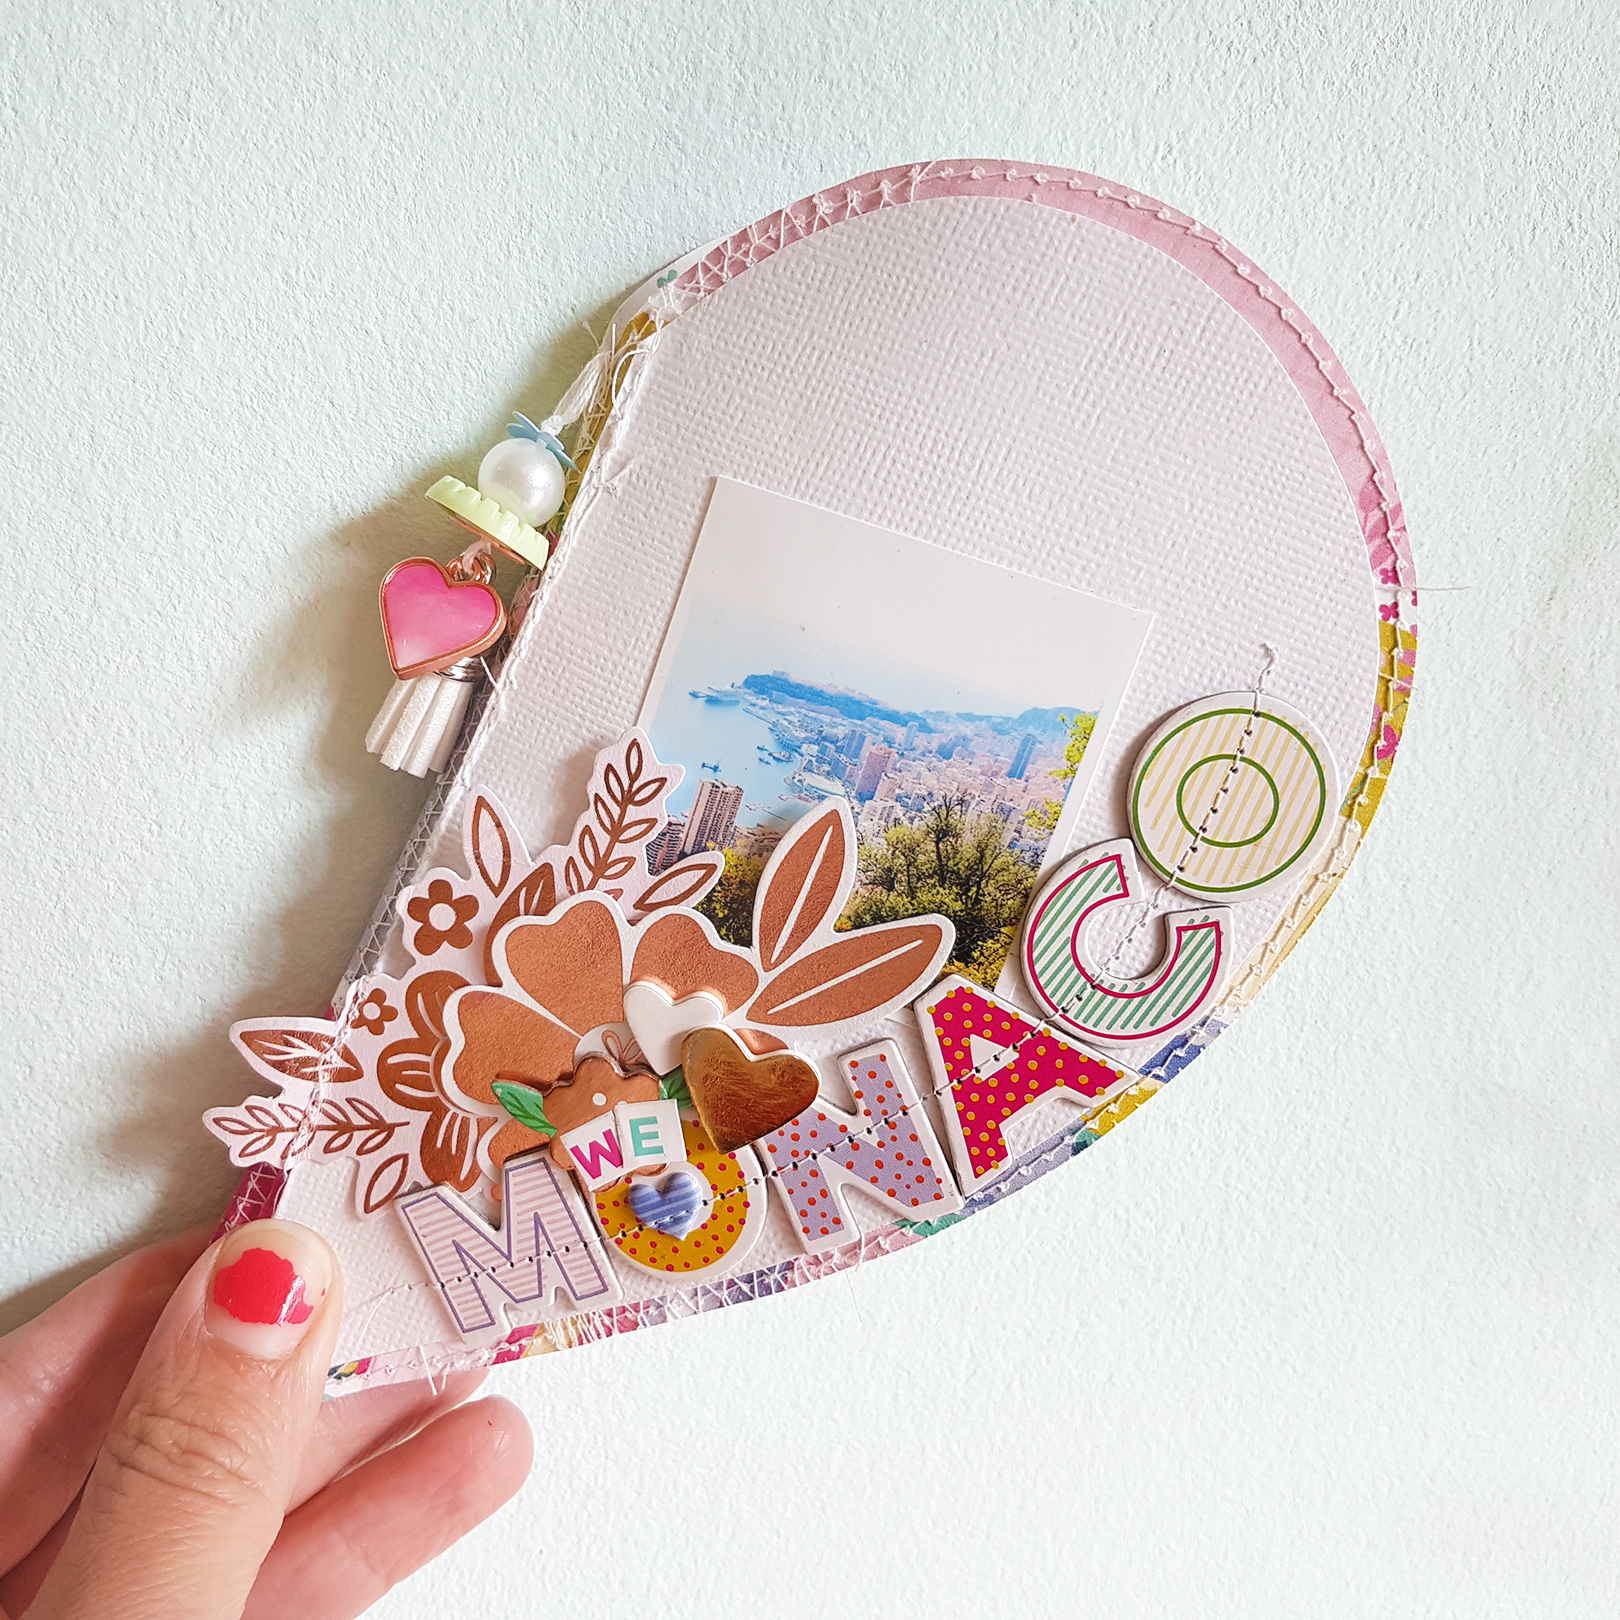
The next spread is all about nearly bumping into the Prince of Monaco!! I made that paperclip with a regular ol' clip and stitched a Take Me Away Button to the end. I was so scared to hand draw that arrow leading to the Prince himself, but after practicing a few times on scratch paper I gave it a go on the real deal and love how it turned out.
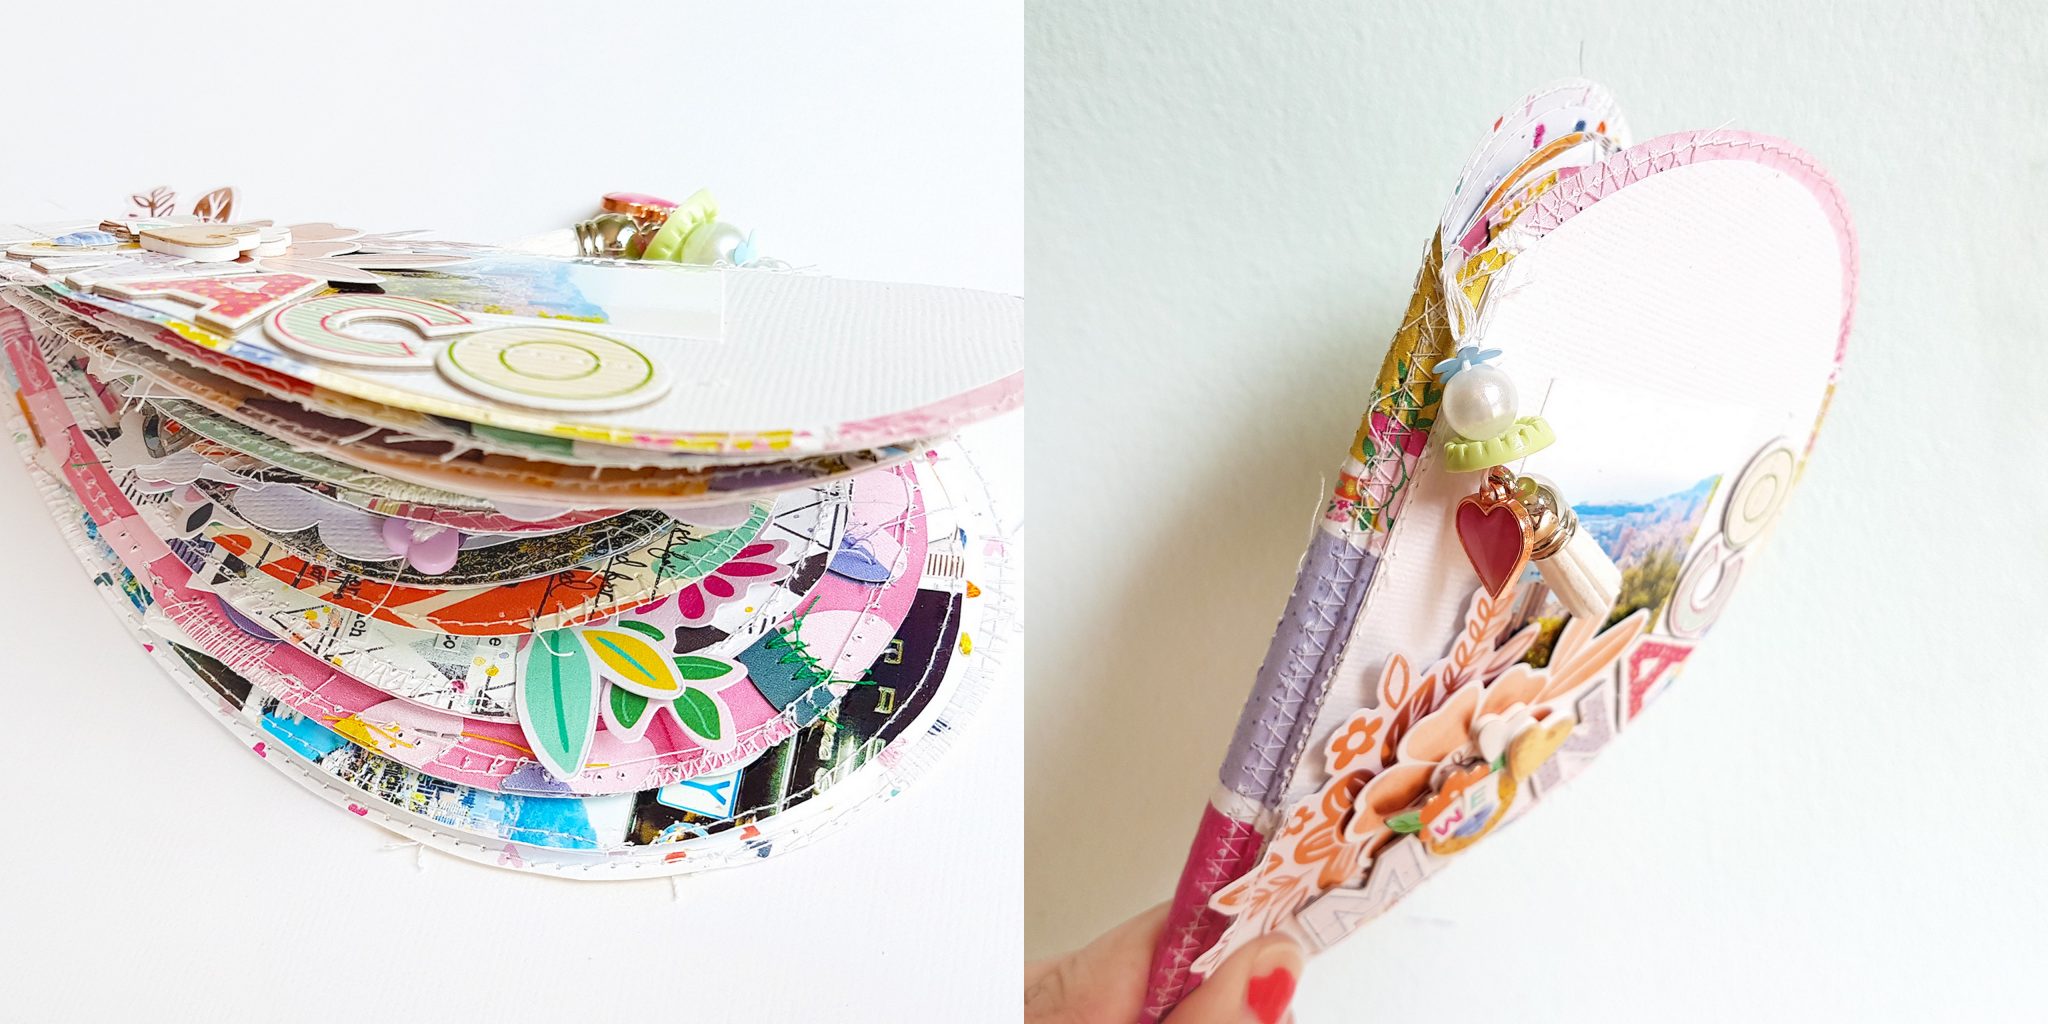
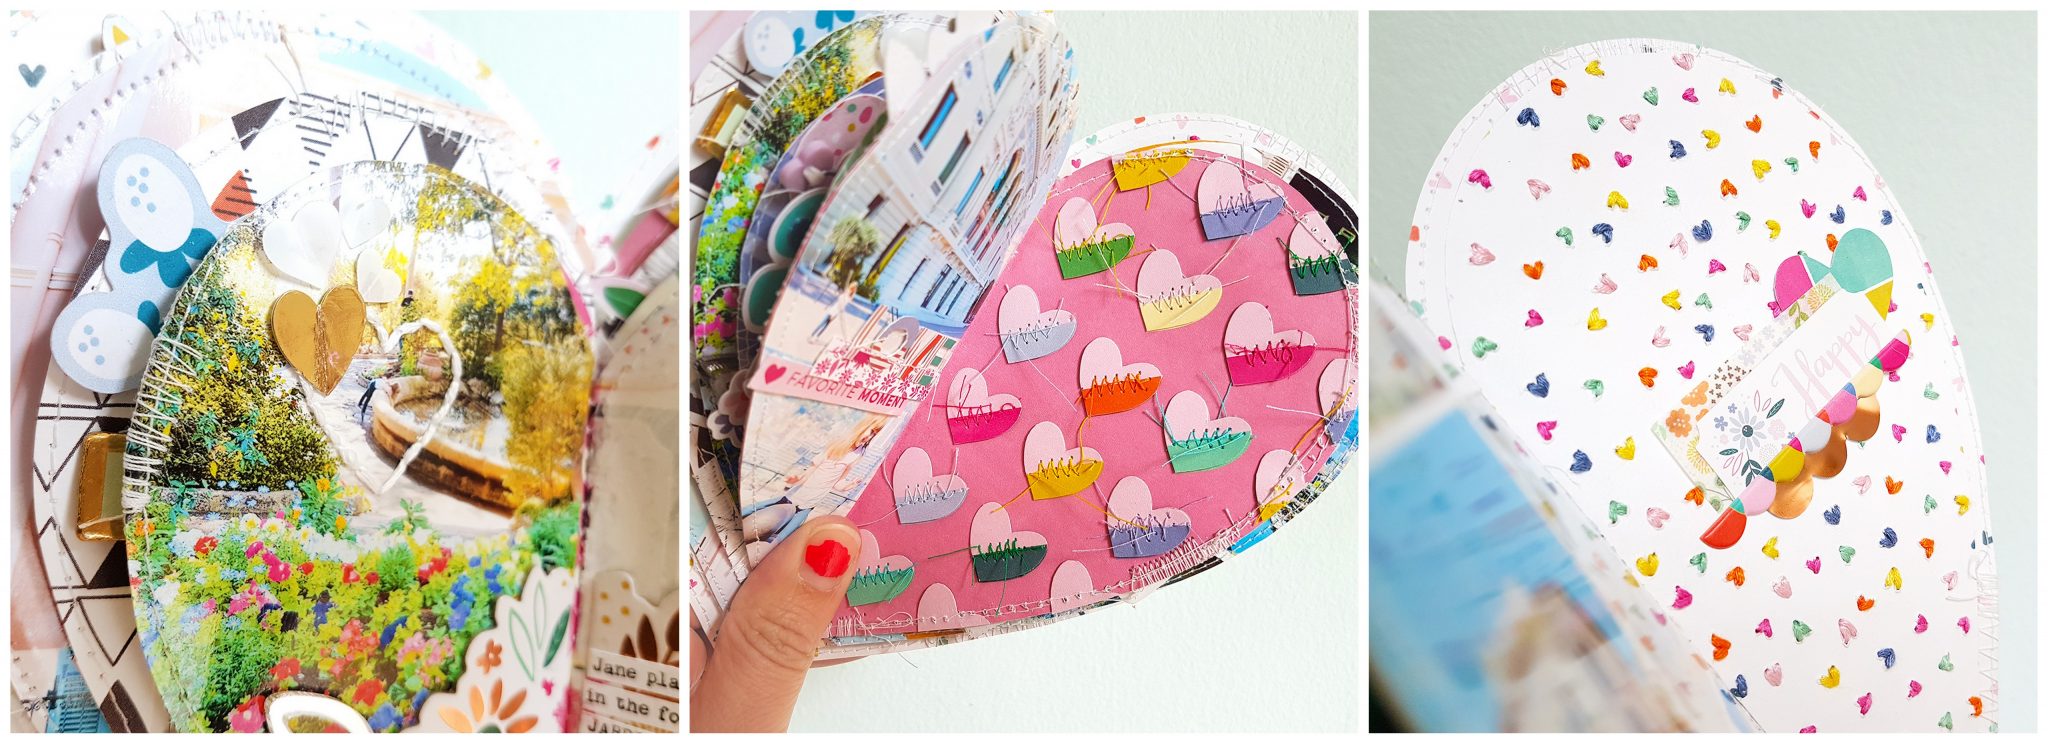
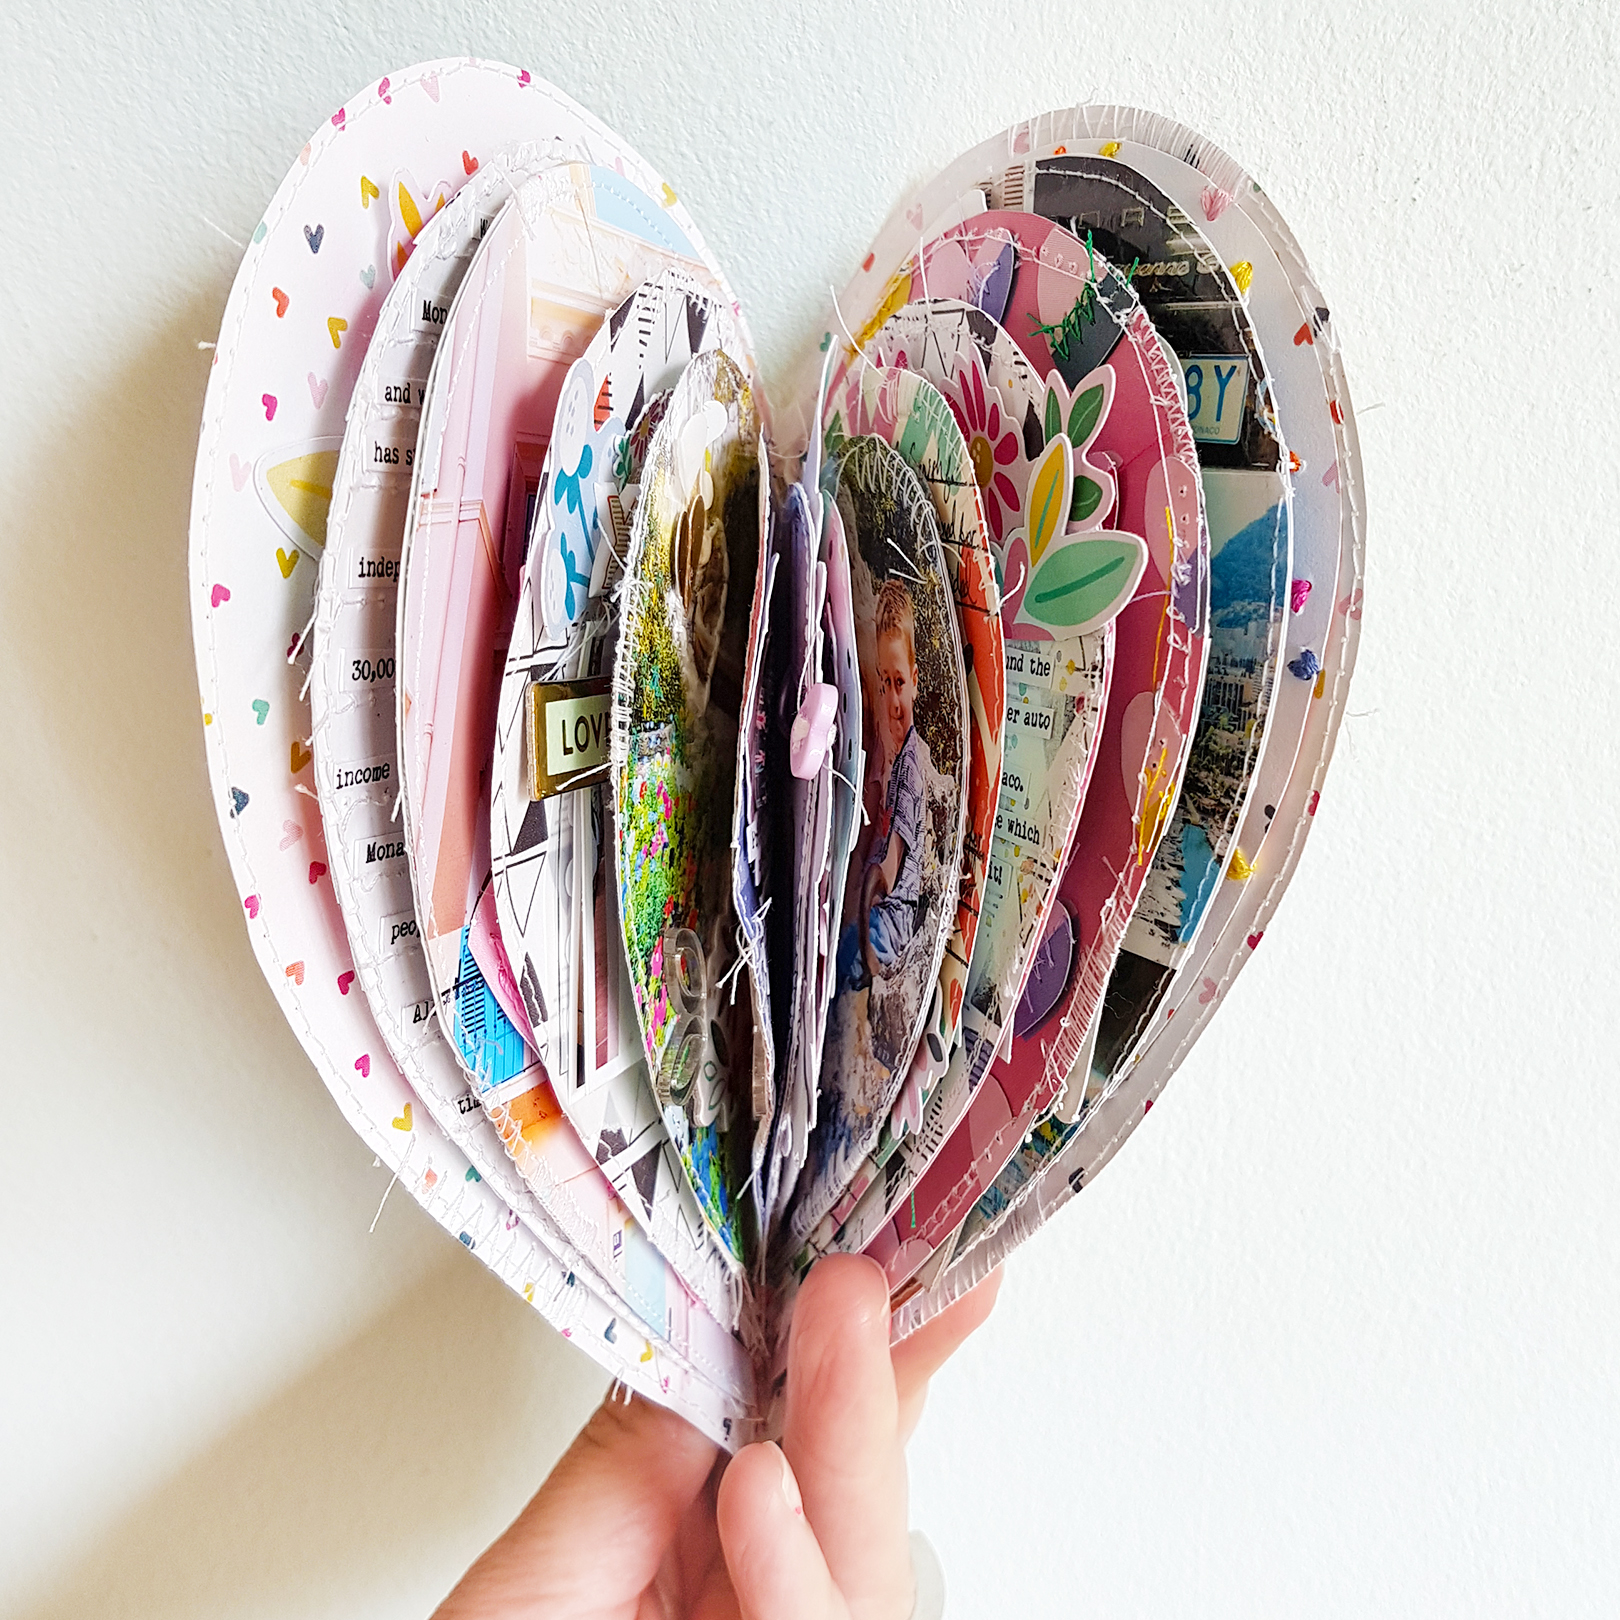
Details of some of the pages. Can you notice a theme? HEARTS, HEARTS, and MORE HEARTS!
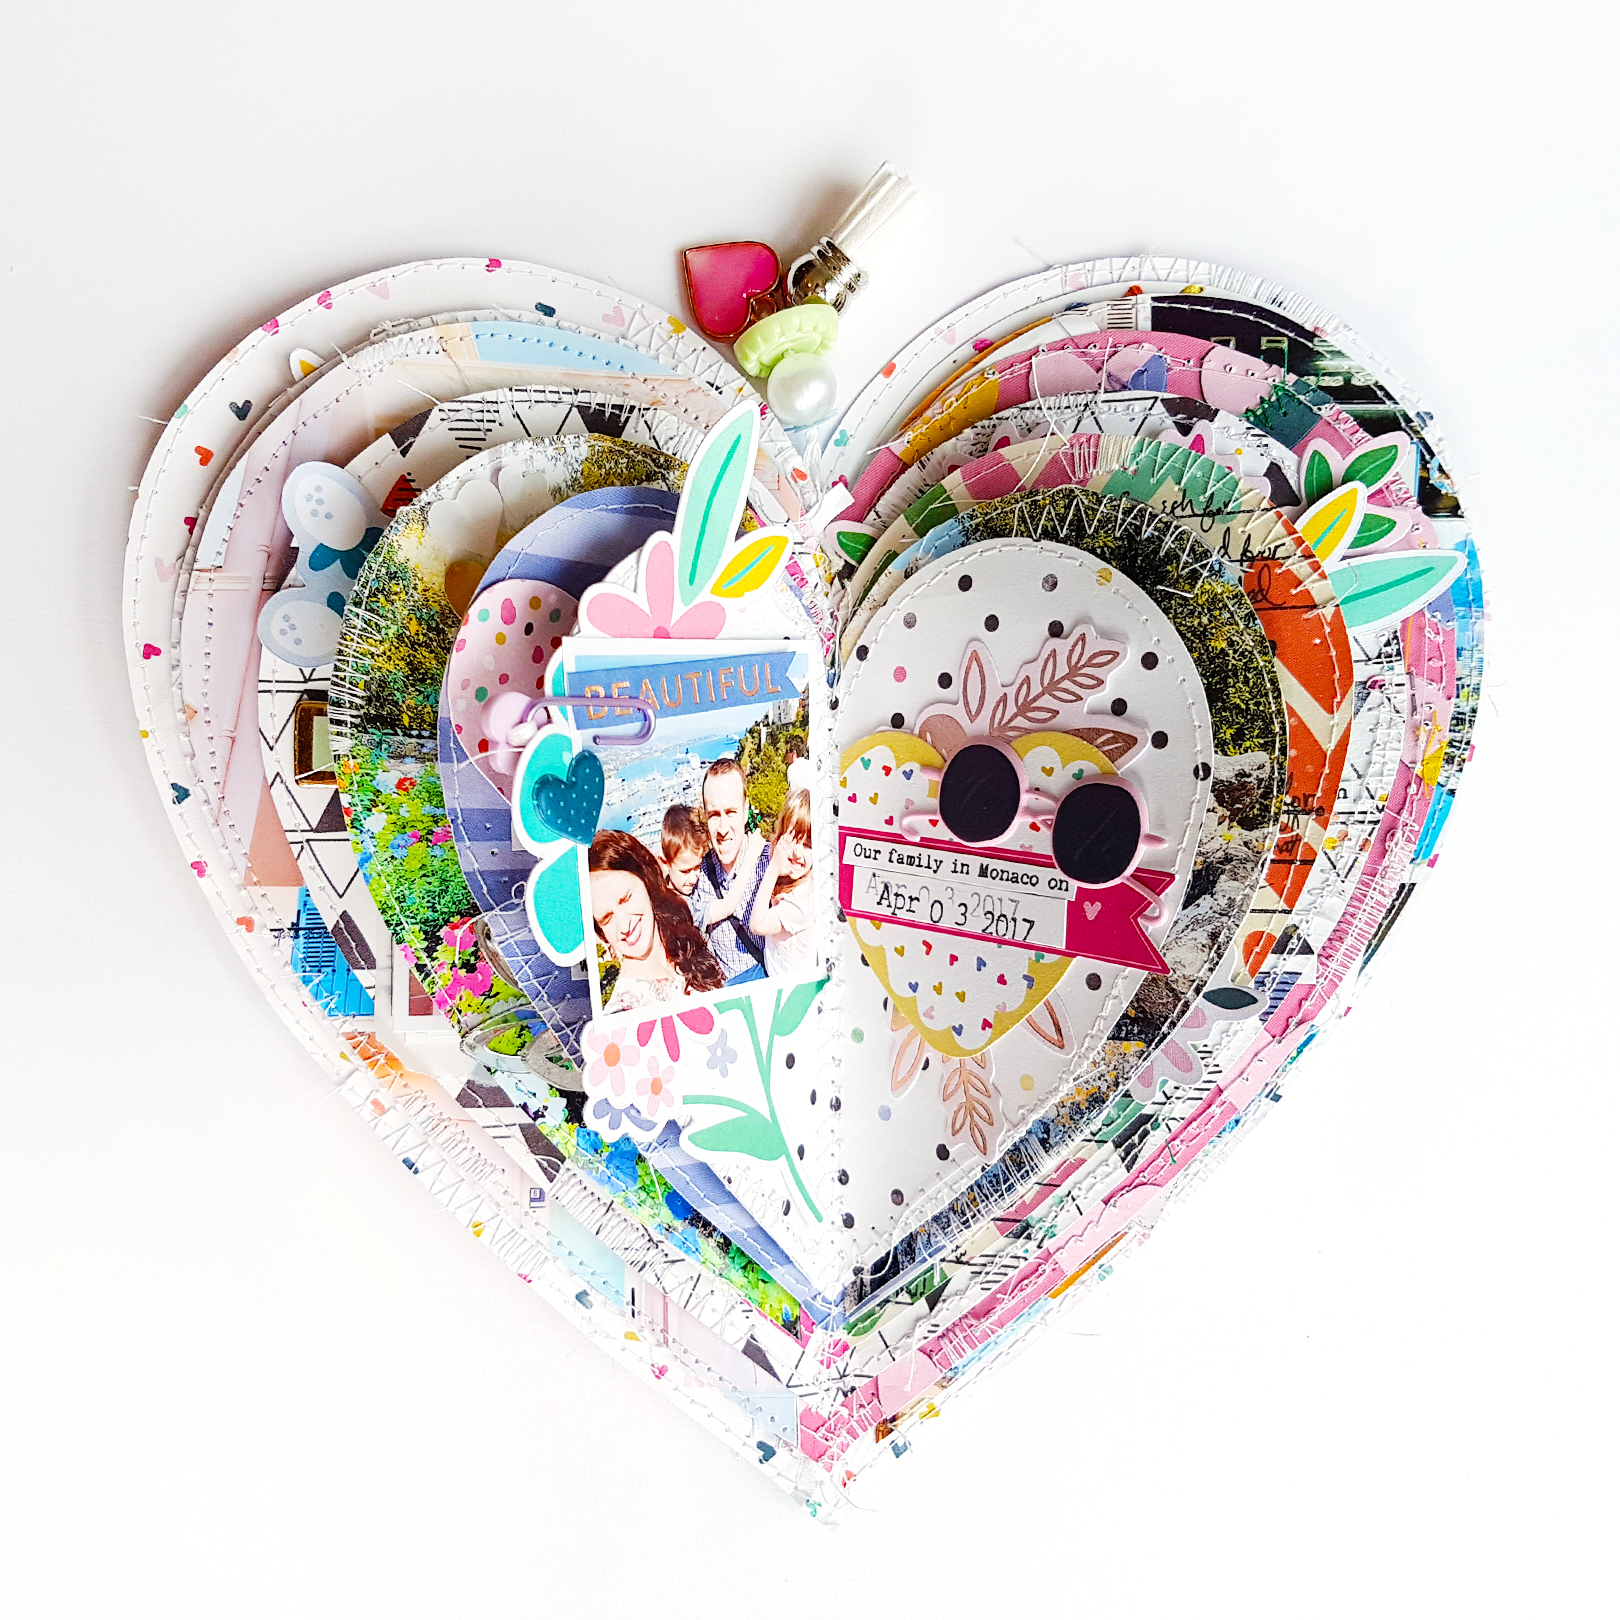
Here is the center spread - our family photo. It was very sunny, so the puffy sunglasses sticker fit the them perfectly!
I used a heart scalloped border punch by American Crafts and strips of vellum to create this textured page next to a full-page photo of the kids.
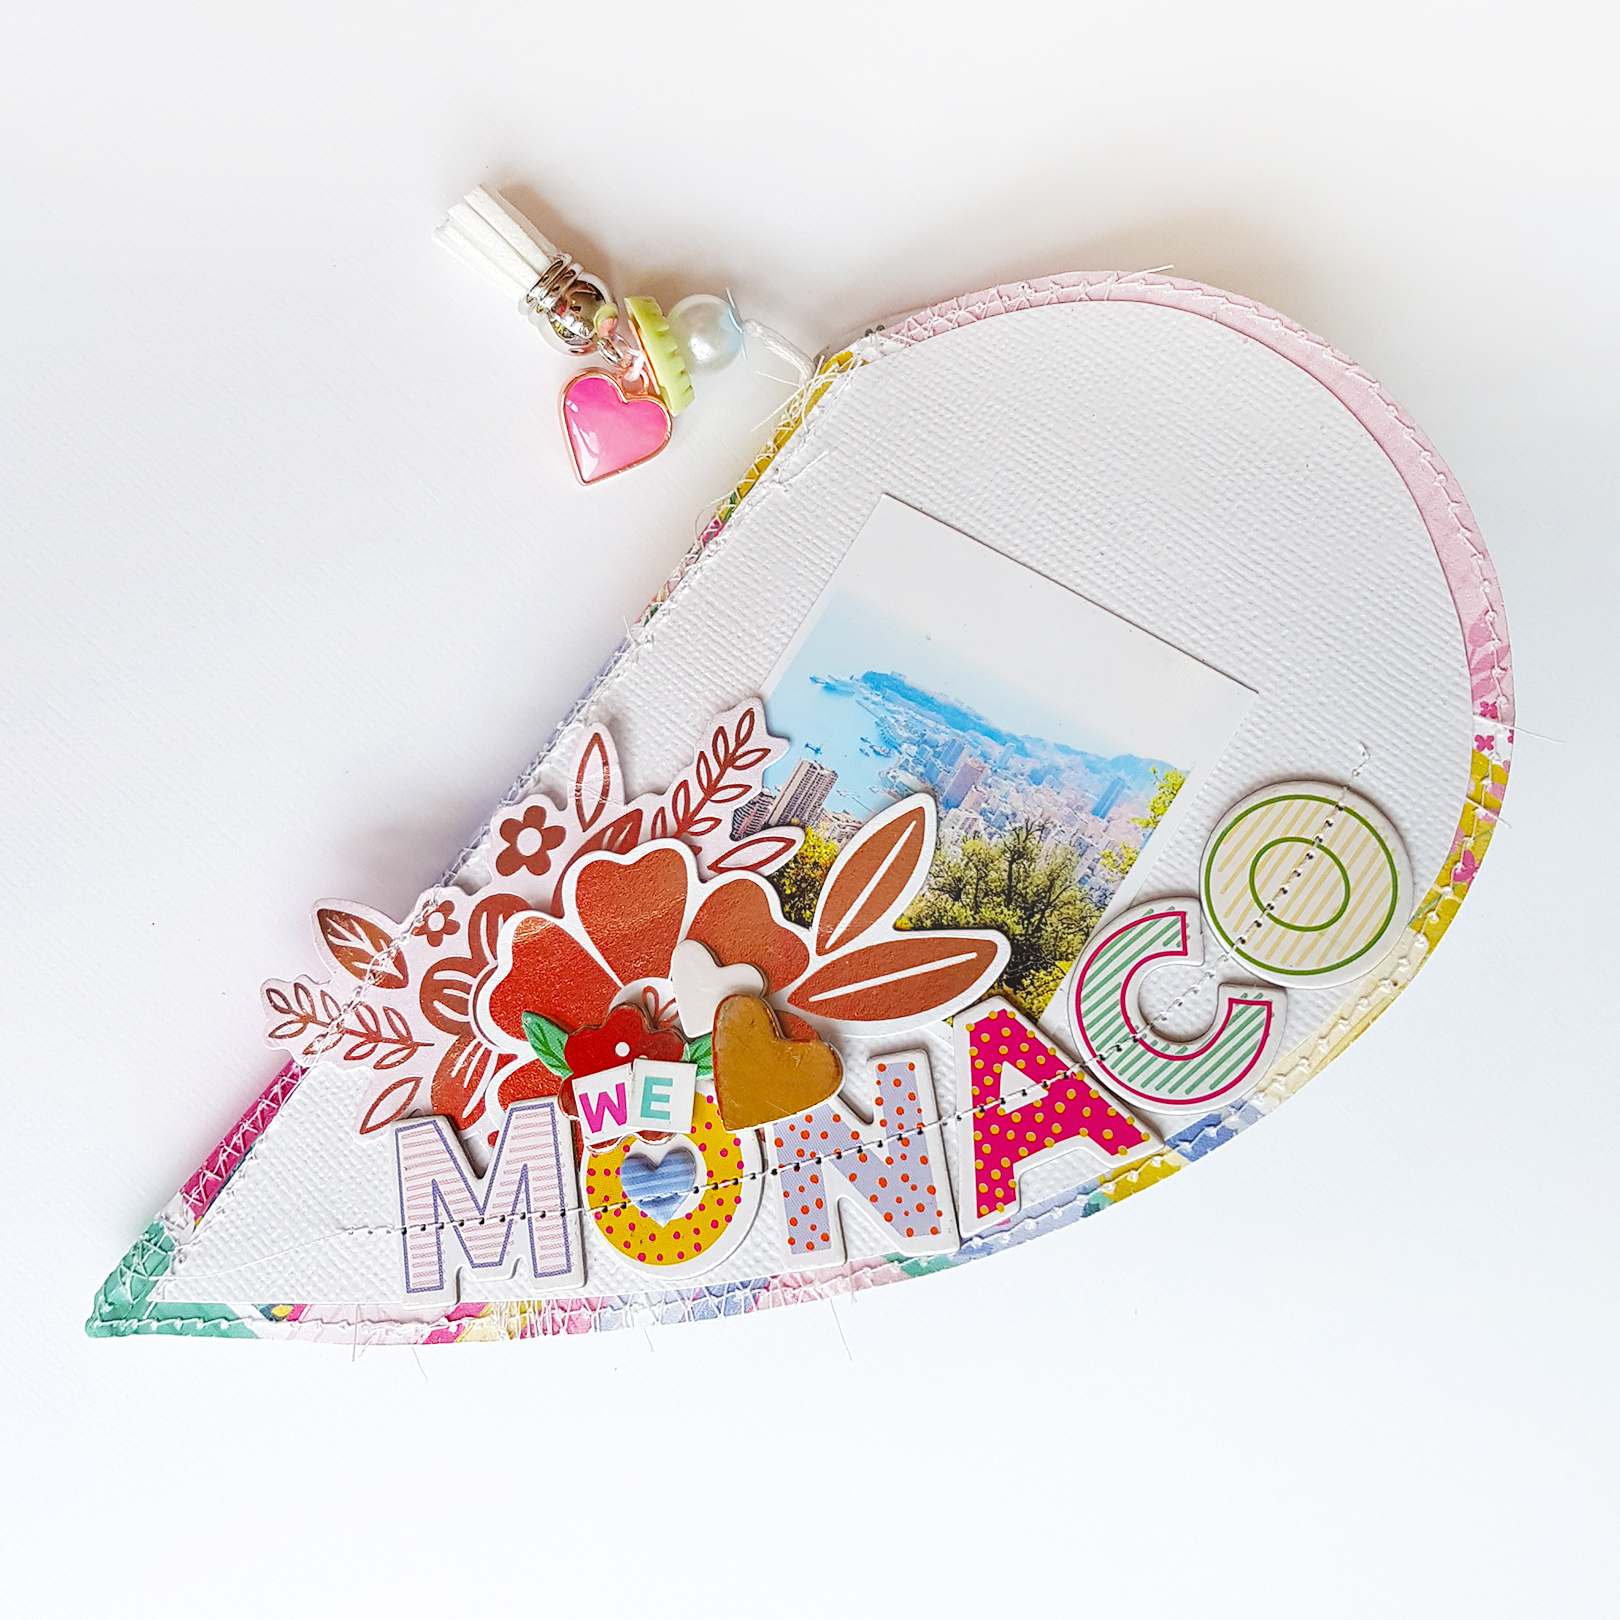
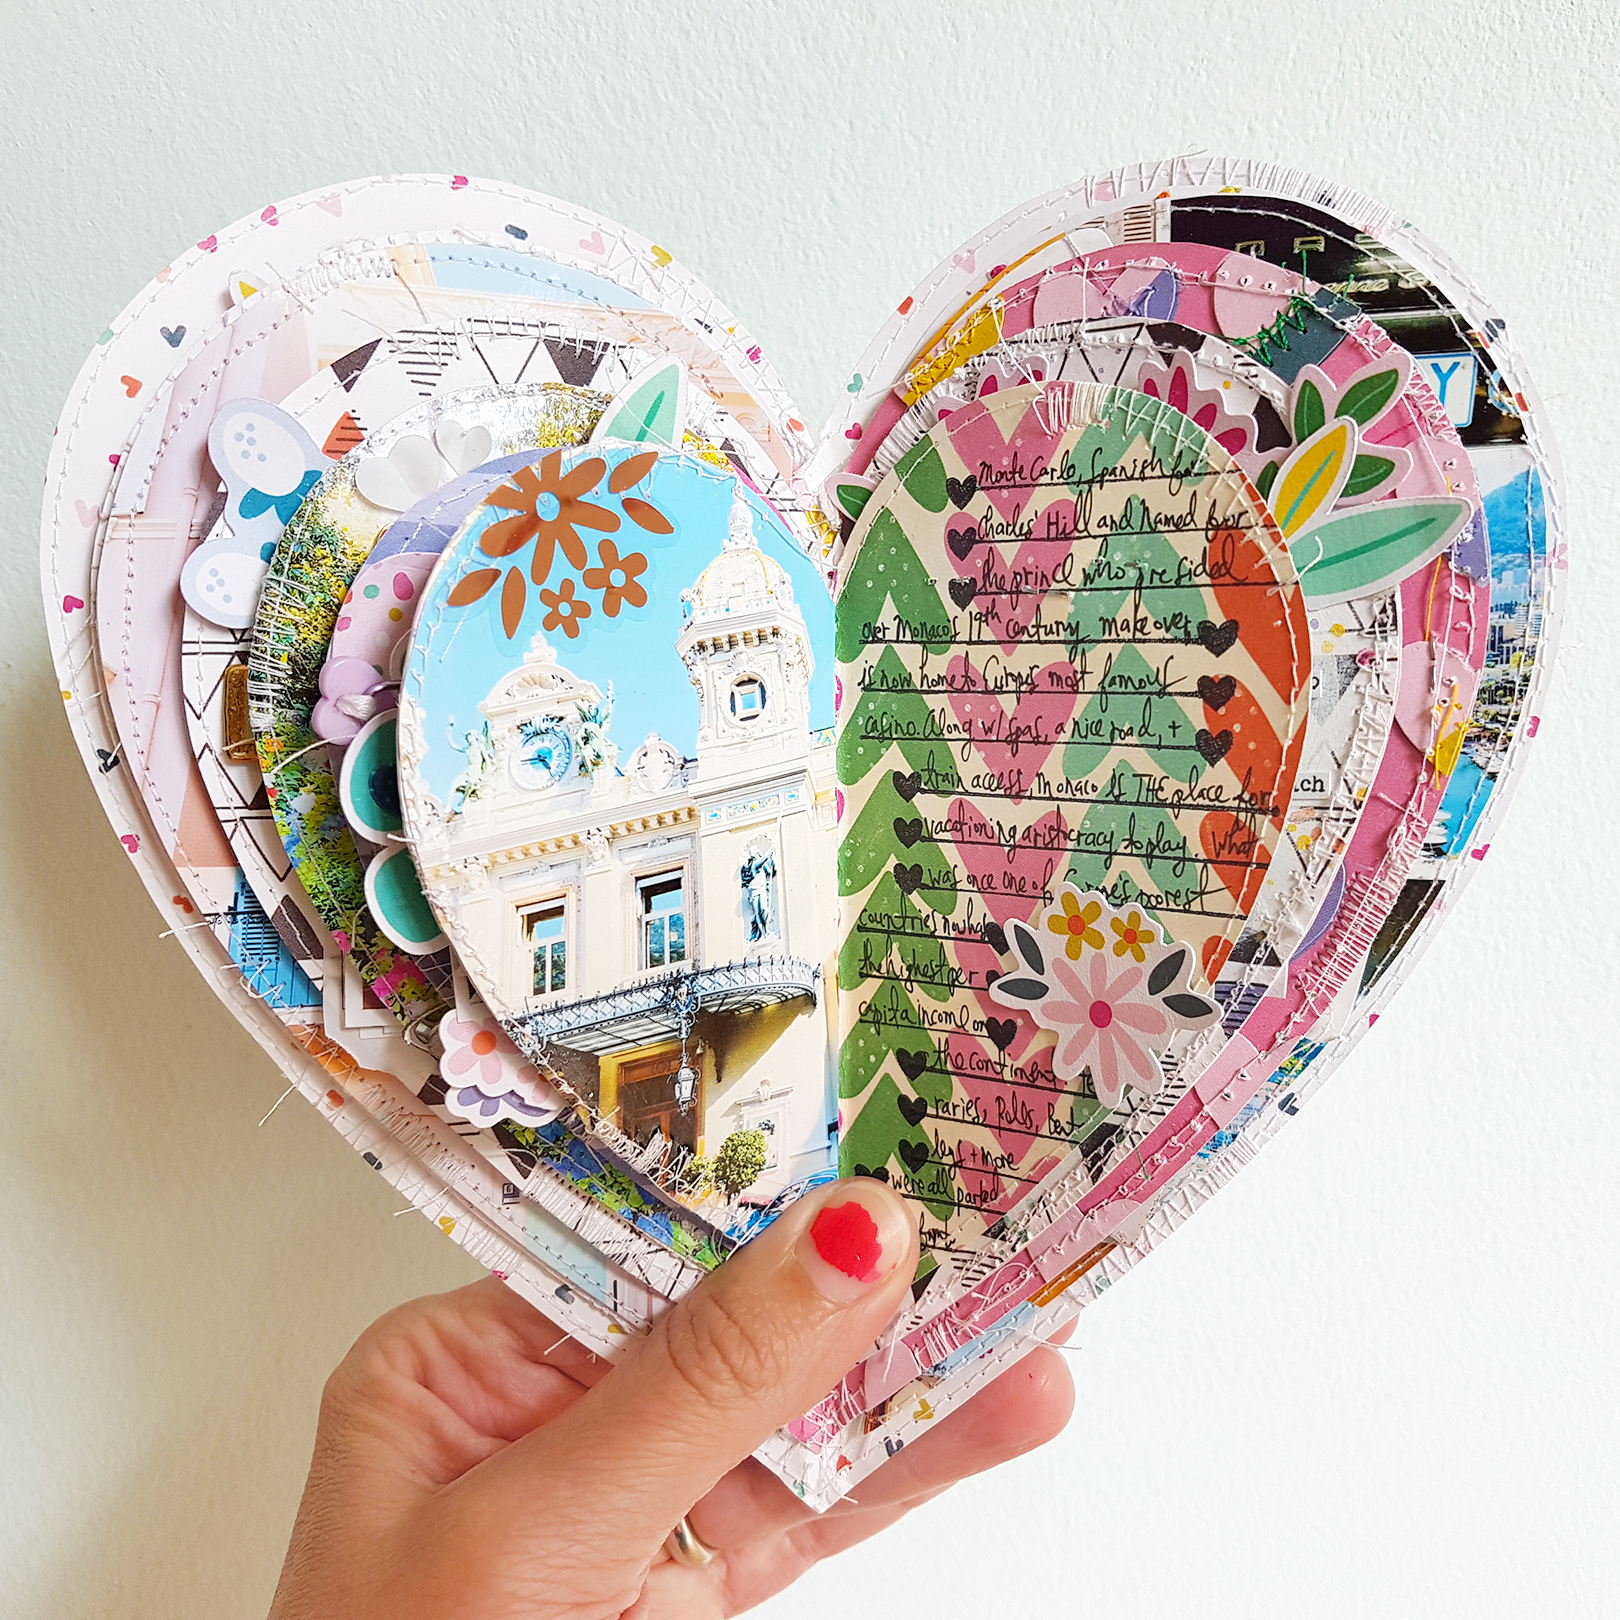
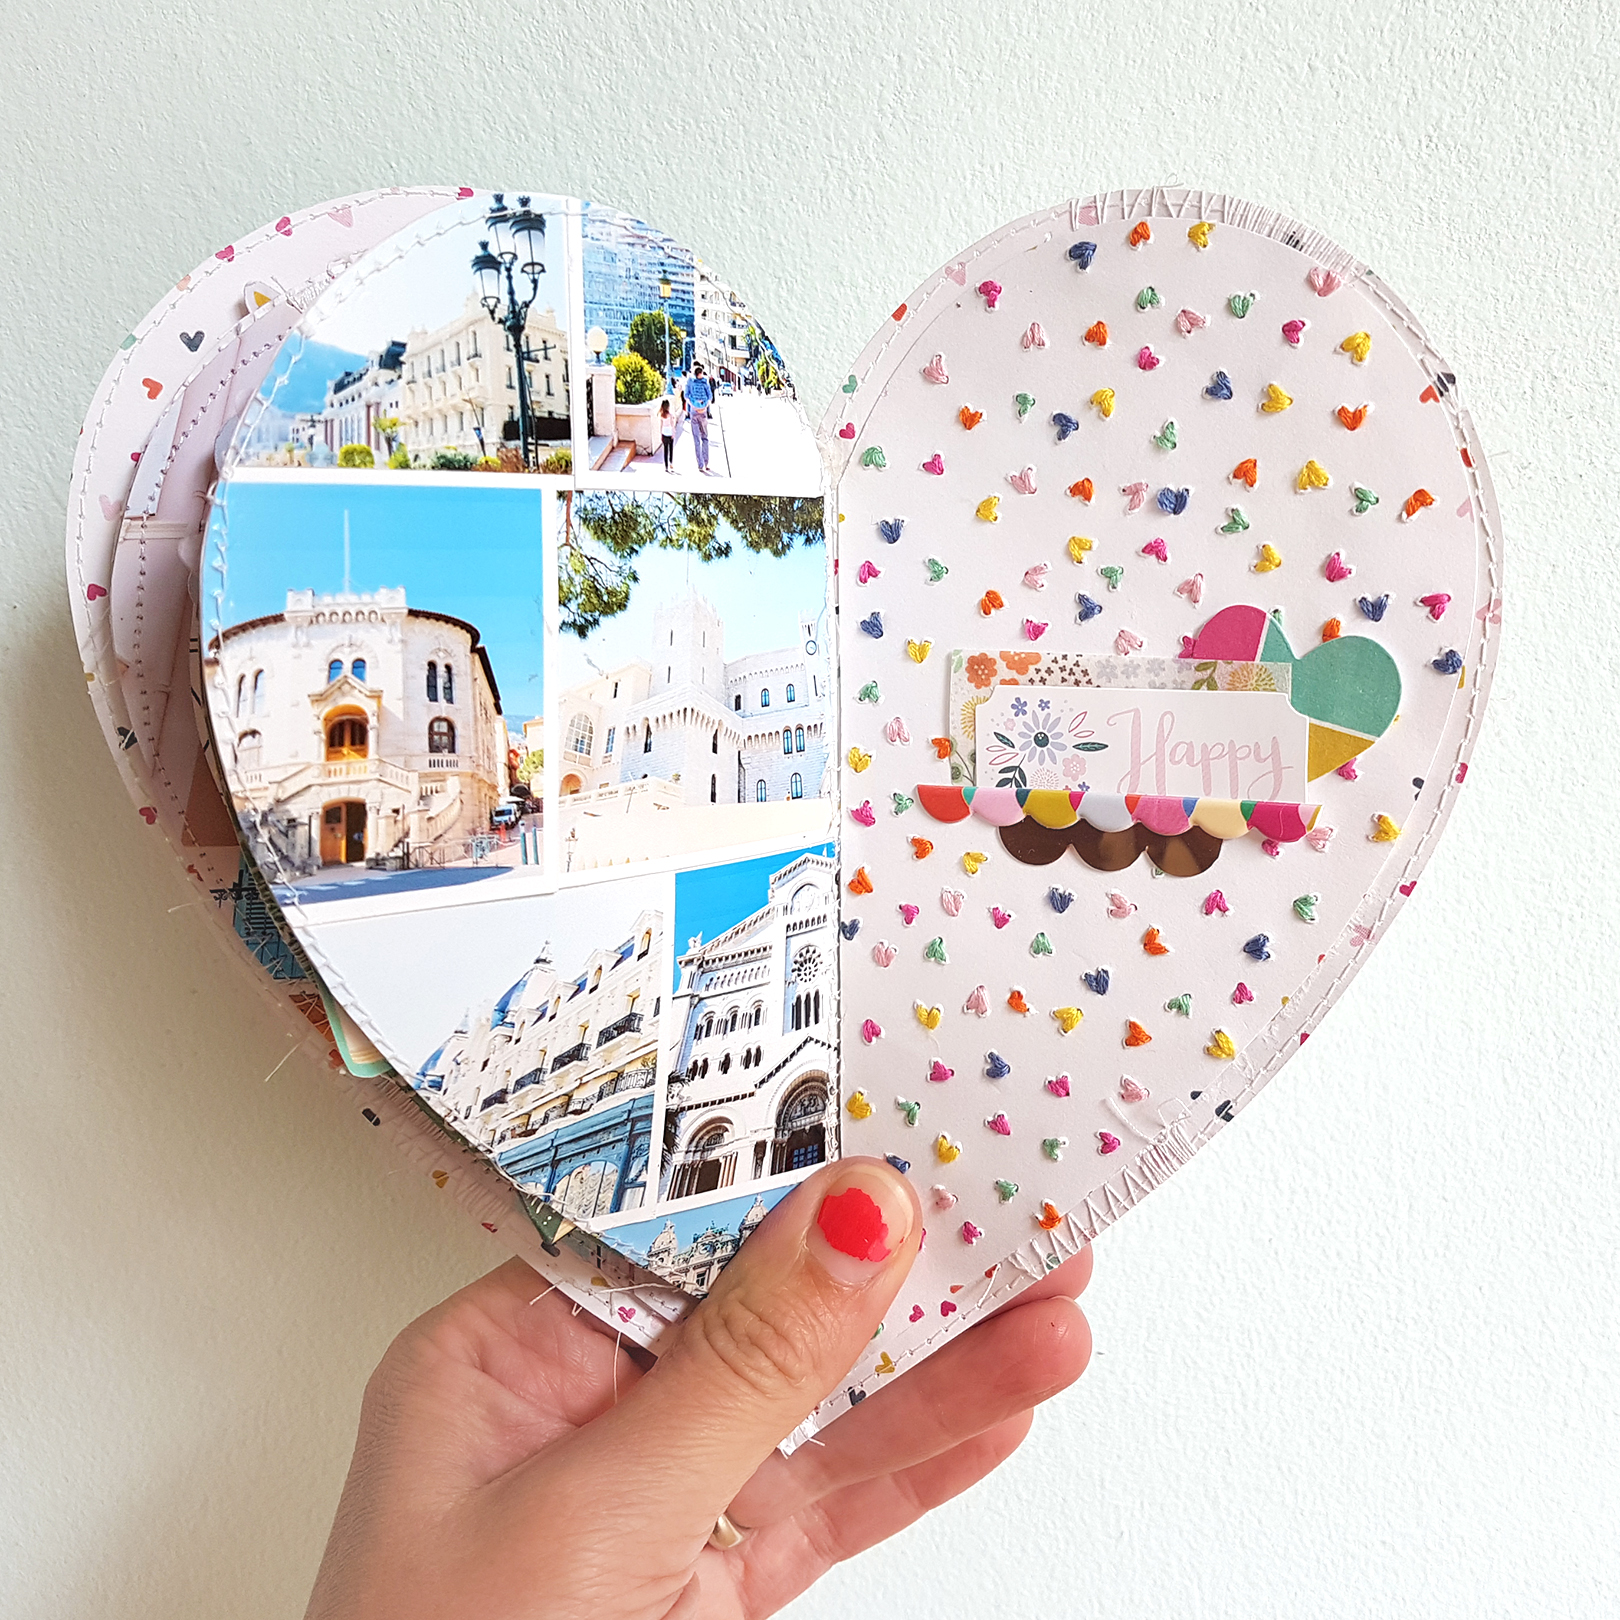
I was so excited to see the Monte Carlo so it needed its own spread. The journaling lines and heart stamps are from the Oh My Heart Acrylic Stamps.
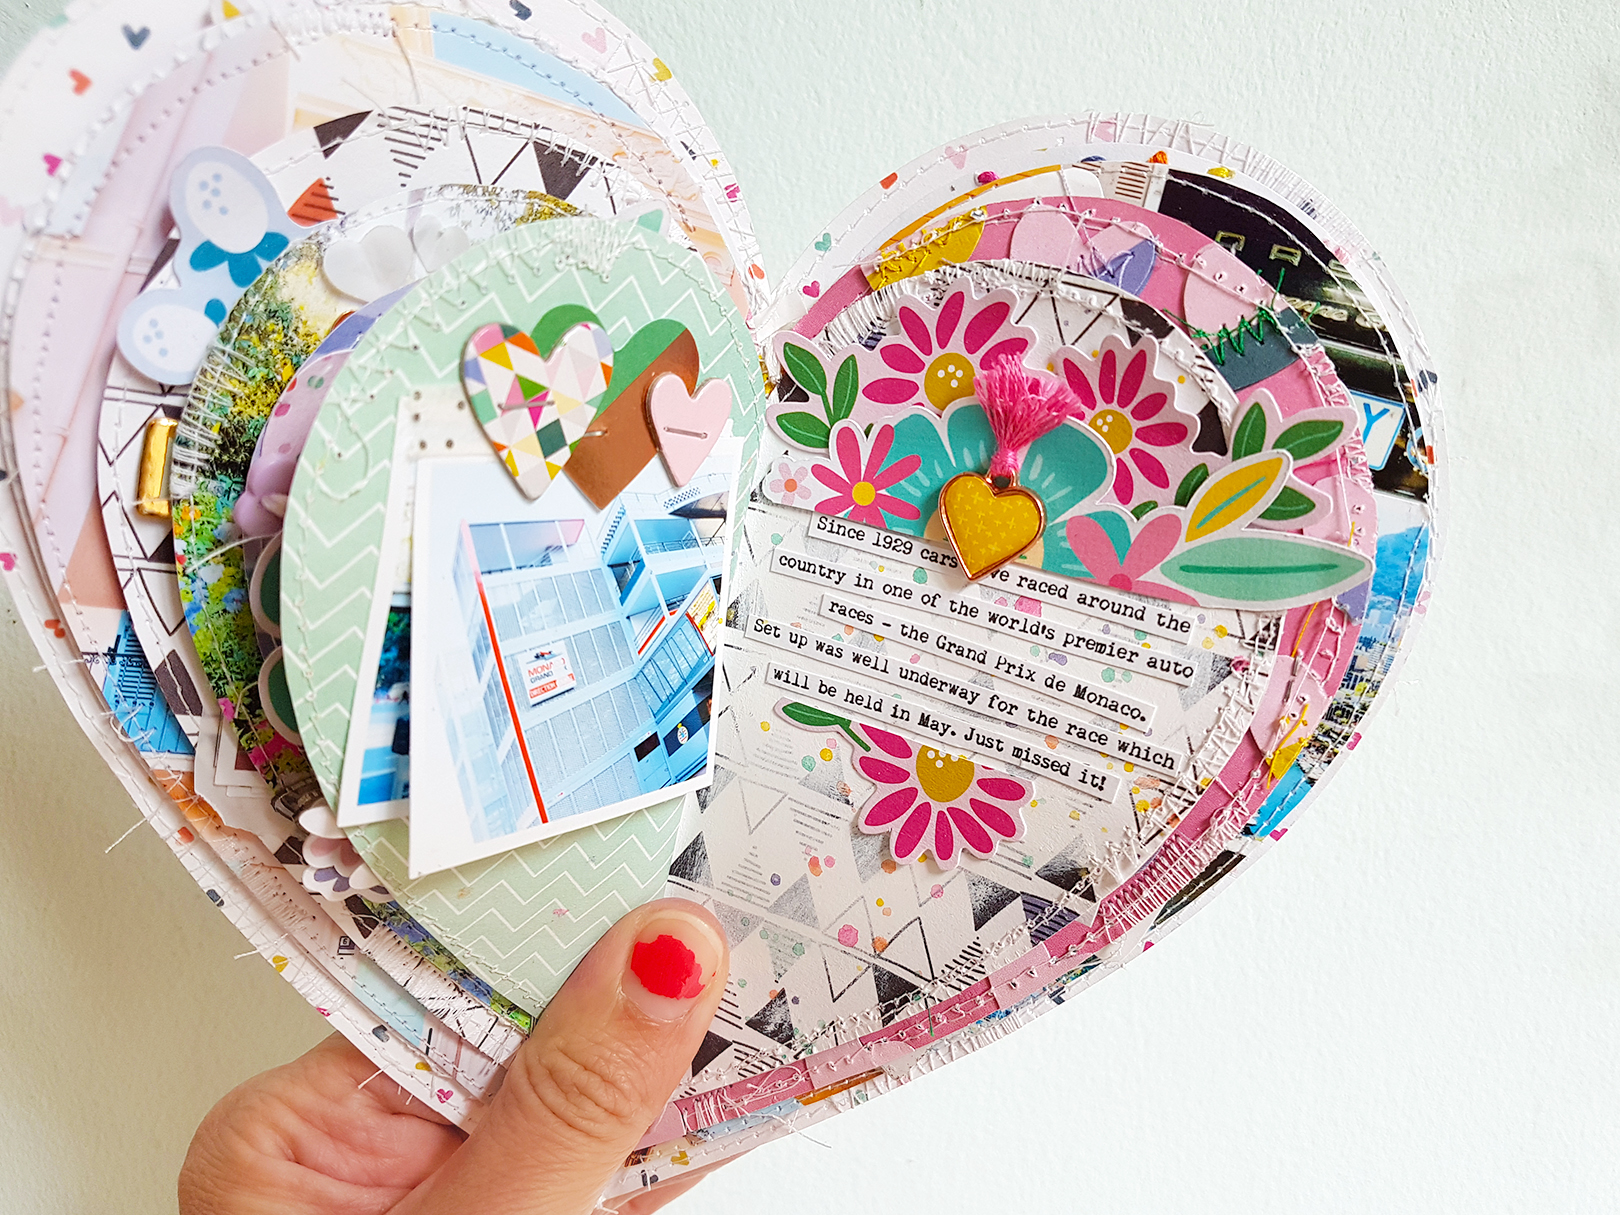
Another thing Monaco is famous for is the Grand Prix race so that needed its own spread too! Lots of hearts and flowers, the usual ;) Oh I also toned down the busy paper with white paint and added splashes of watercolor.
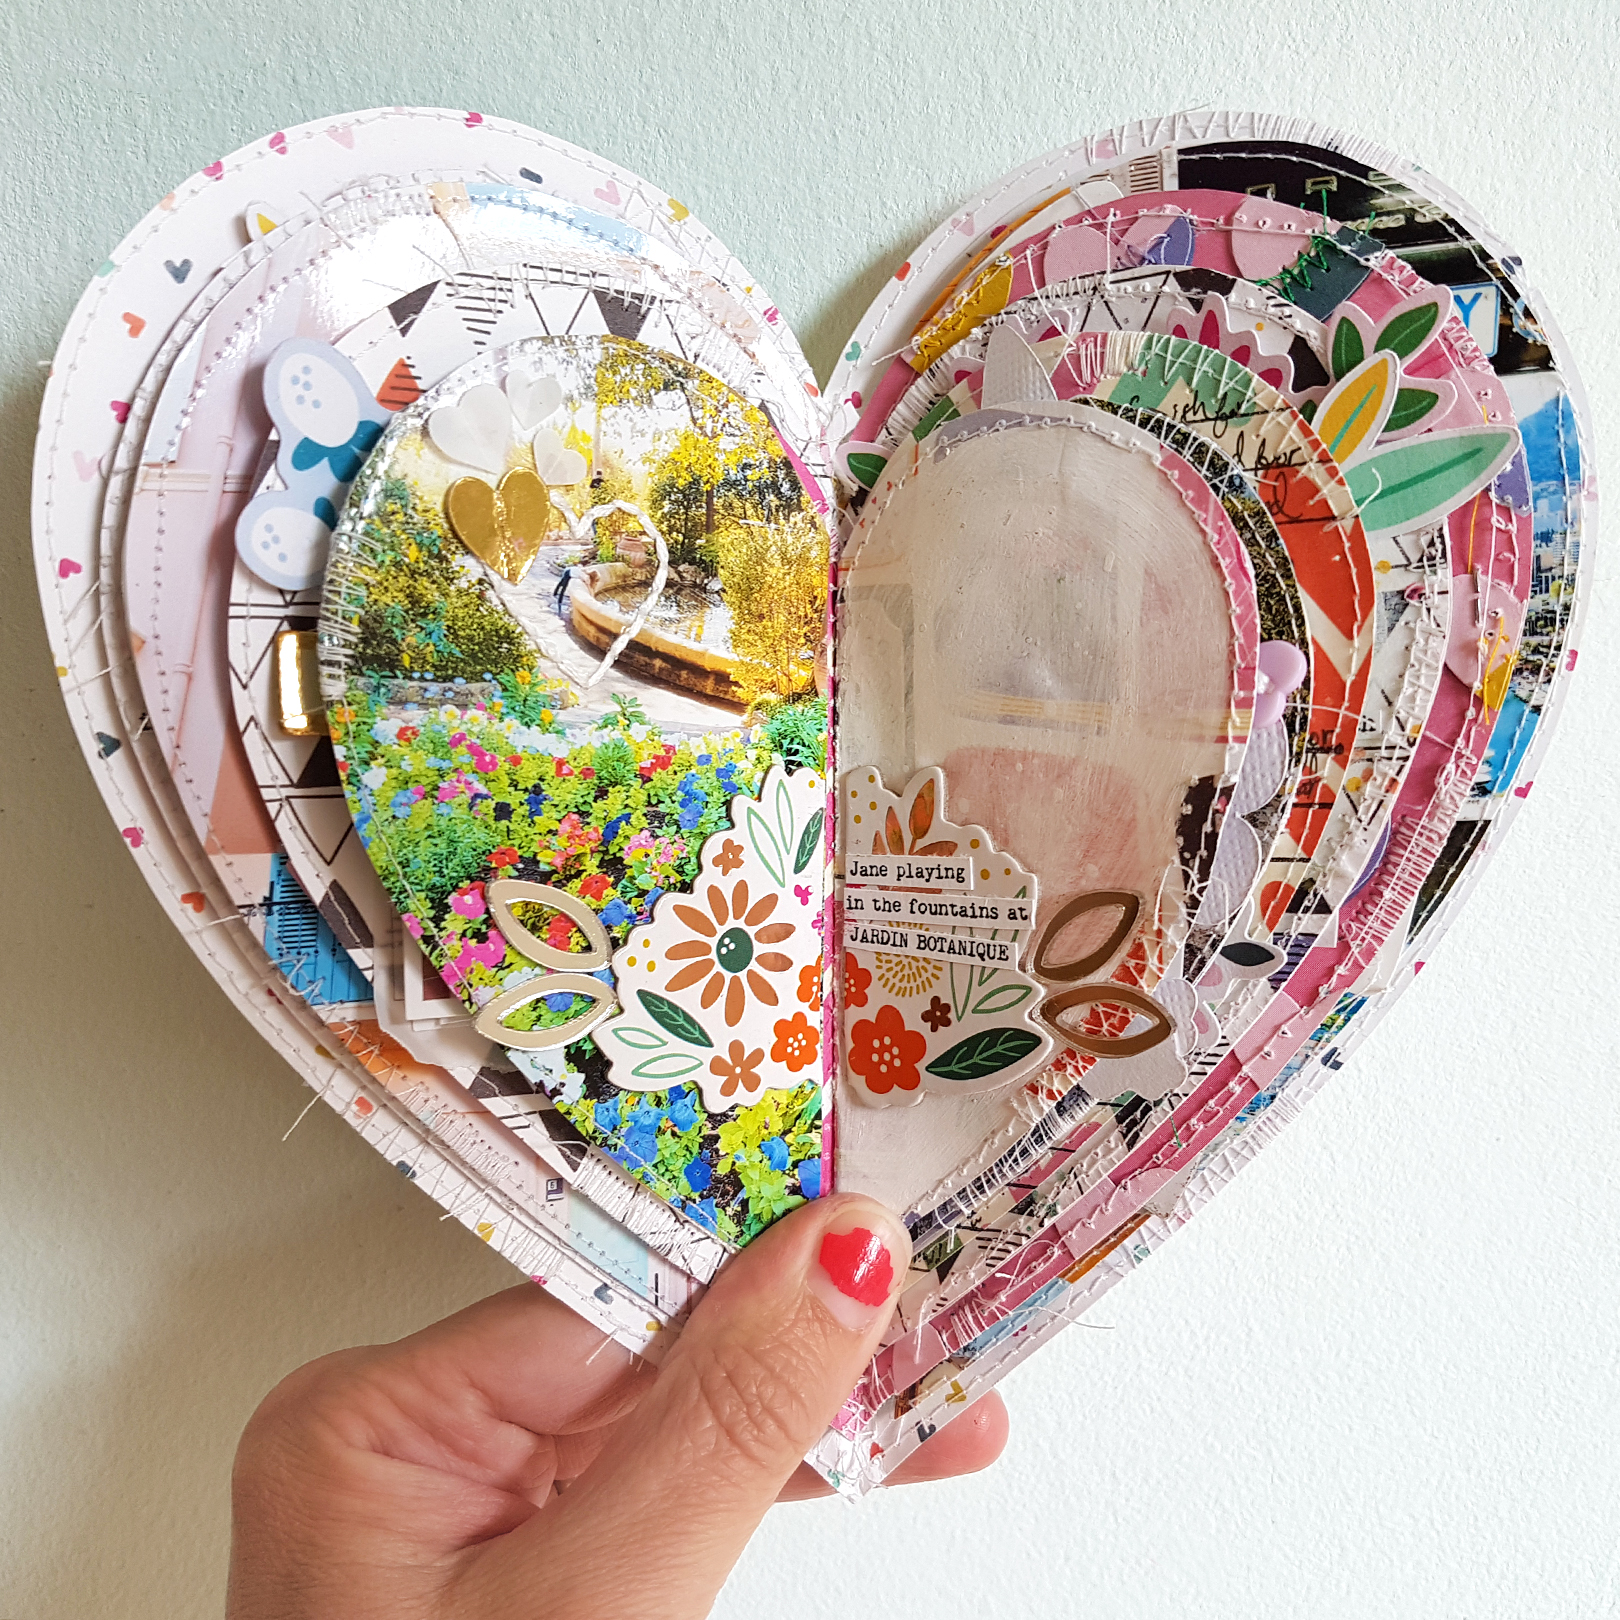
I made another two photo collage for the left full-page photo, added a few bits between, then on the right spread I fussy cut hearts from Paper 11, machined stitched through them with matching colored thread, then adhered them in place on their matching heart. I left the strings pretty long for fun!
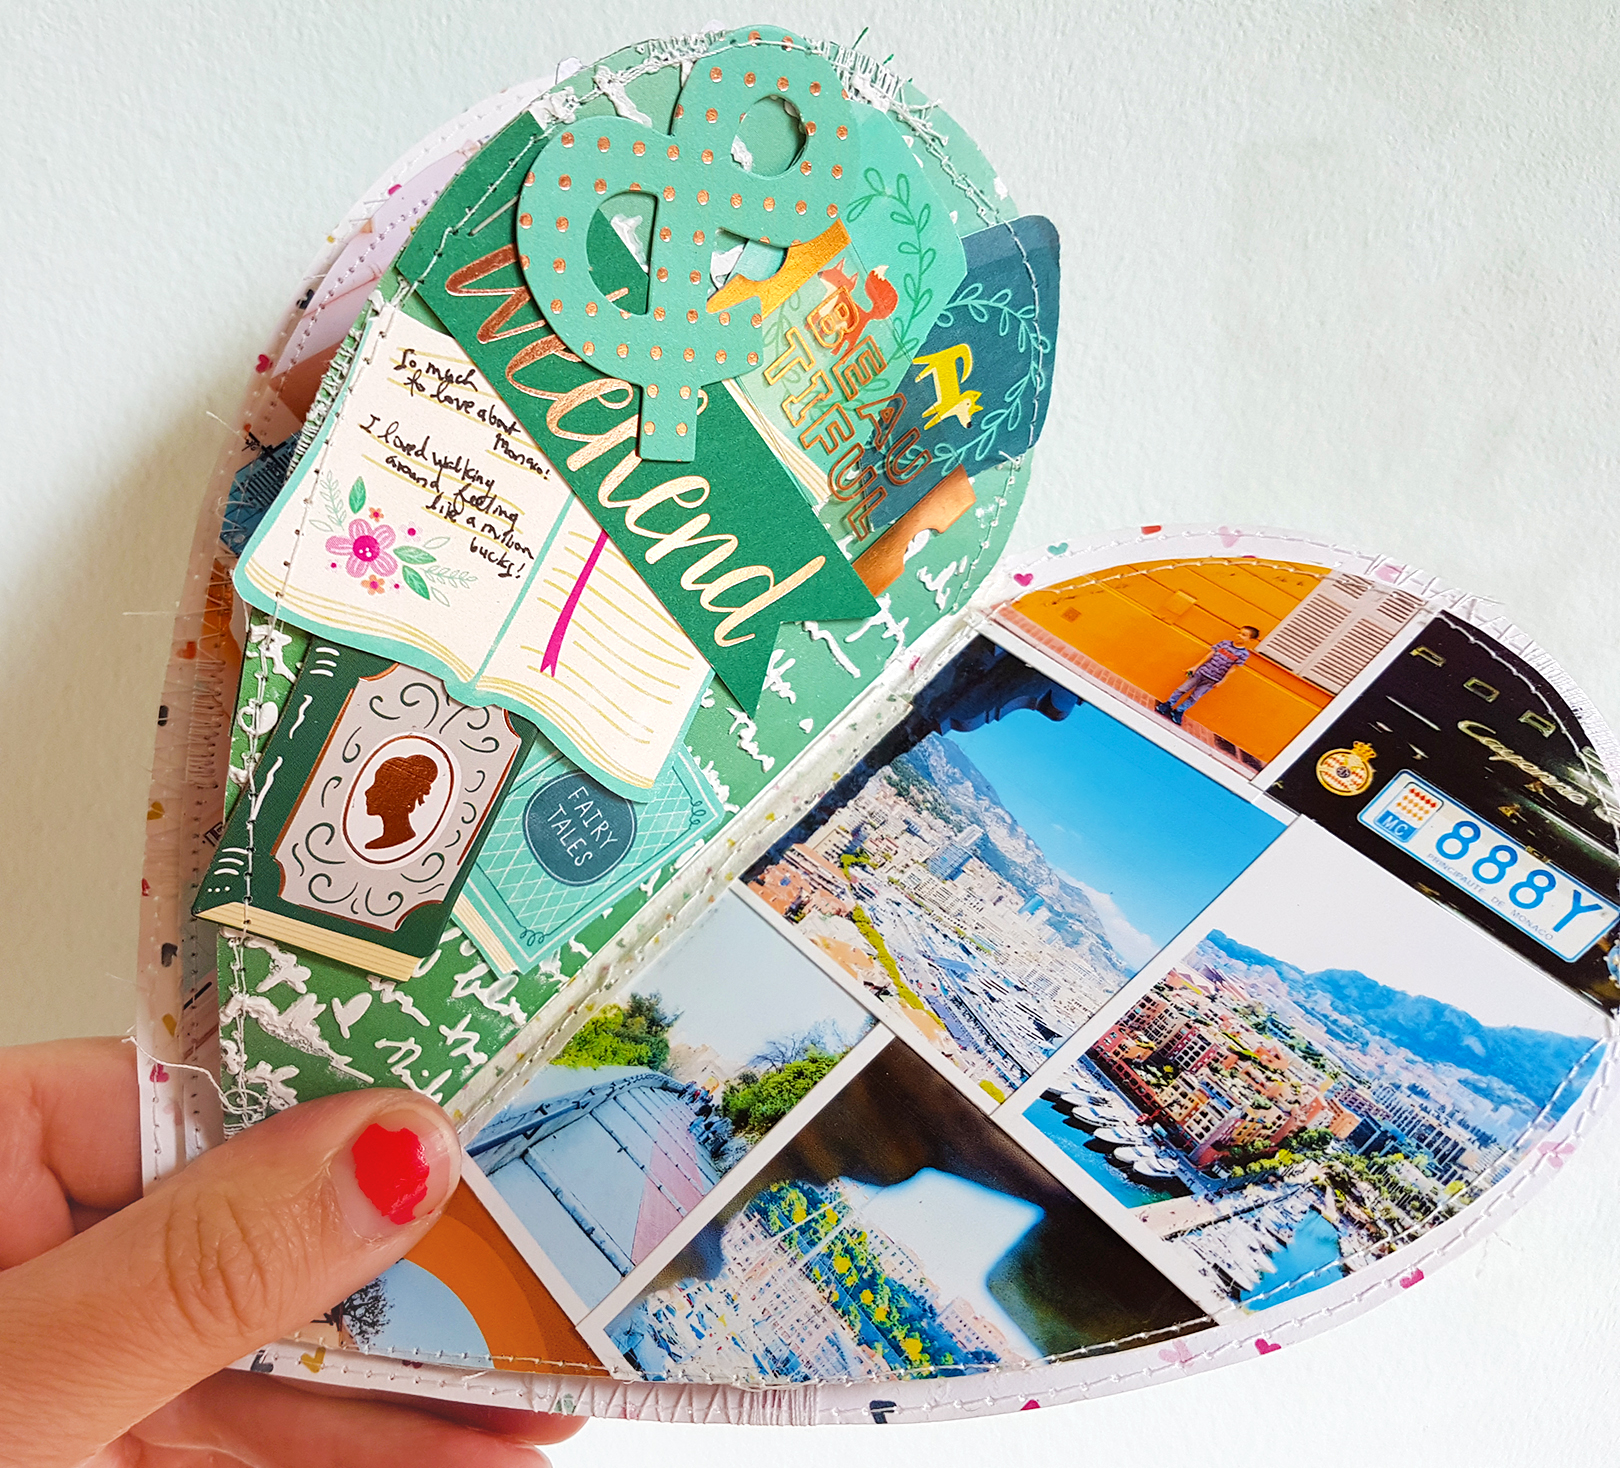
Here I used a Balzer Designs stencil and modeling paste to make the first layer and then piled on all the green embellishments to the left side. The right side is a filler page - I cut a half heart from scratch paper and adhered all the leftover photos to the front and back. It was a little difficult to insert into the album, hence the messy machine stitching, but it's in there for good now and I love having this plethora of photos as the last page.
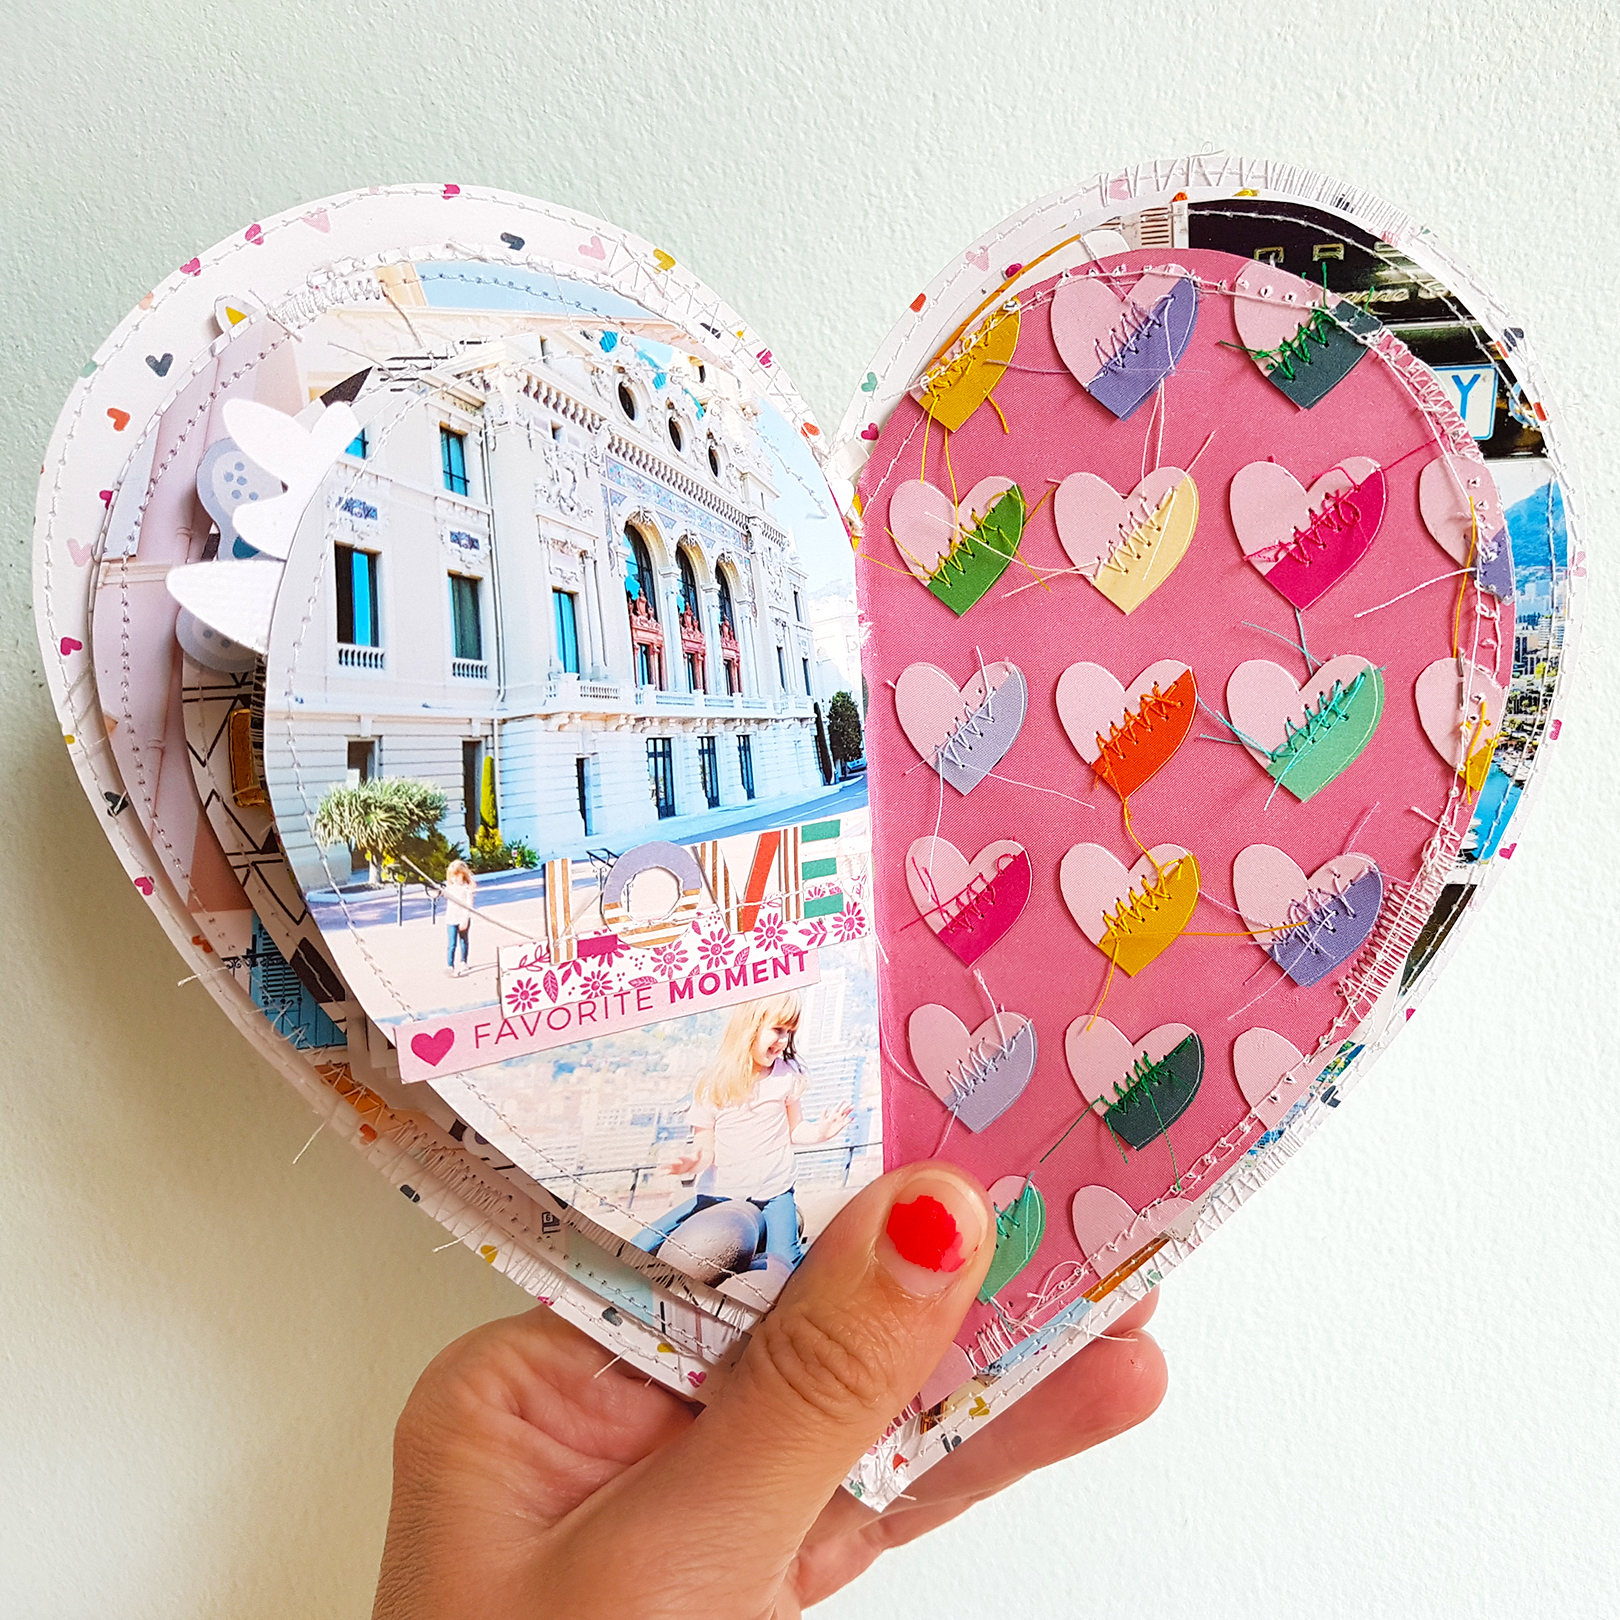
The other side of the photo collage on the left. On the right I cut a slightly smaller piece of Paper 21 and hand stitched through all the tiny hearts to create a really fun texture. I kept the embellishing minimal so the stitching could be the star of the show.
Another view.
If you haven't made many mini albums before, I hope you are inspired to give them a go! I admit I used to hate making them. Hate is a strong word I know... but they were so difficult! But the more I'm making them the more I'm loving them so I'm just gonna keep going down this mini album route until I'm inspired to go back to layouts!
And that my friends is the whole kit and caboodle! See you next time!
SUPPLIES: Patterned paper, die cuts, stickers, Thickers, charms, puffy stickers, buttons, pretty much everything: Paige Evans for Pink Paislee; Cardstock, pen, adhesive: American Crafts; Sewing machine: Brother; Thread: Coats & Clark; Embroidery floss: DMC; Die cut machine: Silhouette Cameo 3; Set of Nested Hearts cut file
SUPPLIES: Patterned paper, die cuts, stickers, Thickers, charms, puffy stickers, buttons, pretty much everything: Paige Evans for Pink Paislee; Cardstock, pen, adhesive: American Crafts; Sewing machine: Brother; Thread: Coats & Clark; Embroidery floss: DMC; Die cut machine: Silhouette Cameo 3; Set of Nested Hearts cut file


Love love love love this! LOVING the shape, the colors, the photos, and the stitching! AND loving how you added that arrow pointing to the Prince!!! So COOL indeed!!!!!!!!!!!!!!!!!
ReplyDeleteI love your style. Thank you for sharing.
ReplyDeleteDebora
I loved this album and just as a good scrapbook should do, I am ready to pack my bags to Monte Carlo. Thanks for sharing this. One question, did you stitch it as you went along? I was wondering how you got all of that stitching in there after the base was stitched? Just confused a little. I am definitely going to try this one.
ReplyDeleteI did most of the stitching before stitching the album together :)
DeleteMuy Belloooo..
ReplyDeleteI absolutely love symbols of Love and would like to give this a try. What kind of paper was used for t the different heart shapes please
ReplyDeleteThis is all scrapbook paper :)
Delete