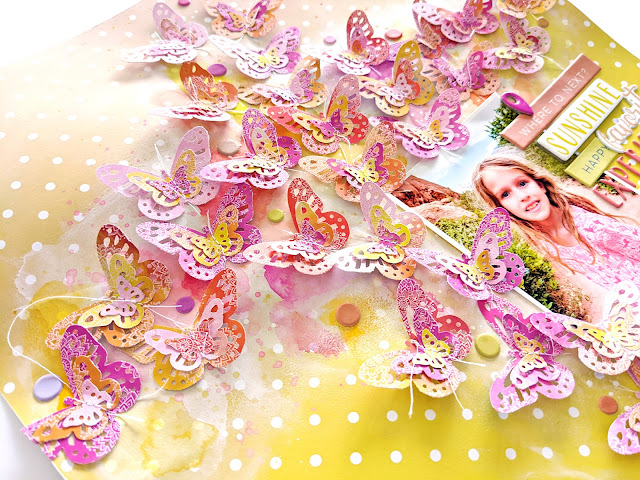
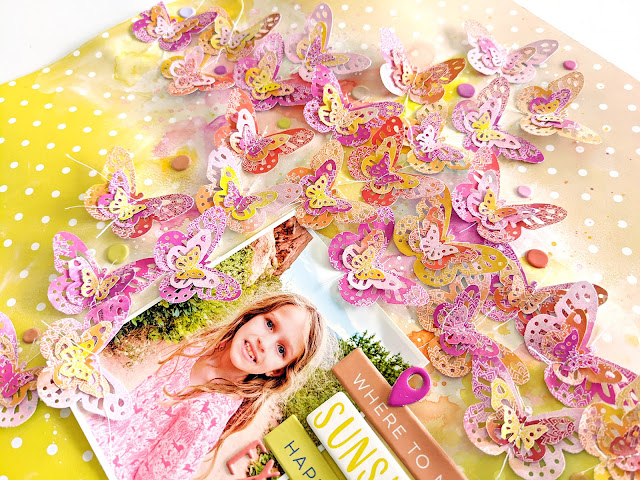
Hi there! I'm back with a new layout and process video using my Go the Scenic Route collection and 3 super old butterfly punches from Martha Stewart Crafts.
Here is the process video showing exactly how this layout came together from start-to-finish:
To start - I wanted to create something! Anything! So I walked over to the corner of my scrap room where I keep punches and was hoping to get inspired. It did the trick! I opened my drawer filled with butterfly punches and came across three similar butterfly punches, all by Martha Stewart Crafts - all very very old and I can only find them on ebay and amazon and the likes now.
I grabbed a piece of Paper 6 with the warm colored splotches topped with mandalas on the B-side and got to work punching a bunch of butterflies from it in all three sizes - large, medium, and a small butterfly made from just one of the three butterflies of the butterfly border punch, which I fussy cut to get it completely trimmed out.
I layered the three sizes of butterflies together with liquid glue between the layers to hold them together. I made a total of 28 butterflies. Then I machine stitched through them to make sure they stay together permanently and also to add a fun texture. Now what to do with them? That's always the hardest part for me - I just spent quality time making them, now how to feature them in the best way possible?
I tinkered around with the placement of the butterflies across the polka dot ombre yellow B-side of Paper 14 but couldn't find an arrangement I liked right there and then, so I switched gears to doing mixed media work on the background.
First I grabbed white gesso and smudged it across the background in a "+" shape and let it dry. Then I dropped and splashed matching watercolors on top. I used Pastel Dreams and Tropicals watercolors by Prima followed by watered down white acrylic paint and a splashing of an orange from the Shimmering Lights watercolors for some sparkle.
Once the background dried, I brought in a photo of Jane from our visit to the Red Rocks this summer which is full of warm colors so it complements the layout, and then placed the butterflies around it also in a "+" shape to mostly cover the background but you still get hints of it peeking through between the butterflies.
To embellish, I didn't add too much, just a smattering of colored dots from the Puffy Phrase Stickers in the gaps between some of the butterflies (again, sticking with only the warm colors) and then created a mixed, long title from Puffy Phrase Stickers, a sentiment from the Chipboard Stickers, and a geotag also from the Chipboard Stickers.
For the journaling, I trimmed off the top of a round yellow journaling spot from the Ephemera Die Cuts, wrote on it with a dark purple pen, and placed it under the title. I still need to stamp the date somewhere. But other than that, all done! I hope you are inspired by this layout to create punched & layered butterflies using a warm color palette from my Go the Scenic Route collection!
SUPPLIES: Patterned papers, stickers, die cuts, embellishments: GO THE SCENIC ROUTE; Butterfly punches: Martha Stewart Crafts; gesso; white acrylic paint; Watercolors: Pastel Dreams, Tropicals, Shimmering Lights; Sewing machine: Brother; Thread: Coats & Clark


This is STUNNING! LOVING those gorgeous butterflies and how well they match Jane's shirt!!!! GORGEOUS!
ReplyDelete