
Hello crafty friends! Amber Mitchell here on Paige’s blog today to share with you my first mini album of 2023 created with the Garden Shoppe collection!

Although this collection has a lot of fall elements, I used it here to create an overgrown garden theme to symbolize new growth for the new year!

The base of this album was made using medium weight chipboard. The measurements for these pieces are as follows: Front cover: 2.5 x 4.5 inches. Spine: 1.5 x 4.5 inches. Back Cover: 4.5 x 4.5 inches
I wrapped these pieces of chipboard using a multicolored woodgrain paper from the 12x12 Paper Pad. I love how this pattern features so many different colors! Next, I lined the inside of the base using a green sheet of paper with different styles of leaves printed on it. I chose this paper because it was simple, yet textured, which adds a fun pop to the album base itself.
I used a paper strap and velcro as a closure for this album. The strap measures 1.5 x 6 inches. I adhered one end to the back of my back cover then wrapped the rest of the strap around and adhered the other end to the front of the front cover using a velcro dot.

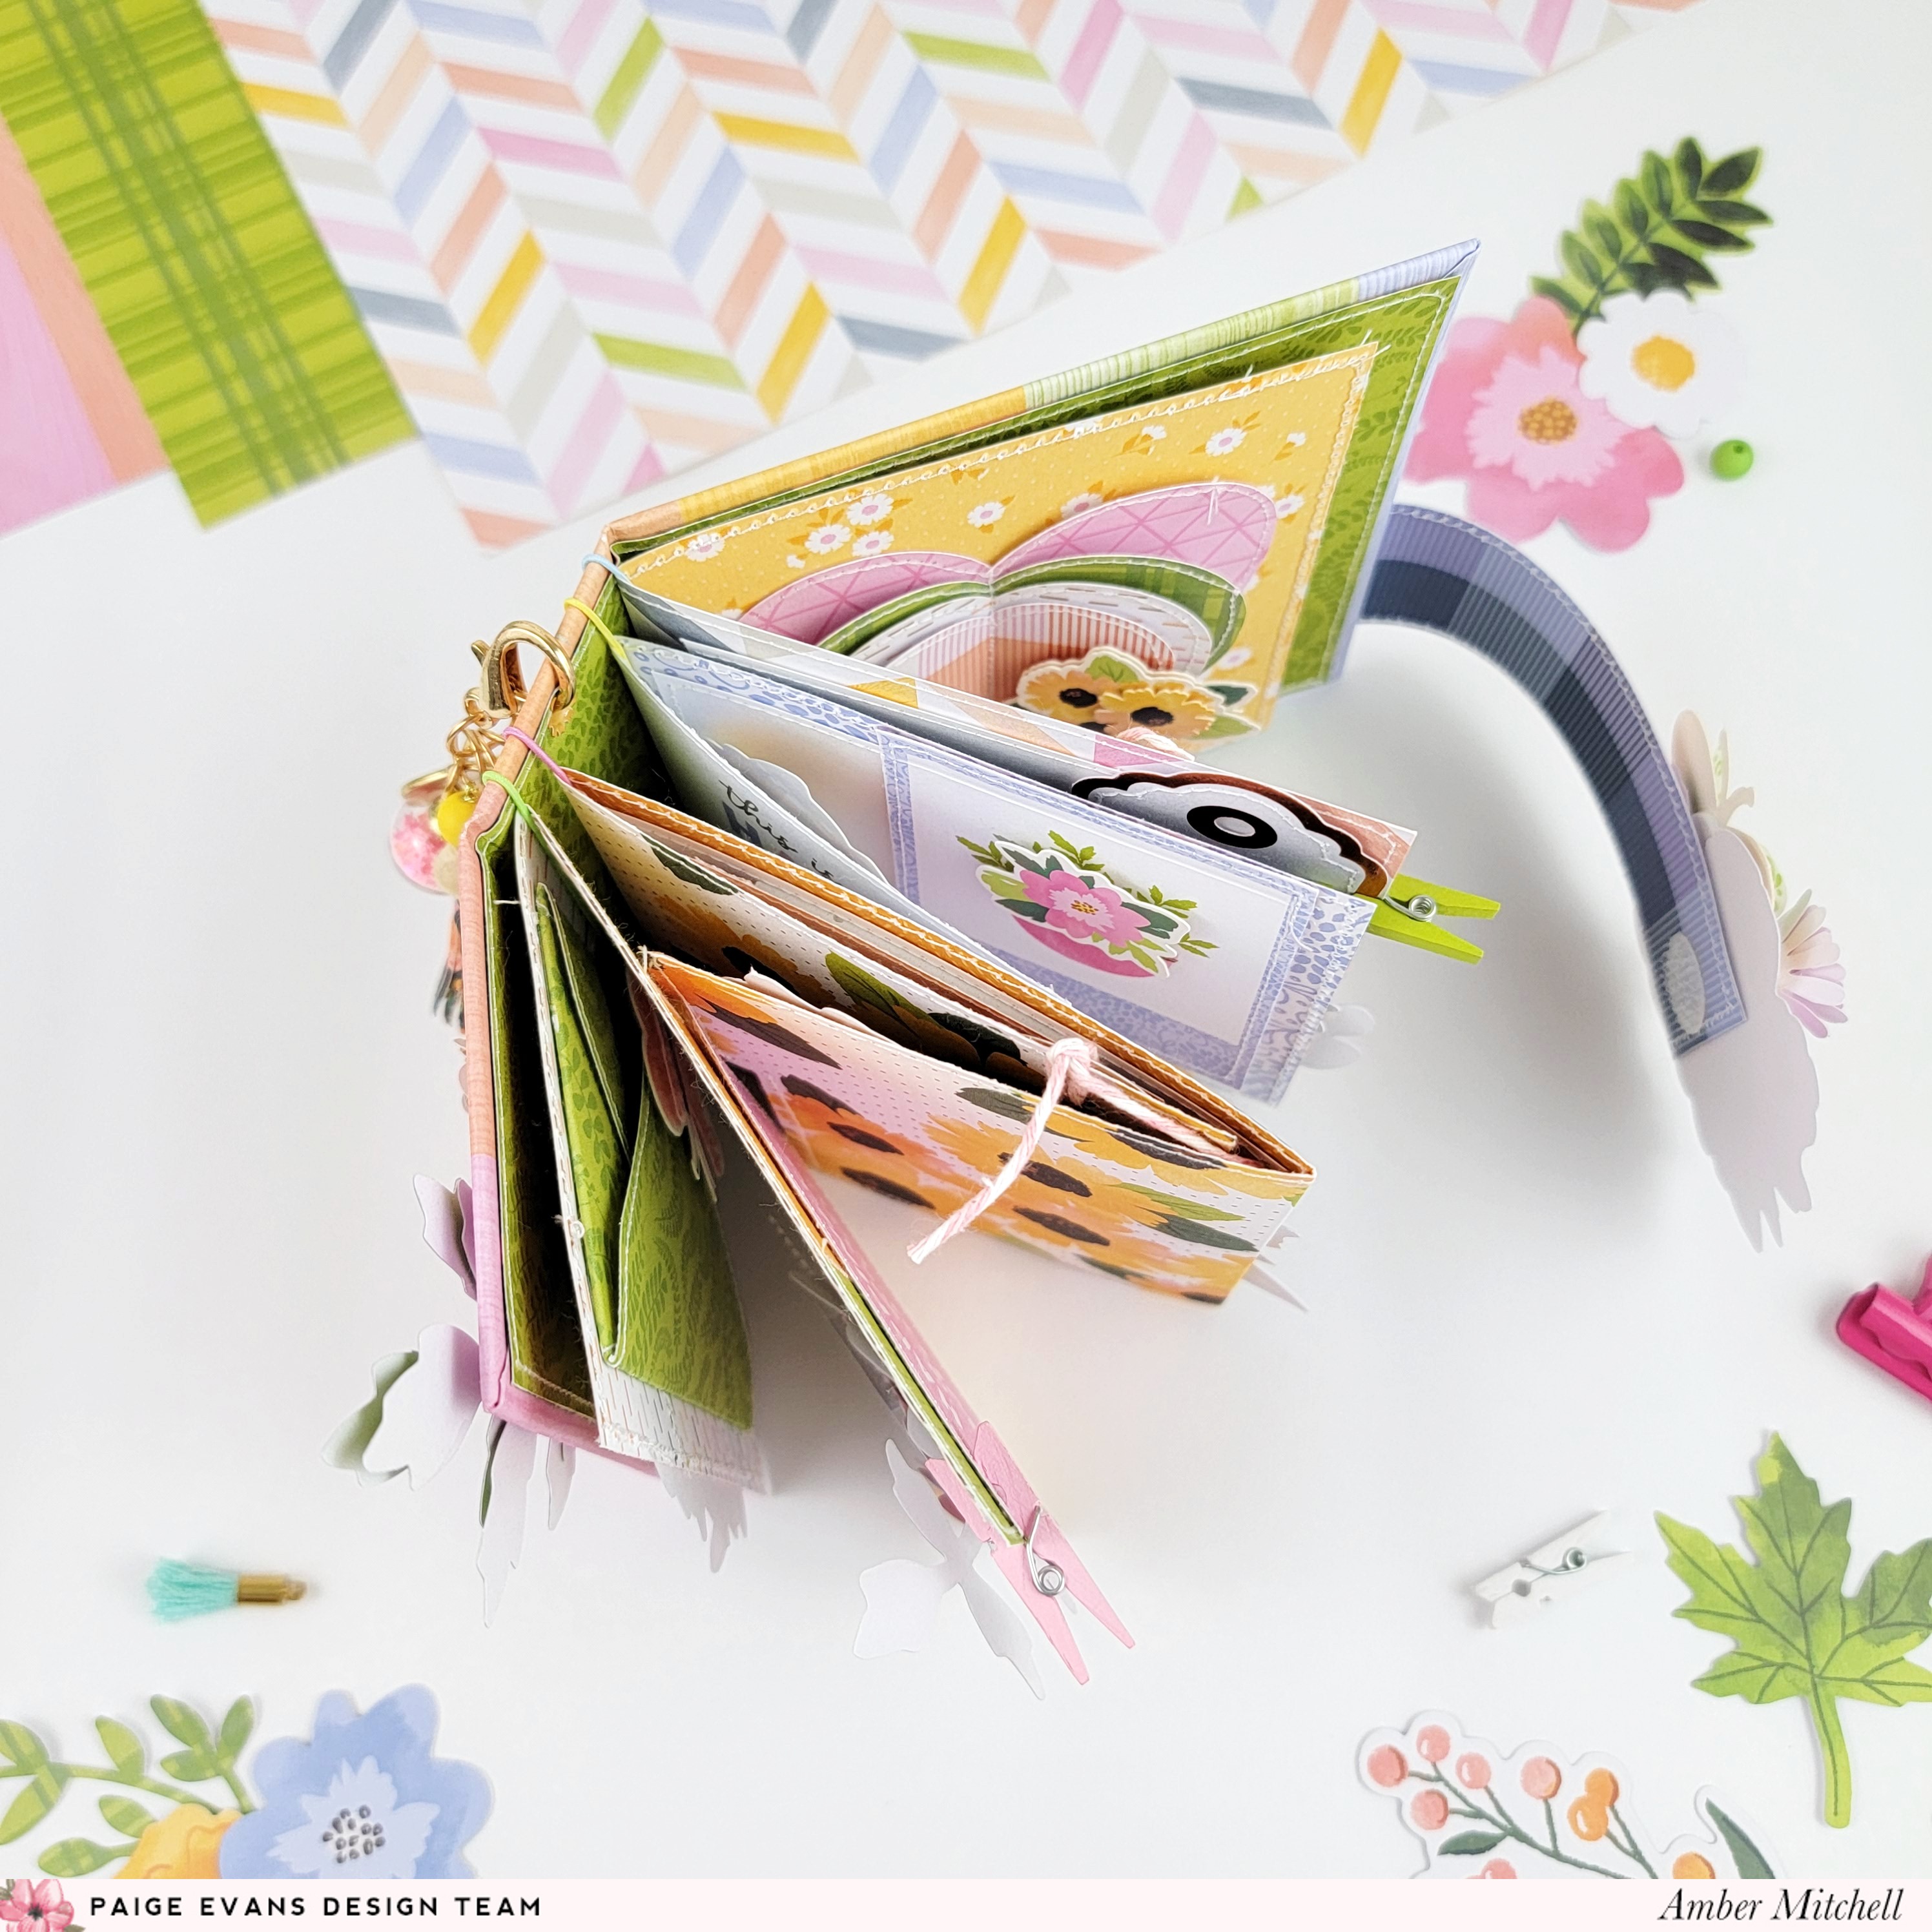
To create the pages for this album, I used four sheets of paper. For the first page, I used a sheet that measured 4.25 x 7 inches, and scored on the 7-inch side at 3 inches, creating a layered page. For the second page, I used a sheet of paper that measured 4.25 x 12 inches. I scored on the 12-inch side at 4 and 8 inches, then trimmed down both outer edges so that each section laid flat when folded. For the third page, I used a pair of cut-aparts from Paper 1 and folded the sheet in half. I kept the last page simple by using a sheet of 4.25 x 8 inch paper, folded in half.

To bind the pages to the base, I used elastic thread. I painted white elastic thread using watercolor paint so that the colors coordinated to those found in the Garden Shoppe collection. After the elastic strings dried, I tied them to the spine of the album using a double knot. I then slipped all four of my pages into the album.

When it came to embellishing the cover of this album, I wanted to feature the beautiful florals from this collection. I layered up some individual flowers and leaves from the Floral Die Cuts on the front cover. On the front of the strap, I layered up some printed floral clusters and one of the Butterfly Stickers. I also added a few dimensional paper flowers that I created using Paige’s Rolled Flowers cut files.

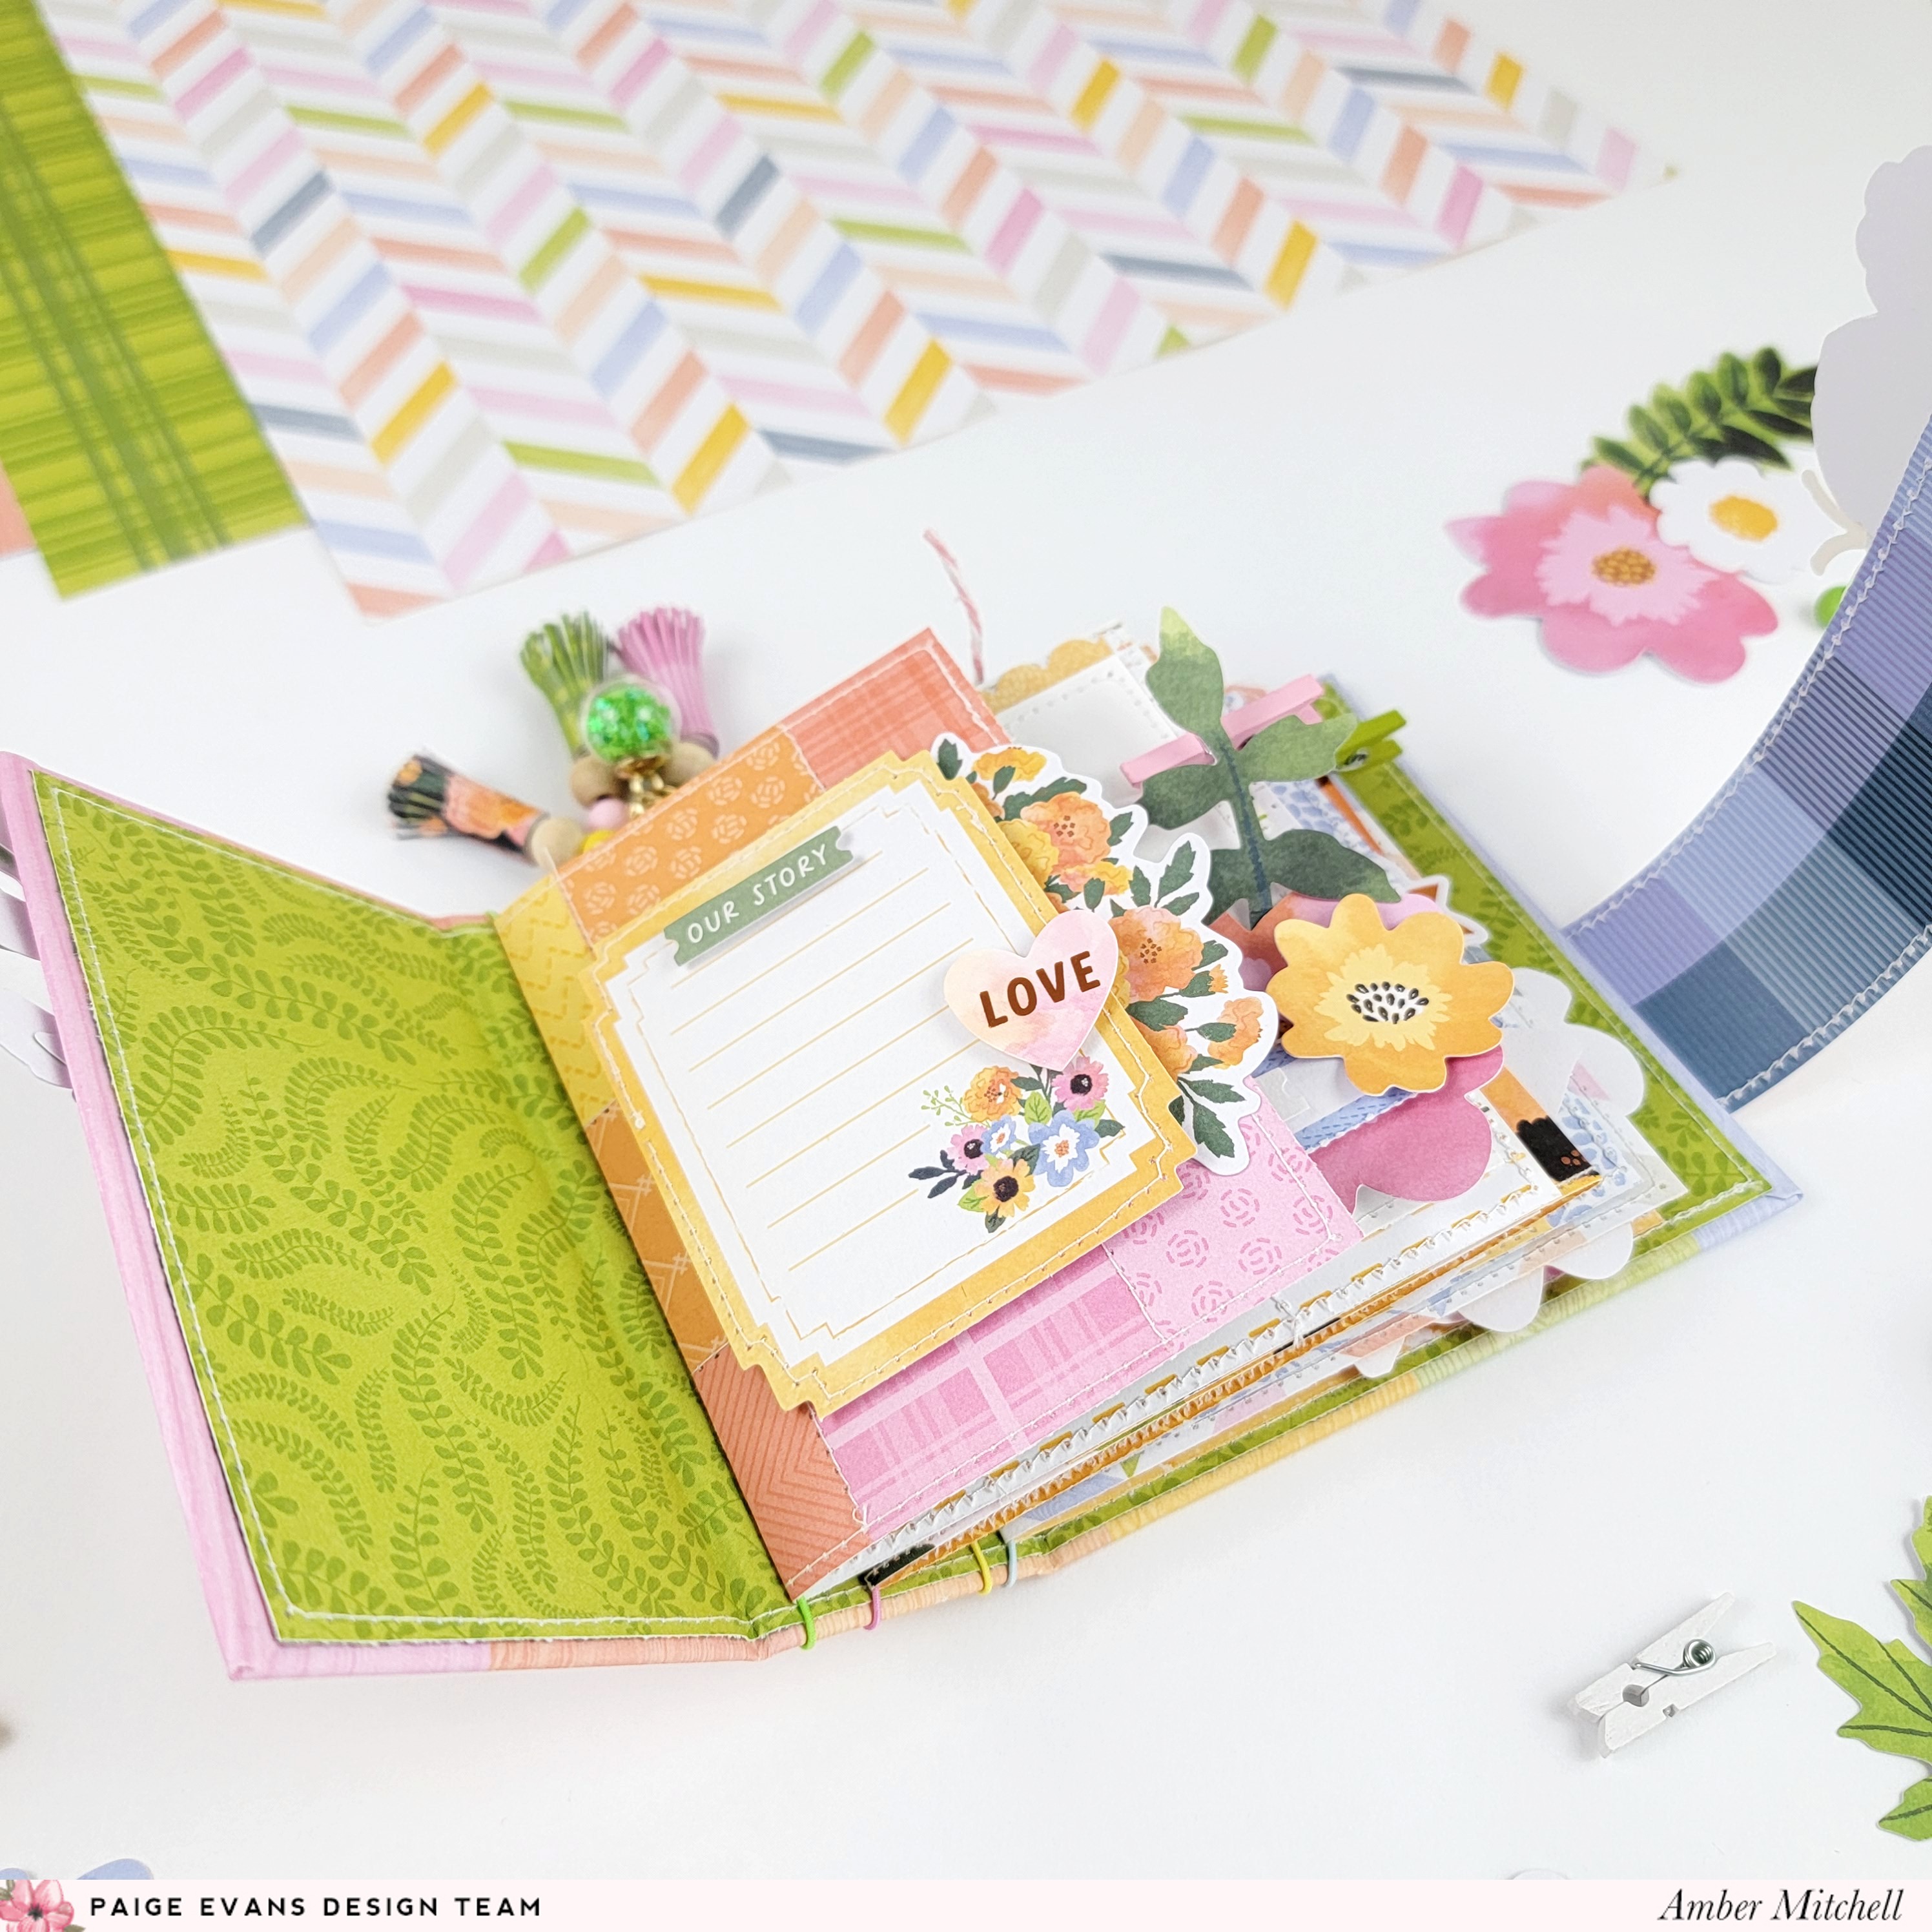
Throughout the album I added photo mats using white cardstock. Most of these mats measure 3.75 x 3.75 inches. Around these photo mats I added either flowers, sentiments, or both. I also added spaces for journaling by using cards from the Ephemera Die Cuts.

To create a title, I adhered a sentiment piece that reads "write your own story" to the spine. For a bit of added fun, I created some paper tassels that I clipped together, along with some charms from my stash, to the top of the spine using an eyelet and large lobster clasp.

To fill in any empty spaces, I used stickers from the Cardstock Stickers and the 8-Page Sticker Book.

Thanks so much for stopping by my post today! I’ll see you next time with another fun project!

SUPPLIES: Patterned papers, die cuts, stickers, Thickers, embellishments: GARDEN SHOPPE; white cardstock; Cut files: Rolled Flowers by Paige Evans

Location: California, USA / Blog: Happy Crafty Studio / Instagram: @bambidearr / YouTube: bambidearr / Pinterest: bambidearr


Hi Amber! What a little jewel!! Besides being beautiful, your creations are cleverly put together! I really love the little dangler and the bouquet on the band! It's all wonderful 💗
ReplyDelete