The Island's Creative Escape Bookbinding, Layout, and Mini Album Class Recap


Sunday, March 4, 2018

I just got back from a wonderful weekend teaching at The Island's Creative Escape in Los Gatos, California! I taught all my favorites: bookbinding, a mini album, and layouts! One particularly fun part about teaching at this store was visiting my old stomping grounds - we lived in San Jose from when I was 3 months - 10 years old! So, lots of nostalgic moments spread throughout this post :)
And my mom tagged along! Yay for girls' trips! We flew on the same flight down to San Jose. It was  a beautiful day above snowy Seattle!
 When we were picking up the rental car the representative asked for my driver's license and when I handed it over it was funny because my license is still from California! It seems like a million years ago that we lived in South Pasadena! We picked up the car and headed straight to Krung Thai - my parents used to eat there often.
 Soooo delicious!
 We were going to go see the Winchester movie since we lived literally two blocks away from the Winchester Mystery House, but I guess seeing the movie at the closest theater to the Winchester house itself is appealing, and even though the movie has horrible reviews, it was sold out! So we bought tickets for Saturday night then headed to the Valley Fair Mall. Cinnabon for the win!
The Apple Store and Microsoft Store were literally across from each other. Whose idea was that? The difference in popularity is so interesting.
 I can't even count the number of times we visited this exact 7-11 when I was a kid! We would walk up the block and I would buy a pack of sixlets :) Can't believe it's still there!
 We had a good sleep at our hotel and the next morning after breakfast we drove around to all our old favorite places. First we drove to one of my best friends' house. As fate/luck/serendipity would have it, my friends' step dad pulled up just moments after I snapped this picture and we got to catch up on the last 23 years! Last time he saw me I was 10, now I'm almost 33, so, it's been awhile!
 Then we drove past my other best friends' house. So many memories!
 Then, we drove past our old house. It's such an indescribable feeling going to a place that has so many memories from so long ago. I'll always remember playing basketball and tetherball in this same driveway, riding wagons up and down these very sidewalks, picking raspberries in this yard, and so so so much more.
 My family in front of the same house circa 1990.

We drove past our old church.
 Then it was time to head to class! But wait! I saw the prettiest pink flowers on the side of the road so we pulled over for a picture. We just don't see things like this so early in the year in the PNW!
And then we arrived at The Island's Creative Escape - I could have sworn that I walked right into heaven!
 Such a mega-super-awesome store with EVERYTHING a scrapper could dream of!!

I loved all of the samples and examples displayed around the store.
 Nuvo Drops in a rainbow of colors.
 Vintage section complete with suitcases and typewriters for sale.
 Ribbon wall.
  I could be in this store for hours and still find more things to discover and oooh and ahhhh over!
 Cute ways to display products.
 Metal die wall.
 This is a future class being taught and I want to come back to take it!

And the wall color?! Be still my heart!
 May Flaum drove 100 miles with her girls to come to my class! She's so awesome.
One of her daughters arranged her papers in rainbow order - I love that!

This photo is from May's instagram, it's such a lovely detail shot.
While I was knee deep in teaching my mom got us lunch from the taco truck in the parking lot. Mmmm.
 Almost finished!
  Demonstrating.

Students hard at work.
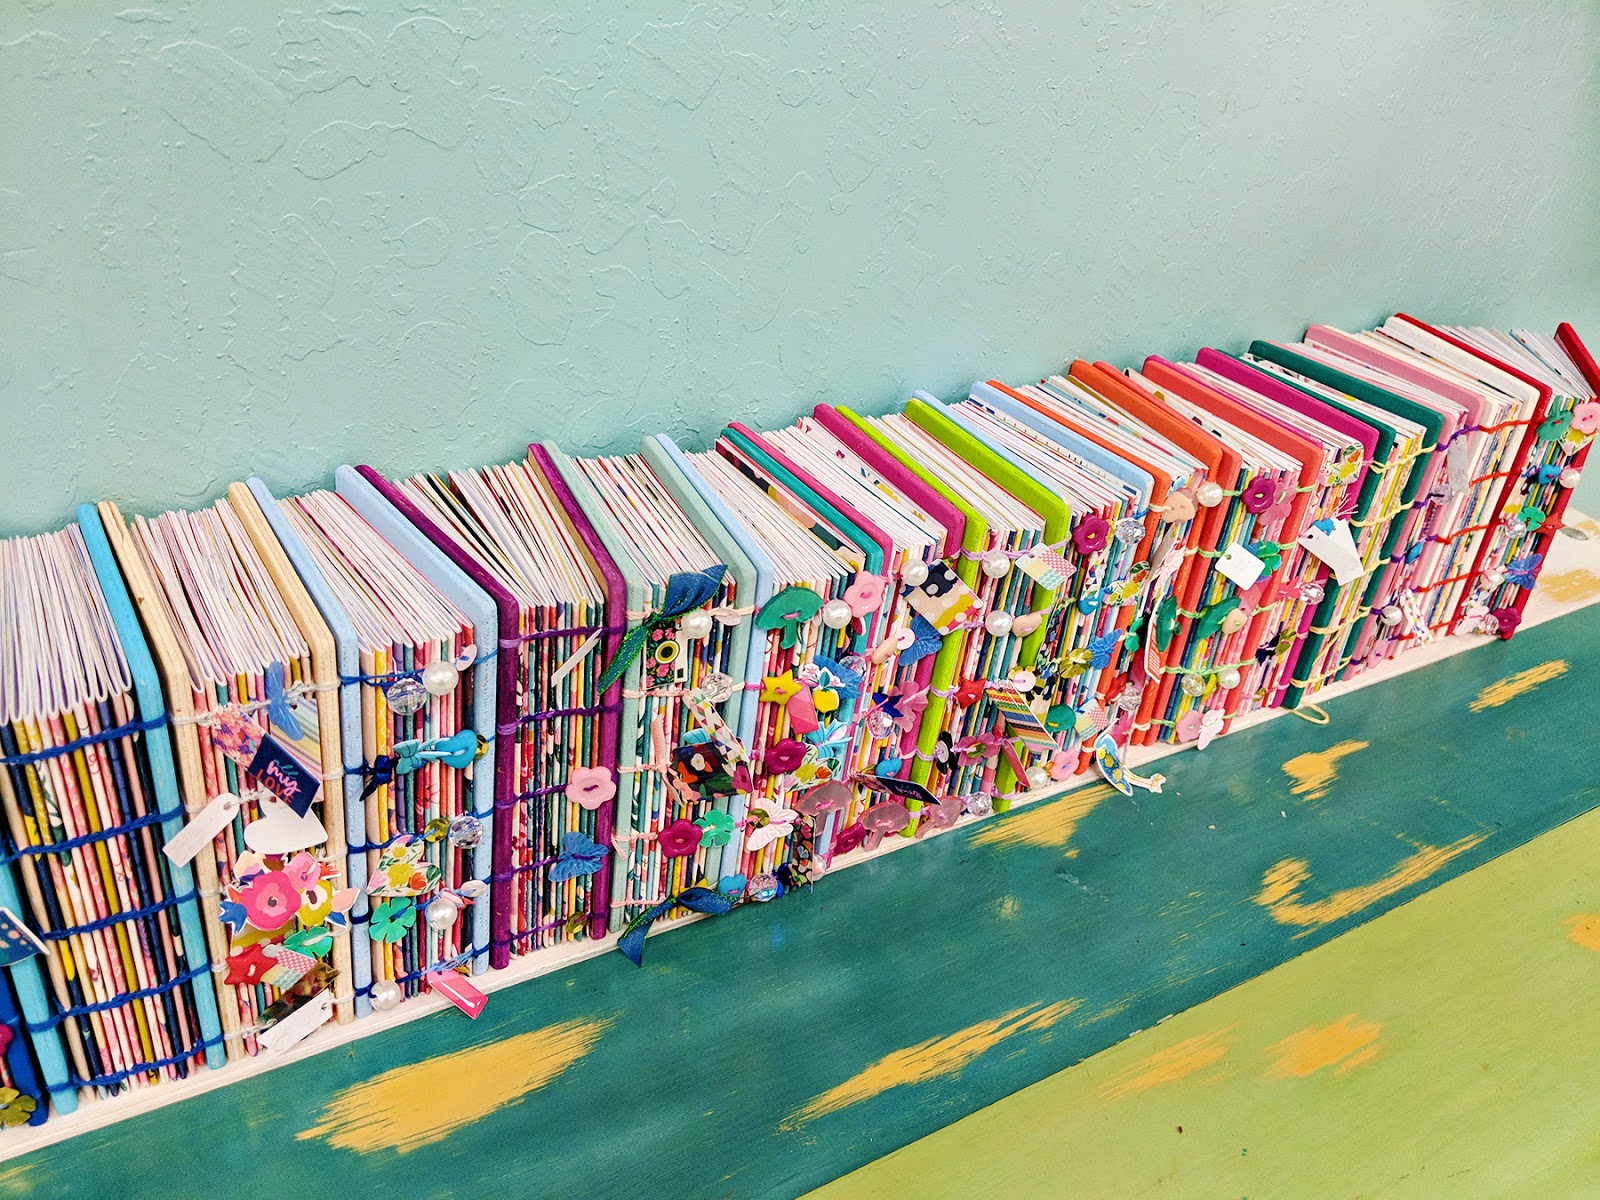
 And of course, my most favorite part: lining up all the pretty finished books!
We all use the same materials but each book is unique because of the paint color, thread color, and charms each gal chooses.

Here is the sample coptic book I made to promote the class. We used my Pick-Me-Up collection including 12 papers, the Haberdashery Multi-Pack, and Puffy Stickers to make our own charms.

So happy that everyone went home with a new skill!
 After class my mom and I once again went to Krung Thai for dinner (why change a good thing?!) then we saw Winchester! I enjoyed it but I despise the "jump" scare tactic lol.
 It was pretty dern cool to see the very same house the movie is based on as we were driving back to the hotel!
 The next morning I dropped my mom off at the airport, sniff sniff, and then went back to the store for day two of fun!
 First we made a two-page spread:
 I scraplifted myself for this layout - I made something similar for Scrapbook & Cards Today magazine last year and thought it would be a fun technique to teach - fringing it up!
 Then we made a folded squares mini album! 
Here is the one I made for an example:
I love this cover on this one made by a participant!

 After class I took myself to Taco Bell for dinner then flew the short flight home. I loved watching the sunset and all the changing colors from day to night.
Here is a group photo from the bookbinding class.

Thank you for an amazing time Laurie and everyone who came! Hope to be back soon!

Easter 2017 Layout for March #moodboardgirls


Saturday, March 3, 2018

I played along with the March #moodboardgirls to make this Easter layout!
Photo sources: 1, 2, 3, 4, 5, 6
First, check out the process video to see how this layout came to be and make sure to subscribe to be the first to know when new content becomes available!

I started with my Easter Egg cut file and used my Silhouette Cameo 3 to die cut it from smooth white cardstock. Then the possibilities were endless! It's like a blank canvas - where do I go from there? I thought about backing each shape individually - that would take hours and hours, but I love a fun project. I thought about going crazy with mixed media and trying something new. I even polled my instagram peeps (hey, "peeps!" totally works for Easter! :) and most wanted to see mixed media! Your wish is my command!
So with mixed media in mind, I painted a layer of white gesso to prep the surface. Then once it dried I painted stripes of watercolors across the rows of shapes. I'm not sure how "mixed media" that is hahaha, but I like how it turned out so there we go! Once the watercoloring was dried I backed the egg with a colorful striped paper from Take Me Away - it adds that much more color and pop! Then to create more texture, color, and interest on the egg I stitched various ribbons across it. Sometimes I cut the ribbons in half to make them thinner and not hog attention. I liked how the scratch white cardstock I used when watercoloring looked so I used that as my base and adhered the egg with dimensional adhesive on the right side.
In the center of the egg I placed two photos of Fox and Jane around Easter time in front of a mint garage door (be still my heart!) and then tucked all kinds of flower die cuts underneath. I used flowers from Take Me AwayOh My HeartTurn the Page, and Pick-Me-Up. There's even a bunny in the Turn the Page Ephemera Die Cuts which goes along perfectly with the Easter theme. Oh and I added a bow die cut from the Take Me Away at the top of the egg.
Across the bottom I trimmed an angled piece of Pick-Me-Up Paper 09 - the B-side has colorful polka dots that resemble eggs! This paper helps "ground" the layout. I punched a lace border from smooth white cardstock and tucked it behind the patterned paper piece - I like how the lace detail mimics the cut outs of the Easter egg die cut.
For the title I mixed and matched all my Thickers and then machine stitched over it. I wrote the journaling around the egg with a pencil, I will probably go back over it with a gray pen so it doesn't smudge. And that's it! :)
I hope you are inspired in some way from this layout and I hope to be back again soon playing along with the #moodboardgirls!
Now hop along to all these other talented ladies' pages to see some eye candy based on the moodboard!

Galoshes Layout by Audrey Yeager


All the heart eyes for this new design team layout by Audrey Yeager!
What a perfect match Paige's Galoshes cut file is for my photos! I made two of each boot and flipped one pair so that they faced the other direction. I wanted the boots to be bright and fun so I cut them from Paper 11 and Paper 16 from the Pick-Me-Up collection.
This dark blue ombre paper (Paper 04) was a great backdrop for the scene. I dressed it up with some gessoinks, and mists to give it a more rainy feel.

I die cut some clouds from a light peach paper in the 6x6 Paper Pad using the Clouds Background cut file and popped them off the top of the page. I hand cut out some raindrops and stitched over them to show their movement down.

I added a few clusters of flowers to pick up on all the fun and bright colors! This layout makes me appreciate spring so much!


SUPPLIES: PICK-ME-UPPaper 04Paper 11Paper 166x6 Paper PadJournaling SpotsWashi Tape BookHaberdashery Multi-PackStickersPuffy StickersChipboard Stickers
Blog: audreysreflection.blogspot.com / Instagram: @audreykit1 / Pinterest: @audreykit /
Facebook: Audrey L. Yeager  / YouTube: Audrey Yeager
There are so many cute details on this page, I want to "soak" it all up!! :)

Marvelous Layout by Flóra Farkas


Friday, March 2, 2018

The pretty and painterly flowers on Paper 02 are perfect for fussy cutting and layering - which is exactly what Design Team member Flóra Farkas did here on this layout she's sharing today!
Hi ladies! Flóra here and I'm sharing a new 12x12 page made with the Pick-Me-Up collection. The starting point of my page was Paige's Flower Heart cut file which I cut from Paper 16. I pierced holes on the edge of the heart and hand stitched with eggplant colored thread. I added blue crosses next to the stitching from the Rub-Ons sheet. I place the heart on Paper 22 - I love this neutral paper, it's just perfect if you need a simple background.
I fussy cut lots of beautiful flowers from Paper 02 and adhered them with foam tape on the left side of the heart. I embellished this area with a gold foiled die cut word from the Ephemera Die CutsPuffy Sticker flower, and phrase sticker from 6x12 Stickers sheet. I also added a gorgeous Chipboard Sticker moth.

On the right I placed a 4x3 photo and embellished around it. I made many layers from the StickersChipboard StickersPuffy Stickers, and Rub-Ons. I created a mini XO title under my photo with Chipboard Thickers. These are the most amazing alphas ever, I love the pretty floral details!

I will continue to document our Venice Carnival trip with the beautiful Pick-Me-Up collection. Stay tuned! Thanks for stopping by!

Blog: pinkandpapergift.blogspot.com Instagram: @floramfarkas Pinterest: @floramfarkas
Facebook: pinkandpapergift YouTube: Flora Monika Farkas
I love how the busy floral half of the heart is balanced by the photo and white space on the right! Simply stunning!

February 2018 Highlights


Thursday, March 1, 2018

In February 2018, someone from Big Picture Classes came out and filmed me making two classes: Paige's Process and Happy Scrappy Place!
Snuggle time!
Chris was reading to the kids and Jane must have been so tired because she passed out on his shoulder.
We went with Eric & Tanya & Zoe to the Children's Museum in Olympia, it was tons of fun!
Then we took them to our favorite local Thai place in Lakewood, Chang Thai. Mmm so good!
One day the kids didn't have school for a holiday so I took them to Panda Express. Our life revolves around food lol.
My mom flew with me to San Jose so I could teach classes at The Island's Creative Escape in Los Gatos. It was so fun to go see all our old stomping grounds. (We lived in San Jose from when I was 3 months to 10 years old). The classes went splendidly!
Just had to pull over and get a pic by these gorgeous pink flowers!
Fox doesn't really like losing teeth, poor guy!

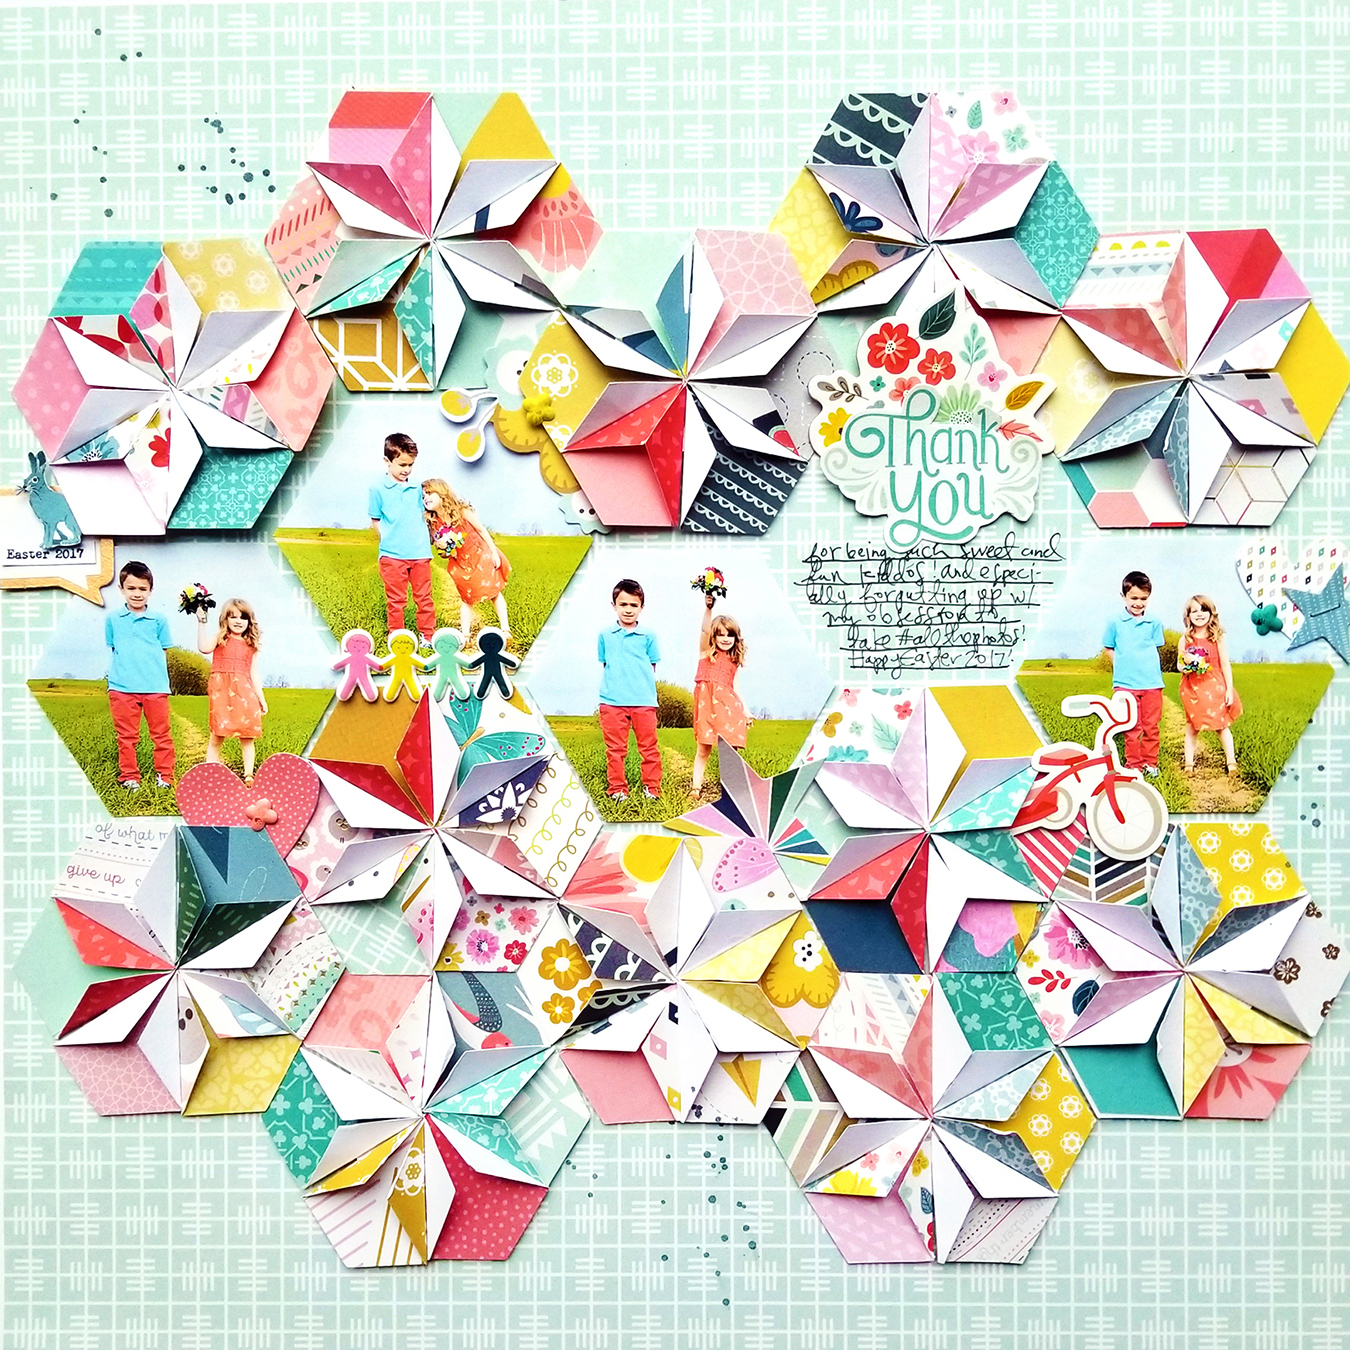
Thank You Kids Layout


Here is the first of the four layouts in my Paige's Pages 15 class at Big Picture Classes featuring a folded hexagons background!
I love using lots and lots of patterned papers on my layouts and I’ve found that by using punches I can get all kinds of patterns and colors on one page – the more the merrier - yay! Since I am using a single collection, my Turn the Page line with Pink Paislee, I already know all of the colors and patterns work well together so I can punch away to my heart’s content! And trust me, once I start, it’s hard for me to stop – it’s addicting to make these!
Once I had all of the hexagon flowers created, the next challenge was to figure out how to use as many of them as possible – I just spent a good chunk of time creating them, now I want to show off all my hard work! It took a few tries to finally find a combo of paper and placement that I liked, and in the end I’m super happy with how it turned out :)
The start-to-finish process video can be found over in the class if you're interested to see exactly how this layout came together!
Paige Taylor Evans © // Quinn Creatives DESIGN